Loading…
GameBrief · Guides
Die in the Dungeon Characters: Which to Pick First
8 min readBy Zara Chen

Reviewing
Die in the Dungeon
ATICO
Die in the dungeon characters don't have class names. They have starting dice sets: and those dice shape how your first ten floors play out more than anything else on the screen.
Picking the wrong character doesn't end runs. It means spending floors 1-4 fighting your playstyle instead of settling into it. This guide maps each starting loadout to the playstyle it rewards, which relics to chase with each, and who to run after your first clear.
TL;DR: Die in the dungeon has 4 frog characters, all unlocked from the start. Each has a distinct starting dice set: attack-heavy, parry/defense, poison/ailment, or heavy dice with board persistence. Pick attack for your first run (most forgiving). The heavy dice character is hardest to pilot. Character choice shapes your relic priorities from floor 1 onward.
Die in the Dungeon characters: Key takeaways
- 4 frog warriors, all available from the first run: no unlock requirements
- Character choice = starting dice shape; the rest of the run builds around that foundation
- All four can clear the game; none is strictly weaker than another
- Attack-focused character is the recommended first run; the heavy dice character is the hardest to pilot initially
- Second run: pick the character opposite to your first. The contrast teaches the relic system faster than a third run with the same character.
What character selection actually means
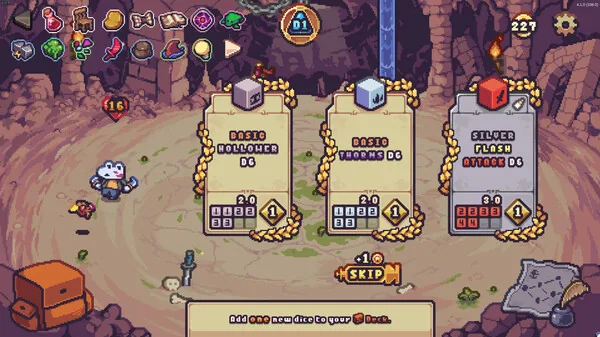
The character select screen in Die in the Dungeon shows each frog's starting dice below their portrait. That display is the real selection. You're not choosing a class archetype: you're choosing a dice loadout that commits you to a specific relic search strategy from floor 1.
Each character's starting dice has a dominant mechanic. Some lean heavily into attack faces with one utility slot. Others carry multiple parry faces, or lead with poison faces that set up ailment stacks. One character's starting dice carry the Heavy property: pieces that stay on the board after being played, which look unspectacular until you understand they are the fuel for Flash-based replay loops that multiply output in ways attack or poison faces cannot match alone.
The game doesn't explain this connection between starting dice and relic priority. Players who pick characters based on frog art and wonder why runs feel inconsistent are often making the same mistake twice: same character on run 2, same relic priorities, no progress on understanding why the system works the way it does.
GODEEPER: For a full breakdown of how the board positioning system interacts with character choice from floor 5 onward, the review covers the spatial layer. Die in the Dungeon Review: Dice-Building With Brains →
The four starting loadouts
Each of the four Die in the Dungeon characters brings a distinct starting dice set that defines the first half of any run. Pick based on which loop sounds right, then chase the relics that fit.
The attack-heavy frog
Starting dice with a heavy attack face distribution: typically five or more attack faces with one utility slot. Relics that trigger on attack faces, on each hit, or on reaching damage thresholds power this character up fast. The attack loop is also the most intuitive: more attacks, more damage, clearer feedback.
Relic priority: look for relics that activate on attack faces or that multiply damage per hit. Relics with narrow "on every third attack" conditions are often here: they reward the consistent attack output this character generates naturally.
Strengths: consistent damage floor to floor. Relic synergies come online early because attack-trigger relics appear throughout the pool. New players can focus on the board positioning layer without worrying about whether their build is working: it usually is.
Weakness: less flexibility late. Attack builds that don't branch into at least one relic-based synergy chain hit a ceiling around floor 7-8 where raw attack output stops scaling with enemy health pools.
First run recommendation: yes. This is the character to start with if you've never played Die in the Dungeon before.
The parry and defense frog
Starting dice lean toward parry faces, with fewer pure attack slots. Parry faces don't deal damage by default: they generate the defensive window that counters incoming attacks. Relics that convert successful parries into damage, that boost counter-hit damage, or that reduce incoming hits when parry thresholds are met are this character's core synergy targets.
Relic priority: parry-triggered relics, counter-damage multipliers, and anything that benefits from taking reduced damage over a fight. Some relics that seem weaker in attack builds become strong here: "reduce damage taken by 1 on turns where parry face lands" stacks meaningfully when multiple parry faces are in your dice.
Strengths: survives longer in sustained fights. Boss encounters that deal heavy burst damage in late floors punish passive builds less when parry faces are giving you active mitigation frames. Board positioning also pairs naturally here: parry-heavy characters tend to play a tighter positional game.
Weakness: lower raw damage early. Floor 1-4 with a parry-focused character can feel slow if the early relic pool doesn't cooperate. This character has a longer runway before the build clicks.
First run recommendation: second or third run, after understanding when board positioning matters.
The poison and ailment frog
Starting dice carry poison faces and possibly additional ailment-type faces. Poison in Die in the Dungeon deals damage over multiple turns: the strength is that damage continues ticking without you spending additional dice faces each turn. Relics that extend DOT duration, that boost damage on poisoned enemies, or that trigger on turn-end ailment stacks are this character's engine.
Relic priority: any relic with "on poison" or "DOT" trigger conditions. Also look for relics that stack additional ailments alongside poison: the interaction between multiple ailment types often generates more output than pure poison stacking.
Strengths: strong against high-health enemies and bosses where the extended time-to-kill benefits from ongoing tick damage. One strong early relic doubles the value of every poison face for the rest of the run.
Weakness: output is delayed. Poison doesn't kill immediately. On floors where fights end in two turns, poison faces contribute less than attack faces would. The character is slower to feel powerful than the attack-heavy version.
First run recommendation: second run, especially after running the attack character once and wanting a different rhythm.
The heavy dice and board control frog
Starting dice feature the Heavy property on multiple pieces: attack and block dice that stay on the board after being played instead of disappearing. That persistence is the foundation for the character's core mechanic. Flash-type effects let you pick up and replay those Heavy dice at no additional energy cost, turning a single die into a multi-hit engine if the right relics are feeding the loop.
Relic priority: Flash-type relics that let you pick up and re-place board pieces, plus any relic that triggers on replay or re-use events. Relics that multiply damage per board piece or that activate when the same face contributes multiple times in a turn scale strongly once replay loops are running. Avoid relics that only trigger on first placement: the payoff here comes from repetition, not one-time activations.
Strengths: highest ceiling for replay-based output chains. A run that finds Flash and Heavy synergy relics in the first biome can accumulate damage late in floors that neither attack nor poison builds approach. Board manipulation also opens positioning plays the other three characters cannot easily access.
Weakness: steepest learning curve. Nothing clicks until you understand how Flash and Heavy interact and which relics trigger on replay events. Before that connection is established, the starting Heavy dice feel slower and less intuitive than attack dice. Veterans recommend this character after at least one run understanding board positioning basics.
First run recommendation: not recommended. Run the attack or poison character first.
 Each character's starting dice tells you your relic priority list. The face distribution is the real selection: the frog portrait is secondary.
Die in the Dungeon characters: Step-by-step: how to pick your character
Step 1: Read the starting dice, not the character portrait
Open character select and look at each frog's starting dice display. Count the dominant face type. One has more attack faces than anything else. One has multiple parry or defense faces. One shows poison or ailment faces prominently. One has Heavy-property dice mixed in: pieces marked to stay on the board after use.
This tells you more about your run than any other information on the screen.
Step 2: Match to your preferred loop
Attack faces = high feedback, consistent damage, simpler relic search. Pick this if you want the build to make sense quickly.
Parry faces = active defense, counter-damage potential, positioning-heavy. Pick this if you enjoyed the board positioning aspect in early floors and want more of it.
Poison faces = delayed damage, attrition-style play, strong against bosses. Pick this if you want a different rhythm than the attack character.
Heavy dice = board persistence, Flash-based replay potential, positioning-heavy. Pick this if you've run at least one other character and want to explore how Heavy and Flash mechanics multiply output across a run.
Step 3: Identify two target relics before floor 1
Before entering the first floor, decide which two relic types you're looking for based on your starting dice. For the attack character: one attack-trigger relic and one damage-multiplier relic. For the poison character: one DOT-extension relic and one "on poison" trigger relic.
This narrows the 142 relics down to a priority list of 10-15 that matter for your current run. Take any of those when offered; pass on relics that don't interact with your dominant face type.
Step 4: On second run, pick the opposite archetype
If you ran attack-heavy first, pick poison or the heavy dice character second. The contrast teaches the relic system faster than running the same character twice. By the end of run 2 with a different starting loadout, the relationship between dice faces and relic priority becomes clear in a way that a third attack run doesn't produce.
GODEEPER: For a breakdown of how trigger types and relic tiers interact across all four characters (including which two-relic compound each frog can build toward) the relic guide has the full framework. Die in the Dungeon Relics Guide: Best Picks and Synergies →
 The relic-face synergy that defines each strong build usually doesn't click until the third or fourth run.
Tips
Don't reroll your starting dice faces early. The starting set defines which relics you're targeting. Rerolling a poison face off an ailment character because it didn't deal damage in floor 2 removes the signal your relic search depends on. Keep the starting set intact through at least floor 3.
The parry character's slow start is not a problem. Floors 1-3 are designed to be cleared by any build. The parry character's difficulty comes from players expecting attack output they won't have. Accept that early floors clear slower and that the payoff comes when late-floor burst damage meets a parry-active build.
Heavy dice are not slow dice: they're replay fuel. The misread that makes the heavy dice character feel weak: treating Heavy-property pieces as plodding attack dice rather than as platforms for Flash-based replay loops. Before discarding this character for feeling weak, check if your current relic set has any Flash-type relics or replay triggers. If it does, your Heavy dice are multiplying those effects each time they are picked up and re-played.
Character choice matters more at floor 5 than floor 1. Floors 1-4 are accessible to every starting loadout. The build choices you made in floors 1-4 shape what happens from floor 5 onward. Don't judge a character by floor 3 performance: the divergence happens later.
The Die in the Dungeon tips guide covers the board positioning layer and dice mechanics that all four characters share: worth reading before your second or third run.
Common mistakes
Picking based on the frog's appearance. The frog art doesn't tell you anything about playstyle. None of the visual design signals which character suits your preferred loop: they all look equally appealing. Check the starting dice display, not the portrait.
Taking relics that don't match your starting dice. A "trigger on three attack faces" relic is weak on the heavy dice or poison-focused character. The relic pool looks similar across runs; the right relics for each character aren't. Passing on a rare relic because it doesn't match your starting face type is correct.
Abandoning the character's core face type. Players who pick the poison character and start replacing poison faces with attack faces because early floors reward attack output end up with a hybrid build that leverages neither. Commit to the starting face type through at least the first biome before adding secondary face types.
Related Reading
-
Die in the Dungeon Complete Guide 2026: Hub for all Die in the Dungeon guides: builds, relics, dice tier lists, characters, and achievements.
-
Die in the Dungeon Floor Guide: Floors 1 to 6 Breakdown: Die in the dungeon floor guide: what each floor demands, how floor 5 kills most runs, and what.
-
Die in the Dungeon Dice Tier List: Best Dice Ranked: Die in the Dungeon dice tier list: S to D ranking of all dice types,.
-
Die in the Dungeon Relics: All Types, Triggers, and Effects: Die in the Dungeon relics guide: all 5 trigger categories, how each fires, which characters.
-
Die in the Dungeon Best Build: Attack, Poison, and Reroll: Die in the dungeon best build: attack concentration, poison DoT, reroll chains.
-
Die in the Dungeon Achievements: All 59 and Dice Unlocks: Die in the dungeon achievements unlock 31 unique dice that persist across runs.
References
- Die in the Dungeon on Steam: official page, patch notes, achievement list
- ATICO on Steam: developer page
Frequently asked questions
Q: How many characters are in Die in the Dungeon? A: Four frog warriors with distinct starting dice sets. All four are available from the first run: no unlock conditions.
Q: Which Die in the Dungeon character should I start with? A: The attack-heavy frog. Their starting dice are straightforward and the relics that power them appear early and often. New players can focus on learning board positioning without fighting an unfamiliar playstyle simultaneously.
Q: Does character choice lock you into a playstyle? A: It shapes your playstyle more than it locks it. Your starting dice define the first 5 floors of relic search. After that, you can branch into secondary face types. But the strongest runs are ones where the starting face type and the relic build stay aligned.
Q: Which character is hardest? A: The heavy dice character. Their output depends on understanding how Flash and Heavy interact and which relics trigger on replay events: that understanding takes at least one prior run to build. Veterans recommend this character second or third, not first.
Q: Can you play all four characters in one save? A: Yes. Each run you select which frog to play. Nothing carries over between runs. Running all four before hitting meaningful repetition is possible without any grind: the game's 59 achievements are the main extended goal.
Q: Are there unlockable Die in the Dungeon characters beyond the four? A: No. Die in the Dungeon launches with four frog warriors and no additional character content planned as of the 1.0 release. The replayability comes from the 142 relics and 31 dice creating different run shapes across the same four characters.
Was this guide helpful?
About the author

Critical game theorist with a background in film criticism. Writing for print and digital outlets since 2015. Specialises in genre analysis and design heritage.
- Background in film criticism
- 10 years games coverage
- Genre theory and design history specialist


Disclaimer
This article is published for informational and entertainment purposes. It does not constitute professional financial, legal, or technical advice. Game performance, online services, patch schedules, and store listings change. Verify critical details (pricing, system requirements, regional availability) with publishers and storefronts before you buy. Affiliate links, where present, help support our editorial work and are labelled in our affiliate disclosure.