ARC Raiders · Guides
ARC Raiders Enemy Types Guide: ARC Units Ranked by Threat
ARC Raiders enemy types guide: ARC machine classes ranked by threat, with audio cues, detection behavior, and the best counters by zone tier.

ARC Raiders enemy types span a large roster of machine classes: not a list to memorize, but a design system worth understanding. Each class exists to punish a specific mistake: moving too fast, standing still, shooting from the wrong range, opening a door without listening first. Knowing which type you're hearing before you see it is the difference between a planned engagement and an emergency.
This guide covers every ARC machine class by threat profile, with the audio signatures, detection behaviors, and counter weapons that make each manageable.
TL;DR: ARC Raiders fields 18+ named machine classes plus bosses, but you only need to read them by threat profile and audio signature. Wasps, Hornets, and Ticks dominate White and Orange zones; Sentinels and elites hold Red zones. The Ferro battle rifle is the anti-armor pick (strips Hornet armor in 2-3 shots), and Ticks never attack conventionally, they close and detonate, so back away and shoot from range.
Key Takeaways
- 18+ named ARC machine types scaled across zone tiers: Wasps, Hornets, Ticks dominate White and Orange zones
- Audio first: every class has a distinct engine signature that carries through walls and closed doors
- Ferro is the anti-armor primary for aerial types: strips armor in 2-3 shots versus 5+ for alternatives
- Ticks do not attack: they approach and detonate: back away and shoot from range, always
- Sentinels headshot: medium head armor exists specifically to survive one
- Equalizer is the optimal weapon for boss encounters (Matriarch, Vaporizer): useless against fast movers elsewhere
How ARC Detection Works
Every ARC unit operates on two thresholds: audio detection and visual lock. Audio detection triggers when you produce enough noise in range: unholstered weapon movement, fast travel, door use. Visual lock triggers when a unit gets confirmed line-of-sight at close enough range. Either initiates alert behavior that can cascade to nearby patrol routes.
Three variables reduce exposure:
Weapon holstering is the zero-investment change that cuts noise most. The ARC Raiders beginner guide covers this as the first survival habit to build.
ARC Detection Radius Reduction from the Survival skill branch shrinks the zone in which enemies lock onto you. The ARC Raiders skill tree tier list ranks it S tier because it changes the threat geometry of every zone: routes that were gauntlets become corridors.
Movement Noise Reduction from the same branch further reduces your audio footprint beyond what holstering alone provides.
S-Tier Threat: Know These First
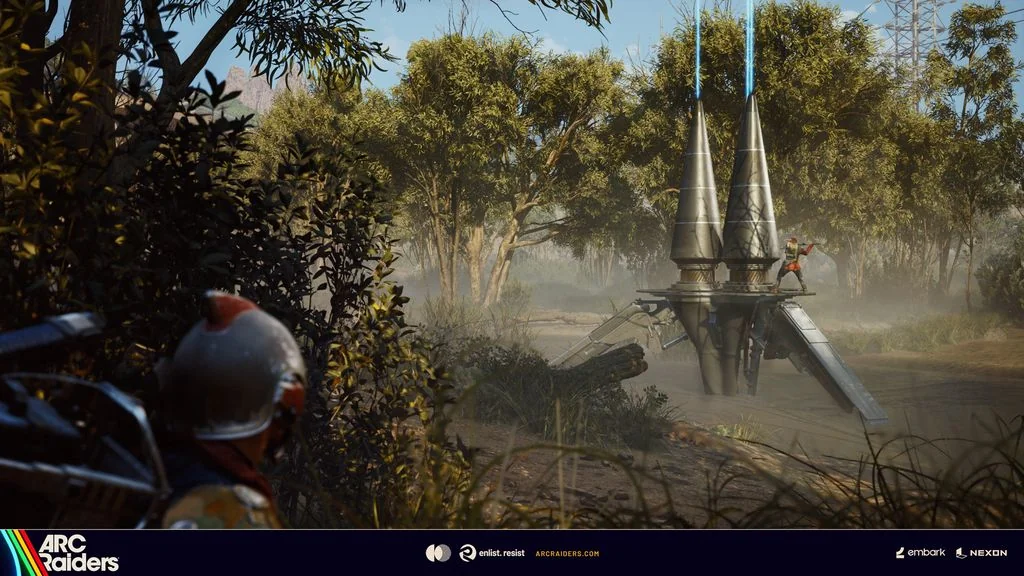
Hornets
Zone: Orange, Red
Class: Combat / Aerial
Primary risk: Sustained aerial damage in cluster encounters
Hornets are the unit that tests whether your weapon loadout is actually correct. Their audio is a low, bass-frequency drone: heavier and more resonant than a Wasp's signature. They appear in Orange zones and increase in frequency toward Red zone boundaries.
The Ferro battle rifle is the correct primary. Other rifles need five or more shots to strip Hornet armor; the Ferro does it in two to three through its armor penetration profile against ARC machine types. At close range indoors (corridors, rooms, tight structures) the Dolabra energy shotgun's two-shot potential is faster than anything else available, though its Energy Clip dependency and Legendary acquisition cost keeps it in Red zone territory for most players.
Corridor cluster encounters are the most dangerous Hornet scenario. Three or four Hornets grouped in a hallway is not a rifle problem: it's a frag grenade problem. Trying to clear them individually with sustained fire gives each unit time to deal damage and call patrols from adjacent rooms. One frag resolves the cluster; the rifle handles stragglers. The ARC Raiders best solo loadouts guide includes a frag grenade as a required slot specifically for this encounter type in Orange zone kits.
Counter: Ferro at mid-range; Dolabra close-range for experienced players; frag grenade for corridor clusters.
Sentinels
Zone: Orange, Red
Class: Guard / Overwatch
Primary risk: Headshot from elevated position before you've confirmed their location
Sentinels are stationed at elevation (rooftops, catwalks, raised platforms) with detection ranges longer than patrol units and a primary attack that targets player heads. The damage on a Sentinel headshot to light head armor is high enough to change the outcome of a run.
Medium head armor is worth the noise penalty for Orange zone runs specifically because of this unit type. Not heavy head armor: the mobility penalty is too significant. But the gap between light and medium head protection, measured against one Sentinel shot at the wrong moment, makes the trade correct.
Pre-scanning elevated positions with binoculars before committing to open areas is the correct approach. EMP grenades temporarily disable Sentinels, creating a window to cross exposed terrain or push into cover. The engagement logic for Sentinels inverts: don't fight at their preferred range. Close distance to mid-range before committing.
Counter: Pre-scan, binoculars; EMP for crossing windows; medium head armor as passive mitigation.
GODEEPER: Which armor tier absorbs a Sentinel headshot and when to run medium vs. light head: ARC Raiders armor guide →
A-Tier Threat: High Frequency, Manageable With Preparation
Wasps
Zone: White, Orange
Class: Scout / Aerial
Primary risk: Alert cascade to adjacent patrols
Wasps are the tutorial enemy: fast, light-armored aerial scouts that most players encounter first and misjudge as low-threat throughout. The damage output is modest. The threat is the alert call.
A Wasp that locks onto you before you've killed it issues an audio alert that draws every patrol within range. In Orange zones with dense patrol distribution, one Wasp alert can bring four or five additional units to your position before you've dealt with the first contact. Killing Wasps fast matters less than not letting them alert at all: which means either avoiding their detection zone or killing them immediately on first visual.
The audio signature is a high-pitched motor whine, lighter and higher-frequency than a Hornet. It carries clearly through geometry. Hearing it means a Wasp is in range: not necessarily in line of sight.
Any weapon handles Wasps cleanly. Ferro, Canto SMG, the Stitcher early-game: all work at appropriate ranges. The accuracy requirement is low; the timing requirement is not.
Counter: Any weapon, prioritize speed over precision. Kill before alert completes.
Ticks
Zone: White, Orange, Red
Class: Crawler / Ground
Primary risk: Proximity detonation, chain explosions in corridors
Ticks do not attack conventionally. Their behavior is approach, detonate on proximity contact. A single Tick detonation is survivable at full health with decent armor. Multiple Ticks detonating in sequence in a confined space is not.
The audio signature is a rapid mechanical clicking that accelerates as they close distance. Hearing clicking means retreat. Back away to create shooting distance and take them out before they reach detonation range. Any weapon works: one shot at distance drops a Tick before it becomes a problem.
The tactical mistake with Ticks is movement. Players who keep advancing into a room that's clicking will take the detonation at close range. Players who stop and reverse their movement create the space needed to handle them safely. In corridor encounters, multiple Ticks can chain: one detonation triggers the others in proximity. This is the scenario that ends runs.
Pre-scanning doors with binoculars before entry identifies Ticks on the other side. It's the zero-cost mitigation for the most preventable Tick death pattern.
Counter: Retreat on audio cue; shoot from range; never advance toward clicking.
B-Tier Threat: Red Zone Escalation
 Pre-engagement positioning before committing. Identifying the unit type from audio before visual contact determines whether to engage, reposition, or break contact entirely.
Red Zone Patrol Variants
Red zones introduce enhanced versions of every base type: higher HP, increased damage output, extended patrol boundaries. The Ferro remains the correct primary for aerial variants. Against ground-type elites, the Renegade battle rifle or Anvil hand cannon combination provides better per-shot damage where burst damage matters more than sustained fire rate.
EMP grenades create disable windows for repositioning or extraction across most elite unit types. The ARC Raiders best solo loadouts guide specifies two EMP slots for Red zone kits because elite encounters and boss phase transitions both require them.
The principle for Red zone elite contact: never extend the fight. Burst damage to end it fast, or disengage completely. Elite farming for materials without a sustainable loadout is a resource-negative activity: kit replacement costs exceed the material value gained.
Electromagnetic Storm Variants
All enemy types under Electromagnetic Storm conditions become more aggressive and more durable. Units pursue further past normal patrol boundaries, and direct engagements cost more resources (more medkits, more armor durability) than equivalent fights in clear conditions.
The storm's effect on ARC enemies is the second reason to avoid combat during storm runs after the extraction restriction. Trial points make storm runs valuable; ARC combat cost under storm conditions makes combat-heavy storm runs unsustainable.
Boss Encounters
ARC Matriarch
A stationary boss encounter found in Red zones. The Equalizer minigun (introduced in the Flashpoint update) is the optimal weapon: pre-spool before the engagement begins, maintain sustained fire, and the armor-shredding capability outperforms any rifle build against the Matriarch's HP pool.
Carry two EMP grenades for phase transition windows. The Matriarch encounter is designed around sustained DPS against a stationary target. The Equalizer's weakness against fast movers is irrelevant in this context.
ARC Vaporizer
The second confirmed boss type in the current build, also appearing in Red zones. The Equalizer loadout applies: pre-spool, sustained fire, EMP for phase shifts.
Both bosses represent the clearest argument for a specialized Red zone loadout. Bringing a stealth scavenger kit into a known boss encounter is the most avoidable form of preventable kit loss in ARC Raiders.
GODEEPER: The Equalizer minigun, Dolabra, and every other weapon ranked for boss encounters and ARC farming: ARC Raiders weapons tier list →
Step-by-Step: Reading the Room Before Entry
-
Stop at every door before opening. Two seconds of audio listening identifies Wasp whine, Hornet drone, or Tick clicking from the other side. This information is always available at zero resource cost.
-
Scan elevated positions before crossing open ground. Binoculars from Shani are worth buying in the first session. Sentinels positioned on rooftops in Orange zones will kill players who cross exposed terrain without checking elevation first.
-
Identify, then decide: engage or avoid. Wasps and Ticks can often be avoided entirely with correct detection radius investment. Forced engagement is only the right choice when avoidance would consume more time than the fight itself.
-
Weapon match before drawing. Ferro for aerial armored types. Canto or shotgun for close-range: interior corridor zones like the Dam shift the enemy mix toward ground units where rifles lose the engagement. EMP for Sentinels at exposed crossings or boss phase transitions. Frag grenade for corridor Hornet clusters.
-
End the fight or leave it. Fights that extend past five to eight seconds generate audio that draws additional patrols. A fast kill or a clean disengage outperforms a drawn-out engagement in almost every scenario.
Enemy Quick Reference
| Enemy | Zone | Class | Primary Threat | Best Counter |
|---|---|---|---|---|
| Hornet | Orange+ | Aerial combat | Sustained aerial damage | Ferro, Dolabra close, frag clusters |
| Sentinel | Orange+ | Guard/overwatch | Headshot from elevation | Pre-scan, EMP, medium head armor |
| Wasp | White+ | Aerial scout | Alert cascade | Any weapon, kill fast |
| Tick | White+ | Crawler | Proximity detonation | Retreat and shoot from range |
| Red Zone Elites | Red | Enhanced variants | Increased HP/damage | Ferro + EMP, Renegade for burst |
| ARC Matriarch | Red | Boss | Sustained encounter | Equalizer + 2× EMP |
| ARC Vaporizer | Red | Boss | Sustained encounter | Equalizer + 2× EMP |
 Enemy mix shifts toward ground units in interior zones. Corridor encounters like this favour shotguns and rifles over aerial-optimized builds.
Tips for Efficient ARC Engagement
Build the audio library before building the skill tree. Knowing what each type sounds like is worth more than an extra skill point for the first 20 hours. Ten minutes in the Practice Range with deliberate audio attention pays out across every session after.
Armor choice follows enemy mix, not zone level. Sentinels appear in Orange zones, not only Red. Medium head armor is the correct choice for any session that includes Orange zone content where elevated positions exist.
EMP grenades are multi-purpose tools. Sentinels crossing your extraction route, Hornets clustering near a container, boss phase transitions: all valid EMP targets outside the explicit boss scenario. Carrying only one EMP for "boss fights" and never using it until then is an inventory inefficiency.
The skill tree directly reduces enemy contact. Detection radius and noise reduction from the Survival branch remove many of these encounters from a given session. The investment pays off most visibly in encounters that don't happen.
Understanding ARC Raiders enemy types changes how you build loadouts. The ARC Raiders best solo loadouts guide covers weapon and armor configuration by zone tier.
Other Raiders are a separate threat category from ARC machines. They're human NPC opponents who appear during extractions and actively compete for loot. Unlike ARC enemies, other Raiders respond to the same sound cues you do and will reposition to cut off extraction routes if they identify your presence. They don't follow patrol routes: they make decisions. The ARC Raiders other Raiders guide covers encounter types by zone and the extraction strategies that minimize forced contact.
Frequently Asked Questions
How many enemy types are in ARC Raiders? ARC Raiders fields over 18 named standard ARC machine types, with additional bosses and husk variants on top of that. Wasps, Hornets, and Ticks dominate White and Orange zones. Sentinels and heavier patrol variants appear in Orange and Red. Red zones introduce elite variants and boss encounters including the ARC Matriarch and Vaporizer.
What is the best weapon against ARC Hornets? The Ferro battle rifle: strips Hornet armor in two to three shots due to exceptional armor penetration against ARC machine types. Full weapon rankings in the ARC Raiders weapons tier list.
How do you detect ARC enemies before they detect you? Each type has a distinct audio signature audible through walls. Wasps: high-pitched whine. Hornets: low bass drone. Ticks: rapid mechanical clicking. Two seconds of listening at any door before entry is the most reliable advance warning available. ARC Detection Radius Reduction from the Survival skill branch reduces the zone in which enemies lock onto you.
What are Ticks in ARC Raiders? Fast-moving ground crawlers with proximity detonation behavior. Retreat on audio cue, shoot from distance. Never advance toward clicking. Multiple Ticks in a corridor can chain-detonate.
What enemies are in Red zones in ARC Raiders? Enhanced variants of every base type (higher HP, increased damage) plus Sentinels in greater density and possible boss encounters. Electromagnetic Storm conditions make all Red zone enemies more aggressive and more durable.
Do enemies respawn during a raid? ARC patrols reconstitute over time on their route cycles. Clearing a patrol doesn't permanently open the area. Efficient extraction matters more than total zone clearance.
Related Reading
- ARC Raiders 1.27.0: Riven Tides Map and All Changes: ARC Raiders 1.27 dropped May 5: Turbine visibility fixes, grenade exploit patched, audio overhaul, and Embark's direct response....
- ARC Raiders Loot Guide: What to Keep, Sell, or Scrap: ARC Raiders loot guide: which materials to keep for crafting, which to sell for vendor XP, and which....
- ARC Raiders Spaceport Guide: Towers, Loot & Vaporizers: ARC Raiders Spaceport guide: Acerra Spaceport POIs, where Vaporizers spawn on the towers, open-terrain extractions, and loadouts that....
- ARC Raiders Machine Types: How to Kill Every ARC Unit (2026): ARC Raiders machine types guide: Hornet, Wasp, Tick, Firefly, Rocketeer kill strategies with exact weak points, ammo picks,....
- ARC Raiders Stella Montis Guide: Loot, Blueprints, PvP: ARC Raiders Stella Montis guide: endgame zone, night-exclusive Tempest and Wolfpack blueprints, free loadout strategy, and why it's....
- ARC Raiders Blue Gate Guide: Loot, Augments, Tips 2026: ARC Raiders Blue Gate guide: the reinforced reception augment spot, underground headhouse section, and what this starter map....
References
- ARC Raiders on Steam: official store page, patch notes, and enemy type documentation
- ARC Raiders Official Site: Embark Studios' official game page with Flashpoint update details
Was this guide helpful?


Disclaimer
This article is published for informational and entertainment purposes. It does not constitute professional financial, legal, or technical advice. Game performance, online services, patch schedules, and store listings change. Verify critical details (pricing, system requirements, regional availability) with publishers and storefronts before you buy. Affiliate links, where present, help support our editorial work and are labelled in our affiliate disclosure.
About the author

Critical game theorist with a background in film criticism. Writing for print and digital outlets since 2015. Specialises in genre analysis and design heritage.
- Background in film criticism
- 10 years games coverage
- Genre theory and design history specialist