GameBrief · Guides
Far Far West Boss Guide: All Five Bosses and Strategies

This far far west boss guide starts with the rule that most guides bury: the moment a stage boss dies, the game spawns an infinite enemy wave. Not a large wave. An infinite one.
If you haven't finished exploring the map before the boss triggers, you won't finish after. Every chest, every secret objective, every bell or medallion for a side mission: clear them first. Boss first means loot lost.
TL;DR: Far Far West has five bosses in Early Access (Winged Skull, Ghost Train, Undead Buzzard, Undead Spellcaster, and Necromancer. Ghost Train is the hardest, with two distinct phases and a tight vulnerability window when the engine core opens. Winged Skull is the tutorial encounter; movement is the mechanic. Always explore the full map before triggering a boss) killing the boss spawns an infinite enemy wave that ends your looting window permanently. Spell recommendations and phase breakdowns below.
Key takeaways
- Five boss encounters in the current Early Access build
- Ghost Train: two phases: spectral mortars, then bandits + cannon charge; engine core = damage window
- Winged Skull: movement-based tutorial boss; bullet-hell pattern avoidance is the core mechanic
- Undead Spellcaster: clear adds before committing to boss damage
- Necromancer: lateral movement trivializes most of the danger
- Every boss death triggers infinite enemy waves: explore the full map before engaging
- Hellfire is the best single-target burst for vulnerability windows; Voodoo Hex Mark stacks damage across all bosses
How boss fights work
Far Far West boss encounters don't follow the typical looter-shooter formula. Understanding two structural facts changes how you approach every boss mission:
The infinite wave rule. When the boss dies, an infinite enemy wave spawns immediately. No wind-down, no grace period. Players who haven't finished the side areas, secret missions, and chest loops before the boss are stuck in wave survival mode with no time to loot. The practical read: a boss marker on the map means that's the last thing you do in that region, not the main event.
Boss encounters aren't random. Unlike standard enemy spawns, boss locations are fixed to specific maps and mission contracts. The map marks them with a skull icon. You won't accidentally stumble into a boss fight. The game signals boss encounters clearly.
Phases and safe windows. Every boss in Far Far West has phases where damage is efficient and phases where you're meant to reposition or manage adds. Identifying which phase you're in is more important than raw damage output. Wasting burst spells during an unsafe phase is the main reason players hit bosses for longer than they should.
GODEEPER: Before you hit the first boss, make sure your spell loadout can handle the phase transitions. Far Far West Spells Guide →
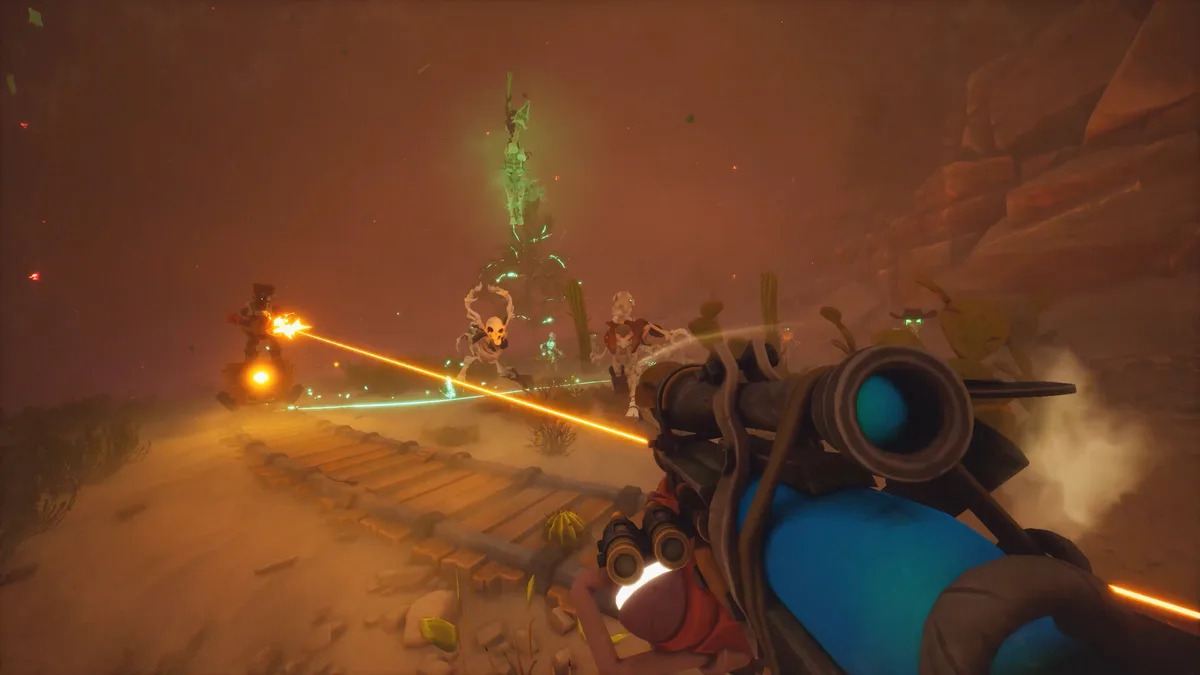
Winged Skull
The Winged Skull is the tutorial boss. Its job is to introduce how Far Far West boss fights feel before the fights get complicated.
The Winged Skull fires dense bullet-hell patterns: skulls, spectral bolts, and spread shots overlap across the arena. Move constantly. Players who hold position and try to optimize shot angles die faster than players who run and fire when gaps appear. The Winged Skull punishes positioning harder than any other mechanic in the fight.
Electric's Chain Spark is the strongest option here. It hits moving targets reliably because the chain arc doesn't require precise aim. Spend most of this fight in motion with Chain Spark firing on cooldown.
After the Winged Skull, the basic pattern of every boss fight in the game applies: movement matters, vulnerability windows exist, and clear the map first.
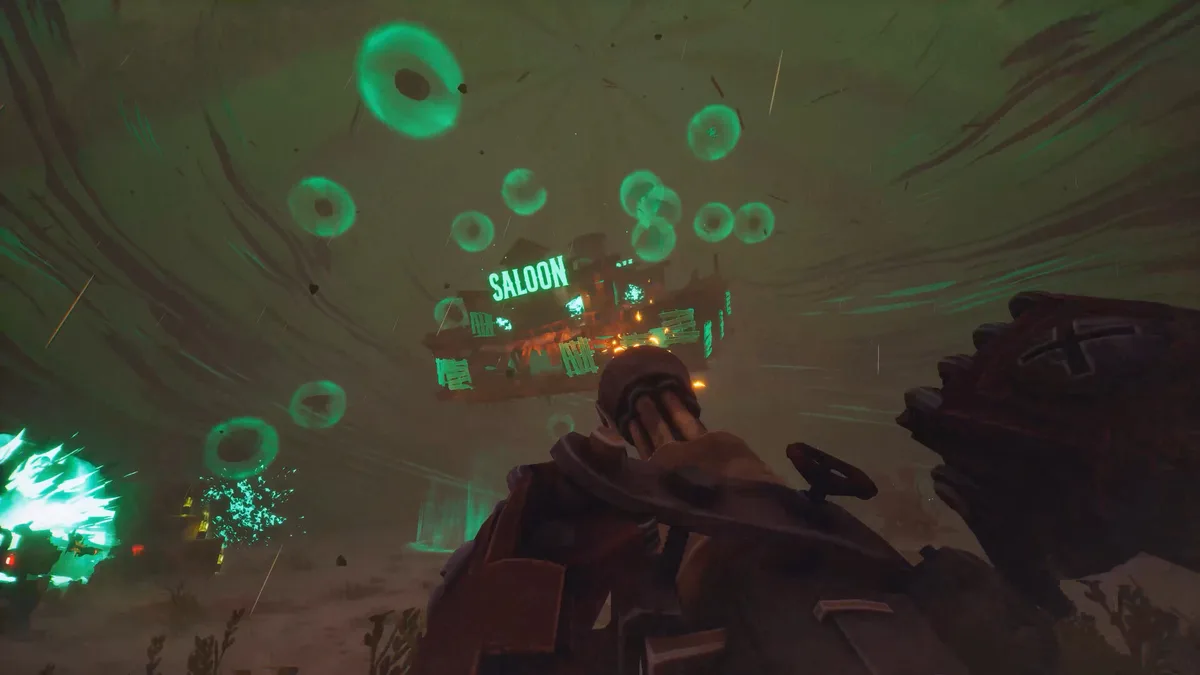
Ghost Train
The Ghost Train is the hardest boss encounter in Far Far West's current Early Access build. It's a two-phase fight with a hard skill check on the second phase transition.
Phase One: Mortar Circles
The train circles the arena continuously, firing spectral mortars in arcing patterns that land a second after launch. Keep moving in the same direction the train circles. Running against its rotation puts you directly in the mortar landing zones.
There's no vulnerability window in phase one. Don't waste your burst spells here. Use movement abilities and weaker spells to sustain pressure while staying alive.
Phase Two: Bandits and the Cannon Charge
Once the train's HP drops below threshold, spectral bandits swarm the arena simultaneously as the train begins charging its main cannon. This is the phase that kills most players: they focus the cannon and get overwhelmed by bandits, or clear bandits and take the cannon shot.
The correct sequence:
- Clear the bandit wave first (they interrupt your positioning and make the cannon dodge harder)
- Once the bandits are down, reposition to the far side of the arena from the cannon
- Stay mobile; the cannon tracks movement but with a delay
The Engine Core Window
After the cannon fires, the engine core opens for approximately 8-10 seconds. This is your damage window and the fight's only real burst opportunity.
Stack at least one cooldown reduction item before this fight. When the core opens, immediately unload your highest-burst combo. Hellfire deals the highest single-target damage during stationary windows. Paired with cooldown reduction, two Hellfire casts can clear a significant portion of the boss's remaining HP during one core opening.
The fight loops back to phase one after the core closes if the boss survives. Phase two transitions get faster on repeat cycles.
Build recommendation: Hellfire for primary burst, one cooldown reduction item, and an add-clear spell for phase two bandits. Place a Cactus turret at the arena edge before phase two triggers and let it handle bandits while you manage the cannon.
Undead Buzzard
The Undead Buzzard introduces the "learn the pattern, then burst" boss template that several later fights reuse.
The Buzzard has a three-phase attack cycle: aerial dive, grounded strafe, repositioning hover. Each phase has a predictable duration. Watch the cycle once and you'll know exactly when the burst windows open.
Don't start a major spell combo mid-dive. The Buzzard's collision hitbox deals significant knockback that interrupts casting animations. Wait for the grounded strafe phase; the Buzzard slows down and the burst window is clean.
Any high-damage school works here because the fight is pure pattern recognition. Pyro's Inferno Burst lands well during grounded phases. Acid's Corrosive Pool spreads damage across the Buzzard's strafe path without requiring precise aim.
The fight isn't complex once you understand the cycle. One clean observation run is usually enough to identify the pattern and execute effectively on a second pass.
Undead Spellcaster
The Undead Spellcaster is the most mechanically demanding of the five bosses because it combines boss damage with crowd control pressure from adds.
The Spellcaster continuously spawns undead adds throughout the fight. They swarm aggressively and interrupt casting animations at close range. Players who ignore the adds and go straight for the boss end up crowded out of their own burst windows.
Clear the add wave first, every time. The Spellcaster has defined channels where it casts major attacks; those are your burst windows. You want to be in position and ready, not swatting adds during the window.
You need at least one crowd control spell here. Cactus thorn turrets placed at the arena perimeter before the fight handle spawning adds passively throughout. Voodoo's Hex Mark stacks a damage debuff on both the Spellcaster and adds simultaneously, so it doubles as offense and utility.
Don't over-commit during unsafe phases. If you don't have a clear burst window because the Spellcaster is mobile or mid-dodge, hold your spells and clear adds instead. Burned cooldowns during unsafe phases extend the fight significantly.
GODEEPER: Team compositions handle the Undead Spellcaster more efficiently when one player takes add management and another focuses boss damage. Far Far West Co-op Guide →
Necromancer
The Necromancer is the easiest fight to survive once you understand its movement pattern.
The Necromancer fires tracking projectiles that home on your current position. Standard movement (strafing, backing up) doesn't break the tracking effectively.
Bunnyhop sideways. Continuous lateral movement in the same direction throws off the tracking significantly. Players who discover this early report the encounter going from dangerous to almost trivial. It applies to any Far Far West boss that fires homing shots: the pattern assumes normal movement prediction, and lateral momentum changes that calculation.
Once the movement clicks, any burst school finishes the fight quickly. Pyro and Electric work best; the Necromancer is a single target without meaningful phases. Acid's sustained stacking is slower when the fight ends fast once the tracking is beaten.
The Necromancer also spawns minor undead adds, though fewer than the Spellcaster. A single Cactus turret is sufficient to handle the adds without dedicating a second spell slot.
General Far Far West Boss Tips
Explore everything before you engage. The post-boss infinite wave ends your looting window. Complete every side objective, open every chest, and trigger every secret mission before pulling the boss encounter. Missing a Joker card because you killed the boss early costs you that card for the run.
Stack cooldown reduction before Ghost Train. It's the only fight where CDR specifically changes the outcome. One item is enough to get a second Hellfire cast during the engine core window. Without it, the window closes before you can fire twice.
Hex Mark first, damage second. Voodoo's Hex Mark debuff increases all subsequent damage to the target. Cast it at the start of every boss fight as the opener. It costs one spell slot but amplifies everything that follows.
In co-op, assign add management before the fight. Add-heavy bosses (Spellcaster, Ghost Train phase two) become significantly easier when one player explicitly handles adds. Uncoordinated co-op teams often have everyone targeting the boss while adds stack up.
Bunnyhopping breaks tracking. Any boss that fires homing projectiles is neutralized by continuous lateral movement. The Necromancer is the clearest example, but the principle applies to tracking phases in other encounters.
Frequently asked questions
Q: What bosses does this far far west boss guide cover? A: Five bosses in the current Early Access build: Winged Skull (tutorial encounter, bullet-hell patterns), Ghost Train (two-phase locomotive fight, hardest in the game), Undead Buzzard (pattern recognition and burst windows), Undead Spellcaster (adds management), and Necromancer (lateral movement breaks tracking). Evil Raptor plans to add content throughout the 12-month Early Access period.
Q: What happens when you kill a boss in Far Far West? A: An infinite enemy wave spawns immediately after boss death. There's no grace period. The wave starts instantly. Loot the entire map before engaging the boss or you'll lose access to remaining chests, secret objectives, and Joker card missions permanently for that run.
Q: How do you beat the Ghost Train? A: Two phases: phase one, keep moving and avoid spectral mortars. Phase two, clear spectral bandits first, then dodge the cannon. When the engine core opens after the cannon fires, unload your burst: Hellfire with a cooldown reduction item is the highest-damage option. Stack CDR before this fight specifically.
Q: What spell is best for bosses? A: Depends on the fight. Hellfire is strongest for stationary vulnerability windows (Ghost Train engine core). Cactus turrets are the best utility for add-heavy bosses (Spellcaster). Hex Mark stacks a debuff that boosts all damage: always open with it. Chain Spark works on mobile bosses where precise aim is difficult.
Q: Can you solo Far Far West bosses? A: Yes, all bosses are designed for solo play. The Ghost Train is the hardest solo encounter because the phase two bandit swarm plus cannon charge creates simultaneous pressure. In solo, Cactus turrets handle bandits passively while you manage the cannon and core window.
Q: How do boss encounters unlock in Far Far West? A: Boss encounters are tied to specific maps and mission contracts. The Winged Skull is encountered in the Far West starting region. Ghost Train is unlocked via the Papa Marquette 1225 questline. Undead bosses appear in Canyon, Desert, and Woodlands maps as you progress into higher-difficulty contracts.
References
- Far Far West on Steam: official Early Access page, patch notes, and developer roadmap
- Far Far West Wiki (Bosses section) community boss documentation for Early Access encounters
- Far Far West complete guide: weapons, spells, bosses, beginner tips, and all cluster guides
Related Reading
For complete spell breakdowns covering all 25 spells across five schools, including which options work best for each boss phase covered in this far far west boss guide, see the Far Far West spells guide.
New to the game and still working toward the boss encounters? The Far Far West beginner guide covers early progression, gold farming, and the upgrade priorities that matter most before the far far west boss fights start in earnest.
Running bosses in co-op? The Far Far West co-op guide covers team compositions, how spell reactions fire cross-player during boss fights, and how to manage the post-boss wave as a group.
- Far Far West Winged Skull Boss: The First Fight Guide: Far Far West Winged Skull boss: the bullet-hell tutorial where movement is the mechanic, the Electric build that....
- Far Far West Cryptic Vulture Boss: Break Shield, Hit Head: Far Far West Cryptic Vulture boss: destroy the Wing Shield skulls, burst the head weak spot, stay mobile....
- Far Far West Fire Spells: All 5 Pyro Spells & Combos: Far Far West Fire spells: all 5 Pyro spells from Fireball to Finger Guns, the Fireball-then-Surcharge order, and....
- Far Far West Voodoo Spells: All 5 & the Healing Rule: Far Far West Voodoo spells: all 5 healing spells from Drain to Doll, the rule that healing only....
- Far Far West Builds Guide: All 3 Archetypes (2026): Far far west builds explained: all 3 archetypes with spell combos, Joker picks, and difficulty.
- Best Early Access Games Worth Buying Right Now: May 2026: Early access games worth buying in May 2026: six picks including Windrose and Subnautica 2,.
- Far Far West Early Access: 250k Sales and What to Expect: Far Far West Early Access launched April 28, 2026: Evil Raptor's 7-person co-op roguelite hit.
- Far Far West Ghost Train Boss Guide: Two-Phase Fight: Far Far West Ghost Train boss guide: dodge the spectral mortars, clear the bandits, and.
Was this guide helpful?
About the author

Senior Critic & Analyst
Former game data analyst turned critic with 11 years covering indie and mid-tier games. Based in Austin. Runs spreadsheets on games most people just play.
- 11 years games criticism
- Former game economy analyst
- Roguelike and strategy specialist


Disclaimer
This article is published for informational and entertainment purposes. It does not constitute professional financial, legal, or technical advice. Game performance, online services, patch schedules, and store listings change. Verify critical details (pricing, system requirements, regional availability) with publishers and storefronts before you buy. Affiliate links, where present, help support our editorial work and are labelled in our affiliate disclosure.