GameBrief · Guides
Far Far West Spells Guide: Schools, Combos, and Reactions

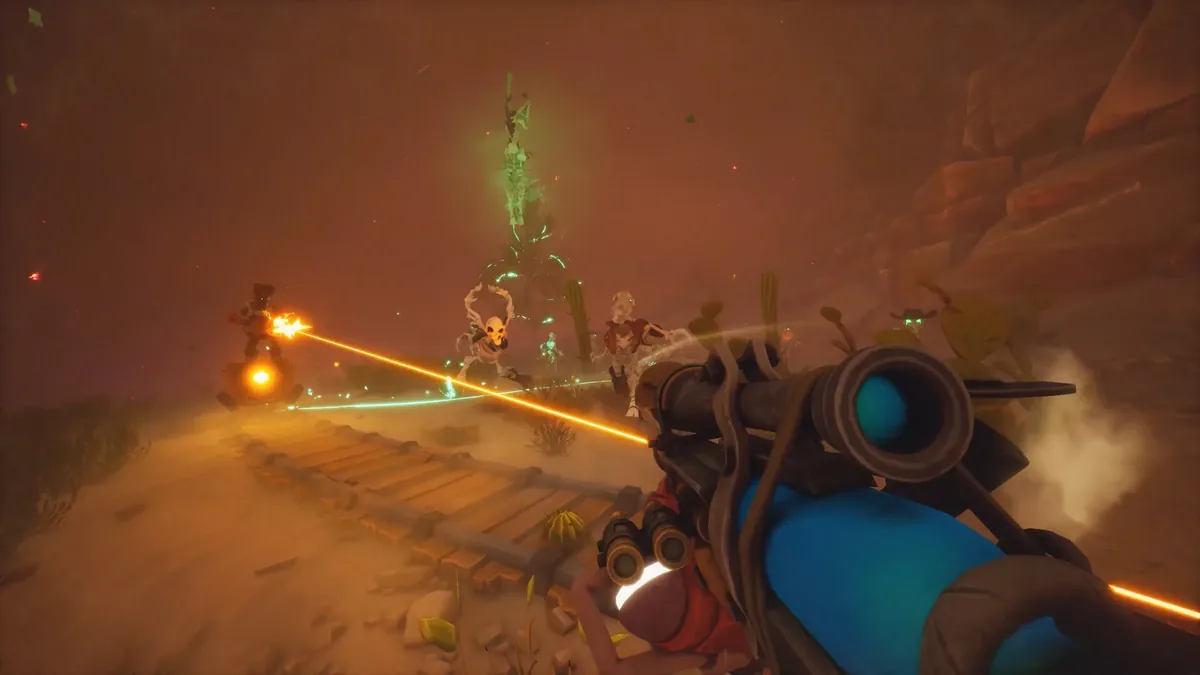
This far far west spells guide covers all 25 across five elemental schools. You equip three at a time. The damage ceiling is not in the spells themselves; it's in the reactions they trigger against each other.
TL;DR: Five schools (Acid, Cactus, Elec, Fire, Voodoo), five spells each, unlocked at levels 1, 4, 12, 20, and 35. Every school interacts with at least two others. The system runs on setup-and-trigger pairs: one element places a surface or summon, a second element contacts it to produce an amplified chain reaction. Portal (Elec, level 12) duplicates any spell thrown through it: the single most important mechanic upgrade in the game. Beginners: Strikes + Drain + Mino. Boss focus: Firebeam + Boing + Geyser. Read the full combo table before you hit level 12 or you'll waste the unlock.
Key takeaways
- Portal (Elec, level 12, 10s cooldown) duplicates any spell cast through it: most players don't realize it until level 20+
- Five schools: Acid (setup foundation), Cactus (autonomous summons), Elec (chains + mobility), Fire (burst damage), Voodoo (healing)
- Cross-school reactions do far more damage than either spell alone: most guides only mention the obvious Fire + Acid interaction
- Cactus is underrated: Mino + Strikes becomes a Tesla tower; Bandito gets melee and speed from Fire and Elec in the same fight
- You equip 3 spells per loadout from any school mix: single-school builds can't produce reactions and hit a hard ceiling fast
How the Spell System Works
Far Far West doesn't use a traditional cooldown-and-cast mage system. Each spell either deposits something on the field (acid puddle, mine, portal, wisp) or applies an immediate effect. The value comes from what happens when those deposits interact.
Every fight has two phases, whether you plan them or not. First, a setup spell leaves something behind: an acid puddle, a mine, a portal gate, a floating wisp. Then a follow-up spell from a different school contacts it and produces something much bigger. Strikes contacting an Acid puddle doesn't just deal Elec damage: it turns the puddle into a thunderstorm that auto-targets nearby enemies. Fireball landing on an Acid puddle spawns a traveling tornado.
The reaction is always stronger than either spell alone. This is why cross-school loadouts outperform stacking one school: you need both a setup element and a trigger to produce reactions.
One exception: Voodoo is mostly a trigger school. Its spells convert existing elemental damage into healing candles rather than dealing big damage themselves.
All 25 Spells by School
Acid
Acid spells leave corrosive puddles that every other school can trigger into reactions. It's the most universally useful setup school.
| Spell | Unlock Level | Cooldown | Effect |
|---|---|---|---|
| Thrower | 1 | 30s | Spit jets of acid, leaves corrosive puddles |
| Geyser | 4 | 45s | Summon acid geyser that erupts on impact |
| Bubble | 12 | 50s | Big acid bubble that bursts on impact (0.4s cast) |
| Contagion | 20 | 80s | Corrodes all enemies in a wide zone, applies Contagious |
| Rain | 35 | 120s | Call down a rain of acid that corrodes enemies |
Bubble is the core setup for the tornado combo. Geyser + any lightning surface spawns three additional geysers. Rain is the endgame crowd control: slow cooldown, but it corrodes the entire zone automatically.
Cactus
Cactus spells deploy autonomous summons that fight independently. They're slow to set up but create sustained pressure.
| Spell | Unlock Level | Cooldown | Effect |
|---|---|---|---|
| Mino | 1 | 10s | Cactus mine that explodes when stepped on (0.2s cast) |
| Pistolero | 4 | 40s | Cactus turret that fires continuously (0.2s cast) |
| Wallo | 12 | 40s | Cactus spikes that damage and slow enemies (0.2s cast) |
| Decoyo | 20 | 95s | Dancing cactus that lures enemies, then explodes (0.2s cast) |
| Bandito | 35 | 120s | Powerful cactus golem that fights for you (0.2s cast) |
Mino has a 10-second cooldown, tied with Portal for the lowest in the game. Keep one active at all times: don't save it. Bandito gets a serious damage and speed buff when you hit it with both Fire and Elec in the same encounter. Decoyo + Drain or Corruption mind-controls nearby enemies before the explosion goes off, which is the kind of chaos co-op was built for.
Elec
Elec spells chain between targets, provide mobility, and include Portal: the mechanic that changes everything at level 12.
| Spell | Unlock Level | Cooldown | Effect |
|---|---|---|---|
| Strikes | 1 | 20s | Line of lightning strikes that zaps everything in range |
| Boing | 4 | 15s | Instant jump to escape enemies (0.2s cast) |
| Portal | 12 | 10s | Spawn up to two linked portals for teleportation |
| Swap | 20 | 25s | Swap positions with an enemy, explosion at both locations (0.2s cast) |
| Thunderstrike | 35 | 100s | Rise up, then dive bomb the area |
Portal ties Mino at 10 seconds cooldown and it's not close as a value proposition. Throw any spell directly through an active portal and it duplicates on exit. The full breakdown is in the Portal section below.
Fire
Fire spells deal burst damage and leave burning ground. The primary damage trigger school for Acid setups.
| Spell | Unlock Level | Cooldown | Effect |
|---|---|---|---|
| Fireball | 1 | 20s | Fireball that explodes and leaves burning ground |
| Firebeam | 4 | 80s | Giant fire beam that scorches everything in range |
| Surcharge | 12 | 60s | Burns all enemies in a wide zone; detonates ablaze enemies |
| Wisp | 20 | 100s | Summon a Wisp dealing extra burn, jumps between targets on kill |
| Finger Guns | 35 | 120s | Replaces weapon with fiery fingers shooting explosive bullets |
Firebeam on an Acid surface creates traveling fire tornadoes. Wisp hit with Elec damage converts into an Electric Wisp that jumps between targets spreading burn. Surcharge's detonation hits enemies already on fire before it lands: cast Fireball first, then Surcharge, not the other way around.
Voodoo
Voodoo is the healing school. It doesn't output raw damage but sustains your team through long fights.
| Spell | Unlock Level | Cooldown | Effect |
|---|---|---|---|
| Drain | 1 | 25s | Drain an enemy's health back to you (0.55s cast) |
| Rescue | 4 | 60s | Heal or revive nearest ally (0.55s cast) |
| Corruption | 12 | 35s | Corrupt enemies to fight for you (0.4s cast) |
| Ritual | 20 | 100s | Summon a ring of healing candles for the team |
| Doll | 35 | 135s | Summon a doll granting invincibility and high speed (1.0s cast) |
Any Voodoo spell cast near active elemental damage spawns three healing candles automatically: no targeting needed, just be close to the fire or acid. This trips people up constantly: they cast Drain on a healthy enemy in the open and wonder why nothing healed. The damage has to already be on the ground. Doll's 1.0-second cast time is the longest in the game; you're dead before it resolves if you pop it mid-fight.
GODEEPER: Six weapons ranked for PvE performance, solo vs. squad loadout builds, and what to skip in the first three runs. Far Far West Best Weapons: Tier List and Loadout Picks →
All Elemental Reactions
This is the complete cross-school combo table. Reactions only trigger when the second element physically contacts the first element's surface or summon.
| Setup | Trigger | Reaction |
|---|---|---|
| Acid puddle | Fire or Elec damage | Localized explosion of the trigger element |
| Acid Geyser | Lightning puddle | Spawns three additional acid geysers |
| Acid Bubble | Fire puddle | Roaming fire tornado dealing continuous damage |
| Acid Bubble | Electric puddle | Splits into three bouncing acid bubbles |
| Acid Rain | Strikes | Thunderstorm that auto-targets all nearby enemies |
| Fire Wisp | Elec damage | Converts to Electric Wisp spreading burn on hit |
| Boing + Thunderstrike (same cast) | : | Movement speed boost added to the dive |
| Portal (active) | Any spell cast through it | Spell is automatically duplicated |
| Gold vein | Fireball | Instantly mines the entire vein |
| Any elemental surface | Any Voodoo spell | Spawns 3 healing candles near the surface |
| Cactus Mino | Strikes | Converts to Tesla tower arcing lightning at enemies |
| Any Cactus summon | Strikes | Six-strike flowering AoE centered on the summon |
| Cactus Bandito | Fire + Elec (same fight) | Gains melee damage and movement speed |
| Mino or Decoyo | Drain or Corruption | Mind-controls surrounding enemies before explosion |
| Pistolero, Wallo, or Decoyo | Ritual | Healing circle centered on the summon |
Most guides stop at Acid + Fire = explosion. The table above includes the Cactus interactions and the Voodoo trigger condition that most players discover by accident.
 The elemental interaction system isn't documented in-game; it's discovered through experimentation.
The Portal Mechanic: Level 12 Changes the Build
Portal has a 10-second cooldown. That alone makes it worth slotting. The duplication effect is what makes it mandatory.
When you throw any spell card directly through an active portal, the game generates a second copy of that cast on exit. Two Firebeams. Two Bubbles. Two Drains. Two Strikes on the same acid surface producing two thunderstorms.
The practical setup:
- Place Portal between you and the enemy cluster
- Cast Bubble through the portal: two bubbles land at once
- Follow with Firebeam through the portal: two tornadoes spawn from the double-bubble surface
- If you have Voodoo active near the tornadoes, healing candles auto-spawn from the fire surfaces
Players call this the "Dual Tornado" setup. Portal, Bubble, Firebeam: all available before level 20. The 10-second Portal cooldown means fresh gates every fight with no waiting.
The only constraint is positioning: the spell must travel through the gate, not around it. In open rooms this is easy. In the cramped final boss arenas it requires deliberate placement.
Best Loadouts by Phase
Levels 1-11 (before Portal): Strikes + Drain + Mino. Short cooldowns across all three. Mino at 10s means continuous mine pressure. Strikes clears waves and triggers Mino into a Tesla tower. Drain heals off any enemy already taking elemental damage. You're not doing peak damage but you're surviving and learning the reaction timing.
Levels 12-19 (Portal unlocked): Replace Mino with Portal. Strikes + Drain + Portal. Start learning the throw-through-gate muscle memory. Even at this stage, a doubled Strikes on an acid surface is a significant damage spike.
Levels 20-34 (Corruption and Wisp available): The two strongest solo setups diverge here. Acid Rain + Strikes + Portal creates a sustained thunderstorm that auto-clears waves while you focus the boss. Wisp + Portal + Firebeam is the boss burst setup: doubled Firebeam on a Wisp converting to Electric gives enormous damage per cycle.
Level 35 (full kit): Bandito becomes the Cactus endgame anchor. Place Bandito, hit it with Strikes, hit it with Firebeam in the same fight: it enters a buffed melee state and clears adds while you focus burst damage on the boss. Finger Guns is situational; its value is in encounters where you run out of cooldowns.
Solo vs Co-op Spell Roles
Solo requires one Voodoo spell at all times. Without team heals, Drain is the safety net. Drop it and you rely entirely on found health packs.
Co-op lets you specialize: one player runs Acid to keep puddles going, one runs Fire to detonate them, one runs Portal + Strikes to duplicate everything the Acid player sets up, and one runs Voodoo to keep the team alive through the back half of the mission. Four players don't have to commit to these exactly, but someone needs to own Voodoo. Without it you're scavenging health packs and hoping.
GODEEPER: What Far Far West actually is, how the Joker perk card system works, and the most common first-session mistakes. Far Far West Beginner Guide: First Run Tips and Joker System →
Tips
Mino is your floor, not your ceiling. Ten-second cooldown means you should have a Mino active constantly. Don't save it for big moments: plant it, move on. If Strikes hits it, you get a bonus Tesla tower. If it doesn't, it still absorbs a hit. Losing the habit of planting Mino passively costs more damage per run than any other mistake.
Cast Voodoo near active fire or acid, not away from it. The three healing candle trigger requires proximity to an elemental surface. Players who misread this cast Drain on a healthy enemy in open ground and get no candles. The positioning is the mechanic: cast Voodoo where damage is already happening.
Get the Surcharge order right. Most people read the tooltip and think Surcharge burns then detonates. It doesn't: it detonates enemies that were already burning when it lands. Fireball first, then Surcharge. Reversed, you get half the damage.
Portal needs a second in the right place. The duplication only works if the spell travels through the gate, not into the wall beside it. Place Portal early in a room before combat starts. Repositioning Portal mid-fight under pressure is the main failure mode for players new to the mechanic.
Frequently asked questions
Q: How do you unlock all 25 spells in Far Far West? A: Spells unlock by reaching specific levels: level 1 (all first school spells), level 4 (second spells), level 12 (third spells), level 20 (fourth spells), level 35 (fifth spells). There's no separate currency unlock: reaching the level is sufficient.
Q: What is the Cactus school good for? A: Sustained area control and co-op synergies. Pistolero fires continuously without player input. Decoyo lures enemies and explodes. The key interactions are Mino + Strikes = Tesla tower, and any Cactus summon + Strikes = six-strike AoE. Bandito (level 35) becomes a melee powerhouse when buffed with Fire and Elec in the same fight.
Q: Can you use two spells from the same school? A: Yes. There's no restriction on same-school loadouts, but you give up all cross-school reactions if you run two Acid spells and one Fire, for example. The setup-and-trigger system only produces reactions when two different schools interact.
Q: What is the fastest cooldown spell? A: Portal at 10 seconds. Mino is second at 10 seconds (same). Boing is 15 seconds. For sustained pressure, Portal + Mino gives you two short-cooldown actions every 10 seconds, which is why they pair well.
Q: Does Corruption (Voodoo) count as Voodoo damage for the healing candle trigger? A: Yes. Any Voodoo spell cast near an active elemental surface triggers the healing candles, including Corruption. The trigger is the presence of an elemental surface, not the specific Voodoo spell used.
Q: What spells are weakest in solo play? A: Rescue (Voodoo, level 4) targets the nearest ally: it does nothing in solo. Ritual requires teammates to benefit from the healing ring area. Swap (Elec, level 20) repositions you to where an enemy was standing, which in solo can leave you in a worse position than before. All three are co-op tools.
Q: Is Fire or Acid better as a primary school? A: Acid is the more versatile setup school: its puddles are triggered by both Fire and Elec. Fire is the stronger damage trigger. Most effective loadouts use Acid for setup and Fire for triggering, not one school as a "primary."
References
- Far Far West on Steam: full patch notes, developer updates, and Early Access roadmap
- Far Far West spells wiki: spell database with complete cooldowns and unlock levels
- Far Far West complete guide: weapons, spells, bosses, beginner tips, and all cluster guides
Related Reading
New to the game? The Far Far West Beginner Guide covers the Joker perk system, the mission loop, and the first-session mistakes that cost players the most time.
Weapon selection and spell loadouts work together: the Far Far West Best Weapons Guide covers all weapons ranked for PvE and co-op, with per-role loadout picks.
For the full picture on what launched in April 2026, the Far Far West Early Access launch article covers the numbers behind the game's debut weekend and what to expect from the Early Access roadmap.
- Far Far West Cryptic Vulture Boss: Break Shield, Hit Head: Far Far West Cryptic Vulture boss: destroy the Wing Shield skulls, burst the head weak spot, stay mobile....
- Far Far West Fire Spells: All 5 Pyro Spells & Combos: Far Far West Fire spells: all 5 Pyro spells from Fireball to Finger Guns, the Fireball-then-Surcharge order, and....
- Far Far West Voodoo Spells: All 5 & the Healing Rule: Far Far West Voodoo spells: all 5 healing spells from Drain to Doll, the rule that healing only....
- Far Far West Elec Spells: All 5 & the Portal Trick: Far Far West Elec spells: all 5 from Strikes to Thunderstrike, why Portal duplicates any spell thrown through....
- Far Far West Boss Guide: All Five Bosses and Strategies: Far far west boss guide: all five encounters with phase breakdowns, best spells per boss,.
- Far Far West Builds Guide: All 3 Archetypes (2026): Far far west builds explained: all 3 archetypes with spell combos, Joker picks, and difficulty.
- Best Early Access Games Worth Buying Right Now: May 2026: Early access games worth buying in May 2026: six picks including Windrose and Subnautica 2,.
- Far Far West Ghost Train Boss Guide: Two-Phase Fight: Far Far West Ghost Train boss guide: dodge the spectral mortars, clear the bandits, and.
Was this guide helpful?
About the author

Critical game theorist with a background in film criticism. Writing for print and digital outlets since 2015. Specialises in genre analysis and design heritage.
- Background in film criticism
- 10 years games coverage
- Genre theory and design history specialist


Disclaimer
This article is published for informational and entertainment purposes. It does not constitute professional financial, legal, or technical advice. Game performance, online services, patch schedules, and store listings change. Verify critical details (pricing, system requirements, regional availability) with publishers and storefronts before you buy. Affiliate links, where present, help support our editorial work and are labelled in our affiliate disclosure.