GameBrief · General
Murim Survival Endgame Guide: Surviving Ascension Mode

Reviewing
Murim Survival
The Murim Survival endgame unlocks without announcement. You finish the final campaign contract, the screen returns to expedition selection, and there's a new difficulty option where there wasn't one before. Most players assume more campaign content is coming. There isn't.
TL;DR: Ascension mode is the Murim Survival endgame: unlocks after the main campaign. Run 15+ with deep mastery in one tree before entering. Ranged kite has the highest ceiling; shortsword chain needs chain window extension variants; heavy momentum needs recovery time reduction items. Companion mismatch costs more post-spike than in normal difficulty.
What changes in Ascension isn't incremental. Enemy density goes up, damage values increase, and stagger recovery speeds up. That last change doesn't sound significant until you realize that shortsword chain (one of the three viable endgame archetypes) depends on stagger windows to complete its sequence. If those windows close faster, the archetype breaks without specific mastery variants you may not have built yet.
This Murim Survival endgame guide covers what changes for each of the three archetypes in Ascension, what mastery you need before entering, and why companion decisions that were easy calls in normal difficulty stop being easy.
Murim Survival endgame: key takeaways
- Ascension mode is the Murim Survival endgame: it unlocks after the main campaign with no announcement
- Run 15+ is the practical target, but mastery concentration matters more than run count
- Stagger recovery speeds up in Ascension: shortsword chain needs chain window extension variants to compensate
- Ranged kite has the highest ceiling in the Murim Survival endgame; movement variant unlock is critical
- Heavy momentum: the gap between working and failing widens in Ascension: recovery time reduction items are load-bearing
- Scattered mastery across multiple trees fails the Murim Survival endgame consistently
What unlocks the Murim Survival endgame
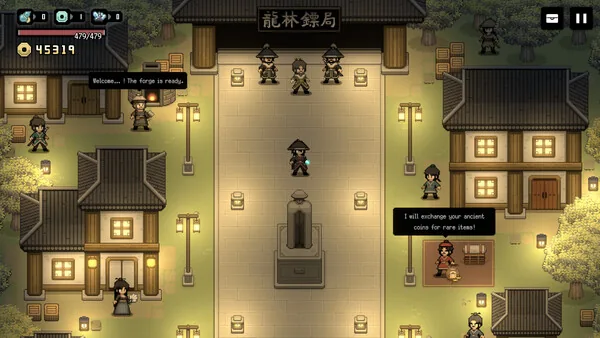
Clearing the main campaign's final contract transitions you to expedition selection, where the Ascension difficulty option now appears. The Murim Survival endgame doesn't announce itself. Most players encountering it assume the game is glitching or that there's content they missed.
There isn't. Ascension is the loop the rest of the game builds toward.
The structure stays the same: same zones, same boss contracts, same companion recruitment event at the midpoint. What changes is the baseline. Enemy density is higher, damage values increase, and enemy stagger recovery is faster than in normal difficulty. The Murim Survival endgame doesn't add new content; it asks whether the build you've constructed across 10-15 runs can hold up under pressure it wasn't designed to ignore.
Most players aren't ready at run 8 or 10. The practical target is run 15+, not because run count is the gate, but because players with 15 focused runs have typically built deep concentration in at least one technique tree. Deep concentration is what unlocks the advanced mastery variants. Advanced variants are what separate viable Ascension builds from builds that worked fine at normal difficulty.
 Late-game wave density requires a mastery-synced build: generic kits cap out early.
How Ascension changes each archetype
Shortsword chain
The shortsword chain archetype relies on completing a multi-step chain sequence while an enemy is staggered. At normal difficulty, the stagger window is long enough that execution errors don't cost much. In the Murim Survival endgame, that window closes faster. An enemy that held vulnerability through four chain strikes in normal difficulty may recover after two or three in Ascension.
The adjustment isn't switching archetypes: it's targeting mastery variants that extend chain window duration. These sit at deeper concentration levels in the shortsword tree. Players who've spread mastery across multiple trees won't have them available.
Chain exposure also increases with Ascension's higher density. Additional enemies are more likely to interrupt a sequence mid-chain, making techniques that suppress or knock back nearby enemies during the chain worth building around. These are niche picks in normal difficulty. In the Murim Survival endgame, they change what the archetype can do.
GODEEPER: How mastery develops the shortsword chain and the other two archetypes across multiple runs. Murim Survival Builds Guide →
Ranged kite
Ranged kite is the most rewarding archetype in the Murim Survival endgame. The positioning requirement (maintaining distance from the enemy cluster) actually works with certain Ascension enemy behaviors. Enemies over-commit to closing range, creating gaps in their formation that ranged attacks exploit more cleanly than in normal difficulty.
The movement variant unlock is what makes this viable in Ascension. At deep concentration in the ranged mastery tree, this variant increases reposition speed and extends dash distance. Without it, kite runs in Ascension become reactive: you're fleeing rather than repositioning with intent. The difference in feel is significant, and it's why ranged kite rewards Murim Survival endgame preparation more than it rewards raw run count.
The delayed projectile technique pays off most in Ascension. In normal difficulty, fire it and reposition immediately: enemies are slow enough not to punish the gap. In Ascension, you sequence repositioning around the delay rather than reacting after it fires. Players who've practiced the timing in runs 10-15 before entering the Murim Survival endgame have a consistent edge in the back half of Ascension runs.
Heavy momentum
Heavy momentum has the widest performance gap in the Murim Survival endgame. Players running it with recovery time reduction items and stagger radius techniques can handle Ascension's increased density more safely than the other two archetypes: the large attack radius handles groups by design. Players who haven't acquired those items find that every missed swing leaves them exposed through recovery long enough to absorb multiple hits from a denser group.
The item dependency is the archetype's endgame problem: recovery time reduction is a specific equipment drop, not a predictable mastery unlock. Some runs won't produce it. This makes heavy momentum less consistent in the Murim Survival endgame than the other two archetypes, which depend on mastery variants that can be developed across runs with focus. That inconsistency is why ranged kite and shortsword chain are the more reliable first choices for players approaching Ascension for the first time.
Step-by-Step
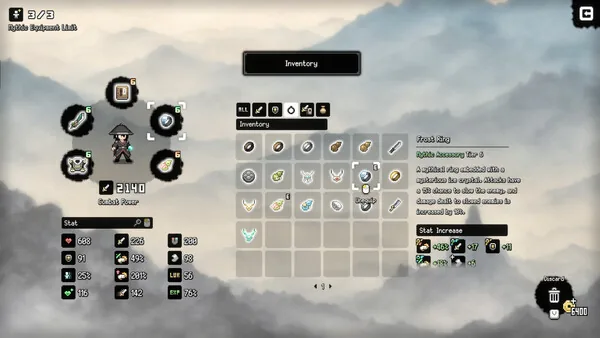
1. Verify your primary tree has advanced variants unlocked. Before entering Ascension, open your mastery screen and confirm that your chosen archetype's primary tree has reached deep concentration. Advanced variants (the ones that change what the archetype can do, not just its damage numbers) should be visible and selected. If they're not available yet, run another campaign expedition focused on that tree before transitioning to the Murim Survival endgame.
2. Pick one secondary technique, not a secondary tree. Choose one technique from a secondary tree that covers a specific gap in your primary archetype. For shortsword chain: a stagger move or interrupt that creates additional chain openings. For ranged kite: a positioning aid that extends repositioning options. For heavy momentum: a distraction or redirect technique that buys recovery windows. One technique from a secondary tree: not medium investment across a second full tree.
3. Adjust companion selection criteria before the recruitment event. Know your archetype before the companion recruitment event triggers, because the decision is permanent. For ranged kite in the Murim Survival endgame, rule out melee-aggressive companions before the event rather than deciding under pressure. For heavy momentum, actively look for interrupt companions in the available pool. Read the full companion description before accepting.
4. Track archetype-specific equipment drops. Each archetype has a specific item that determines its Ascension performance. Heavy momentum needs recovery time reduction. Ranged kite benefits from movement enhancement items. Shortsword chain gains from stagger extension items. If those drops haven't appeared by the midpoint spike, adjust the run strategy rather than assuming they'll arrive in the back half.
5. Reassess at the midpoint difficulty spike. The midpoint spike in Ascension is the moment where preparation shows. After clearing it, check: did your chain windows survive the faster stagger recovery? Is your kite positioning still intact with your companion's movement pattern? Did heavy momentum's attack radius cover the denser groups? The spike is the diagnostic: if the build held, continue. If something broke, the Murim Survival endgame's back half is harder to recover from than stopping here to reassess.
 The tier 5-6 equipment gap is where most players stall: the mastery unlock is the gate.
Murim Survival endgame mastery priorities
The mastery structure that works in the Murim Survival endgame is easy to describe and hard to actually commit to.
One primary tree at deep concentration. Not medium, not "spread across both." Deep. This is what gives you the advanced variants that make the archetype viable in Ascension. Spreading investment evenly across multiple trees is the most common reason players fail the Murim Survival endgame after ten or fifteen attempts: it looks like flexibility, but it produces none of the archetypes at their actual capability.
One secondary technique for a specific gap. Not a secondary tree at medium depth. One chosen technique that addresses one weakness in your primary archetype. Heavy momentum uses this slot for a stagger radius expansion or a distraction move. Shortsword chain might use it for an interrupt technique. Ranged kite for a secondary positioning option.
Nothing else. Players who arrive at the Murim Survival endgame with four trees at medium depth have zero advanced variants available in any of them. They're running the archetypes at a fraction of their designed output, which is why Ascension punishes them consistently while players with focused mastery progress through it.
Companion selection in the Murim Survival endgame
GODEEPER: Companion behavior types, recruitment timing, and when to recruit despite a mismatch. Murim Survival Companion Guide →
In normal difficulty, any companion is worth taking before the midpoint spike: presence alone reduces incoming pressure. That logic holds in the Murim Survival endgame for the pre-spike portion. What changes post-spike:
For ranged kite, a melee-aggressive companion creates a consistent positioning problem in Ascension's denser enemy groups. Enemies cluster around the companion in the center, disrupting the open field that kite builds depend on. The problem is manageable in normal difficulty. In the Murim Survival endgame post-spike, it's a run-long liability.
For heavy momentum in Ascension, interrupt companions are worth prioritizing. The recovery exposure is the archetype's main vulnerability: that window after a missed or landed swing where you're committed to animation. A companion that redirects one enemy's attention during that window is the most direct fix available in the Murim Survival endgame.
Murim Survival endgame tips: what goes wrong
The most common Murim Survival endgame failure is entering Ascension with scattered mastery. Fifteen runs with investment spread across three or four trees means zero advanced variants available in any of them. It feels like flexibility. In Ascension, it plays like none of the archetypes.
Applying pre-spike companion logic to the entire Ascension run is the second one. The "any companion helps" instinct is correct before the midpoint spike: even in Ascension. But post-spike, a melee-aggressive companion in a ranged kite build is a consistent positioning problem, not a minor inconvenience. The higher density amplifies the mismatch.
Heavy momentum without recovery time reduction items is a specific trap. The archetype's recovery exposure is longer than Ascension's enemy density tolerates without that item. If recovery time reduction hasn't appeared by the midpoint spike, the back half of the Murim Survival endgame run goes sideways. Adjust the strategy rather than hoping it drops late.
Entering Ascension before run 15 is the last common one: not a hard rule, but runs 1-14 typically don't produce enough mastery concentration in one tree. Check your primary tree's depth before committing. Another campaign run beats an Ascension attempt that stalls at the difficulty spike.
Frequently asked questions
How do you unlock Ascension mode in Murim Survival? Ascension unlocks after completing the main campaign objectives. It appears in expedition selection without announcement: you finish the final campaign contract and the Ascension difficulty toggle is available in the same menu. Most players hit this around run 8-12.
What's the best build for the Murim Survival endgame? Ranged kite has the highest ceiling in Ascension once the movement variant unlocks. Shortsword chain works with chain window extension variants. Heavy momentum is powerful but depends on specific equipment drops, making it less consistent. All three are viable with correct preparation; generalist builds are not.
How many runs before the Murim Survival endgame? Run 15+ is the practical target. Mastery concentration is the real entry requirement: deep concentration in one primary tree unlocks the advanced variants Ascension demands. Run count alone doesn't guarantee readiness.
Does companion selection matter more in Murim Survival Ascension? Yes, post-spike. Pre-spike, any companion still reduces incoming pressure enough to be worth taking. Post-spike in the Murim Survival endgame, a mismatched companion (particularly a melee-aggressive companion in a ranged kite build) creates problems that normal difficulty tolerates and Ascension doesn't.
What mastery strategy works for the Murim Survival endgame? One tree at deep concentration, one secondary technique for a specific gap. Distributed mastery consistently fails Ascension because it prevents advanced variant access in the primary tree.
How does Ascension differ from normal difficulty? Enemy density increases, damage goes up, and stagger recovery speeds up. The stagger change most directly affects shortsword chain. All three viable builds can handle the Murim Survival endgame with correct preparation; generalist builds scattered across multiple trees typically cannot.
References
- Murim Survival on Steam: official store page, 78% positive reviews from 218+ players, system requirements, and 1.0 launch information from Sunwood Games
- Sunwood Games developer page: developer profile and related titles from the studio
Related reading
The Murim Survival builds guide covers the three core archetypes (shortsword chain, ranged kite, and heavy weapon momentum) and how mastery develops them across multiple runs. The Ascension-specific adjustments in this guide build on that foundation.
The Murim Survival companion guide covers the companion system in full: behavior types, recruitment timing, and how to match companions to your archetype. The endgame companion notes above summarize the key Ascension differences; that guide has the full decision framework.
For players still learning the game's structure before the Murim Survival endgame, the Murim Survival tips guide covers the mastery system, mid-run decisions, and equipment selection from a beginner perspective.
The Murim Survival review covers the full game: 1.0 launch state, the roguelite loop, and whether the mastery system earns long-term investment past the Murim Survival endgame tier.
Was this guide helpful?
About the author

Senior Critic & Analyst
Former game data analyst turned critic with 11 years covering indie and mid-tier games. Based in Austin. Runs spreadsheets on games most people just play.
- 11 years games criticism
- Former game economy analyst
- Roguelike and strategy specialist


Disclaimer
This article is published for informational and entertainment purposes. It does not constitute professional financial, legal, or technical advice. Game performance, online services, patch schedules, and store listings change. Verify critical details (pricing, system requirements, regional availability) with publishers and storefronts before you buy. Affiliate links, where present, help support our editorial work and are labelled in our affiliate disclosure.