GameBrief · General
Murim Survival Companion Guide: Recruitment and Synergies

Reviewing
Murim Survival
Murim Survival companion recruitment happens once per run, mid-expedition, with a fixed NPC pool and no second chances. The companion you take shapes the rest of the run. The one you skip because it looked wrong might have been exactly what your current build needed.
The companion system doesn't explain itself clearly. This guide covers how companion behavior types map to the three build archetypes, when to recruit despite a mismatch, and what the companion description text is actually telling you.
TL;DR: Murim Survival companion recruitment is a one-time, mid-run choice from a fixed NPC pool with no take-backs, so pick for the build you're actually running rather than the flashiest kit. Match the companion's behavior type to your technique archetype; a mismatched companion dilutes your run more than no companion would. When in doubt, read the description text for the behavior cue rather than the stat line.
Murim Survival companion guide: key takeaways
- Companions have fixed movesets: they won't adapt to your techniques or mastery investment
- Read the full description before recruiting. Ten seconds of reading avoids a run-long mismatch
- Three rough behavior types: melee aggressive, melee support/interrupt, and ranged/evasive
- Before the midpoint difficulty spike, take any companion over none
- After the spike, a badly mismatched companion creates coverage gaps but isn't a run-ender
- Can't replace a companion once recruited: the decision is permanent for the run
Overview: how companions work in Murim Survival
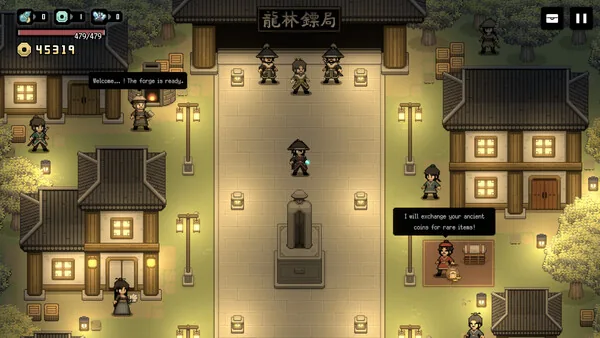
Companions appear as a recruitment event during the expedition. The trigger is tied to expedition progress rather than a fixed zone: you'll encounter it roughly at the run's midpoint or slightly before. The game shows you the companion's portrait, a brief description of their combat pattern, and sometimes specific skill names before you decide.
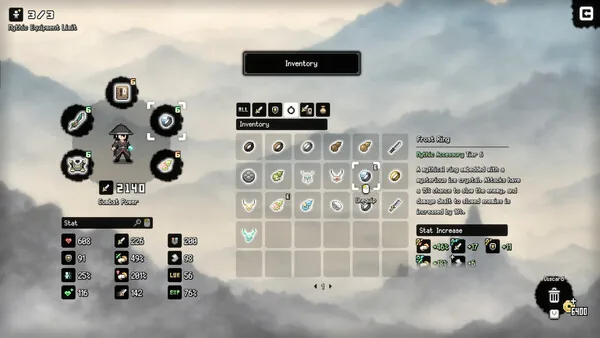
Once recruited, the companion is there for the rest of the run. There's no dismissal mechanic, no swap, and no companion upgrade system. What you see in the description is what you get. Their moveset doesn't scale with your mastery level, doesn't respond to your technique tree, and doesn't adjust to the enemies you're fighting.
Mastery in Murim Survival is entirely personal: it tracks the techniques you use, not your companion's attacks. A companion with a stagger move that you recruited in run 3 will still have that same stagger move in run 30. The companion's value is entirely about whether their fixed pattern complements what you're doing.
 Companion choice affects your passive kit: pick based on your current mastery tree, not just stats.
The three companion behavior types
Not every companion fits a clean category, but most fall into one of three patterns:
Melee aggressive
These companions close distance, engage the nearest enemy, and stay in contact. They generate threat and draw hits, which is useful in some situations and actively harmful in others: particularly ranged kite builds, where pulling enemies to the center breaks positioning.
Melee support and interrupt
These have specific moves designed to create openings: stagger attacks, intercept moves, or disruption skills that temporarily stop an enemy's action. They don't do the highest damage but create windows your own attacks can use. For shortsword chain builds, this is the strongest companion type.
Ranged or evasive
These companions attack from distance or retreat between attacks. They maintain space, don't redirect enemy attention to the center, and fight in patterns that don't require closing range. The best fit for ranged kite builds.
Matching companions to build archetypes
Shortsword chain
The chain attack window closes when an enemy interrupts it. A companion that staggers or distracts a secondary target while you run the chain on the primary target extends the effective range of the build. What you're looking for: interrupt moves, stagger attacks, or anything described as "disruption" or "control."
A melee aggressive companion can work if it generates enough threat to keep secondary enemies occupied. An evasive ranged companion does almost nothing for this build: the chain sequence requires close range, and a companion staying at distance doesn't reduce the interruption risk.
GODEEPER: The chain attack sequence and which armor synergy unlocks the parry window are covered in full in the builds guide. Murim Survival Builds Guide →
Ranged kite
The enemy positioning requirement for ranged kite is the most strict of the three archetypes. You're maintaining distance. A companion that runs into the enemy cluster and redirects attention toward the center breaks the open field you need.
The right Murim Survival companion for ranged kite has ranged attacks or moves with retreating patterns: something that fights without closing range to the enemy cluster. Failing that, an evasive companion that fights defensively and doesn't consistently redirect enemy aggression is second best. A melee aggressive companion is the worst case: enemies end up clustered around the companion in the center, not spread at your preferred range.
Heavy weapon momentum
Heavy weapon runs need spacing during attack recovery. A companion with interrupt or distraction moves that peel one enemy off you while you recover from a missed swing covers the build's weakness. The timing is specific: the window during animation recovery is when you're most exposed, and a companion that redirects one enemy's attention in that moment changes the run.
Any companion that generates threat works better for heavy weapon than no companion. The build's recovery exposure means even a suboptimal companion that draws one hit is worth the slot.
GODEEPER: The full review covers the mastery system, 1.0 launch state, and whether the roguelite loop earns long-term investment. Murim Survival Review →
 The companion's fixed moveset in action mid-wave: what you see in the description is exactly what you get.
Step-by-step: recruiting the right companion
Step 1: Know your build archetype before the event triggers
By the time the companion recruitment event appears, you should know which archetype you're running. If your technique tree and equipment both point toward shortsword chain, you know you want interrupt or stagger companion moves. Knowing your archetype lets you read the companion description with a specific filter rather than deciding in a vacuum.
Step 2: Read the full description
Don't click through on the portrait. The companion description contains behavioral language that tells you what pattern they'll fight in. Read for:
- Range preference (close, mid, ranged)
- Attacking behavior (aggressive, controlled, evasive)
- Specific move types (stagger, intercept, support, pressure)
Step 3: Apply the pre-spike threshold
Is this recruitment event happening before the midpoint difficulty spike? If yes: recruit unless the companion is a clear disaster for your build and the mismatch is severe. Any companion reduces incoming pressure. Before the spike, the raw presence matters more than perfect fit.
Step 4: Make the call
If the companion matches your archetype, recruit without hesitation. If it's a mismatch, assess severity: a melee aggressive companion in a ranged kite build is a real problem. A melee aggressive companion in a heavy weapon build is suboptimal but workable. A good match in any archetype is worth taking immediately.
Murim Survival companion tips for the difficulty spike
The midpoint difficulty spike (a consistent wall in every expedition) is the clearest argument for recruiting any companion over none. The spike introduces denser enemy patterns and faster aggression. Without a companion, you're managing all threat yourself during the same phase that tests how much mastery investment you've made.
A companion going into the spike, even a mismatched one, splits enemy aggression. Enemies target the companion, which creates moments where you're not the primary target. In heavy weapon builds especially, those moments matter: recovery windows are shorter when you're not being hit.
After the spike, the run typically opens up. You have more technique variants active, equipment buffs are compounding, and the companion's baseline value shifts from "anyone helps" to "is this companion actively working against my positioning?" Post-spike, a bad match is more costly to assess critically.
The Murim Survival companion recruitment tip most players learn late: the spike changes what a companion is worth. Pre-spike, value = presence. Post-spike, value = synergy.
Reading companion descriptions
The description text uses consistent language across the companion pool. "Closes distance quickly" or "frontal pressure" means melee aggressive: expects to be in range constantly. "Intercepts attacks" or "disrupts combos" means interrupt or stagger behavior, creating openings rather than raw damage. "Retreats after striking" or "mobile pattern" means evasive, repositioning between attacks. "Ranged skill" or "distance preferred" means they fight from further back with minimal enemy redirection. "Draws attention" or "threat generation" means the companion is designed to pull aggression regardless of damage output.
None of these are inherently good or bad. They're only good or bad relative to what your current archetype needs.
Common Mistakes
Skipping the description
The most common Murim Survival companion error is recruiting on portrait alone without reading the description. A companion who looks like a melee brawler might have an evasive pattern. Reading takes ten seconds. Running a mismatched companion for fifteen minutes costs more than that.
Recruiting post-spike by default
The "always recruit" instinct that serves you well pre-spike becomes less accurate after the midpoint. A melee companion in a ranged kite build post-spike creates consistent positioning problems. Post-spike, apply more scrutiny to severe mismatches.
Expecting mastery to compensate
Mastery improves your techniques, not the companion's. If a companion's moveset doesn't fit your build, accumulating more mastery in your preferred technique tree won't change the companion's behavior. Mastery and companion selection are parallel systems, not connected ones.
Frequently asked questions
How do companions work in Murim Survival? Companions are NPCs that join your expedition after a recruitment trigger mid-run. Each has a fixed moveset that doesn't change regardless of your technique investment. You see the companion's description and combat pattern before deciding to recruit. Once recruited, they stay for the rest of the run and can't be dismissed or replaced.
Which companion is best for the shortsword chain build? Companions with interrupt or stagger moves work best for shortsword chain. The chain attack window closes if an enemy interrupts it: a companion that staggers or distracts a second enemy while you complete the chain on the primary target is worth significantly more than general damage output. Look for description language like "disrupt," "intercept," or "control range" in the companion text.
What companion works for ranged kite builds in Murim Survival? Ranged kite needs a companion that doesn't pull enemy attention to the center of the map. A melee-aggressive companion will run into the enemy cluster, which forces enemies away from your preferred kite range. Look for companions described as "evasive," "mobile," or with ranged skills.
Should you always recruit a companion in Murim Survival? Before the midpoint difficulty spike, yes: any companion is better than no companion. The presence alone adds target priority that reduces incoming pressure. After the spike, a clearly mismatched companion creates coverage gaps. Post-spike, if the available companion is badly mismatched, it's a close call rather than an automatic recruit.
Can you replace a companion mid-run in Murim Survival? No. Once recruited, a companion stays for the duration of the run. You can't dismiss them or swap for a different NPC later. This makes the recruit decision permanent, which is why reading the description before committing matters.
Does mastery affect companions in Murim Survival? No. Mastery only applies to the techniques you use directly. Companions have fixed combat patterns that don't respond to your mastery investment. A companion described as a heavy melee attacker will fight that way regardless of your technique tree.
What should I look for in a Murim Survival companion description? Read for combat range and targeting behavior. "Melee aggressive" or "frontal pressure" means the companion will close distance and engage directly. "Evasive" or "mobile" means they'll retreat and reposition. "Interrupt" or "stagger" means they create openings. Match these to your build's needs.
Related Reading
- Murim Survival Endgame Guide: Surviving Ascension Mode: Murim Survival endgame is Ascension mode: enemy density rises, stagger recovery speeds up, and most builds break. Here's....
References
- Murim Survival on Steam: official store page, current review score (77% positive, 260+ reviews), system requirements
- Sunwood Games developer page: developer information and other titles from the studio
Related reading
The Murim Survival builds guide covers the three core archetypes (shortsword chain, ranged kite, and heavy weapon) and how mastery investment develops each over multiple runs. Companion selection is one layer of build construction; that guide covers the full picture.
The Murim Survival tips guide covers the mastery system, mid-run decisions, and equipment selection alongside companion strategy for players still learning the game's structure.
Was this guide helpful?
About the author

Games Critic
Games writer and reluctant optimist who has reviewed over 400 titles across 9 years. Irish, currently in Berlin. Has strong opinions about tutorial design.
- 400+ games reviewed across 9 years
- Platformer and horror specialist
- Narrative design focus


Disclaimer
This article is published for informational and entertainment purposes. It does not constitute professional financial, legal, or technical advice. Game performance, online services, patch schedules, and store listings change. Verify critical details (pricing, system requirements, regional availability) with publishers and storefronts before you buy. Affiliate links, where present, help support our editorial work and are labelled in our affiliate disclosure.