GameBrief · General
Murim Survival Builds Guide: Best Archetypes (2026)

Reviewing
Murim Survival
Murim Survival builds work differently from most roguelites because the mastery mechanic never resets. The techniques you invest in carry into every future run. That changes everything. You're not optimizing one session; you're deciding what kind of fighter you're becoming over 10, 20, 30 runs.
This guide covers the three Murim Survival builds that remain viable into Ascension difficulty, which equipment items define each path, and how to direct mastery investment early so later runs aren't fighting against a scattered technique pool.
TL;DR: Murim Survival builds are permanent: mastery carries across every run, so you're shaping a long-term fighter, not optimizing one session. Commit to one or two technique archetypes early rather than spreading mastery thin, and lean into the path your unlocked techniques and equipment already support. Three archetypes stay viable into Ascension; heavy-weapon momentum has the highest skill floor. There's no respec, so invest deliberately from your first runs.
Murim Survival builds: key takeaways
- Three viable Ascension archetypes: shortsword chain, ranged kite, heavy weapon momentum
- Mastery is permanent: early technique usage choices shape your long-term build ceiling
- 12-15 of 60+ equipment items create distinct patterns; the rest are stat variants
- Companion selection must match your archetype (fixed movesets, no flexibility mid-run)
- Do not spread mastery across multiple technique trees before committing to one path
Overview: how mastery shapes builds
The standard roguelite problem is that every run feels isolated: you build a powerful character, the run ends, and you start fresh. Murim Survival sidesteps this with the mastery system. Use a technique in combat and it gains experience. Level it up enough and move variants unlock. None of this resets between runs.
The practical consequence: Murim Survival builds develop over many sessions rather than within a single run. A run where you use chain attacks 40 times advances the chain technique tree by a meaningful amount. Twenty such runs, and the chain-attack variant that opens up is substantially stronger than what a new player can access.
This makes Murim Survival builds less about finding the right item combination in one run and more about deciding which technique tree you're investing your total play time into. The three archetypes below are the paths worth committing to.
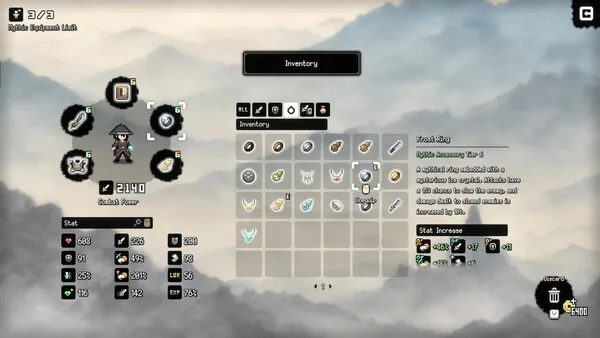
 The strongest builds combine mastery tier 3+ with equipment combos that aren't obvious from tooltips.
The three core archetypes
Shortsword chain
The most documented and most approachable of the three. The foundation is a specific synergy: shortsword equipped alongside the armor set that triggers a parry window on the third hit of a combo. That parry window leads directly into a chain attack sequence that deals concentrated damage before enemies can reposition.
The mastery investment goes into chain-attack techniques and the parry timing variants that open up as those level up. Early runs feel slower while the mastery accumulates: you're deliberately using chain sequences even in low-threat rooms to bank levels. By the time you're pushing Ascension, the chain windows are tight and the damage output per sequence is high enough to handle the increased enemy density.
Equipment to prioritize: the shortsword (obviously), plus whichever armor set in the current item pool provides the third-hit parry. The specific armor varies by available items per run, so the target isn't a single item name but the effect: check tooltips for parry or third-hit modifiers.
Companion selection: melee support companions with interrupt or stagger moves amplify this build. A companion who distracts a second target while you complete your chain on the primary is worth significantly more than a ranged support companion standing at distance.
Ranged kite
The ranged kite build rewards patience. You're not building toward high-burst windows: you're building sustained damage output from a distance while movement mastery keeps you out of retaliation range. The technique investment goes into distance weapon skills and the footwork variants that let you maintain range while the field fills.
The equipment priority is a distance weapon that has inherent movement mechanics: weapons that let you continue moving mid-attack or that don't interrupt a dodge animation. These specific items appear in the pool but are less common than generic melee drops. Passing on a good generic item for the right ranged item is correct early; don't fill the weapon slot with a shortsword just because it dropped first.
This archetype is slower to come online than shortsword chain but scales better against high-density rooms in late Ascension where melee exposes you to multiple simultaneous attackers.
Companion selection: the wrong companion tanks this build. A melee-forward companion that runs into the enemy cluster pulls enemies away from your preferred kite distance and forces suboptimal repositioning. Look for companions with ranged skills or high-evasion patterns that don't redirect enemy attention toward the center of the map.
GODEEPER: Murim Survival's mastery system and its 1.0 release after Early Access are covered in the full review. Murim Survival Review →
Heavy weapon momentum
The hardest archetype to execute and the most punishing when it fails. Heavy weapons hit slowly and with high stagger value: one clean swing on a grouped enemy cluster staggers multiple targets simultaneously. The problem is the animation recovery time. A missed heavy swing leaves you exposed for longer than a missed shortsword combo, and Ascension enemies hit hard enough to make that difference matter.
The mastery investment is the most concentrated of the three archetypes: technique diversity here hurts you. You need the heavy weapon technique tree leveled deeply enough that recovery times are reduced and the stagger radius expands. Spreading mastery into other trees while building heavy weapon is a trap: you end up with a slower-than-average melee attack pattern that doesn't compensate with the high stagger value that makes the archetype work.
When it's working, it's the strongest single-target clearer of the three archetypes in Ascension. When it's not working, you're a slow melee fighter in a game designed to punish slow melee fighters.
Companion selection: any companion with interrupt or distraction moves. Heavy weapon builds need spacing: a companion that peels one enemy off you while you recover from a swing is the difference between a failed run and a cleared encounter.
Equipment priorities by archetype
Rather than listing specific item names (which change based on run RNG), here's the equipment logic by archetype:
Shortsword chain: weapon tier and the parry-trigger armor matter more than anything else. If the armor effect isn't present, the chain window that defines the archetype doesn't open. Running a generic armor to pick up earlier is correct only if you plan to swap at the first opportunity.
Ranged kite: movement-compatible ranged weapon first, everything else second. The difference between a ranged weapon that lets you move during the attack animation and one that roots you is the entire build. Don't settle.
Heavy weapon momentum: look for armor that reduces recovery time on heavy attacks: the tooltip language varies but the effect is consistent. Second priority is anything that extends stagger radius. Third is raw damage.
General rule: the 12-15 equipment items that create distinct patterns are recognizable because their tooltips describe behavior changes, not just stat increases. "Increases chain window by 0.3s" matters. "+5% attack" usually doesn't.
 Area-damage builds outperform single-target in later waves once enemy density spikes.
Mastery investment roadmap
Run 1-5: use techniques from your intended archetype deliberately, even inefficiently. You're banking levels.
Run 6-15: the mastery investment starts paying off: technique variants begin opening. Stay committed to one tree. Dabbling in a second tree dilutes the return.
Run 15+: by now you should have your primary technique tree far enough leveled that Ascension mode is viable. Murim Survival builds at this stage are defined by mastery more than by item RNG on any given run.
The trap: players who explore multiple technique trees in the early runs end up with a scattered mastery pool that doesn't unlock the deep variants in any tree. The early curiosity feels good but the builds don't converge into anything cohesive.
GODEEPER: Before diving into builds, the tips guide covers the mastery mechanic and companion selection rules in more detail. Murim Survival Tips Guide →
Tips for each archetype in Ascension
Shortsword chain in Ascension
Ascension increases enemy density and damage. The chain window build handles density well when the parry setup is clean: the sequence still fires on grouped enemies. Where it struggles: enemies in Ascension sometimes have faster recovery from stagger, which can break the chain window prematurely. The adaptation is to look for mastery-unlocked variants that extend the chain window duration rather than chain damage.
Ranged kite in Ascension
Ascension rewards ranged kite more than any other difficulty tier because of the damage spike from enemies. Staying out of melee range is the right call at any difficulty; in Ascension it's survival-critical. The technique investment in movement variants pays off here: footwork unlocks that let you reposition without stopping attack output are worth their mastery investment at this stage.
Heavy momentum in Ascension
The gap between a working heavy weapon build and a failing one widens in Ascension. If the recovery time reduction items are present and the stagger radius techniques are leveled, it's strong. If you're running a half-built version, Ascension's faster enemies punish the recovery windows relentlessly. Don't bring heavy momentum into Ascension unless the technique tree is specifically developed for it.
Common mistakes
Spreading mastery early
The single most common build problem. Using five different technique trees in the first 10 runs feels exploratory, but it leaves you with no technique line leveled high enough to access the variants that make builds work. Commit to one archetype's techniques from the start.
Equipping the first weapon that drops
All three archetypes depend on specific weapon behaviors, not just weapon tier. A high-tier shortsword is worse for ranged kite than a mid-tier ranged weapon with the right movement modifier. Check behavior tooltips, not just stat values.
Recruiting companions without checking movesets
Companions have fixed combat patterns. A companion that charges into melee will do this regardless of your build. Read the companion description before recruiting. The 10 seconds this takes is worth more than any marginal resource reward from skipping the check.
Entering Ascension before a technique tree is leveled
Ascension is a difficulty spike that rewards committed builds. A scattered mastery pool that hasn't unlocked deep technique variants won't survive it. If you're dying early in Ascension, the problem is almost always mastery spread rather than skill execution.
Frequently asked questions
Can you change builds mid-run in Murim Survival? Equipment swaps mid-run are possible. Mastery investment is permanent. You can pick up a different weapon type during a run, but you won't have the mastery levels to support it: the technique variants that make each archetype function are locked behind mastery depth.
Which archetype is best for new players? Shortsword chain. The synergy is the most clearly documented in community guides, the parry window gives a defined skill expression point rather than requiring continuous positioning, and the mastery investment compounds quickly because chain sequences are used frequently in normal play.
How many runs does it take to reach Ascension viability? No fixed number. The critical factor is mastery concentration. A player who uses chain techniques deliberately across 15 focused runs will reach Ascension viability faster than a player who does 30 runs with scattered technique usage. Intentional mastery investment is more important than run count.
Does game difficulty (below Ascension) affect mastery gain? No. Mastery advances from technique use regardless of difficulty setting. Earlier difficulty tiers are valid training grounds for banking mastery levels before Ascension.
Related Reading
- Murim Survival Endgame Guide: Surviving Ascension Mode: Murim Survival endgame is Ascension mode: enemy density rises, stagger recovery speeds up, and most builds break. Here's....
- Murim Survival Companion Guide: Recruitment and Synergies: Murim Survival companion guide: match movesets to your build archetype, know when to recruit anyway, and read descriptions....
References
- Murim Survival on Steam: official store page, system requirements, current review score
- Sunwood Games developer page: developer information and additional titles
Related reading
The Murim Survival tips guide covers the mastery system mechanics in detail before the build-specific application in this guide: a useful starting point if the carry-between-runs behavior isn't clear yet.
The Murim Survival review covers whether the 1.0 release delivers on what the Early Access period promised: relevant if you're deciding whether to invest time in the mastery system at all.
Was this guide helpful?
About the author

Senior Critic & Analyst
Former game data analyst turned critic with 11 years covering indie and mid-tier games. Based in Austin. Runs spreadsheets on games most people just play.
- 11 years games criticism
- Former game economy analyst
- Roguelike and strategy specialist


Disclaimer
This article is published for informational and entertainment purposes. It does not constitute professional financial, legal, or technical advice. Game performance, online services, patch schedules, and store listings change. Verify critical details (pricing, system requirements, regional availability) with publishers and storefronts before you buy. Affiliate links, where present, help support our editorial work and are labelled in our affiliate disclosure.