GameBrief · Guides
Die in the Dungeon Dice Tier List: Best Dice Ranked

Reviewing
Die in the Dungeon
ATICO · HypeTrain Digital, Sidekick Publishing
This die in the dungeon dice tier list covers every die type available in the game, ranked from the two S-tier dice that carry most successful runs to the C-tier options that will leave you struggling on floor 30 and beyond.
Die in the Dungeon hands you a pool of six-sided dice and asks you to think about adjacency, chaining, and scaling. Not all dice are equal. Some get steadily stronger the longer a fight goes. Others hit a wall at mid-game and start costing you fights they should win. This die in the dungeon dice tier list is the reference you need before you lock in your build. Knowing which dice scale and which plateau saves a lot of dead frogs.
TL;DR: Grow and Mirror are the two S-tier dice. Grow gains +1 to its value every time it is played (resetting at the start of each fight), so it snowballs across a long fight. Mirror copies the value of a die at range, effectively doubling your highest output. Both are near-mandatory for Endless mode floor 41+. A-tier: Terrain, Area, and Boost. B-tier: Bomb, Shield, Drain. C-tier: Pierce and Eternal. Replace Basic-tier dice (face values 1-2) as fast as possible.
Die in the Dungeon dice tier list: Key takeaways
- S-tier: Grow and Mirror are the two dice that define the ceiling of this die in the dungeon dice tier list
- A-tier: Terrain, Area, and Boost are strong situational picks with clear strengths
- B-tier: Bomb, Shield, and Drain have useful moments but plateau earlier
- C-tier: Pierce and Eternal underperform relative to alternatives at their tier
- Basic-tier dice (values 1-2) should be replaced as fast as possible without exception
- Scaling dice (Grow, Mirror) beat flat-value dice at every floor past 20
How the Die in the Dungeon dice tier list works
Every die in the game is a D6. Three quality tiers exist: Basic (face values 1-2), Silver (values 2-4), and Gold (values 4-6). The quality tier sets the raw numbers. The die type label, Grow, Mirror, Area, and so on, determines what the die actually does when rolled.
The die in the dungeon dice tier list is not a raw damage ranking. A Gold-tier Pierce die will always show higher face values than a Silver-tier Pierce die. But a Silver Grow die will outperform a Gold Pierce die by floor 25 because Grow scales. The tier list ranks die types by their behavior and scaling potential, not by their current face values.
All tier list positions assume mid-to-late game viability. A die that dominates floors 1-10 but falls off by floor 30 is a B or C in the die in the dungeon dice tier list. A die that is mediocre early but mandatory for Endless mode floor 41+ gets scored on what it enables, not what it shows on floor 5.
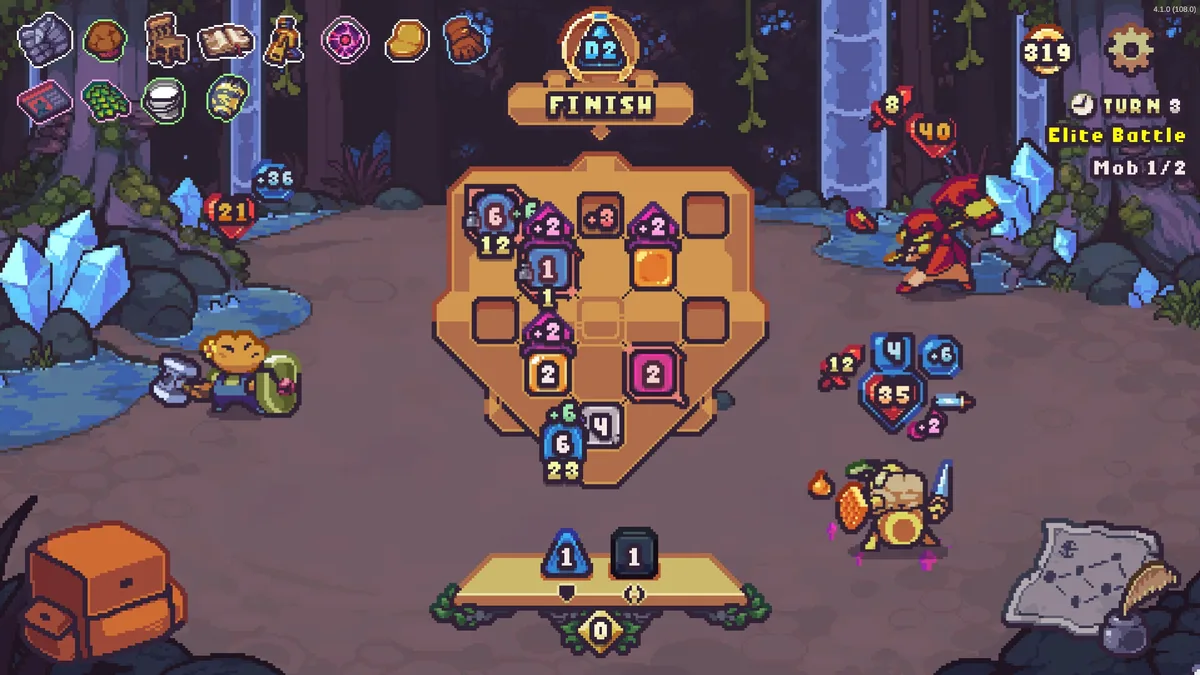
 Caption: Grow and Mirror positioned adjacent to each other on the combat grid. This is the core two-die synergy that most S-tier runs are built around.
S-tier dice: Grow and Mirror
Grow, S-tier
Grow tops the die in the dungeon dice tier list for a reason. A Grow die's final value increases by +1 every time it is played, and that growth carries through the rest of the fight before resetting to its base at the start of the next one. Play it early and often in a fight and the numbers climb fast. By the back half of a long encounter it is outputting values that Basic or flat Silver dice cannot approach.
The key thing to understand is that Grow rewards a long fight, not a short one. The bonus is additive (+1 per play), not a flat one-time boost, so the dice you replay the most are the ones that snowball. Against a boss with a large health pool, a Grow die you have been feeding all fight is doing more work than two Silver Bomb dice combined.
Build philosophy around Grow: prioritize playing it every turn so the stack keeps climbing, and protect the slot it sits in. A Grow die you only get to play once or twice in a fight is still functional, but it is wasting most of its kit. The reset between fights means it never carries growth over, so value it for boss and elite floors over short clears.
Mirror, S-tier
Mirror shares the top spot in the die in the dungeon dice tier list for a different reason than Grow. Mirror copies the result of an adjacent die. Simple rule, enormous implications. Place Mirror next to Grow after Grow has stacked twice and you effectively double your highest output. Place it next to any die that exceeds its baseline value and you get that value twice.
Mirror is the die that makes Floor 41+ in Endless mode survivable. Enemy health scaling past floor 40 is steep. Running without Mirror means your output is capped at whatever your highest single die can produce. Mirror removes that ceiling.
S-tier dice: take any Gold version you see. Take a Silver version if you have no better option in the current offer. Do not pass on Grow or Mirror expecting a better offer.
GODEEPER: For full build theory around Grow and Mirror combinations, see the Die in the Dungeon Best Build Guide, which maps which characters synergize best with each scaling die type.
A-tier dice: Terrain, Area, and Boost
Terrain, A-tier
Terrain earns its A-tier place in the die in the dungeon dice tier list not through its own damage but through board amplification. After a Terrain die is played, the area it landed in gains a buff equal to the die's rolled value (+X), and that buff decays by 1 each turn. Any die you then play into that buffed area gets the bonus on top of its own value. The payoff is not the Terrain die's face number; it is the multiplied output of everything you stack into the zone afterward.
Terrain rewards setup. Drop a high Terrain roll, then funnel your scaling dice (Grow, Mirror) into the buffed area before the buff decays. Done right, it is one of the strongest value multipliers in the game and pairs naturally with Boost. Done carelessly, the buff ticks away before you use it.
One important caveat: Terrain is also affected by Boost, so a Boost die near a Terrain roll can push the area buff higher still. Players who plan two or three turns ahead get the most out of it; players who play reactively will watch the buff expire unused.
Area, A-tier
Area dice deal damage to all visible enemies in the same attack. Against single enemies, Area performs like a normal damage die. Against multiple enemies packed together, it multiplies its value across every target simultaneously.
Area is the die in the dungeon dice tier list's most situational A-tier pick. It falls to mid-B against single-target boss floors. It climbs to near-S in narrow corridor layouts where three or four enemies share an attack lane. Score it based on how many multi-enemy encounters your current run has.
Area and Bomb dice do not synergize despite both dealing damage to groups. Bomb has a burst pattern, Area has a sustained multi-target pattern. Running both dilutes your deck without creating a compounding effect.
Boost, A-tier
Boost is the enabler that makes the scaling dice sing. A Boost die adds its rolled value to other dice within a range equal to that value, so a high Boost roll can lift several neighboring dice at once. It deals no damage itself, which is the only reason it is not S-tier: a Boost die occupying a slot is only as good as what sits next to it.
Place Boost next to Grow or Mirror and you compound an already-scaling output. Boost also stacks with Terrain, pushing an area buff higher than either could manage alone. The skill expression is adjacency: an isolated Boost roll is a wasted turn, while a well-positioned one is the difference between clearing a floor and stalling on it. Prioritize a Gold Boost in any build leaning on Grow or Terrain.
B-tier and C-tier dice explained
Bomb, B-tier
Bomb sits squarely in the middle of the die in the dungeon dice tier list. Bomb creates an explosion when rolled. The burst is meaningful but single-use in effect: it hits once, hard, and the next Bomb roll resets. There is no stacking. There is no multiplication. Bomb is consistent mid-game damage that never gets dramatically better.
Run Bomb in builds that need to clear enemy clusters fast in the early floors. Replace it with Terrain or a second Mirror when those become available.
Shield, B-tier
Shield blocks incoming damage equal to its rolled value. Defense has real value in Die in the Dungeon, but the math works against pure Shield builds. In the die in the dungeon dice tier list, Shield is B-tier because it cannot scale the way Grow or Mirror can. You need to block more damage than you deal to win attrition, and the enemy scaling in Endless mode makes that arithmetic unfavorable past floor 25.
Shield is strongest in the first 15 floors, where a Silver Shield gives you margin to experiment with riskier placements. After that, start replacing Shield dice with Grow or Area.
Drain, B-tier
Drain sits at B-tier in the die in the dungeon dice tier list. It heals you for a percentage of the damage dealt on that roll. In sustain builds, particularly early and mid-game, Drain buys you extra floors with low risk. The problem is the same as Shield: it does not scale. Your healing output stays proportional to your damage output, and once you have enough damage to kill quickly, Drain's sustain contribution becomes marginal.
Keep one Drain die if your run has no other healing option. Cut it when you have stable healing from relics or when your damage is high enough that fights end before you take meaningful chip damage.
Pierce, B/C-tier
Pierce ignores armor on the target. Against armored enemies this is useful. Against unarmored enemies Pierce is just a damage die with unremarkable face values. The armor-ignore mechanic is real but narrow: most fights do not require it, and equivalent-tier Grow or Area dice produce more value across a broader range of encounters.
The die in the dungeon dice tier list places Pierce at B/C because it has a genuine niche. If an armored enemy is your current wall, Pierce solves that. It should not be a building block of your main strategy.
Eternal, C-tier
Eternal lands at the bottom of the die in the dungeon dice tier list alongside Pierce. Eternal dice never leave your deck. Permanent deck presence sounds like an advantage until you realize the Eternal die's face values are not high enough to justify the permanent slot it occupies. In late game, every slot in your hand matters. A C-tier Eternal die showing a 2 or 3 on every roll is costing you a slot that could hold a Grow die showing 8 or 12 after stacking.
The appeal is obvious: consistency, predictability, no discard. The reality is that the Eternal die is not strong enough to warrant that floor space past mid-game. Take it early if nothing better is offered. Replace it at the first opportunity.
 Caption: The upgrade screen where Basic dice get swapped for Silver. This is the first transition in the die in the dungeon dice tier list. Never hold Basic dice longer than you have to.
How to build around the best dice
The die in the dungeon dice tier list is most useful as a priority framework, not a shopping list. You cannot build whatever you want; you build with what the game offers you. The tier list tells you which offers to accept immediately and which to pass on waiting for something better.
Rule 1: Always take S-tier when offered. Gold Grow and Gold Mirror are always correct picks. Silver Grow and Silver Mirror are almost always correct. The only exception is a run already holding two copies of the same die type, where a third provides minimal additional value.
Rule 2: Replace Basic dice as fast as possible. Basic dice (values 1-2) drag every floor they are in your hand. There is no argument for holding a Basic die past the first shop opportunity unless the alternative is nothing. Basic Grow is a partial exception: even a Basic Grow will eventually produce higher values than a Silver flat-damage die because of its scaling mechanic.
Rule 3: Grow and Mirror need each other. A single Grow die in a deck of flat-value dice produces good but not spectacular results. Add Mirror adjacent to Grow after it has stacked and your output doubles. This is the core synergy of every high-floor run.
Rule 4: Do not stack non-synergizing dice. The die in the dungeon dice tier list penalizes Area-plus-Bomb specifically because those dice share a slot without building on each other. Two Bomb dice do not feed each other. Two Area dice hit the same enemies twice but provide nothing beyond doubled raw damage. A Grow die you replay all fight, a Mirror copying your biggest roll, or a Boost lifting its neighbors: those build on each other. Spend deck slots on dice that scale or amplify, not flat-value dice.
For the full character-by-character breakdown of which starting dice complement the die in the dungeon dice tier list, see the Die in the Dungeon character guide. For early-floor tips on choosing your first dice replacements, the Die in the Dungeon tips guide covers the first five floors in detail.
GODEEPER: The die in the dungeon dice tier list pairs with character selection. See which characters start with Grow-compatible dice in the Die in the Dungeon Character Guide.
Frequently asked questions
What are the best dice in Die in the Dungeon? Grow and Mirror are the best dice in the die in the dungeon dice tier list. Grow gains +1 to its value every time it is played (resetting each fight), so it snowballs across a long fight, and Mirror copies the value of a die at range. Both are essential for reaching Floor 41 and above in Endless mode.
How does the die in the dungeon dice tier list rank Basic dice? Basic dice (values 1-2) rank at the bottom of the die in the dungeon dice tier list and should be replaced as fast as possible. The one exception is if a Basic die has a unique property worth keeping temporarily.
Are Pierce dice worth using in Die in the Dungeon? Pierce dice sit at B/C-tier in the die in the dungeon dice tier list. They ignore armor but most other dice at equivalent tier produce more consistent output. Take Pierce if nothing better is available.
What tier is the Eternal die in Die in the Dungeon? Eternal die is C-tier in the die in the dungeon dice tier list. It never leaves your deck, which sounds good, but its base values are not large enough to keep up with late-floor damage scaling.
What dice synergize best in Die in the Dungeon? Grow and Mirror are the strongest synergy pair in the die in the dungeon dice tier list. Grow increases values over time, Mirror doubles the highest result. Area and Bomb dice do not meaningfully synergize with each other despite both dealing damage.
How many dice tiers are there in Die in the Dungeon? All dice are six-sided D6s split into three quality tiers: Basic (face values 1-2), Silver (values 2-4), and Gold (values 4-6). The type label determines what a die does, while the tier determines how much damage or effect it produces.
When does Endless mode unlock in Die in the Dungeon? Endless mode unlocks after you finish the campaign. Floor 41 and beyond scale enemy health rapidly. Mirror dice are near-mandatory for surviving the scaling in Endless mode.
Related Reading
- Die in the Dungeon Best Build Guide: How to build attack concentration, poison, and reroll chains using the highest-tier dice for each character.
- Die in the Dungeon Relics Guide: All 142 relics by trigger category and how to evaluate them against your current dice composition.
- Die in the Dungeon Achievement Guide: All achievements with unlock conditions, including special dice locked behind completionist runs.
- Die in the Dungeon Complete Guide: Hub for all Die in the Dungeon guides covering characters, mechanics, and progression.
- Rune Dice Archer Build: The Two-Volley Lateral Throw: Rune Dice Archer build guide: the lateral throw that scales arrow and wind dice, the two-volley relic that....
- Die in the Dungeon Floor Guide: Floors 1 to 6 Breakdown: Die in the dungeon floor guide: what each floor demands, how floor 5 kills most.
- Die in the Dungeon Relic Tier List: Best Picks & Synergies: Die in the Dungeon relic tier list: all 142 relics ranked, the categories to prioritize.
References
Was this guide helpful?
About the author

Senior Critic & Analyst
Former game data analyst turned critic with 11 years covering indie and mid-tier games. Based in Austin. Runs spreadsheets on games most people just play.
- 11 years games criticism
- Former game economy analyst
- Roguelike and strategy specialist


Disclaimer
This article is published for informational and entertainment purposes. It does not constitute professional financial, legal, or technical advice. Game performance, online services, patch schedules, and store listings change. Verify critical details (pricing, system requirements, regional availability) with publishers and storefronts before you buy. Affiliate links, where present, help support our editorial work and are labelled in our affiliate disclosure.