GameBrief · Guides
Subnautica 2 Biomes Guide: All 6 Zones Ranked (2026)

Reviewing
Subnautica 2
Unknown Worlds Entertainment · Unknown Worlds Entertainment
All six Subnautica 2 biomes are confirmed at Early Access launch: and the depth ranges, threat levels, and Leviathan placements across those zones are not well-documented anywhere yet. This guide maps all of them.
TL;DR: Six biomes at EA launch, ranging from 0m (Sparse Plains) to 1,200m (Thermal Spires). The Collector Leviathan is in the starting zone but won't aggro near spawn. The Thermal Spires are the most dangerous biome. Visit the Overgrown Ruins before rushing chapter 1: it has story-relevant scan points most players skip.
Subnautica 2 biomes: key takeaways
- Six biomes confirmed at launch: Sparse Plains, Graveyard, Plateaus, Thermal Spires, Jelly Plateaus, Overgrown Ruins
- Depth range spans 0-1,200m across all EA content
- Three Leviathan classes are present: Collector (Sparse Plains), Void (outer map), Wakemaker (deep biomes)
- All Leviathans are unkillable: designed as environmental hazards, not combat targets
- The Overgrown Ruins is the most story-critical biome that players most commonly skip
- The Thermal Spires at 400-1,200m is the most dangerous biome in EA: avoid until depth-rated equipment is ready
- Scanning creatures in each biome yields codex data, blueprints, and DNA modification unlocks
How Subnautica 2 biomes work
Subnautica 2 structures its biomes primarily around depth rather than horizontal distance. The deeper you go, the more dangerous the environment becomes, the more specialized your equipment needs to be, and the harder it is to scan creatures without losing your life in the process.
The pattern follows the franchise's established logic: start in shallower, more forgiving terrain; gather enough resources and research to survive the pressure differential; descend into progressively hostile territory. What Subnautica 2 adds is a DNA modification system tied directly to creature encounters across biomes. Each biome's fauna offers distinct modification unlocks. Skipping a biome isn't just an exploration gap: it's a build gap.
This matters because the temptation, especially in co-op, is to push the story as fast as possible. The biome structure punishes that approach in chapter 1. Players who sprint through Sparse Plains into the story's next objective will arrive at the Thermal Spires without the hull sections needed to survive 1,200m depth, and without the DNA modifications that simplify the creatures they'll encounter there.
The recommended approach (and the one that matches how Unknown Worlds structured chapter 1's progression) is to treat each biome as a discrete research tier before descending to the next.
 Each biome has a resource density pattern: the kelp forest is the fastest early-game farming zone.
Biome reference table
| Biome | Depth Range | Threat (1-5) | Key Feature |
|---|---|---|---|
| Sparse Plains | 0-500m | 2 | Starting zone; Collector Leviathan territory |
| Graveyard | 0-800m | 2 | Ancient/destroyed structures; atmospheric |
| Plateaus | 100-600m | 2 | Mid-depth terrain; transitional zone |
| Jelly Plateaus | Variable | 3 | Jellyfish fauna; unique ecosystem |
| Overgrown Ruins | Variable | 3 | Story scan points; plant-reclaimed structures |
| Thermal Spires | 400-1,200m | 5 | Hydrothermal vents; most dangerous biome |
Threat ratings are relative to equipment available at the depth range indicated. The Collector Leviathan in Sparse Plains rates a 2 specifically because its territory starts 20,000-25,000 units from spawn: it's avoidable. Approach it without preparation and the rating climbs fast.
Sparse Plains in Subnautica 2: resources, creatures, and base tips
The Sparse Plains runs 0-500m and is your entire early game. Titanium Fragments, Copper Ore, and Quartz are all reachable without specialized hull sections. The Collector Leviathan is present but its territory starts 20,000-25,000 units from spawn, which puts it well outside your first several hours. Build here, scan everything you can, and don't descend before you have 20+ Titanium Fragments and a working Fabrication Module.
The depth ceiling of 500m is accessible without specialized equipment. The relative openness of the terrain makes navigation learnable before the game demands more precise awareness.
Resources in Sparse Plains: Titanium Fragments are the primary structural material and appear on the seafloor in dense patches within 200-300m of spawn. Copper Ore and Quartz both surface in the first 100m before you need deeper gear. Creepvine samples (for Fiber Mesh early in the crafting tree) are plentiful along the biome's edge zones. These three, Titanium/Copper/Quartz, cover your entire first crafting queue. Don't descend before you have 20+ Titanium Fragments, which is roughly 15 minutes of shallow scanning near the starting area.
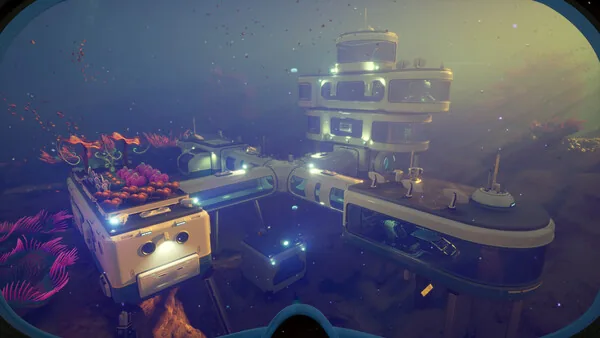
Base placement: Build your first base within 50-200m of spawn, not right at spawn. The Fabrication Module is always first; without it, nothing else in your inventory chain functions. Add storage containers before depth-rated hull sections, because storage saturation is what stops early resource runs, not depth. Two Solar Panels cover a minimal early base. The Sparse Plains has consistent ambient light for solar power across its depth range.
Hammerhead encounters: The Hammerhead, a mid-tier aggressive predator, occupies the Sparse Plains alongside the Collector Leviathan. At threat level 3/5, it's more likely to interrupt your first few hours than the Leviathan, which stays far from spawn. The Hammerhead's pursuit has a distance cap: sprint-swim in a straight line with the Seaglide and it disengages. Don't stop, don't turn, don't try to face it.
Threat level 2 is accurate for the biome as a whole, with one critical caveat: the Collector Leviathan. This 4-tentacled predator is territorial and fully unkillable. Its territory begins roughly 20,000-25,000 units from the spawn point, far enough that players who stay near their initial base location won't encounter it for the first several hours. When they do encounter it, the critical skill is recognizing its audio cue, which signals aggression before an attack. Retreat immediately.
The Collector Leviathan's scanning value is high. Approaching it close enough to scan is a deliberate risk-reward decision and one of the better early-game DNA modification unlocks available. The recommended approach: deploy from a secondary base positioned at the edge of its territory, scan from maximum range, retreat on the audio cue.
Waterslug sightings in Sparse Plains are worth noting. This 1/5 threat passive fauna signals safer zone conditions: where Waterslugs congregate, predators are typically absent. Track them as environmental indicators.
First session checklist for Sparse Plains:
- Collect 20+ Titanium Fragments (seafloor, 0-100m)
- Build Fabrication Module + Storage Containers + 2 Solar Panels
- Craft Seaglide (highest priority mobility tool)
- Scan Waterslug and Hammerhead for DNA unlock data
- Scout Collector Leviathan territory boundary without crossing it
- Build depth-rated hull sections before descending past 500m
GODEEPER: Creature behavior and threat ratings across all biomes are covered in detail, including how to approach Leviathan scans safely. Subnautica 2 Creature Guide →
 The deep zone biomes unlock the game's most efficient resource loops: but require thermal power setup first.
Graveyard (0-800m): ancient structures
The Graveyard reaches deeper than the Sparse Plains (down to 800m) but maintains a similar surface-level threat rating. The distinguishing feature is environmental: ancient and destroyed structures scattered throughout the biome's depth range.
The Graveyard is primarily an atmospheric and lore biome. For players focused on story progression, it delivers environmental context about what happened to the world above the ocean floor. Scan points here tend to yield historical data rather than creature-specific modifications or crafting blueprints.
The 0-800m range means players will encounter parts of the Graveyard early and other sections later, once they've built the depth capability to push past 500m. It's not a single-visit biome: players should expect to return here after upgrading hull sections.
Threat level 2 reflects the absence of major predators in most of the Graveyard's depth range. The destroyed structures create navigation complexity and reduce sightlines, which increases the surprise factor if fauna are present. Move carefully through interior sections.
Plateaus (100-600m): the transitional zone
The Plateaus run from 100-600m and function as a transitional biome between the surface-adjacent Sparse Plains and the more hostile environments below. The terrain (tiered geological formations) provides natural cover and a more vertically complex navigation experience than the open plains above.
This is where players who've exhausted early Sparse Plains resource nodes will typically relocate for the mid-game. The 600m ceiling means depth-rated hull sections aren't yet required for most of the biome's accessible area, though the lower sections start demanding attention to pressure management.
Fauna density increases in the Plateaus relative to Sparse Plains. The Hammerhead (rated 3/5 threat) appears in this depth range. It's a mid-tier predator with enough aggression to threaten an unprepared player but manageable with the evasion mechanics available by the time most players reach 100-600m depth. Scanning it is worth doing early; the codex entry unlocks crafting context that matters at 800m+.
Jelly Plateaus: jellyfish-themed ecosystem
The Jelly Plateaus don't have a fixed depth range confirmed in the same way as the Plateaus. What's confirmed is the distinct jellyfish-themed fauna and formations that define the biome. Bioluminescent jellyfish-like creatures populate both the water column and the geological formations named for them.
Threat level sits at 3/5. The biome's creatures are more exotic than the Graveyard or Sparse Plains (they've evolved in an environment shaped by their bioluminescent biology) and some of them are not passive. The DNA modification options available from Jelly Plateaus creatures tend to be among the more unusual unlocks in chapter 1, rewarding players who spend time there rather than treating it as a transit zone.
Navigation note: the bioluminescent environment means visibility is better here than in some darker biomes, but the same light that improves sightlines makes the player more visible to predators. The Jelly Plateaus reward careful, methodical movement over aggressive exploration.
Overgrown Ruins: story-critical scanning location
The Overgrown Ruins is the biome that players who treat Subnautica 2 as a pure action-exploration game most commonly skip. This is a mistake with consequences for chapter 1's story comprehension.
Ancient structures reclaimed by plant life define the biome visually and thematically. The vegetation that has overtaken the ruins is specific: it's not generic overgrowth but a distinct species that has colonized former structures over what appears to be hundreds of years. The scan points throughout the biome document this history.
For chapter 1, the Overgrown Ruins holds the highest concentration of story-relevant scan data of any biome. Players who skip it and finish chapter 1 will notice gaps in their understanding of what the environmental storytelling has been building toward. Players who spend two hours in the Ruins before finishing chapter 1's main objectives will find those objectives carry much more weight.
Threat level 3/5. The combination of dense plant growth reducing sightlines and confined interior spaces in the ruins themselves creates more predator encounter risk than the open biomes above. Move slowly and scan frequently: both because the scan data is the point of being here, and because the sound design in the Ruins is more reliable at detecting nearby fauna than visual scanning through the vegetation.
GODEEPER: Your base setup determines how deep you can operate and how long you can stay. Get the fabrication module and hull sections right before pushing into the Ruins. Subnautica 2 Base Building Guide →
Thermal Spires (400-1,200m): most dangerous biome
The Thermal Spires are the most dangerous biome in Subnautica 2's Early Access content. That's not ambiguous: it's the design intent. Hydrothermal vents define the environment, running hot enough to damage unshielded hull sections. The depth ceiling of 1,200m requires equipment that most players won't have until mid-to-late chapter 1.
The Wakemaker Leviathan is present in the deeper sections of the Thermal Spires. Like all Leviathans in Subnautica 2, it's unkillable. Unlike the Collector Leviathan in Sparse Plains, the Wakemaker doesn't provide comfortable territorial distance from a starting spawn point. It functions as a depth boundary marker: the game's mechanical signal that the player has pushed into territory where they should be cautious about how much deeper they go.
Threat level 5/5 reflects: vent heat damage to unprepared hull sections, a Leviathan-class creature present and territorial, increased ambient fauna aggression relative to shallower biomes, and the depth pressure differential that requires specialized base construction to operate from rather than day-trip to.
The correct approach to the Thermal Spires is deliberate. Build depth-rated hull sections before committing. Establish a research base at 400-600m depth before pushing to 1,200m. Scan the Wakemaker Leviathan from a staging depth, not from the floor of the Spires. The DNA modifications available from Thermal Spires creatures (particularly the fauna adapted to vent conditions) are among the most powerful in chapter 1, which explains why the biome is gated behind equipment progression.
Recommended exploration order
Based on the depth progression and equipment requirements across all six biomes, this sequence minimizes unnecessary deaths and maximizes research value per hour spent:
-
Sparse Plains (0-300m): first 3-5 hours. Build the fabrication module and storage. Scan Waterslugs and the Hammerhead if it appears in the shallower sections. Begin approaching Collector Leviathan territory from range.
-
Plateaus (100-400m): hours 4-7. Scan the Hammerhead. Gather mid-depth resources. Begin hull section research for 600m+ depth.
-
Graveyard (0-600m): can overlap with Plateaus visits. Primary value is lore and atmospheric scan data. Return at 600m+ depth capability to access lower sections.
-
Jelly Plateaus: hours 6-9. DNA modification priority. Move slowly, scan everything. The bioluminescent fauna here doesn't appear in other biomes.
-
Overgrown Ruins: before finishing chapter 1 story. The story-relevant scan data here isn't optional if you want chapter 1's ending to carry its full weight. Two hours minimum.
-
Thermal Spires (400-800m first, then deeper): after depth-rated hull sections are built. Stage at 400-600m before committing to 1,200m. Scan the Wakemaker from a safe staging depth, not from the vent floor.
Tips
Scan everything you can reach safely. The DNA modification system is tied to creature scanning data, not to story progression. Players who skip scanning in early biomes arrive at later chapters with build options that are thinner than they should be.
Treat the Collector Leviathan's audio cue as a timer, not an alarm. The cue signals incoming aggression: you have seconds, not milliseconds, to change course. Retreating immediately on the cue is almost always the right call.
Stage bases between depth tiers. A small secondary base at 400m depth before pushing to the Thermal Spires cuts down the logistics of operating at 1,200m. Hull sections for a forward base are cheaper than repeatedly traveling from your main base in the Sparse Plains.
In co-op, designate a Ruins specialist. Someone in a 2-4 player group should own the Overgrown Ruins scanning pass. It's a task that benefits from focused attention rather than being squeezed between shared objectives. The player who does the Ruins thoroughly will be the one who explains chapter 1's ending to the rest of the group.
Don't treat the Void as a biome to explore. The Void Leviathan patrols the outer map boundary. Players who head toward the edge looking for undiscovered content will find an unkillable Leviathan and no new biome. Stay inside the confirmed biome boundaries in Early Access.
For timing expectations and how long each biome tier takes to fully explore, the Subnautica 2 how long to beat guide breaks down chapter 1 runtime by playstyle. The early access tips guide covers the equipment and base-build progression that unlocks access to the deeper zones.
Frequently asked questions
How many biomes are in Subnautica 2 Early Access? Six: Sparse Plains, Graveyard, Plateaus, Thermal Spires, Jelly Plateaus, and Overgrown Ruins. The full 10-chapter game will expand this list through 2028-2029.
What biome should I go to first? Sparse Plains: you spawn there. After the starting zone, move to the Plateaus at 100-400m depth before pushing deeper. The Thermal Spires at 400-1,200m should be your last major biome in chapter 1.
Where is the Collector Leviathan? The Collector Leviathan is in the Sparse Plains starting biome. Its territory begins roughly 20,000-25,000 units from the spawn point: you can play for several hours without encountering it if you stay near your initial base.
Can you kill Leviathans in Subnautica 2? No. All three Leviathan classes confirmed in Early Access (Collector, Void, and Wakemaker) are unkillable by design. They function as environmental hazards and territorial barriers, not as boss fights.
What is in the Thermal Spires? Hydrothermal vents, the Wakemaker Leviathan, and the deepest confirmed depth in EA (1,200m). It's the most dangerous biome with the most powerful creature-based DNA modification unlocks.
Is the Overgrown Ruins story-relevant? Yes. It has the highest concentration of story-relevant scan points in Early Access. Players who skip it will miss context that affects how chapter 1's ending lands.
What does scanning creatures do in Subnautica 2? Each creature scan adds to the codex, unlocks crafting blueprints, and provides DNA modification options. Scan data is biome-specific: creatures in the Thermal Spires yield different unlocks than creatures in the Jelly Plateaus.
Related Reading
- Subnautica 2 Creature Guide: full threat ratings and scanning strategy for the fauna in each biome.
- Subnautica 2 Base Building Guide: hull section progression and depth-rated construction for deeper biomes.
- Subnautica 2 Complete Guide Hub: survival, biomes, base building, DNA mods, and all cluster guides.
- Subnautica 2 Leviathan Guide: Avoid, Scan, Survive: Subnautica 2 leviathan encounters: patrol patterns, safe scanning range for both confirmed EA Leviathans, and.
- Subnautica 2 Resources: Biome Farming Guide for Early Access: Subnautica 2 resources: fractional harvests, biome rarity, and the scan-first fabrication pipeline most players get.
- Subnautica 2 Base Building Advanced Guide: Power and Depth: Subnautica 2 base building advanced tactics: power management, hull pressure thresholds, multi-base networks, and deep-sea.
- Subnautica 2 Vehicles: Only the Tadpole in Early Access: Subnautica 2 vehicles: only the Tadpole is in the Early Access build.
References
- Subnautica 2 on Steam: store page with official biome and feature information
- Unknown Worlds Entertainment: developer site with Early Access roadmap updates
Was this guide helpful?
About the author

Senior Critic & Analyst
Former game data analyst turned critic with 11 years covering indie and mid-tier games. Based in Austin. Runs spreadsheets on games most people just play.
- 11 years games criticism
- Former game economy analyst
- Roguelike and strategy specialist


Disclaimer
This article is published for informational and entertainment purposes. It does not constitute professional financial, legal, or technical advice. Game performance, online services, patch schedules, and store listings change. Verify critical details (pricing, system requirements, regional availability) with publishers and storefronts before you buy. Affiliate links, where present, help support our editorial work and are labelled in our affiliate disclosure.