
GameBrief · Guides
Subnautica 2 Base Building Guide: 8 Essential Setup Steps

Reviewing
Subnautica 2
Unknown Worlds Entertainment · Unknown Worlds Entertainment
Subnautica 2 base building is the progression anchor for everything else in the game. Your base is where you respawn, store resources, craft equipment, and coordinate with co-op partners. Build it wrong and you'll be swimming naked in an alien ocean after the third death, half your resources gone.
This guide covers where to place your first base, which modules to prioritize, how hull integrity works and what floods your structure, power source selection by depth, co-op role splits, and when to start building forward bases in deeper biomes.
TL;DR: Build your first base beside the Lifepod or in the nearby current zone before you push past swim range from the starting area. Priority order: room and Habitat Builder access, Fabricator, storage, reinforcement, then power. Hull integrity is cumulative: every added piece changes the global number, so reinforce before it reaches zero. In co-op, assign a dedicated builder and a player to monitor the shared power UI.
Subnautica 2 base building: quick answer
Build beside the Lifepod early, unlock the Room and Habitat Builder, then place Fabrication, storage, power, and reinforcement before expanding. Assign a dedicated builder in co-op and check the live integrity preview before building at depth.
- Build beside the Lifepod first, then consider the current zone for a larger main base
- Start subnautica 2 base building before venturing past comfortable swim range
- Module order: room/Habitat Builder access, Fabricator, storage, reinforcement, power
- Hull integrity is cumulative: one wrong section floods everything
- In co-op, assign a dedicated builder and a power monitor; 30% is a useful warning rule, not a hard game threshold
- Leviathans mark biome boundaries; never build near their patrol routes
- A lifepod-area base plus deeper forward posts is a practical Chapter 1 layout; add them when travel time justifies it
Current status: September 18, 2026
Steam currently lists Subnautica 2 at $29.99 with a Very Positive rating across 127,478 total reviews. The official Early Access Buddy System Hotfix 1 fixed wall-rack refunds, exterior furniture movement for multiplayer clients, leftover base-item save data, and construction ghosts that lingered after a build. The current notes support checking the live build UI for placement and integrity values rather than relying on a static depth table.
When to build your first Subnautica 2 base
Earlier than you think.
Most players explore first, stack materials, then build later. That leaves you without a respawn point during the most dangerous early period. Subnautica 2's respawn message reads "Reprint complete. You have experienced conditions incompatible with life." You will see it. The question is whether you respawn near your resources or back at the starting coordinates.
Subnautica 2 base building should start the moment you have materials for a basic hull section and a Fabrication module. A small, functional base is better than a large imaginary one. The oxygen constraint makes this more urgent than in most survival games. The swim back from a failed deep dive without a base nearby is a run-ender. Managing oxygen and dive planning around your base location is the early skill that separates clean runs from constant respawn loops.
Build early, build small, expand as resources arrive.
Where to build: location criteria
Location decisions balance three factors: resource proximity, biome safety, and route access for the Tadpole submersible.
Biome selection at EA launch
The current Early Access map includes areas such as Sparse Plains, Graveyard, Plateaus, Root Canyon, Necrolei Hills, and Overgrown Ruins. For a first base, the safer recommendation is beside the Lifepod: shallow water, nearby oxygen, and a short recovery route after a death. The current zone can become a stronger main-base site once you have the materials for reliable power. Sparse Plains is an exposed route patrolled by the Collector Leviathan, not the safest starter location.
Build near the Lifepod first, or move to the current zone once the extra travel risk is acceptable. Avoid the Sparse Plains Collector patrol loop and never treat the Void boundary as a base site.
Resource proximity
Your first base needs to be near at least two resource types, not just one. A single node depletes fast. Scout a 200m radius around your intended build site and confirm at least two distinct resource patches before committing.
Leviathan avoidance
The Collector Leviathan patrols the Sparse Plains and Karakorum Metal Farms; the Shiver guards the Void beyond the Early Access boundary. Neither will actively attack your base, but building inside the Collector's patrol loop means every approach is a hostile encounter, and basing near the Void boundary is never worth it. If you see a Leviathan silhouette when scouting a build site, move away and reassess rather than trusting an arbitrary distance. The Subnautica 2 Leviathan guide covers both in detail.
Tadpole access
The Tadpole submersible becomes available mid-early game. Your first base should allow the Tadpole to reach it without squeezing through narrow terrain that blocks the vehicle. Build near open terrain.
Scanner Station for second-base site selection
Once your first base has a Scanner Station installed, use its live scan results to evaluate second-base sites before committing to the swim. The current base reference describes it as detecting nearby wrecks, fragments, and deposits, so use the displayed range and filters rather than assuming an undocumented upgrade priority. A scan can inform the route; it does not replace checking terrain, power, and Leviathan patrols in person.
GODEEPER: The Scanner Room's camera drone changes how you scout resource nodes and evaluate second-base sites from safety. Build order, Speed vs Range upgrades, and what the scan filters actually show. Subnautica 2 Scanner Room Guide →
Subnautica 2 base building modules: priority order
Clear priority order exists. Players who rush to the interesting modules before the foundation ones regret it.
First: Fabrication module
The Fabricator handles essential crafting and is available at the start. Unlock the Room and Habitat Builder first so functional modules have somewhere to go, then place the Fabricator before expanding the base.
Second: Storage containers
Death is inevitable in Subnautica 2. Storage containers mean gathered resources survive even when you don't. Build at least two in your first session. A disorganized storage bank causes almost as much time loss as no storage at all.
Third: Reinforcement and integrity
Every base piece changes the global hull-integrity number, and deeper construction makes that budget tighter. The exact cost depends on the piece and the current build, so check the live preview before committing to a room, window, or extension. Add foundations or reinforcement before expanding into deeper water instead of relying on a fixed biome-to-hull table.
Fourth: Power systems
The current base guide documents Solar Panels for daytime power, a Hydroelectric Turbine in the current zone, Bioreactors for mid-game bases, and Thermal Plants for deep bases. Match the source to the site: the turbine needs natural currents, while a large or deep base needs a more durable plan than a single solar array.
In co-op with multiple active workstations, power drain accelerates significantly. Four players running Fabrication and scanning stations simultaneously can outpace a single solar array at night. Plan power capacity with co-op headcount in mind.
Module layout
Group modules for shorter walking routes, clean power connections, and easier expansion. The current official notes do not document a hidden adjacency bonus, so judge power draw and fabrication speed from the live base UI rather than assuming nearby stations consume less or craft faster.
Later: expansion modules
Grow rooms, additional fabrication stations, Tadpole docking, crew quarters for co-op. These come after the foundation is functional. Build functional first, comfortable later.
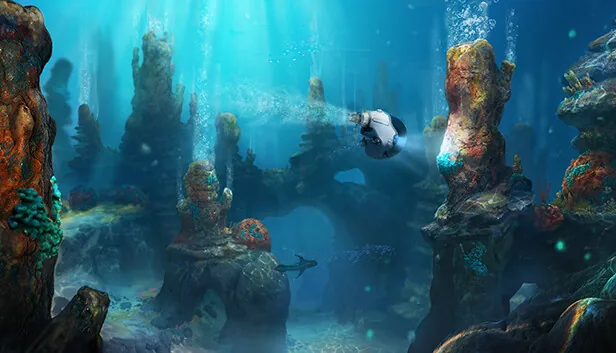 A Lifepod-area starter base keeps oxygen and recovery close; the current zone is a practical later main-base option when you can support its power needs.
Hull integrity: what floods your base
Hull integrity is a global number. Every module, window, foundation, or reinforcement you add changes it. When it reaches zero, the base floods.
Depth matters because deeper construction consumes more of that integrity budget, but the exact cost is piece-specific and can change during Early Access. Check the build preview and the number in the live HUD before placing a large room or extending a corridor. Foundations and reinforcements are the confirmed way to offset the cost without rebuilding the whole structure.
Two things trip players who understand the concept in theory:
One bad expansion can sink the whole base. Hull integrity is calculated across the entire structure. If the global number reaches zero after a room, window, or corridor is added, the base can flood even when most of the existing structure was stable. Check the preview before committing the next piece instead of judging safety by the majority of the build.
Flooding locks you out of everything. When integrity hits zero, you lose access to storage and workstations until the structure is repaired. In practice, this means retrieving repair materials from outside while managing your oxygen timer. The flooding animation is fast. Recovery is slow.
Foundations and reinforcement are the fix. If your base is near an integrity warning and you want to expand without rebuilding, add the pieces that raise the global total before placing more rooms. That preserves your storage layout and gives the next expansion room in the budget.
Check the live hull-integrity preview before committing a deep build site. The current sources do not justify a universal hull-tier table for every piece, so use the displayed cost and add foundations or reinforcement before placing the next module.
Co-op base building strategy
Subnautica 2 co-op puts up to four players in the same base-building situation, sharing one save state and one set of progression decisions.
The core problem: four people gathering simultaneously creates a bottleneck where everyone runs resources and nobody builds. You end up with 800 raw materials, no one at the Fabrication module, and a half-built base that's been "almost done" for an hour.
The split that works
For four players: two gatherers running resource nodes, one builder staying at the base processing and constructing, one scout advancing toward signal towers and marking hazards. This matches each player's action to a phase of the base-building cycle. It's the arrangement that makes co-op feel like a team effort rather than four people doing the same thing.
For three players: one gatherer, one builder, one multi-role. For two: both gather until you have materials for the first module, then one goes builder while the other continues.
Battery monitoring
Multiple players using workstations simultaneously can make a shared power warning arrive sooner than in a solo session. A 30% warning is a useful team convention, not a hard game threshold: it gives the group time to adjust before power becomes an emergency.
Assign one player to monitor battery level. When solar is inactive at night, all non-essential workstations should shut down and the group should coordinate around what's worth running on reserves. Agree on the priority queue before nightfall, not during it.
Communication before depth decisions
Before pushing into deeper biomes as a group, agree on whether the current base needs hull reinforcement first. One player's decision to "quickly check a deeper area" can strand the group if the base isn't set up to support a deeper respawn point. The Subnautica 2 co-op guide covers role splits and shared progression decisions in more detail.
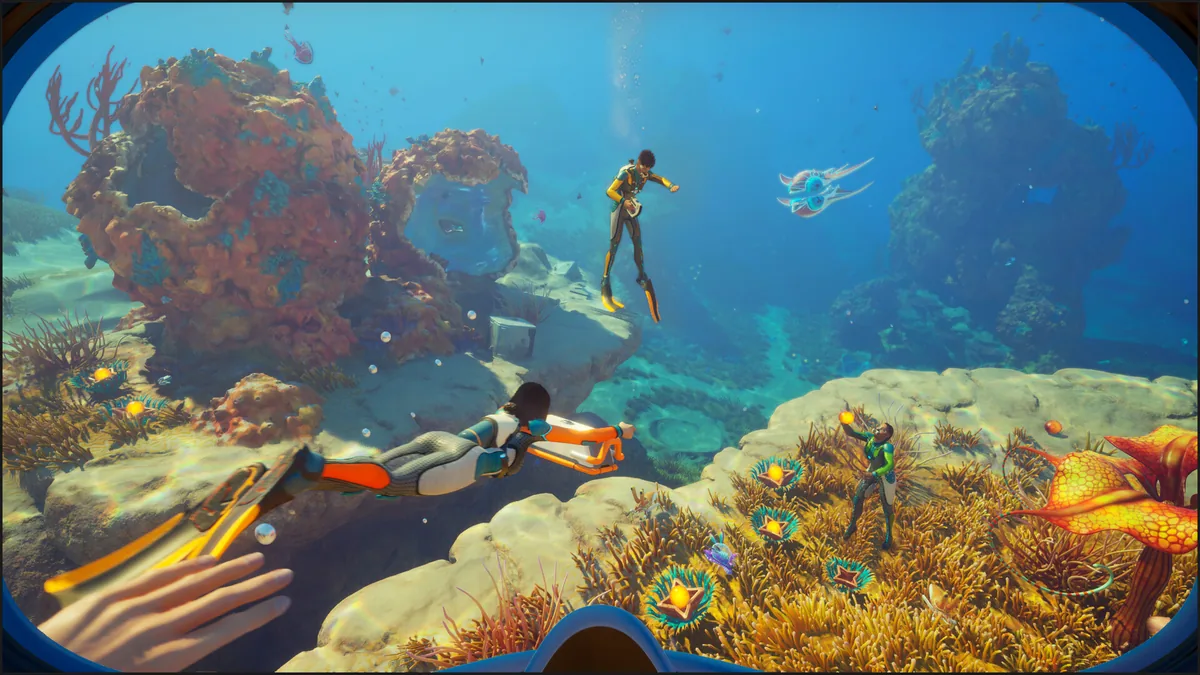 Base module layout in Subnautica 2: grouping Fabrication and Storage keeps walking routes short and leaves room for expansion. No official note currently confirms a hidden adjacency power or speed bonus.
Expanding and relocating as you go deeper
Your first base will not be your last. Subnautica 2 base building in the mid-game is about forward operating posts at depth, not commuting from a shallow starter base to every later objective on every run.
When to build a second base
Build when the round trip from your first base to your current exploration target exceeds what you can manage on a single oxygen run. The Tadpole extends this range considerably, but there's a point where even the Tadpole makes the journey inconvenient. A lifepod-area main base plus forward posts near the next deep objectives is a practical Chapter 1 layout; the exact number depends on your route and co-op group.
Root Canyon and Overgrown Ruins are the kinds of objectives that may justify a forward base in the first EA content block. The right timing depends on your gear, Tadpole access, route, and co-op group rather than a fixed three-base plan.
GODEEPER: The Tadpole submersible changes your base-building range significantly: depth ratings, docking at a base, and how it handles the transition from Sparse Plains to Root Canyon. Subnautica 2 Vehicles Guide →
Depth transition notes
Each deeper expansion consumes more hull integrity, but the current sources describe piece-specific costs rather than a universal depth-band table. Check the live preview, plan a material run for foundations or reinforcement, and avoid committing to a room if the displayed total is already near zero.
Expand progressively. Build at the depth you can currently reach. Use the Tadpole to scout the next depth band before committing base resources to it. The DNA modification system provides swim-speed and oxygen-efficiency upgrades that extend your safe operation range at depth, worth prioritizing before pushing into Root Canyon.
Step-by-step: first base setup checklist
- Scout the site: use a practical nearby radius to confirm resource access, no Leviathan silhouettes, and open terrain for the Tadpole
- Lay the first structure: start beside the Lifepod or in a shallow, stable site and keep the live integrity number positive
- Build Fabrication first: nothing else is craftable without it
- Add two storage containers: label them if categorization is available
- Install solar panels: at least two panels for solo, three for co-op groups
- Verify hull integrity: confirm it's positive before adding more modules
- Build storage before expanding: always have more storage than you think you need
- Scanner Station next: once functional, its scan results can inform how you approach the next biome
Frequently Asked Questions
Where should I build my first base in Subnautica 2? Build beside the Lifepod first: it is shallow, gives you nearby oxygen while you build, and makes recovery easy. The current zone is a sensible larger main-base location later; avoid the Collector's Sparse Plains patrol route and the Void boundary.
When should you start base building in Subnautica 2? Before you push past comfortable swim range from the starting area. A base set up early gives you a respawn point, storage, and Fabrication access before the first dangerous biome crossings. Build small and functional rather than waiting to build big.
What are the priority modules for Subnautica 2 base building? Unlock room access and the Habitat Builder, then place a Fabricator, storage, reinforcement, and power. Fabrication unlocks crafting unavailable at the surface. Storage preserves resources across deaths. Power must match your active workstation count or you'll lose it mid-operation.
What happens if my base floods in Subnautica 2? When hull integrity hits zero, the base floods and you lose access to storage and workstations until repaired. The practical cause is a global total that has been pushed too low by expansion without enough foundations or reinforcement. Recover repair materials from outside the flooded structure while managing oxygen.
What are reinforcement modules in Subnautica 2? Reinforcement pieces increase the global integrity budget without requiring a full rebuild. If your base is near an integrity warning and you want to expand, add reinforcement or foundations first, then confirm the live number before placing more rooms.
How does co-op change subnautica 2 base building? Split roles: one dedicated builder, two gatherers, one scout. Running everyone on the same task creates a bottleneck. In four-player sessions, simultaneous workstation use can drain the shared power reserve faster, so assign a power monitor and agree on a warning point such as 30%.
What depth rating do base modules have in Subnautica 2? There is no single fixed depth table for every current base piece. Deeper construction consumes more hull integrity, so check the build preview, add foundations or reinforcement, and expand only while the global number stays positive.
What biomes are available in Subnautica 2 Early Access? The Early Access map includes areas such as Sparse Plains, Graveyard, Plateaus, Root Canyon, Necrolei Hills, and Overgrown Ruins. Use the Lifepod area as the first base, then add forward posts near deeper objectives when the travel route justifies them.
How does module adjacency work in Subnautica 2 bases? No official patch note confirms a hidden adjacency efficiency bonus. Group modules for shorter walking routes, clean power connections, and easier expansion, but judge power draw and fabrication speed from the live base UI.
What are Leviathans in Subnautica 2? Large creatures that mark biome boundaries. The Collector patrols the Sparse Plains and Karakorum Metal Farms; the Shiver guards the Void beyond the Early Access boundary. Neither actively destroys bases in the current build, but building inside the Collector's patrol loop makes every approach hostile. Leave a generous buffer from a visible patrol and never base near the Void; the game does not publish a universal safe-distance number.
Related Reading
- Subnautica 2 Advanced Base Building Guide: power management, hull integrity, multi-base networks, and deep-sea operations in Root Canyon.
- Subnautica 2 Scanner Room Guide: scan results, camera use, and forward-base site selection.
- Subnautica 2 Leviathan Guide: Collector and Shiver behavior, how to read hazard zones before committing a build site.
- Subnautica 2 Biomes Guide: what each biome contains, which resources are exclusive per zone, and when to push deeper.
- Subnautica 2 Co-op Multiplayer Guide: role split strategies, shared progression, and how four-player sessions change base-building pacing.
- Subnautica 2 DNA Modification Guide: swim-speed and oxygen-efficiency upgrades that extend your safe depth range before committing to a Root Canyon forward base.
- Subnautica 2 Tips: First Steps, Base Building, and Co-op: first-hour survival and base-building decisions.
- Subnautica 2 Beginner Guide: Systems, Survival, First Hours: oxygen, biomods, food, and base timing.
- Best Early Access Games Worth Buying Right Now: May 2026: six current Early Access picks including Subnautica 2.
- Subnautica 2 Resources: Biome Farming Guide for Early Access: biome farming, scan-first fabrication, and resource routing.
References
- Subnautica 2 on Steam
- Subnautica 2 official announcements: current base-building hotfixes and placement changes
- Subnautica 2 base-building reference: current community documentation for Lifepod starts, integrity, and reinforcement
- Unknown Worlds Entertainment
- Subnautica 2 complete guide hub
Was this guide helpful?
About the author

Indie & JRPG Critic
Indie game evangelist and lifelong JRPG fan covering small studios since 2017. Mumbai-born, London-based. Writes the way she talks.
- 7 years indie games coverage
- JRPG and visual novel specialist
- Narrative design focus
Keep reading




Disclaimer
This article is published for informational and entertainment purposes. It does not constitute professional financial, legal, or technical advice. Game performance, online services, patch schedules, and store listings change. Verify critical details (pricing, system requirements, regional availability) with publishers and storefronts before you buy. Affiliate links, where present, help support our editorial work and are labelled in our affiliate disclosure.
Comments
Loading comments…