GameBrief · Guides
Subnautica 2 Deep-Sea Base Guide: Power and Hull Depth

Reviewing
Subnautica 2
Unknown Worlds Entertainment · Unknown Worlds Entertainment
Subnautica 2 deep-sea base techniques are where the game stops being survival and starts being systems management. The Subnautica 2 base building guide covers where to place your first structure and which modules to prioritize in the opening hours. This isn't that guide.
Subnautica 2 deep-sea base play starts once your first base is functional and you're staring at the gap between "a room with a fabricator" and a self-sustaining network that handles deep-sea operations, multi-player workload, and sustained Thermal Spires runs. That gap is where most players bleed progress: not because the game is hidden, but because the systems interact in ways the early game never forces you to learn.
TL;DR: Solar power fails in the Thermal Spires (400-1,200m), so switch to thermal plants before building there. Hull integrity is cumulative: one mismatched hull section in a 15-module base can tip the whole structure into flooding. Three bases cover Chapter 1 efficiently: Sparse Plains main, Plateaus/Graveyard forward, Thermal Spires entry. In co-op, four players running workstations simultaneously can outpace a single thermal plant; assign a battery monitor at 30%, not 5%.
How does a Subnautica 2 deep-sea base work? (quick answer)
- Power: solar panels fail below the Sparse Plains depth band: switch to thermal before building in the Thermal Spires (400-1,200m)
- Hull integrity is cumulative: each module adds or subtracts from the total. One mismatched deep-section piece can flood an otherwise well-built base
- Layout: module adjacency matters: clustering similar-function modules reduces power draw and improves throughput
- Three-base networks cover Chapter 1 more efficiently than a single large base
- In co-op, four players running workstations simultaneously drains shared power faster than solo: assign a battery monitor role before night operations
- Reinforcement modules extend the effective depth of existing hull sections without requiring a full rebuild
- The Thermal Spires is the payoff biome: hull prep and a local power source are what make deep-base operations there viable
Overview: what the basic guide doesn't cover
The first Subnautica 2 base building guide covers the opening loop correctly: build early, Fabrication module first, don't build near Leviathan patrol routes. Solid foundation. What it skips is what happens once that foundation exists and you're trying to run operations at depth. Subnautica 2 deep-sea base strategy is a different discipline from the starting-biome basics.
Three gaps come up constantly in the mid-to-late Early Access content block:
Hull flooding. Basic hull sections hold fine at Sparse Plains depth. Push a base below that band without upgrading hull sections and integrity drops. Most players discover this mid-build in the Thermal Spires: watching the flooding animation because one corridor piece was the wrong tier. Deep bases require hull planning before construction, not during it.
Power mismanagement. Solar is the right first power source for the starting biome. It becomes the wrong answer the moment your base is deep enough that solar isn't reliable. Switching to thermal before you need it is the correct call; players who don't end up with constant battery drain in co-op, especially with multiple active workstations.
One-base thinking. Running all Chapter 1 operations from a single Sparse Plains base works through the early game and breaks down beyond it. The Thermal Spires at 400-1,200m is too far from a surface base to support consistent operations without a forward position. The fix is a three-base network instead.
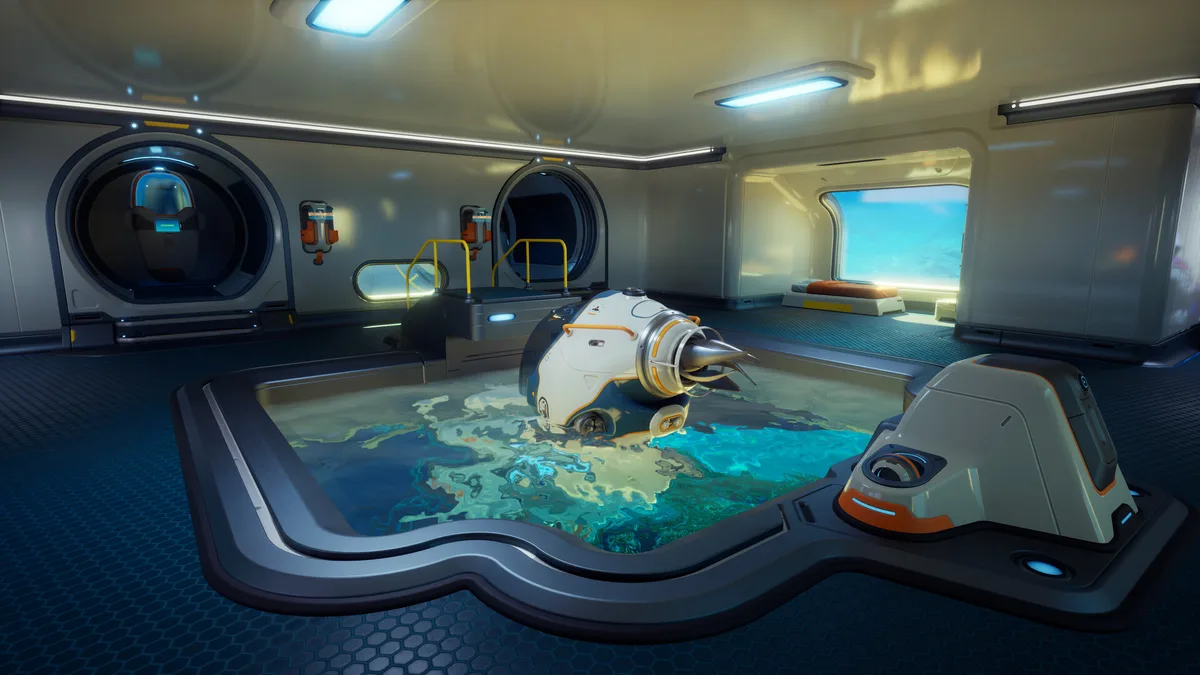 Caption: A mid-game Subnautica 2 base configuration in the Plateaus biome: the staging point before committing to deep Thermal Spires operations.
Subnautica 2 deep-sea base: power management
Power is the system that breaks bases quietly. A flooded base is obvious. A base drawing more than it generates fails slowly: storage runs low, workstations lag, and in co-op the battery hits zero at the exact moment four players need full fabrication throughput.
Solar panels need open-sky access. Sparse Plains (0-500m) gives you that reliably. Plateaus (100-600m) depends on terrain: build under an overhang and solar drops to near zero. Thermal Spires (400-1,200m) is where solar stops being a primary option at depth, because the biome's hydrothermal conditions exist specifically to power a thermal plant.
The working rule for deep-base power: if your base is below the Sparse Plains ceiling and you're not in a clearly open-sky position, plan a thermal backup before you build, not after.
Thermal plants draw from hydrothermal vents. Vent activity in the Thermal Spires is dense enough that thermal is the correct primary source for any base there. It runs continuously: no day/night cycle, no weather interference. The tradeoff vs. solar: thermal requires proximity to a vent. Site your deep base near vent activity, not just near whatever resource cluster caught your attention. The wrong build site means long cable runs, and long runs create structural vulnerabilities.
Co-op battery drain is a separate problem in deep-base setups. Four players running fabrication, scanning stations, and grow rooms simultaneously can outpace what a single thermal plant or solar array supplies. Designate one player as battery monitor before any extended base session. Their call happens at 30% battery, not 5%: at 5%, you're already reacting and workstations are about to go dark.
GODEEPER: Power efficiency depends heavily on which biome your base sits in. The Subnautica 2 biomes guide covers depth ranges, threat profiles, and terrain characteristics for each zone: pick your build site based on both power access and creature pressure.
Subnautica 2 deep-sea base: hull pressure and depth ratings
Hull integrity is the mechanic that ends mid-game bases. The basic guide mentions hull sections have depth ratings. The reality at depth is that hull integrity is a cumulative value: every module contributes to or detracts from the total, and a single mismatched section can push integrity negative even when everything else is correctly specced.
Each hull piece, corridor, module, and connection point has an integrity contribution value. Reinforced hull sections add to it. Large fabrication rooms, multi-compartment storage units, and external dock connections subtract from it because they create structural complexity. The net value must stay positive or the base floods.
Players who build sprawling bases often hit a point where one additional module tips integrity negative. Nothing wrong with that module on its own: they've just hit the cumulative threshold of everything built before it.
Reinforcement modules add positive integrity without requiring a teardown. If you've hit an integrity warning, that's the fix. Place them at corridor junctions and large module connections: those are typically where the integrity cost is highest.
The tradeoff: reinforcement modules take a build slot and draw a small amount of power. In exchange, they let you push the same basic hull configuration slightly deeper without a complete tier upgrade. A properly reinforced Sparse Plains base can expand into the upper Graveyard depth range without rebuilding from scratch.
Depth tier transitions
Before committing a base site at Thermal Spires depth (400m+), run this checklist:
- Hull tier matches the target depth band
- Reinforcement modules staged for the first expansion
- Power source is thermal, not solar
- A clear exit route from the build site (Thermal Spires terrain can be complex)
The exit route matters more than most players expect. If you build in a narrow vent passage and the base floods during construction, getting out is harder than getting out of an open terrain site. Build in accessible terrain even if the resource concentration is slightly lower.
Module adjacency and layout efficiency
The basic guide covers module priority, what to build first. Layout, where to build things relative to each other, is a different problem, and it's where deep bases diverge most from beginner builds.
Subnautica 2 deep-sea base layouts reward functional clustering. Fabrication modules adjacent to storage, scanning stations near crew quarters, power generation centralized near whatever draws the most. Spread those across disconnected corridors and the total power cost goes up. How much? Enough to matter in co-op when you're already running close to capacity.
The fabrication module should sit next to primary storage because every fabrication cycle draws from both. Keep them connected and the intermediate draw is lower than if they're at opposite ends of a corridor chain. In solo play the difference is small. With four players fabricating simultaneously, it adds up: a tight cluster is meaningfully more power-efficient than four players spread across separate work areas.
Grow rooms are worth building once power management is sorted. They produce food and materials, but draw continuously: the power consumption never stops. Isolate a grow room at the far end of the base and you're adding corridor power overhead to an already-constant draw. Put it adjacent to crew quarters and fabrication.
One unconfirmed but observable pattern: grow rooms in the Thermal Spires appear to yield better output near hydrothermal vents than in cold deep-water placement. Unknown Worlds hasn't published numbers for this, so treat it as anecdotal: but if you're building a grow room in your deep base, place it near vent proximity rather than at the edge of the structure.
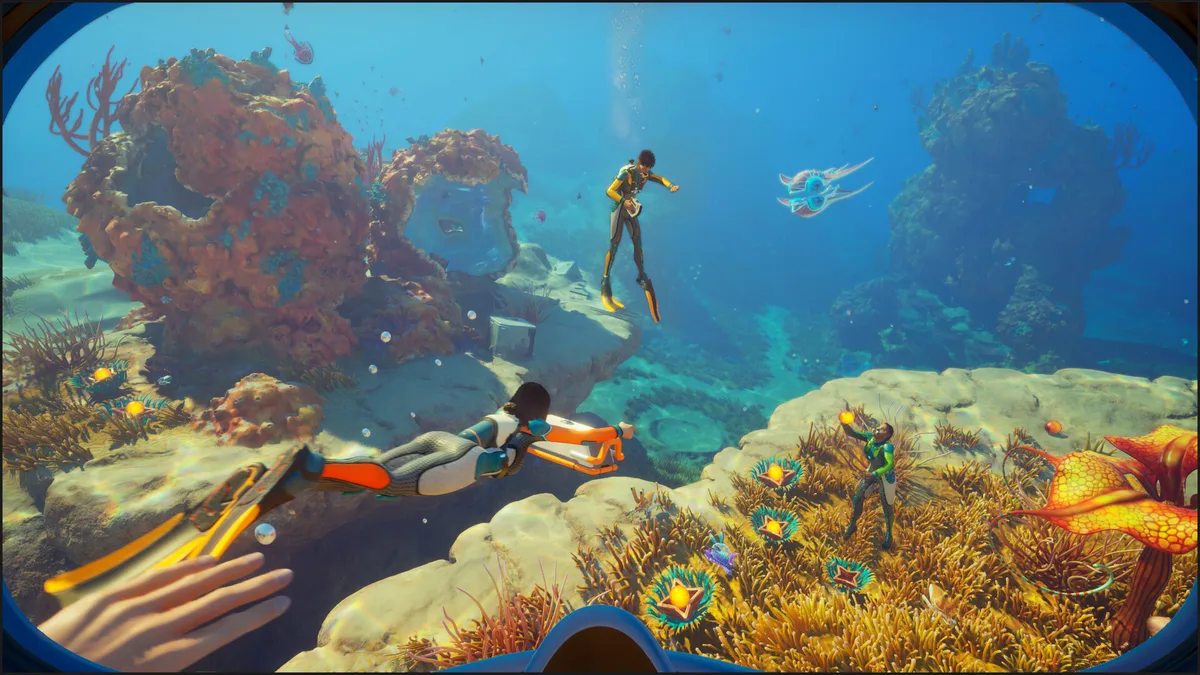 Caption: The Thermal Spires biome at depth: hydrothermal vents here power thermal plants and grow rooms more efficiently than any other biome in Chapter 1.
GODEEPER: Resource gathering efficiency determines how fast your advanced base gets built. The Subnautica 2 resources guide covers the fractional harvest system, biome-specific node density, and why Thermal Spires nodes yield upper-tier materials other zones can't provide.
Step-by-step: a three-base deep-sea network
Three bases is the deep-sea base configuration that covers Chapter 1 without the commute friction of single-base play.
Base 1: Main base (Sparse Plains, 0-200m)
This is your existing first base. At this stage, the starting base needs optimization before you build outward: consolidate the fabrication cluster, add reinforcement if integrity is marginal, and confirm solar power is adequate. The main base stores the bulk of your resources and is where new players or respawning players return by default.
Base 2: Forward base (Graveyard or Plateaus entry, 200-400m)
The forward base is a staging point: minimal footprint, enough storage for a day's resource run, a single fabrication module for emergency crafting. Hull should be reinforced tier for the depth. Power here can still be solar if terrain allows sky exposure, but a thermal backup is worth the build cost.
The purpose of base 2 is reducing round-trip time to the Thermal Spires. Without it, every Thermal Spires run starts from the Sparse Plains: that's a long swim or vehicle trip that eats into oxygen and patience before you've collected anything.
Base 3: Deep base (Thermal Spires, 400-600m entry zone)
Build base 3 at the entry to the Thermal Spires rather than deep in it. The 400-600m range is deep enough to access the biome's resources and fauna, but shallow enough to avoid the most extreme pressure demands. This is the hardest base to build correctly: reinforced hull sections, thermal power from the nearest vent, and enough storage to run a full biome sweep without returning to base 2.
The Reaper Leviathan Statue blueprint (awarded to all players as a thank-you for the 5 million wishlist milestone) makes a good landmark decoration for base 3. It's the kind of thing that tells you at a glance which base you're in.
Connecting the network
The three-base network doesn't require hard infrastructure connections between the bases. The Tadpole submersible serves as your transit layer. What matters is that each base has its own power, its own storage for biome-relevant resources, and a clear vehicle path between them. Plan the Tadpole route before finalizing build sites: a base the Tadpole can't reach efficiently defeats the whole staging chain.
Tips for Subnautica 2 deep-sea base operations
Pin hull integrity to your HUD now. The game has multiple info panels and hull integrity isn't front-and-center by default. Move it before building anything in the Plateaus or deeper. Discovering an integrity warning mid-build is already a bad situation; discovering it after you've flooded is worse.
Build the thermal plant before you think you need it. Retrofitting a thermal plant into an existing deep base is the most common deep-base mistake in the Thermal Spires. Vent scouting, cable routing, and module slot allocation are all easier during initial construction than around an already-operational base. Build it first.
Reinforce before expanding outward. Adding corridors without upgrading hull integrity is the most common way players lose a deep base. Players hit their first depth warning, respond by building more rooms for storage, and can't work out why the warning got worse. More structure means more integrity cost. Reinforce, then expand.
Name your bases before you have three of them. The game may not support in-game labeling. Doesn't matter: agree on names before confusion sets in. "Main," "Forward," "Deep" works. Without it, "go back to base" becomes ambiguous at the worst possible time.
Do a Thermal Spires creature scan pass before committing a build site. The Subnautica 2 DNA modification system yields its best modifications from Thermal Spires fauna. Where the creatures cluster is often where the most valuable scan targets are: and that might shift your base 3 location by 100-200m from your first instinct.
Frequently Asked Questions
What is the depth limit for basic hull sections in Subnautica 2? Basic hull sections are rated for the shallower starting zones: roughly the Sparse Plains depth range of 0-500m. Pushing below that without reinforced hull sections causes flooding. The Thermal Spires at 400-1,200m requires at minimum reinforced hull. Check your current hull tier before committing a deep build site.
Which power source is best for a deep-sea base in Subnautica 2? Solar panels lose effectiveness below open-sky zones. For deep bases in the Thermal Spires (400-1,200m), thermal power is the correct choice: it runs off the same hydrothermal conditions that define the biome. Solar is still viable in the Sparse Plains and Plateaus where sky access is consistent.
How do I stop my Subnautica 2 base from flooding? Hull integrity is the core mechanic in deep-base construction. If integrity drops to zero (from mismatched hull depth ratings, structural damage, or missing reinforcements) flooding begins. Build hull sections rated for your actual depth, not your target depth. Add reinforcement modules to increase hull integrity before pushing deeper.
What is module adjacency in Subnautica 2 base building? Placing certain module types next to each other provides efficiency bonuses: power usage reductions, faster fabrication output, and storage capacity gains. The exact combinations aren't documented in-game, but the core rule is: group similar-function modules together rather than spreading them across disconnected corridors.
How many bases should I have in Subnautica 2 Chapter 1? Three is the practical number for full Chapter 1 coverage: a main base in Sparse Plains for early-game operations, a forward base at the Graveyard or Plateaus entry for mid-game, and a deep base in or near the Thermal Spires for late-game access. Running everything from one base forces long commutes once the Thermal Spires become relevant.
Can Leviathans destroy my base in Subnautica 2? Unknown Worlds has not confirmed base destruction mechanics in the Early Access build. Leviathans in the current Chapter 1 represent patrol-zone threats rather than active base attackers. The practical danger is building inside a patrol route and having every base approach turn into a hostile encounter rather than direct base destruction.
How does co-op affect power consumption in Subnautica 2? Multiple players using base workstations simultaneously draws more from the shared power supply. Four players running fabrication and scanning stations at the same time drains the battery faster than a single player doing the same. In co-op, designate one player to monitor battery levels and call power warnings before nightfall: solar panels stop charging after dark.
Related Reading
- Subnautica 2 Base Building Guide: First-base placement, module priorities, and early-game setup before tackling the advanced systems covered here.
- Subnautica 2 Resources Guide: Biome-by-biome node density and why Thermal Spires yields upper-tier materials unavailable elsewhere.
- Subnautica 2 Biomes Guide: Depth ranges, terrain maps, and threat profiles for scouting base 2 and base 3 sites before building.
- Subnautica 2 DNA Modification Guide: Why creature scanning near your Thermal Spires base should influence where you place base 3.
- Subnautica 2 Complete Guide Hub: Index of all Subnautica 2 guides covering survival, vehicles, co-op, and progression.
- Subnautica 2 Tips: First Steps, Base Building, and Co-op: Subnautica 2 tips for your first hours of Early Access: no-map navigation, when to build.
- Subnautica 2 Beginner Guide: Systems, Survival, First Hours: Subnautica 2 beginner guide: oxygen, DNA modification, food, base timing, and the 5 mistakes new.
- Subnautica 2 Oxygen Guide: Dive Planning and Survival: Subnautica 2 oxygen management explained: tank upgrade path, when to turn back, depth zones, Tadpole.
- Subnautica 2 Leviathan Guide: Avoid, Scan, Survive: Subnautica 2 leviathan encounters: patrol patterns, safe scanning range for both confirmed EA Leviathans, and.
References
- Subnautica 2 on Steam: Steam store page, system requirements, Early Access updates
- Unknown Worlds Entertainment (5 Million Wishlists Thank You Post) source for Reaper Leviathan Statue blueprint and developer commentary on base decoration
- Subnautica 2 Base Building Guide: Location and Setup: foundation guide covering first-base placement and module priorities
- Subnautica 2 Resources Guide: biome-by-biome resource farming including Thermal Spires upper-tier materials
- Subnautica 2 DNA Modification Guide: scanning system and why deep-biome fauna unlocks the best modifications
- Subnautica 2 complete guide hub: survival, biomes, base building, DNA mods, and all cluster guides
Was this guide helpful?
About the author

Senior Critic & Analyst
Former game data analyst turned critic with 11 years covering indie and mid-tier games. Based in Austin. Runs spreadsheets on games most people just play.
- 11 years games criticism
- Former game economy analyst
- Roguelike and strategy specialist


Disclaimer
This article is published for informational and entertainment purposes. It does not constitute professional financial, legal, or technical advice. Game performance, online services, patch schedules, and store listings change. Verify critical details (pricing, system requirements, regional availability) with publishers and storefronts before you buy. Affiliate links, where present, help support our editorial work and are labelled in our affiliate disclosure.