GameBrief · Guides
Subnautica 2 Shiver Leviathan: The Void's Pack Hunter

Reviewing
Subnautica 2
Unknown Worlds
This Subnautica 2 Shiver Leviathan guide covers the creature that punishes curiosity: the pack hunter that guards the Void at the edge of the map. The Shiver is not a boss you beat, it is a wall that bites back, and the danger is not the giant female but the three agile males she launches at your Tadpole. This guide breaks down where it appears, how the pack actually attacks, why your vehicle dies in one grab, and the boundary trick that lets you scan it without dying.
TL;DR: The Shiver Leviathan patrols the Void beyond the ocean boundary, the out-of-bounds guardian of the Early Access map. It hunts as a pack: one armored female carries three small, fast males on her back and launches them at you like projectiles. The males have claws that clamp your Tadpole and destroy it instantly, so any contact is a one-shot. It cannot be killed and Distraction Flares do nothing. Camouflage (scan a Bullethead) is the only counter. To scan it, wait for it to reach its boundary turn-back animation and scan during the turn. Scanning either the male or female completes both databank entries.
Subnautica 2 Shiver Leviathan: where it patrols and why you met it
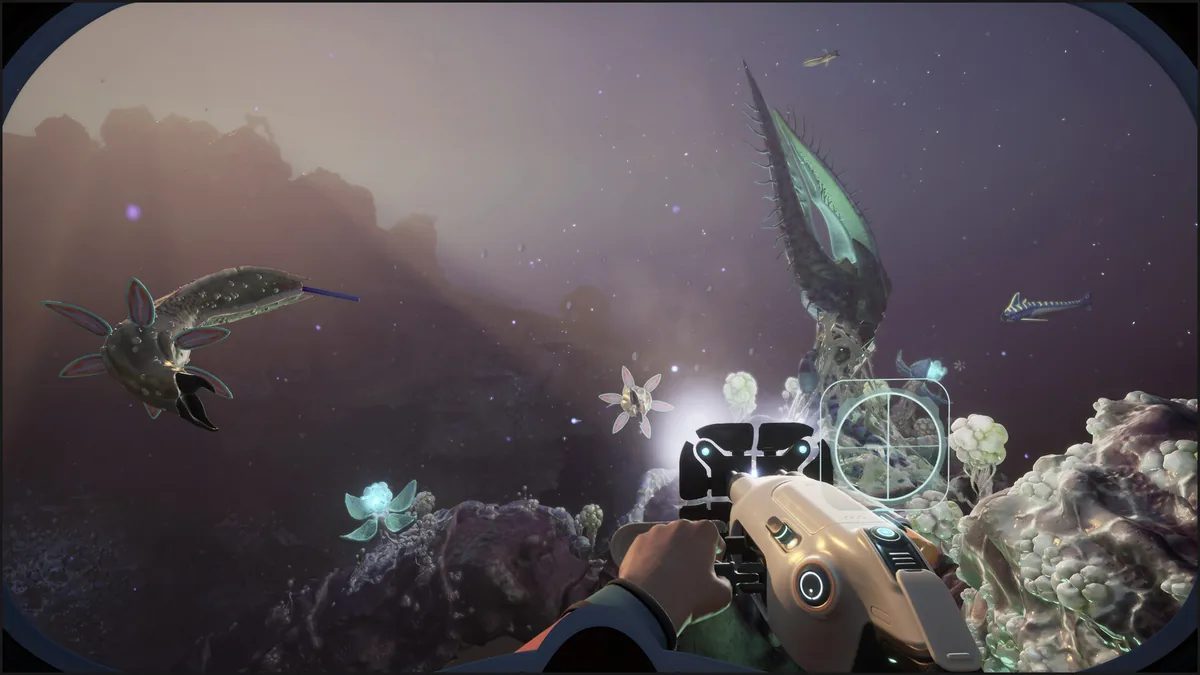
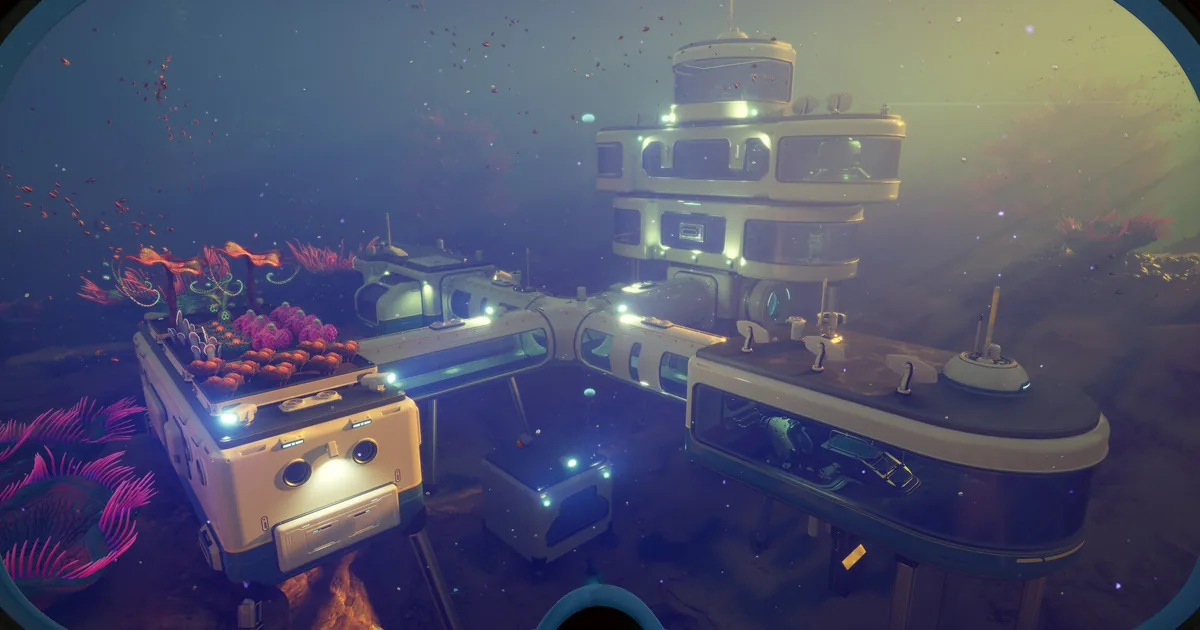
The Shiver Leviathan lives in the Void, the open black water past the edge of the playable map. It is the game's out-of-bounds guardian: the moment you cross the boundary beyond the current Early Access region, a Shiver materializes to herd you back inland. You do not discover it by diving deeper into a known biome. You find it by leaving the mapped world, usually by accident, chasing what looks like one more trench to explore.
That design matters for how you treat it. The Shiver is a fence, not a fight. Most players' first encounter is a panic: they push past the boundary, the water goes empty and wrong, and then something enormous turns toward them. If you understand it as a boundary creature, you stop treating the Void as a place to survive and start treating it as a place to not be.
Two specifics most guides skip. First, the encounter is not depth-triggered, it is boundary-triggered. The Shiver spawns the moment you cross the outer barrier, which can happen within meters of the surface at the map edge. You do not need to go deep to trigger it. Second, confirmed spawn points in the current Early Access build sit at the north and east map boundaries. The PDA log entry for the Shiver places the true Void floor at approximately 5,000 meters below. That number is not gameplay-relevant right now, but it explains the pack design: an apex that evolved for three-dimensional open water with no terrain anywhere needs a hunting strategy that covers all angles simultaneously, and that is exactly what the female-plus-three-males pack delivers.
Key takeaways
- The Shiver patrols the Void beyond the ocean boundary, the edge of the Early Access map.
- It hunts as a pack: one armored female carries three small, agile males.
- The female launches the males as projectiles; they are the real threat.
- A male's claws clamp your Tadpole and destroy it instantly. Contact is a one-shot.
- It cannot be killed. Distraction Flares do nothing. Camouflage is the only counter.
- Scan it during its boundary turn-back animation; one scan completes both entries.
- The encounter is boundary-triggered, not depth-triggered. The spawn can happen within meters of the surface the moment you cross the line.
- The female detects you using a tail sonar organ that reads thermal signatures. Her turn-back animation is also a sensor blind spot. That is why the scan window exists.
- In co-op, scan progress is shared across all players. One person draws aggro from in-bounds while the second scans from the boundary edge.
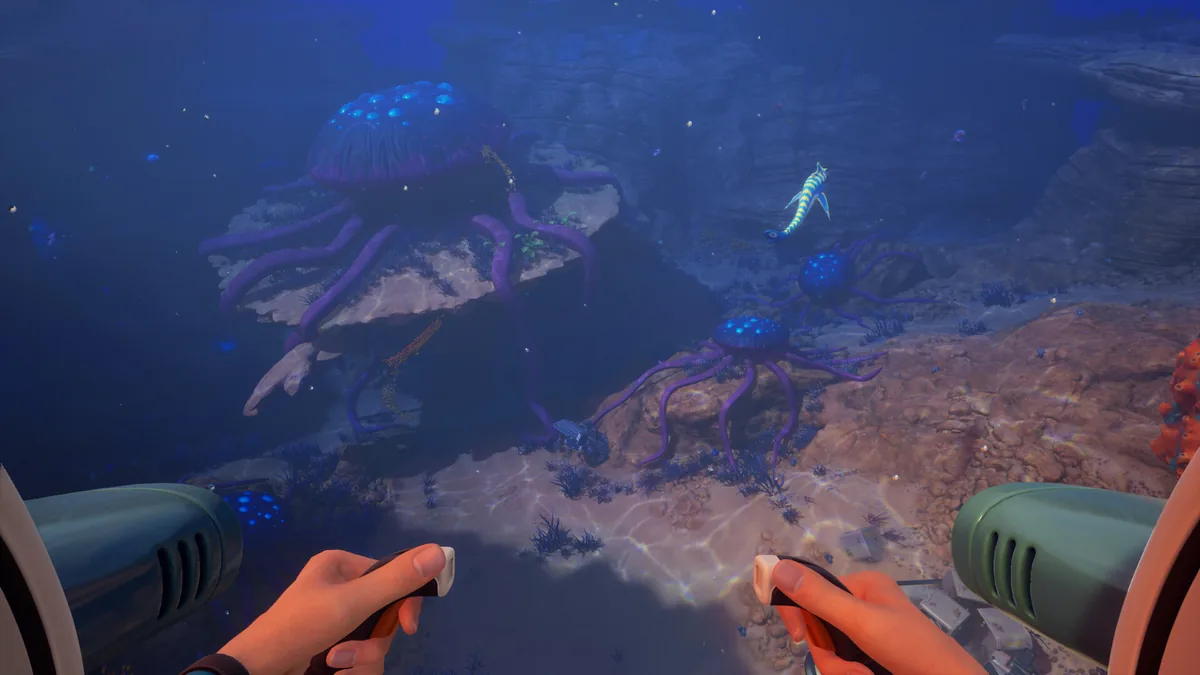
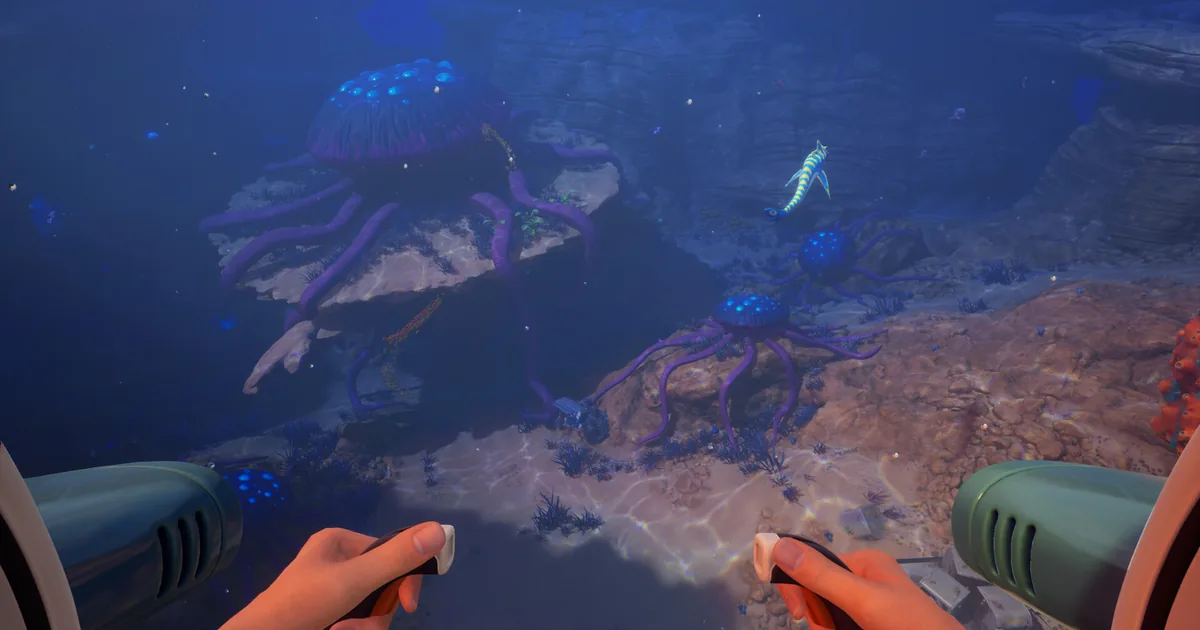
The pack mechanic: the female is the carrier, the males are the weapons
Here is the detail that changes the whole encounter: the Shiver Leviathan hunts as a coordinated pack, not as a single creature. A massive armored female leads, and she carries three smaller, highly agile males on her back and pectoral wings.
The female rarely lunges at you directly. She is a launch platform. When she detects an intruder, the males detach and pursue, and she effectively fires them at you like projectiles. They are fast, they close the gap almost instantly, and they come from multiple angles because they spread as they pursue.
So the threat model is inverted from what your eyes tell you. Your instinct is to track the giant armored female, because she is the thing you see first. The actual killers are the three small shapes peeling off her wings. The moment she orients on you, do not watch her, watch for the males detaching, and assume they will reach you faster than you can turn the Tadpole around.
The ambush is also three-dimensional in a way that a flat description undersells. The female holds a head-on orientation that draws your attention forward. While she holds that line, one male angles around your right flank and one rises from below. The third closes from directly ahead behind her. By the time you register three separate threats, the flanking angles have already closed inside your reaction time. The visual cue you are tracking, the enormous female charging at you head-on, is actively misdirecting your attention away from where the kills are actually coming from.
GODEEPER: The Shiver is the most lethal of several unkillable apexes, and the survival rules carry across all of them. Subnautica 2 Leviathan Guide →
How the female finds you: the tail sonar system
Here is the detail that changes how you think about evasion. The female carries a sensory organ along her tail that functions as long-range sonar. It reads thermal signatures through dense water columns, which is why noise and light discipline alone is not enough: she locates warm-bodied prey by body heat, not by sight or sound. Running silent does not make you invisible to her. You are warm. That is enough.
The males navigate off her signal. Without the female's active detection they lose orientation, and their pursuit becomes less coordinated. This makes her something more than a launch platform. She is also the pack's navigation system.
The practical payoff connects directly to the boundary scan trick. When the female hits her movement limit and executes her turn-back animation, her tail sonar is briefly pointed away from you. The males, momentarily following her direction rather than your heat signature, lose some of their coordination. That is not coincidence. The turn-back window is the one moment when she stops actively locating you, which is why it is the only reliable scan window. You are not just waiting for her to face away from you, you are waiting for her sensor to go offline.
Why your Tadpole dies in one grab
There is no damage race against a Shiver. The males have highly developed segmented claws built to clamp onto your Tadpole, and the grab destroys the vehicle outright.
This is what separates the Shiver from a creature like the Collector. The Collector grabs you, shakes the vehicle, and you can sometimes break away with hull left. A Shiver male does not chip your hull. It ends the craft. One successful clamp is a kill on the Tadpole, and out in the Void that means you are now a swimmer at extreme depth with three pursuers and no way home.
The practical takeaway: never approach the Void in a Tadpole you cannot afford to lose, and never approach it without an escape already planned. Because there is no surviving a grab, all of your safety has to come before contact. By the time a male has you, the decision was made several seconds earlier when you let it get into launch range.
 The deep is where scanning gets dangerous. Against a Shiver there is no hull-damage race to win: a single claw grab from one of the males ends your Tadpole outright.
It cannot be killed, and flares do nothing
Like every leviathan in Subnautica 2, the Shiver cannot be killed. There is no weapon, no special tool, no damage threshold that makes it leave. It is a hard boundary by design.
Worse, the tool that saves you elsewhere fails here. Distraction Flares, which reliably pull the Collector Leviathan off you, have zero effect on the Shiver. Throwing a flare at a Shiver pack does nothing except waste the throw and the second of attention it cost you. If your Void plan was "flare and run," you do not have a plan.
What works is Camouflage. It makes you invisible to predators while you hold completely still, and it is effective against the Shiver where nothing else is. The catch is the same as always: any movement breaks it. In the open Void there is no rock to tuck behind, so Camouflage means committing to total stillness in open water while a pack circles. It is nerve-wracking and it is the only thing that works. Unlock it before you go near the boundary by scanning a Bullethead near the Observatory biome.
GODEEPER: Camouflage is one of several Biomods and tools that replace weapons entirely in Subnautica 2. The full kit matters before any Void run. Subnautica 2 Creature Evasion Guide →
How large is the Shiver Leviathan? Scale context from game files
The scale of the Shiver rarely registers properly in gameplay because the Void has no reference points. Community analysis of game files gives approximate numbers, with reported measurements varying between sources and build versions as the game patches through Early Access. The female is estimated between 89 and 98 meters across different analyses, and each male between 33 and 39 meters. For comparison, a Reaper Leviathan from the original Subnautica measures roughly 47 meters. A single Shiver male is longer than the most iconic leviathan from Subnautica 1 regardless of which end of the range you use. The female is comparable in length to the Collector Leviathan, which most players consider enormous until they encounter the Shiver.
The males read as "small" in gameplay because the female is enormous, but 33 meters is not small. When three of them detach and accelerate toward you from multiple angles, the visual speed is partly a product of their actual mass covering distance fast. They are not drones. They are large apex predators moving at pursuit speed.
What happens when the Shiver destroys your Tadpole
Understanding the full consequence keeps the Void dangerous rather than just frustrating. When a male Shiver clamps your Tadpole and destroys it, you are immediately in open water at Void depth without a vehicle. That situation compounds fast.
The 100m oxygen efficiency penalty applies at Void depth, meaning your air depletes faster than in the shallows. Your swim speed is far slower than the males that just destroyed your Tadpole. There is no terrain to use for cover, no rock shelf to hide behind, and Camouflage requires you to hold completely still while pursuit is active. Reaching your base requires an uninterrupted swim through open black water, almost certainly with the pack still nearby.
Survive this scenario by planning for it before it happens: approach the Void on a dedicated trip, leave excess materials at base, and accept going in that the Tadpole may not come back. A Void run where you lose the vehicle but escape on foot is a success if you got the scan. A Void run where you lose the vehicle and then panic-swim without a plan ends at the respawn screen.
How to scan the Shiver Leviathan safely
You can get the databank entry, and you do not have to die for it. The trick is the boundary itself.
The Shiver patrols the edge of the Void and reaches a movement limit, a point where it stops chasing inland and performs a sharp turning animation back toward the deep. That turn is your window. While it is committed to swinging away from you, hold the scanner on it. It is not coming at you during the turn, so the close range that would normally be suicide is briefly safe.
The bonus that makes this worth it: scanning either a male or the female automatically completes both databank entries. You do not need two separate approaches at two separate risk windows. One clean scan during one turn-back animation finishes the whole Shiver entry. So pick a single good window, get the scan, and leave. Do not greed for a second pass you do not need.
A few habits make the scan run survivable. Approach the boundary slowly, because speed and noise are what trigger the pursuit in the first place. Have Camouflage ready as your bailout if the timing goes wrong. And do the scan run on a dedicated trip with a Tadpole you have written off, not bundled with an objective dive where you also care about getting home with cargo.
 Scanning deep fauna inside the mapped world is routine. The Shiver is the exception: get the entry during its boundary turn, when it is committed to swinging away from you, then leave before it comes back around.
Co-op Void runs: split roles and shared scan progress
The Shiver encounter changes in one important way when playing co-op: scan progress is shared across all players in the session. Only one person needs to get the scan to complete both databank entries for the whole group.
That single fact changes the optimal strategy entirely. In co-op, split the roles. One player takes the aggro run: cross the boundary, confirm the Shiver spawns and orients, then immediately retreat in-bounds. The Shiver cannot follow past the boundary. It will break pursuit and return to the Void once you step back over the line. The player who drew aggro is safe the moment they re-enter the mapped zone.
While the pack is occupied chasing that player or recovering from the failed pursuit, the second player approaches the boundary from the safe side. Wait for the pack to turn during its boundary limit animation, then scan from the just-inside-the-boundary position. One scan, shared instantly, completes both entries for the session.
The mandatory coordination step: say it before you cross. One player suddenly sprinting toward the Void without context looks identical to a mistake, and a confused partner following you in doubles the risk with no benefit to the strategy. A single callout before the aggro run covers everything.
The mindset for Void edges
Surviving Shiver territory is mostly about respecting the boundary as a real thing rather than a soft suggestion. The map ends where it ends, and the water past it is not content you are meant to clear, it is a deterrent with teeth.
Treat any dive that trends toward open black water with no terrain as a warning. The Void announces itself: the seabed drops away, the ambient detail thins out, and the game stops giving you things to look at. That emptiness is the tell. The instant you notice it, turn back toward mapped terrain before a female orients on you, because once the males launch, the distance you needed to escape is already gone.
One fact that also works in your favor: the Shiver cannot cross the boundary back into the mapped world. If you are being chased and you cross in-bounds, the pursuit ends. The pack breaks off, reorients, and swims back into the Void. This is not the same as outrunning them in open water, which is not possible. It is a hard stop tied to the boundary itself.
The PDA log entry for the Shiver also contains a detail worth noting if you plan to revisit the Void as Early Access expands. The entry references Shivers as predators capable of targeting large submarines, a vehicle class that does not exist in the current build. Unknown Worlds has flagged new vehicles as part of the larger content drop roadmap. The Shiver's pack design already accounts for that threat scale. What functions now as an out-of-bounds deterrent is likely being built toward a proper deep-zone encounter timed to when the larger submersibles arrive.
Frequently Asked Questions
Where is the Shiver Leviathan? In the Void, the open water beyond the ocean boundary at the edge of the Early Access map. It appears when you cross past the playable region.
Why does my Tadpole die instantly? The small males have claws that clamp the vehicle and destroy it in one grab. There is no hull-damage race, contact is a kill.
Can you kill it? No. Like all leviathans it cannot be killed and there is no weapon for it. Survival is avoidance only.
How do you scan it? Wait for it to reach its boundary movement limit and start its sharp turn back toward the deep, then scan during the turn. One scan completes both databank entries.
What counters it? Camouflage only. Distraction Flares do nothing. Hold completely still with Camouflage active when a pack is near.
How does the pack work? One armored female carries three agile males and launches them at you as projectiles. The males are the actual threat, not the female.
How big is the Shiver Leviathan? Community analysis of game files puts the female at approximately 97.6 meters and each male at around 33 meters. A Shiver male is longer than a Reaper Leviathan from Subnautica 1. The open Void removes all sense of scale, which is why the speed of the males consistently catches players off guard.
What happens when the Shiver destroys your Tadpole? You are in open Void water, at depth, without a vehicle, with the oxygen penalty active and the pack nearby. Plan Void runs as dedicated trips: leave excess cargo at base, accept that the Tadpole may not return, and have a clear swim route home before you cross the boundary.
Does the Shiver chase you back into mapped territory? No. The Shiver cannot cross the boundary into the mapped world. If you re-enter in-bounds, pursuit ends immediately and the pack breaks off back into the Void. This is the hard stop that makes the aggro-draw co-op strategy viable.
How does scanning the Shiver work in co-op? Scan progress is shared across the whole session. One player crosses the boundary to draw aggro and retreats in-bounds immediately. While the pack breaks off or recovers, the second player scans from just inside the boundary during the pack's turn-back animation. One scan completes both entries for all players.
Related Reading
The Subnautica 2 Leviathan Guide overviews every leviathan and the survival rules shared across all of them.
The Subnautica 2 Creature Evasion Guide covers Camouflage, Distraction Flares, and the full no-weapons toolkit you need before any Void run.
The Subnautica 2 Complete Guide Hub links every Subnautica 2 system, from survival basics to biomes and vehicles.
- Subnautica 2 Collector Leviathan: Scan, Escape & Where: Subnautica 2 Collector Leviathan: where it patrols, how its sonar-pulse grab works, how to bio-scan it safely, and.
- Subnautica 2 Hotfix 2: Full Patch Notes and Changes: Subnautica 2 Hotfix 2 (May 22) adds Silver resource spots, fixes Hammerhead following players, patches Tadpole teleport bug.
- Subnautica 2 Great Jaw: The Trap You Loot, Not Fight: Subnautica 2 Great Jaw leviathan: the Venus-flytrap clam in Dolerite Spires, why you avoid its pink tendrils, and.
- Subnautica 2 Tips: First Steps, Base Building, and Co-op: Subnautica 2 tips for your first hours of Early Access: no-map navigation, when to build.
- Subnautica 2 Resources: Biome Farming Guide for Early Access: Subnautica 2 resources: fractional harvests, biome rarity, and the scan-first fabrication pipeline most players get.
- Subnautica 2 Base Building Advanced Guide: Power and Depth: Subnautica 2 base building advanced tactics: power management, hull pressure thresholds, multi-base networks, and deep-sea.
- Subnautica 2 Base Building Guide: Location and Setup: Subnautica 2 base building guide: where to build, module priority order, hull integrity thresholds, power.
References
- Subnautica 2 on Steam: official Early Access page, updates, and patch notes
- Unknown Worlds: the developer behind Subnautica 2
Was this guide helpful?
About the author

Games Critic
Games writer and reluctant optimist who has reviewed over 400 titles across 9 years. Irish, currently in Berlin. Has strong opinions about tutorial design.
- 400+ games reviewed across 9 years
- Platformer and horror specialist
- Narrative design focus
Keep reading

Disclaimer
This article is published for informational and entertainment purposes. It does not constitute professional financial, legal, or technical advice. Game performance, online services, patch schedules, and store listings change. Verify critical details (pricing, system requirements, regional availability) with publishers and storefronts before you buy. Affiliate links, where present, help support our editorial work and are labelled in our affiliate disclosure.