GameBrief · Guides
Subnautica 2 Complete Guide: Early Access Hub (2026)
Subnautica 2 complete guide hub: covers oxygen, bases, all 6 biomes, Leviathans, DNA modification, co-op setup, and links to all 15 Early Access guides.

Reviewing
Subnautica 2
Unknown Worlds Entertainment · Unknown Worlds Entertainment
Subnautica 2 complete guide: here's everything in one place. The game launched May 14, 2026 into Early Access with 6 biomes, a co-op system that changes how most survival decisions work, an intentionally unkillable creature roster, and a 2-3 year roadmap before 1.0. Over 4 million copies sold in the first week, 119,000+ reviews at Very Positive on Steam. Three hotfixes have shipped through June 1, 2026. There's a lot to learn.
This Subnautica 2 complete guide hub organizes all 15 topic guides by system so you can find what you need without reading three articles to answer one question.
TL;DR: Subnautica 2 launched May 14, 2026 in Early Access at $29.99, with 6 biomes, 4-player co-op, a DNA modification system, and an intentional no-kill creature design confirmed by Unknown Worlds. Over 4 million copies sold in the first week; 119,000+ reviews at Very Positive on Steam. This hub links to all 15 topic guides covering oxygen, bases, creatures, vehicles, and co-op roles. Unknown Worlds estimates 2-3 years before 1.0.
Key takeaways
- $29.99 at Early Access launch. Price increases at 1.0. One purchase covers everything.
- 4 million+ copies sold in the first week; 119,000+ reviews at Very Positive on Steam
- 6 biomes in the current build, ranging from shallow starting zones to the deep Thermal Spires
- 4-player online co-op: per-player oxygen and hunger, shared base, per-player vehicles
- Creatures cannot be killed: intentional design. Evasion is the entire combat model.
- 2-3 year EA window before 1.0, with multiple planned story chapters
- Developer/Publisher: Unknown Worlds Entertainment (original Subnautica). Krafton is parent company: owns UWE, not listed as publisher on Steam.
 Chapter 1 includes 6 biomes at increasing depths. The oxygen bar governs every dive. Fauna cannot be killed: evasion and depth awareness replace combat.
- Subnautica 2 Scanner Room: Build the Scanner Station: Subnautica 2 scanner room is called the Scanner Station: where to find the fragment, the...
What is Subnautica 2?
Subnautica 2 is a first-person underwater survival game where you're stranded on an alien ocean world. You gather resources, build underwater bases, explore biomes at increasing depths, and navigate a food chain that doesn't particularly care whether you survive. Like the original, there is no combat in the traditional sense: weapons exist for cutting and gathering, not for fighting fauna.
Unknown Worlds Entertainment made the original Subnautica in 2018, which reached "Overwhelmingly Positive" status and stayed there. Subnautica 2 is a direct successor under the same team. The development path ran through a publicized dispute with publisher Krafton over a $250 million performance bonus: the community sided loudly with Unknown Worlds during the lead-up to launch, which contributed to the significant first-week sales. As of Early Access, Unknown Worlds retains creative control.
The Early Access build is Chapter 1 of a planned multi-chapter story. The current content is substantial: 6 biomes, two confirmed Leviathans, a DNA modification system, multiple vehicle tiers, and a co-op system that distinguishes it sharply from the solo-focused original. Unknown Worlds estimates 2-3 years before 1.0.
One mechanical change from the original gets the most community attention: fauna cannot be killed. This was confirmed as intentional design. The lead developer put it plainly: "You are here to exist on this planet, not to dominate it." That design decision shapes every encounter and every dive plan.
- Subnautica 2 Early Access Launch: What's in Chapter 1: what the launch build actually contains, what's missing, and whether the $29.99 price makes sense at EA entry.
- Subnautica 2 EULA Explained: What Krafton's Terms Mean: the controversy over the Krafton EULA: no VPN, fan art licensing, arbitration clause, and what it means for early access buyers.
- Subnautica 2 Lore: Story, Connections and What's Next: the Observatory story endpoint, Ryley Robinson's absence, how Sub2 connects to the original, and what the Alien Ruins hint at next.
Subnautica 2 complete guide: survival basics
The three systems that govern your first 5-10 hours: oxygen, food, and fabrication.
Oxygen governs every dive. You start with a limited tank capacity, and most decisions in the first hours run through that constraint: how deep to go, how long to stay, where to anchor your base. The Tadpole submersible maintains its own air supply and changes the math considerably; without one, you're always measuring distance back to the surface. The oxygen tank upgrade is the highest-impact early fabrication choice, the one that unlocks the first biome transitions more than anything else.
Hunger degrades over time and imposes penalties before it kills you. Food spawns throughout every biome, and the starting zone has enough that you won't notice the system much early on. In co-op sessions where exploration circuits run 90+ minutes from base, one player managing food supply while another explores removes the problem entirely.
The Fabrication module gates advanced crafting. In solo, you build toward it immediately. In co-op, it's the shared base's first priority: a Builder near the starting beacon while Explorers bring resources is the fastest path to getting it live for the whole team.
GODEEPER: Oxygen management is the survival skill that separates consistent progress from repeated deaths at inconvenient depths. Subnautica 2 Oxygen Guide: Dive Planning and Survival →
- Subnautica 2 Tips: First Steps, Base Building, and Co-op: first-session habits that avoid the most common early deaths and wasted time.
- Subnautica 2 Food Guide: How to Feed Your Crew Underwater: how to sustain four players: fish vs slugs, Fabricator advantage, co-op food roles, and when to build the biofarm.
Biomes and exploration
Subnautica 2's Early Access build has 6 biomes. They're not all accessible from the start: each transition zone requires gear or progression that the previous biome provides. The depth progression is the main gating mechanism.
The Sparse Plains are the starting biome. Shallow, well-lit, resource-accessible. This is where you learn the game's rhythms: oxygen windows, food management, base placement, first creature encounters. The Collector Leviathan patrols here, which introduces the reality of unkillable fauna early. You navigate around it.
Biomes further down (including the Thermal Spires) introduce environmental hazards beyond depth. Temperature extremes, pressure, and bioluminescent creature density all increase. The Wakemaker Leviathan operates in the Thermal Spires, and avoiding it at 400-1200m while managing a co-op group requires planning, not improvisation.
The biomes aren't just resource zones. They're the context for the DNA modification system: each zone has unique fauna that offers distinct modification paths. A player who only explores the starting biome leaves a significant portion of the upgrade system inaccessible.
- Subnautica 2 Biomes Guide: All 6 Zones Ranked (2026): what each biome contains, when to visit, and what resources and creatures are exclusive to each zone.
Creatures and Leviathans
Every creature in Subnautica 2 is invulnerable. This isn't a placeholder or an Early Access limitation. Unknown Worlds explicitly confirmed it as a design choice: the game is built around coexistence, not elimination.
In practice, this means encounters are always evasion problems. You can't clear a patrol route or remove a threat from a zone by defeating it. The Collector Leviathan in the Sparse Plains will always be there. The Wakemaker in the Thermal Spires will always be there. You learn their detection radii, patrol patterns, and reset behaviors: not how to kill them.
This produces a different tension than most survival games. Smaller fauna (filter feeders, scavengers, ambient ocean life) you avoid or maneuver around. Larger aggressive fauna you give space. Leviathans you plan around at the session level, not the encounter level.
The community reacted strongly to this design, with the thread "Why can't we kill the creatures?" becoming one of the highest-upvoted in the game's subreddit. Unknown Worlds acknowledged in their developer letter that the current mitigation tools (flares and the Survival Tool) aren't effective enough, and upcoming patches will adjust aggression timing, aggro range, and tool effectiveness. The design principle isn't changing; the implementation is being improved. A third-party mod addresses killing for players who want it, but the base game won't support it.
Hotfix 2 change (May 22): Hammerheads were being attracted to Tadpole submersible lights, which caused them to follow players back to their bases. This has been fixed. Hammerheads now ignore the Tadpole's lights.
GODEEPER: The Collector and Wakemaker have specific detection mechanics and patrol resets that make them manageable once you know them. Subnautica 2 Leviathan Guide: Avoid, Scan, Survive →
- Subnautica 2 Creature Guide: All Leviathans and Fauna: full catalog of fauna by biome with behavior notes, detection ranges, and how to move through occupied zones.
- Subnautica 2 Immortal Creatures: Why You Can't Kill Fauna: the design rationale, what Unknown Worlds said, practical survival strategies for aggressive encounters, and what the modding community built in response.
- Subnautica 2 Weapons Guide: No Knife, How to Defend Yourself: what tools exist in the EA build, why there's no knife or Stasis Rifle, and the step-by-step approach to surviving Hammerhead encounters without combat options.
- Subnautica 2 Creature Evasion: 4 Biomods That Actually Work: Camouflage, Electric Discharge, Chum Cloud, and Dash explained with creature-specific compatibility tables showing which tools work on which Leviathan.
- Subnautica 2 Collector Leviathan: Scan, Escape & Where: Subnautica 2 Collector Leviathan: where it patrols, how its sonar-pulse grab works, how to bio-scan...
- Subnautica 2 Shiver Leviathan: The Void: Subnautica 2 Shiver Leviathan guide: the female-plus-males pack guarding the Void, why your Tadpole dies...
- Subnautica 2 Great Jaw: The Trap You Loot, Not Fight: Subnautica 2 Great Jaw leviathan: the Venus-flytrap clam in Tufa Towers, why you avoid its...
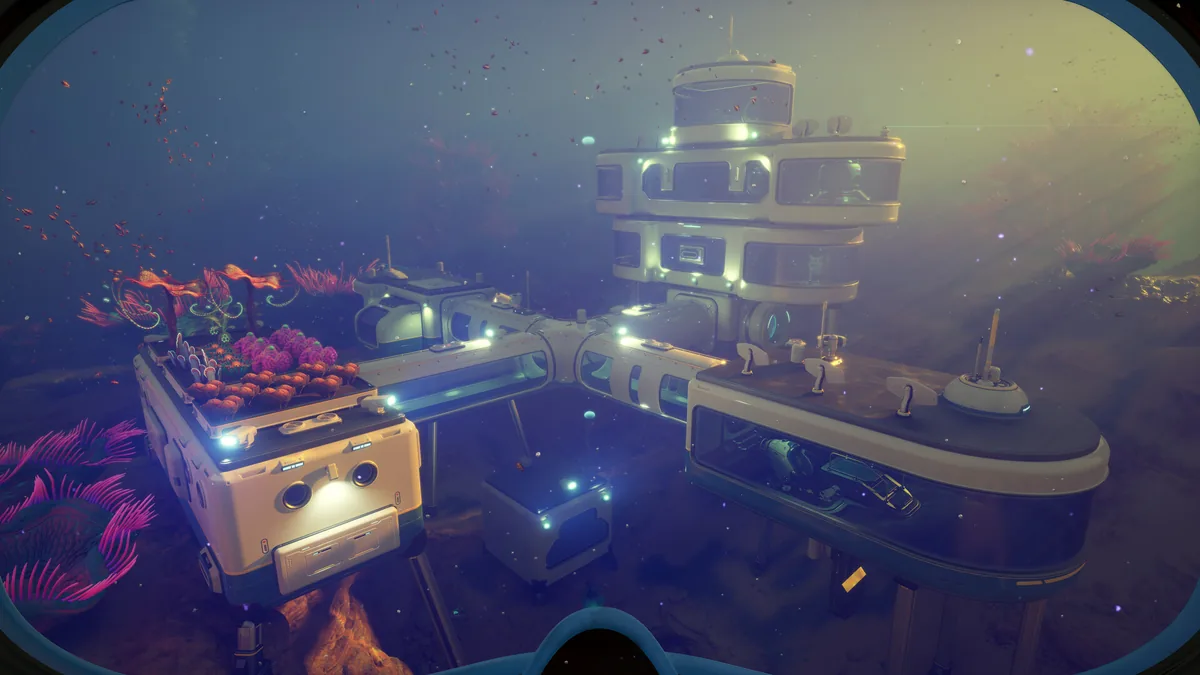
Base building
Your base is the fixed anchor for everything else: oxygen recharge, storage, fabrication access, and co-op respawn point. Where you place it and what order you build modules matters more than the total number of modules.
The first placement decision: you want the base at the depth boundary between the starting zone and the first transition biome. Too shallow and it wastes its utility; too deep and you can't reach it safely while undergeared. Most players go too shallow in the first session and then relocate once they understand the biomes.
Module build order: Fabrication module first: it unlocks the rest. Then power generation, then oxygen network (which extends safe dive range from the base outward). In co-op, the oxygen network moves up the priority list because multiple players ranging from a central base at different depths means someone is always near their limit.
The base is shared in co-op. All players contribute modules, access storage, and respawn here. Individual inventories remain private. This asymmetry matters for resource planning: shared storage is a coordination tool, not automatic pooling.
- Subnautica 2 Base Building Guide: Location and Setup: first base placement decision tree, module priorities, and what to build before going deeper.
- Subnautica 2 Base Building Advanced Guide: Power and Depth: power scaling, deep base requirements, oxygen network extension, and relay module strategy for multi-biome exploration.
 Base placement is a survival decision, not just aesthetic. Biome proximity affects creature patrol density, resource access, and how far from home you can safely range.
DNA modification
The DNA modification system is how Subnautica 2 replaces traditional stat progression. You use the Biosampler tool to collect DNA from creatures, which you then convert into biological modifications that expand your survivability in specific environments.
Modifications include things like thermal resistance (which extends your safe operating depth in high-temperature zones), pressure adaptation (which allows deeper sustained diving), and bioluminescence handling (which affects creature detection ranges). Each player builds their own modification profile: DNA sampling is not shared.
The co-op implication is significant. Two players specializing in different modifications can access biome combinations neither could reach alone. A player with thermal resistance and a player with pressure adaptation, diving together, cover a combined depth-and-temperature range unavailable to a solo player at the same progression stage. Most co-op groups don't exploit this because they end up pursuing the same modifications by default. Diverging early pays out substantially later.
The Biosampler itself requires crafting from the Fabrication module and specific materials from the first transition biome. Unlocking it is one of the cleaner mid-game goals to work toward in the first 5-8 hours.
- Subnautica 2 DNA Modification Guide: Scan to Upgrade: how the Biosampler works, which modifications to prioritize, and the co-op specialization paths that unlock zones inaccessible to solo players.
- Subnautica 2 Creature DNA Guide: Biosampler Tips 2026: creature-by-creature DNA yield guide with which samples to prioritize for each modification path.
Vehicles and mobility
The Tadpole submersible is Subnautica 2's primary vehicle in the Early Access build. It operates like a mobile base for deep dives: maintains its own internal air supply, has storage, and significantly extends how far you can range before needing to surface.
Vehicles are per-player. In a 4-player co-op session, every player needs their own Tadpole before any dive below 150m is practical. Building four Tadpoles requires coordinating resource gathering across the team, which is one of the main mid-game co-op coordination problems.
Subnautica veterans want a PRAWN equivalent: a powered exosuit for heavy terrain and deep zone work. Unknown Worlds hasn't confirmed one, but given the franchise history it would be surprising not to see something like it over the 2-3 year EA window. For now, the Tadpole is what there is.
- Subnautica 2 Vehicles Guide: Submersibles in Early Access: Tadpole build cost, upgrade path, internal storage, and how it changes dive range calculations compared to swimming.
Co-op and multiplayer
Four people underwater changes the survival math in ways that aren't obvious from the solo game. The systems work the same way, but the coordination layer on top of them is genuinely different.
The base is fully shared: all players build, access, and respawn at it. Individual inventories, oxygen bars, hunger meters, DNA profiles, and vehicles are all per-player. No health pool sharing, no oxygen sharing. When your oxygen hits 40%, you turn back, regardless of what the rest of the team is doing. The base doesn't keep anyone alive. You do that by communicating before things go critical.
Role splitting (Builder and Explorers) is the defining co-op decision. A Builder who stays near the starting beacon and focuses on module construction while Explorers range for resources gets the Fabrication module placed 45-60 minutes faster than a group where everyone explores. The efficiency gap is largest in the first 3 hours and matters less after the base is established.
Leviathan evasion changes in groups. Detection radii expand with more players nearby. Sending four players toward a Wakemaker simultaneously creates a larger combined detection signature than two players at the same distance. Smaller groups handle Leviathan encounters more cleanly than larger ones.
- Subnautica 2 Co-op Guide: Setup, Roles, and Strategy: session setup, Builder/Explorer role split, Leviathan group evasion, oxygen coordination, and the 4-player vs 2-player efficiency difference.
- Subnautica 2 Co-op Tips: Advanced Squad Strategies: advanced co-op strategies for experienced players covering biomod role builds and relay outpost coordination.
Subnautica 2 complete guide: Scanner Room
The Scanner Room is a base module that passively pings resources and fauna in a radius around your base. In the EA build, it's one of the most useful quality-of-life modules to build once the Fabrication module and oxygen network are in place. It removes the guesswork from resource farming: you can see what's in range before diving.
The scanner's upgrades extend range and improve scan fidelity for specific resource types. In co-op, a base-stationed player can use the scanner feed to direct Explorers to resource nodes without making the dive themselves.
- Subnautica 2 Scanner Room Guide: Upgrades and Efficient Use: how to place it for maximum range, which upgrades matter, and how to use the scanner feed to coordinate resource runs in co-op.
Subnautica 2 complete guide: how long to beat
The first story chapter takes most solo players 15-25 hours to reach the main milestone. Full biome exploration and all current content pushes to 35-50 hours. Co-op with an efficient Builder/Explorer split cuts the story milestone to 10-16 hours for the team.
There's no endgame yet: the current build is the first story chapter, with more to come across the EA window. What you're measuring is how long the current content holds up before you've seen most of what's available. For players who like thoroughness, there's enough in the EA build to fill 50 hours before the repetition becomes obvious.
- Subnautica 2 How Long to Beat: EA Story Length (2026): detailed time breakdowns by playstyle: story only, full exploration, completionist, and co-op.
- Subnautica 2 Resources: Biome Farming Guide for Early Access: which resources are in which biomes, efficient farming loops, and which nodes are worth the depth risk.
Early Access patches
Three hotfixes have shipped since launch, all addressing community-reported problems.
Hotfix 1, May 15, 2026: Fixed AMD GPU crash-on-startup errors, fixed an infrequent crash from the Ping feature, made analytics opt-in (only enabled after accepting Terms of Service), and reduced backend telemetry volume.
Hotfix 2, May 22, 2026: Added more Silver resource areas in the early-game region and more Troilite areas in the late-game region. Fixed Hammerhead behavior: they were being attracted to Tadpole submersible lights and following players back to bases; this is now corrected. Fixed a bug where players could be teleported back to base while piloting a Tadpole. Fixed an infinite oxygen bug triggered by dying from hunger or thirst inside a Tadpole. Fixed multiplayer disconnect crash and a late-game region crash. Improved performance on Epic visual settings. Added telemetry opt-out callout and revised the Terms of Service and Privacy Policy.
The Silver/Troilite additions specifically address a resource scarcity issue players reported in the first week: early-zone Silver for DNA modification and late-zone Troilite for vehicle upgrades were both underrepresented relative to how the game directs players to use them.
Hotfix 3, June 1, 2026: The most recent patch. Cuts Interior Wall build cost, addresses additional crash reports, and includes further balance and quality-of-life adjustments. EA 1.1 is the next planned major update.
All Subnautica 2 guides
All guides and patch coverage for the current Early Access build:
- Subnautica 2 Hotfix 2: Full Patch Notes and Changes: Full list of Hotfix 2 changes: Silver resource spots, Hammerhead light-tracking fix, two Tadpole bugs, crashes, and TOS rewrite.
- Subnautica 2 Update: Hotfix 3 Changes & What: The latest Subnautica 2 update is Hotfix 3, live now. It cuts Interior Wall cost...
Frequently Asked Questions
Is Subnautica 2 out now? Yes. It launched in Early Access on May 14, 2026 at $29.99 on PC via Steam. The launch build is the first story chapter in a multi-chapter game. Unknown Worlds estimates 2-3 years before 1.0.
Can you kill creatures in Subnautica 2? No. All fauna is invulnerable by design. Unknown Worlds confirmed this is intentional: the game is built around coexistence with the ocean, not domination of it. A third-party mod changes this, but the base game won't.
How many players can play co-op in Subnautica 2? 1-4 players online. Each player manages their own oxygen, hunger, and inventory. The base is shared. Vehicles are per-player.
What is the Subnautica 2 price? $29.99 USD at Early Access launch. The price increases at 1.0. One purchase covers all content updates through the full release.
How many biomes are in Subnautica 2 Early Access? 6 biomes in the current build. The deeper ones require upgraded gear or a Tadpole submersible to explore without constant danger.
Who made Subnautica 2? Unknown Worlds Entertainment developed and published Subnautica 2. Krafton is the parent company. The team had a publicized $250M bonus dispute with Krafton, launched on schedule, and retains creative control.
Is Subnautica 2 on Game Pass? Yes. Subnautica 2 launched day one on Xbox Game Pass Ultimate and PC Game Pass alongside Early Access. It's available on PC via Steam and Epic Games Store, and on Xbox Series X|S.
Related Reading
- Subnautica 2 Beginner Guide: Systems, Survival, First Hours: Subnautica 2 beginner guide: oxygen, DNA modification, food, base timing, and the 5 mistakes new.
- Best Early Access Games Worth Buying Right Now: May 2026: Early access games worth buying in May 2026: six picks including Windrose and Subnautica 2,.
References
- Subnautica 2 on Steam: Unknown Worlds Entertainment, Early Access May 14 2026, $29.99
- Unknown Worlds Entertainment: developer site, devlogs, and Early Access roadmap updates
- r/Subnautica: community discussion, player reports, and developer responses including the immortal fauna confirmation
About the author

Senior Critic & Analyst
Former game data analyst turned critic with 11 years covering indie and mid-tier games. Based in Austin. Runs spreadsheets on games most people just play.
- 11 years games criticism
- Former game economy analyst
- Roguelike and strategy specialist


Disclaimer
This article is published for informational and entertainment purposes. It does not constitute professional financial, legal, or technical advice. Game performance, online services, patch schedules, and store listings change. Verify critical details (pricing, system requirements, regional availability) with publishers and storefronts before you buy. Affiliate links, where present, help support our editorial work and are labelled in our affiliate disclosure.