
GameBrief · Guides
Alabaster Dawn Skill Tree: Best Builds and Tips 2026

Reviewing
Alabaster Dawn
Radical Fish Games
The alabaster dawn skill tree is one mastery tree per weapon, 8 weapons total, and the single most important build decision in Radical Fish Games' May 2026 EA launch. Spread investment thin and Chapter 2 hits a wall you won't see coming. Commit early and the combat opens up in ways the first two hours never hint at.
This guide covers how the mastery tree works across all 4 elements, which tier unlocks matter most, 3 build paths for different playstyles, and when to stop experimenting and actually commit.
TL;DR: Focus one weapon to Tier 2 before touching anything else. Two different elements in your 2 slots, primary element is your commit, secondary is coverage only. Tier 3 changes how the weapon plays (not just the numbers). Aggressive build beats a cautious one in Chapter 2 onward. Use the first settlement restoration as your mastery commitment deadline.
How the alabaster dawn skill tree works (quick answer)
Each of Alabaster Dawn's 8 weapons has its own separate mastery tree. You equip 2 weapons at a time from Juno's 4 available elements, with 2 weapons per element in the current EA build. Both equipped weapons are active during combat simultaneously.
Each mastery tree runs 3 tiers. Tier 1 unlocks the weapon's first passives and one additional active move. Tier 2 adds another passive and extends the base combo. Tier 3 is the payoff: a unique active move that doesn't exist at lower tiers, plus a passive that changes how the weapon's mechanics behave rather than just buffing damage numbers.
Mastery materials come from enemies, exploration, and settlement restoration rewards. The supply isn't unlimited. Chapter 1 gives you enough to push one weapon comfortably to Tier 2, or two weapons partway. The design is built around commitment, not experimentation.
Tiers are per-weapon, not per-element. Having Fire at Tier 2 on one weapon doesn't carry over to the other Fire weapon. All 8 trees are independent.
Key Takeaways
- 8 weapons total, 4 elements (2 weapons per element), 2 active slots
- Each weapon's mastery tree runs 3 tiers with independent investment
- Tier 3 changes weapon behavior, not just stats (worth reaching on your primary)
- Chapter 1 supplies roughly enough materials to push 1 weapon to Tier 2
- Primary weapon: commit before the first settlement restoration
- Secondary weapon: Tier 1 is acceptable until Chapter 2 materials open up
- Aggressive playstyle with depth mastery outperforms cautious play by Chapter 2 significantly
The 3 build paths and when to use each
Alabaster Dawn's combat draws from Devil May Cry and Kingdom Hearts. That design context matters for build choice: the fights are built around aggressive commitment, aerial follow-ups, and working through a combo to its finish rather than retreating after one hit. Each of the 3 build paths below works within that framework but emphasizes a different aspect.
Build 1: Aggressive single-element focus
Pick one element, equip both weapons from it, and push the primary to Tier 3 before entering the roguelite side story. The secondary (same element) stays at Tier 1 through the entire main EA campaign.
Same-element pairings mean both weapons share the same enemy weakness window. You lose elemental coverage, but you hit Tier 3 faster because you're only pushing two trees instead of splitting across different elements. By mid-Chapter 2, your primary is at Tier 3 and your damage output inside that element's weakness window is the highest available to any build.
The problem is that Chapter 1 masks resistances. Enemy variety is low, so you don't feel the gap. Chapter 2 introduces resists more actively, and when an enemy type genuinely shrugs your element, you're going to feel it. This build requires accepting harder fights on those enemy types. If that sounds frustrating rather than interesting, go with Build 2.
Good for players comfortable with the action-RPG format who want to feel the combat's ceiling fast.
GODEEPER: For more on how Alabaster Dawn's combat differs from CrossCode's and why the aggressive approach works, the Alabaster Dawn tips and beginner guide covers the tempo difference and why CrossCode-style cautious play undersells the fight system.
Build 2: Two-element coverage (recommended for first playthrough)
Pick two different elements, equip one weapon from each, and push the primary to Tier 2 while keeping the secondary at Tier 1. This is what the mastery economy in Chapter 1 is calibrated for.
One weapon at high mastery handles your primary combat and boss fights. The secondary is there for enemy types your primary is weak against. You're rarely at a serious disadvantage because one of your two elements almost always matches something in the current fight.
Your secondary stays weaker than it would be in Build 1. That's fine. The secondary's job is coverage, not output. A Tier 1 secondary in a useful element beats a Tier 2 secondary in an element that overlaps with your primary.
On element pairing: Chapter 1 doesn't punish the choice hard enough to make it matter much. Pick whichever element's first weapon feels best in your hands during the opening 90 minutes, then choose something different for coverage. Don't overthink it. Commit before the first settlement restoration.
Good for a first playthrough, anyone new to the game, or anyone who doesn't want resistant-enemy fights to be a hard wall.
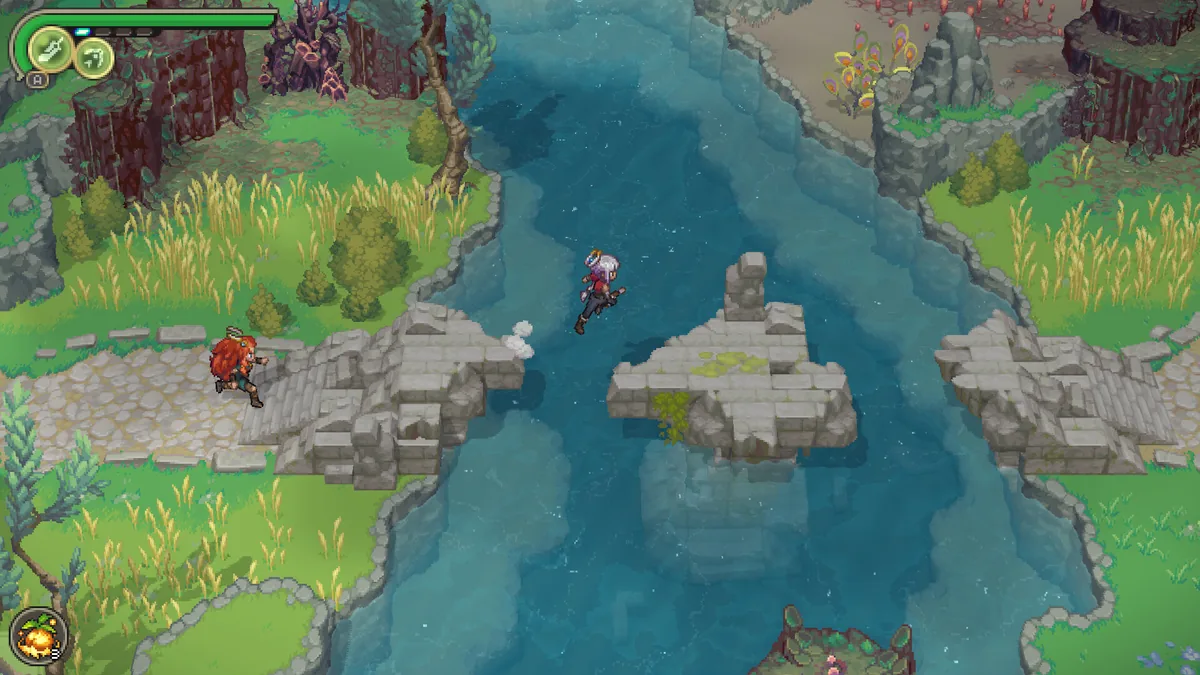 Getting between settlements and dungeons is its own traversal challenge. Mastery investment pays off once you're through the door and into a fight, not on the way there.
Build 3: Secondary investment for the roguelite side story
Two-element pairing, primary at Tier 3, secondary pushed to Tier 2 before entering the roguelite content. This one takes longer than the other two builds, but it's specifically for players going deep on the side story.
The roguelite content scales difficulty against your mastery investment. Players who enter with a Tier 3 primary and a Tier 1 secondary find the later waves significantly harder than the main campaign implied. Getting the secondary to Tier 2 first gives you enough flex for the waves that rotate through different elemental types quickly.
The catch: Tier 2 on a secondary requires materials beyond what Chapter 1 provides. Chapter 2 story content and its settlement restorations cover the gap, so don't rush into the side story until you've cleared the main EA content at least once. It's end-of-EA content, not a parallel track.
Good for players who've finished the main campaign and want to push the roguelite at its intended ceiling.
Which skills to prioritize in each tier
All 8 weapons share the same structural shape: Tier 1 gives a passive and one active move, Tier 2 extends the base kit, Tier 3 is the defining unlock. What changes is what each tier actually does for a given weapon type.
Spend Tier 1 on your primary weapon as soon as mastery materials drop from early enemies. The Tier 1 passive on most weapons directly improves your most-used attack, either an extra hit in the combo string or a damage buff on a specific attack type. The Tier 1 active varies: aggressive weapon types usually get an air extension here, defensive types often get a counter move.
Tier 2 is the upgrade that actually changes fights. The combo extension at Tier 2 is the single most impactful node in the whole tree for most weapons. The Tier 2 passive tends to be situational (usually tied to staying airborne or maintaining combo chain length), but it matters on boss fights. Push Tier 2 on your primary before touching anything else.
Tier 3 is why you commit to a primary in the first place. Each weapon's Tier 3 active is genuinely distinct, not a scaled-up version of the lower-tier moves. On an offensive archetype, Tier 3 might unlock a ground-slam follow-up after an aerial combo. On another, it might be a charge-up move with a longer punish window on landing. The Tier 3 passive changes weapon behavior rather than just bumping numbers, and that distinction matters more than it sounds. A few of the behavior-altering passives change the feel of a fight at Tier 3 in ways that don't read clearly from the description screen. Don't judge them without trying them.
GODEEPER: Radical Fish Games' structural decisions on the skill tree relate directly to how the dungeon format changed from CrossCode. The Alabaster Dawn early access overview covers what the studio said about balancing mastery depth against the shorter dungeon format.
Nuemera boss fights and build relevance
Bosses in Alabaster Dawn are Nuemera, creatures corrupted by Nyx, the game's antagonist force. Each Nuemera boss has an elemental weakness window during the fight, a phase where their resistance drops and a specific element deals increased damage.
Your mastery investment matters for these fights in a specific way. The weakness window is time-limited. A high-mastery weapon hits the window harder in fewer moves. A Tier 1 weapon in the correct element still does increased damage but burns through the window more slowly, meaning you need the window to open twice rather than once to use it efficiently.
For the two-element coverage build (Build 2 above), one of your two elements will almost certainly match a boss's weakness. For the aggressive single-element build, you hit harder in your element's window but may need to play defensively during phases where your element isn't favored.
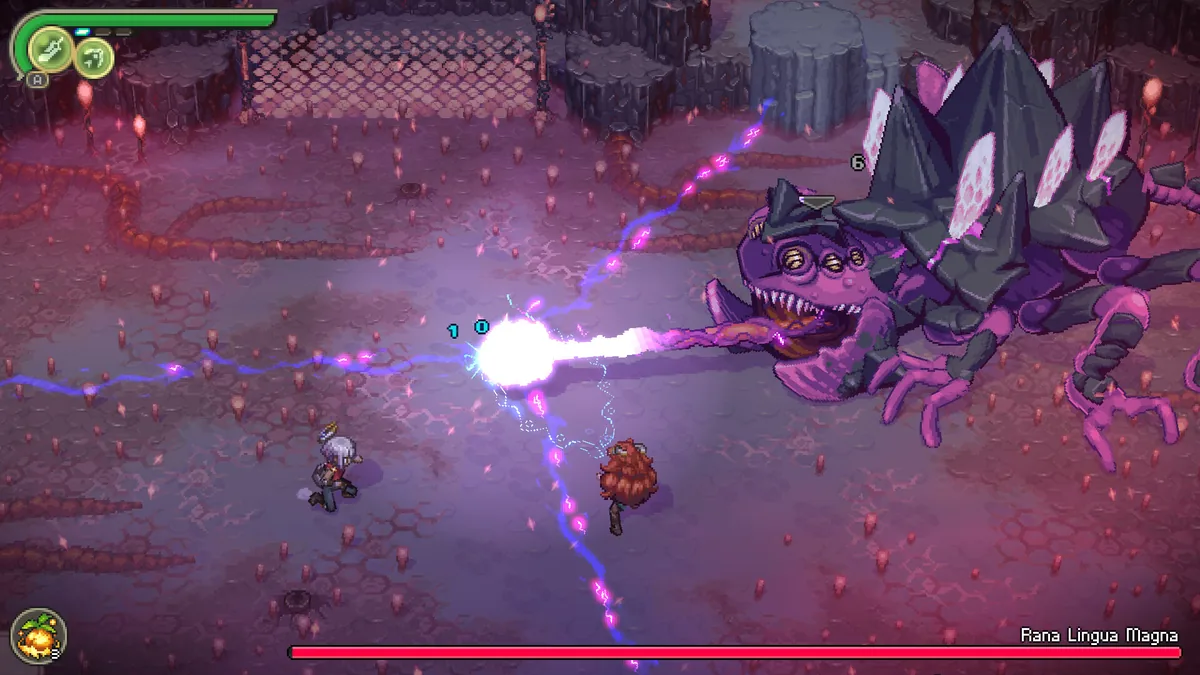 Nuemera boss fights have timed weakness windows where your primary element deals significantly higher damage.
Settlement restoration matters for boss preparation because it provides mastery materials. The first major Nuemera fight after the Chapter 1-to-2 transition is the first real test of your mastery depth. Players who've spread investment thin find this fight substantially harder.
When to swap weapons and restart a build
New weapons unlock through story progression and settlement restoration, and the temptation to swap your primary each time is strong. The game never tells you not to.
Swapping your primary weapon before reaching Tier 2 on your current one splits mastery investment without achieving the depth that makes either weapon effective. The materials cost to push your new primary from Tier 0 to Tier 2 is the same as it was for your original choice. If you switch twice in Chapter 1, you arrive at Chapter 2 with 2-3 weapons at Tier 1 and nothing higher.
The practical rule: use your first settlement restoration as the deadline to commit and stop testing. After that milestone, your primary is locked until you clear Chapter 2. You can swap exploration afterward once Chapter 2 materials are flowing.
For players who genuinely misread a weapon and want to change primary mid-Chapter 1: do it before the first settlement, not after. That's the one window where the mastery materials haven't been spent.
Tips: skill tree decisions across the EA build
Do settlement restorations in the order the story presents them, not in whatever order looks accessible. Each restored settlement provides a mastery material reward, and the numbers are calibrated: first restoration gets you to Tier 2, subsequent ones carry you toward Tier 3. Trying to sequence-break for a distant settlement early disrupts that supply curve.
Save manually before every Nuemera boss fight. Autosaves cover the room entrance but not the fight itself. A disconnect mid-boss restarts from before the room. Manual saves cost nothing.
Several Chapter 2 enemy variants have a vertical vulnerability that ground combos don't reach well. If a ground approach isn't clicking on a specific cluster, go aerial before assuming the build needs adjusting.
Alabaster Dawn is Steam Deck Verified. Default graphical settings run stably without any manual adjustment, and the mastery UI works fully on controller without needing to touch the mouse.
Frequently Asked Questions
How many weapons are in Alabaster Dawn's skill tree? There are 8 weapons total in the May 2026 EA build, split evenly across 4 elements (2 per element). Each weapon has its own mastery skill tree with 3 tiers. You can only equip 2 weapons at once, so every build runs a 2-weapon combination and focuses mastery investment on those 2 trees rather than all 8.
What is the best build for beginners in Alabaster Dawn? Equip one weapon from two different elements, push the primary to Tier 2 mastery before investing anywhere else, and use the secondary for elemental coverage only. The specific element combination matters less than mastery depth. A Tier 2 weapon in any element outperforms a Tier 1 weapon in the theoretically optimal element.
What unlocks at Tier 3 mastery in Alabaster Dawn? Tier 3 mastery unlocks a unique active move specific to each weapon type, plus a passive that changes the weapon's core behavior. Tier 3 is expensive in mastery materials and is typically reached on your primary weapon in mid-Chapter 2.
Should I spread mastery across all 8 weapons or focus on one? Focus. Spreading mastery across multiple weapons leaves you with several Tier 1 weapons, which is worse than two weapons at Tier 2. The mastery material supply in Chapter 1 is calibrated for pushing one weapon to Tier 2.
Which element should I pick first in Alabaster Dawn? Chapter 1 enemies do not punish element choice heavily, so the starting pick is a preference call. What matters is committing before the end of Chapter 1. The first settlement restoration provides enough mastery material to reach Tier 2 on a single weapon. Use that as your deadline.
What is the aggressive build in Alabaster Dawn? An aggressive build front-loads mastery into a single high-output weapon, uses air attacks consistently, and commits fully to combo chains. Pair with a coverage element secondary kept at Tier 1 until Chapter 2 materials open up.
Can you respec mastery points in Alabaster Dawn? The May 2026 EA build does not include a full respec option. Mastery materials are not refunded when you switch your active weapon loadout, making primary weapon selection a meaningful commitment.
References
- Alabaster Dawn on Steam: official EA page, patch notes, Radical Fish Games
- Radical Fish Games: studio behind CrossCode and Alabaster Dawn
- Alabaster Dawn Roadmap 0.2.0 announcement: Radical Fish Games confirming 7 total chapters and mastery economy plans
- r/AlabasterDawn: community discussions on build strategies and weapon tier comparisons
Related Reading
- Alabaster Dawn Tips: Weapons, Elements, and Cabbage: covers the weapon slot system and element commitment rules in detail, the starting point before skill tree investment.
- Alabaster Dawn Review: CrossCode's Shadow, Its Own Light: the full 8.0/10 EA review covering how the combat system and mastery depth land in practice.
- Alabaster Dawn Early Access: CrossCode Successor Overview: what Radical Fish changed from CrossCode structurally and why, context for understanding the mastery system's design.
- Farever Builds Guide: Best Class: another action-RPG with a per-weapon specialization model, a useful parallel if the Alabaster Dawn skill tree structure clicks for you.
Was this guide helpful?
About the author

Senior Critic & Analyst
Former game data analyst turned critic with 11 years covering indie and mid-tier games. Based in Austin. Runs spreadsheets on games most people just play.
- 11 years games criticism
- Former game economy analyst
- Roguelike and strategy specialist
Keep reading



Disclaimer
This article is published for informational and entertainment purposes. It does not constitute professional financial, legal, or technical advice. Game performance, online services, patch schedules, and store listings change. Verify critical details (pricing, system requirements, regional availability) with publishers and storefronts before you buy. Affiliate links, where present, help support our editorial work and are labelled in our affiliate disclosure.
Comments
Loading comments…