
GuideAlabaster Dawn
Alabaster Dawn Somu's Dream Guide: Keys & Blessings
About the game
Alabaster Dawn
Radical Fish Games
This Alabaster Dawn Somu's Dream guide explains the game's optional roguelite mode as it exists in the current Early Access slice. Somu's Dream is not a second campaign with a fixed dungeon route. It is a sequence of procedurally assembled rooms, short-term Blessings, and a persistent Token economy that rewards finishing Layers cleanly.
The mode is easy to misunderstand because the main game introduces it through story scenes, while the useful rules are spread across room types, Perks, and currency screens. You can enter a run without knowing what a red-smoke door means, waste Shards on a Blessing that does not match your Aspect, and leave with a fraction of the Tokens you could have earned.
TL;DR: Somu's Dream unlocks through Dream within a Dream near the end of Chapter 2. Each Layer is a procedural room maze with Keys, optional rewards, and a boss door. Spend Shards during the run, then finish at the boss-room elevator when you can. Blessings disappear when you leave, while Tokens buy persistent Perks and exchange rewards.
Alabaster Dawn Somu's Dream guide: quick answer
Somu's Dream is Alabaster Dawn's optional roguelite mode. The current wiki snapshot describes three Layers, each themed after a major region, with a Key hunt leading to a Layer boss. A successful boss clear lets you descend, while leaving the mode converts your remaining Shards into Tokens and preserves the long-term rewards you purchased with those Tokens.
That makes the mode a two-part decision rather than a simple gauntlet. During a run, you are building a temporary combat package from Blessings, food, and room rewards. Between runs, you are buying Perks and Token Exchange items. The first goal is survival. The second is learning which rewards make later runs more reliable.
Key takeaways for Somu's Dream
- Unlock the mode through Dream within a Dream, near the end of Chapter 2.
- A Layer is a maze of rooms, not a fixed left-to-right level. Find a Key, identify the boss door, and decide how much optional content you can afford.
- Shards are for the current run. Tokens are the persistent currency created when you leave.
- Blessings last for one run. Perks change the rules of later runs.
- The boss-room elevator is the safest exit for Token value. The wiki records a 0.5x multiplier for leaving by another route.
- The current public material is Early Access. Radical Fish's 0.2.0 update is still being developed, so room pools, Blessings, and Layer depth can change.
The complete Alabaster Dawn guide hub covers the wider Early Access boundary. If you are still learning the fixed-world dungeons, use the Alabaster Dawn dungeon exploration guide first. Somu's Dream asks for the same combat fundamentals, but it adds a risk calculation after every room.
How to unlock Somu's Dream
Somu's Dream unlocks through the Dream within a Dream story near the end of Chapter 2. You do not need to find a hidden class, collect a full weapon set, or finish every optional quest before entering. The story sequence is the gate, and the mode is designed as optional content alongside the Early Access campaign.
The first visit is a Tutorial Dream. The official wiki describes it as a one-Layer introduction with four rooms: a Start Room, a Blessing Room, a Combat Room, and a Boss Room. Somu appears during this first version to explain the mode. Exiting early changes dialogue, but the wiki records no other effect on progression.
That tutorial is useful because it teaches the basic loop without asking you to understand every Perk. Do not treat it as a full farming route. It is a controlled introduction to Keys, Blessings, a boss door, and the elevator. Once the regular Dream becomes available, the room mix and optional systems become more important than the opening tutorial.
Layers, Keys, and boss rooms
Each current Layer is a procedurally generated maze of rooms. The public wiki lists Layer 1 as Koro Valley, Layer 2 as Trial of Aether, and Layer 3 as Aurum Plains. It also records increasing enemy levels and Shop prices as you descend, with better rewards deeper in the Dream.
Your immediate objective is always the same: explore, collect a Key, find the locked boss door, and defeat the boss to descend. Combat Rooms can reward Keys, and unused Keys can carry into the next Layer. The boss door is always locked. A second locked door can appear, but the two doors are not interchangeable.
Look for red smoke under the door. That identifies the boss room. The other locked door leads to a room that grants a Blessing, such as a Blessing Room, Shop Room, or Trial Room. This small visual distinction saves a lot of backtracking. If you have one Key and see two locked choices, spend it according to your run plan rather than guessing which route advances the Layer.
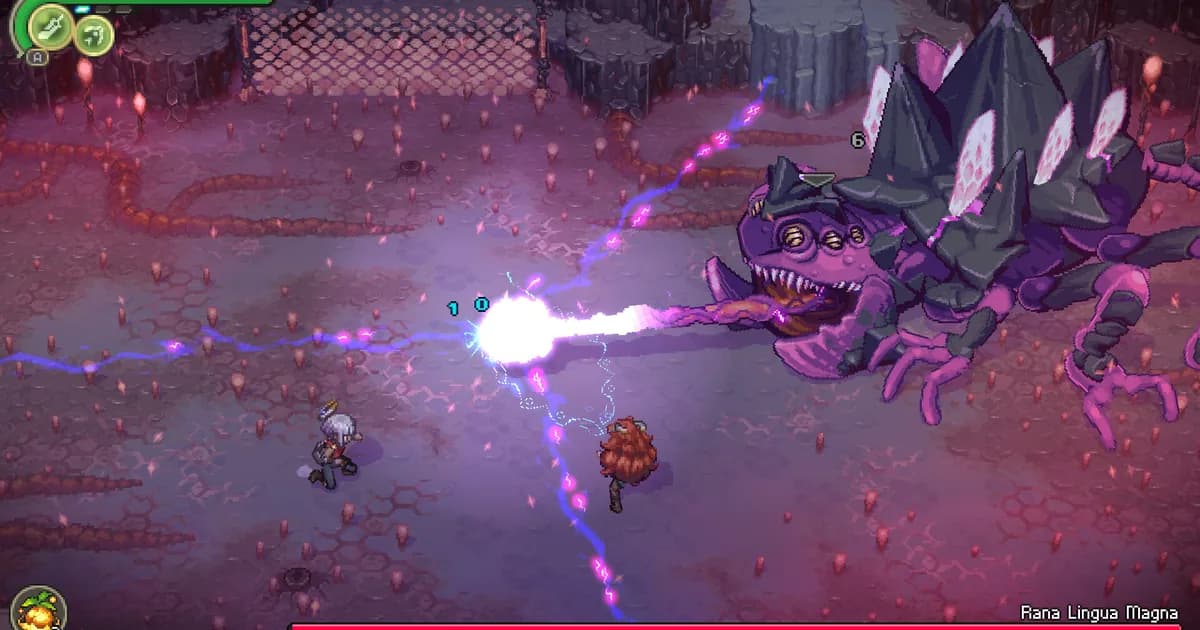
The current boss list is Layer-specific: Inferna Vespa for Koro Valley, Rana Lingua Magna for Trial of Aether, and Grandis Molis for Aurum Plains. Those names come from the current Somu's Dream page on the official wiki. They should not be treated as a full-game boss roster, especially while the 0.2.0 roadmap still lists missing boss work for upcoming content.
The Alabaster Dawn tips guide has the cluster's general combat advice, but its older build claims should be read against the latest official notes. In Somu's Dream, the safer rule is simpler: use the weapon and Aspect tools your current build actually provides, and avoid assuming an undocumented weakness table.
A run can make every route feel dangerous, so read the room symbols before spending a Key.
Shards, Tokens, and persistent progression
Shards are the currency inside a Dream. Enemies and forageables provide them instead of the ordinary items and experience used in the main world. Shop Rooms spend Shards on Blessings. The wiki also records a few Blessings and Perks that increase Shard drops, including Make it Rain and Treasure Goblin.
Tokens are the long-term currency. When you leave, leftover Shards become Tokens. The mode also records bonuses and penalties: the current wiki snapshot lists 250 Tokens for each Layer cleared, 5 per enemy defeated, 250 per boss defeated, another 250 for a flawless boss, and 1,000 for a flawless Layer. Taking damage subtracts one Token per damage point, while exiting through the menu subtracts 100.
The most important rule is the exit multiplier. The current wiki records a 0.5x Token multiplier when you leave by anything other than the elevator in a Boss Room. That makes a completed Layer valuable twice over: you get the Layer reward, and you preserve the better conversion by using the intended exit. If a run is collapsing, leaving is still better than losing everything, but it should be a deliberate safety decision.
Purple rooms combine combat movement with the environmental obstacles that make a Dream route costly.
Tokens buy Perks, which are persistent modifiers for future runs. The Token Exchange becomes available after completing the Dream once and offers additional items. Because the exact stock and costs are Early Access data, do not plan a permanent purchase order around a number that has not survived a patch. Buy the Perk that changes a problem you have actually encountered.
This separation also explains why a mediocre run can still be useful. A failed push can teach you which rooms drain healing, how many Shards a Shop Room needs, or whether a Blessing fits your current weapon. The run disappears, but the information improves the next decision.
Room types and route decisions
Room types tell you what a detour costs. Start Rooms are mandatory and mostly safe. Combat Rooms lock their doors and require you to clear the encounter, with a chance to reward a Key. Filler Rooms are less consistent and can contain forageables, small enemy groups, or simple obstacles.
Blessing Rooms offer a choice between two temporary Blessings. Shop Rooms offer two Blessings for Shards. Trial Rooms are harder multi-wave encounters that produce a Blessing chest if you clear them. Rest Rooms contain a cooking pot and can restore some Life, but the current wiki says they are toggled by a Perk and only appear every five Layers, which means Layer 1 is the relevant current case. Bounty Rooms provide many forageables and are also Perk-gated.
Treat optional rooms as a budget question. A Blessing Room is usually a safer upgrade than a Shop Room because it does not consume Shards. A Shop Room is attractive when you have enough currency and already know which kind of effect your build needs. A Trial Room is a good risk only when the reward can change the boss attempt, not when you are entering it with low Life and no healing plan.
The Alabaster Dawn dungeon guide covers the fixed-world exploration loop around cooking pots and Rest Rooms. The Dream version has its own limits, and the current wiki notes that cooking there gives fewer Healing Bulb charges than cooking outside the Dream. Save a recipe choice for the moment it will affect the next fight, not simply because the pot is available.
Blessings and depth rules
Blessings are temporary power-ups that last until you leave Somu's Dream. The current Blessings page separates them into three pools: Shop, Treasure, and Midnight Snack. Shop Blessings come from Shop Rooms, Treasure Blessings come from Blessing or Trial rooms, and Midnight Snack Blessings can drop from Combat Rooms when the Midnight Snack Perk is active.
Rarity is tied to depth. Common, Uncommon, and Rare Blessings can normally appear across the mode. The wiki records Exotic Blessings as Depth 3 rewards, while the Big Bounty Perk lowers the rarity requirement so Exotic effects can appear on every floor and Legendary effects can appear at Depth 3. That is a rules interaction, not a promise that a Legendary Blessing will appear in every run.
Useful examples include Mappa Mundi, which reveals the floor layout and locked gates; Energy Vampire, which increases Divine Charge gained from attacks; and Shadow Clone, which rewards a Perfect Dodge with a damaging clone. These are not universally best picks. Mappa Mundi has more value when navigation is costing you time, while Energy Vampire matters more for a build that can safely keep attacking.
Aspect restrictions matter too. Several Blessings are only active in Neutral or a named Aspect. Read the small requirement before buying an effect that looks stronger on paper. The Alabaster Dawn skill tree guide covers the older build discussion, but this mode-specific check is more reliable than a fixed tier list while the Early Access combat system is still moving.
Step-by-Step: a safe first regular run
1. Enter after the story unlock: Finish the Dream within a Dream sequence and use the Tutorial Dream to learn the door and reward symbols before trying to optimize Tokens.
2. Clear enough Combat Rooms to find a Key: Do not sprint through every unexplored door. A Combat Room can provide the Key needed for the boss door, and the fight also supplies Shards for later decisions.
3. Read the door before spending the Key: Red smoke means the boss room. A different locked door is optional reward content. Choose the boss when your current Blessings and Life are good enough to descend, or choose the reward when the run needs one more upgrade.
4. Spend Shards with a job in mind: Buy a Blessing that helps your actual weapon, Divine Charge plan, navigation problem, or survivability. Keep enough currency for a later Shop Room if the current Layer has one.
5. Use the elevator after the boss: The elevator is the intended clean exit and preserves the full Token multiplier recorded by the current wiki. Descend only when your Life and damage plan support another Layer.
6. Spend Tokens between runs: Buy a Perk that answers the failure you just experienced. Unlock map help if navigation was the issue, room options if rewards were too narrow, or survivability if damage penalties erased the run's value.
Tips for Somu's Dream runs
Keep one distinction in your head: a temporary Blessing solves the next room, while a Perk changes the shape of future runs. It is tempting to value the flashiest combat effect, but a navigation or economy Perk can create more successful boss attempts over time.
Do not burn every Key on the first locked reward door. The boss door is always part of the Layer's progression, and a second door may be the only optional reward route. If you cannot identify the smoke, pause at the threshold instead of spending the Key by reflex.
Use the cooking pot only when the result improves the next section. Food can recharge Divine Gear and restore Healing Bulbs, but the Dream version has its own limits. The Alabaster Dawn early access overview is useful for the broad scope question, not for current room costs.
Finally, write down the patch version when you test a route. The official 0.2.0 news post says new Blessings, Somu's Dream content, and additional gameplay are still being worked on. A reward that is sensible in the current three-Layer snapshot may move when the new dungeon and swamp content arrive.
Frequently Asked Questions
How do you unlock Somu's Dream in Alabaster Dawn? Somu's Dream becomes available through the Dream within a Dream story near the end of Chapter 2. The mode is optional, and its current entry point is tied to main-story progress rather than a separate menu unlock.
How many Layers are in Somu's Dream? The current wiki snapshot lists three Layers: Koro Valley, Trial of Aether, and Aurum Plains. Early Access updates can change that list, so treat it as a versioned snapshot rather than a promise about the finished game.
What are Shards used for in Somu's Dream? Shards are the run currency. Enemies and forageables drop them, Shop Rooms spend them on Blessings, and leftover Shards become Tokens when you leave the Dream.
What do Keys unlock in Somu's Dream? Keys open locked doors inside each Layer. The boss door always needs one, and a second locked door can lead to a Blessing, Shop, or Trial room. Red smoke identifies the boss door.
Do Blessings last after leaving Somu's Dream? No. Blessings are temporary run power-ups and last until you leave the Dream. Tokens are the persistent currency that buys Perks and Token Exchange rewards between runs.
What is the safest way to finish a first Somu's Dream run? Clear combat rooms for Keys, buy only a Blessing that supports your weapon or survival plan, and leave through the boss-room elevator when possible. That preserves the full Token multiplier for the run.
Related Reading
- Alabaster Dawn complete guide hub: cluster overview for the current Early Access slice.
- Alabaster Dawn dungeon exploration guide: fixed-world dungeons, settlements, and exploration decisions.
- Alabaster Dawn skill tree builds guide: Growth Chart context and build terminology, with Early Access caveats.
- Alabaster Dawn tips guide: general combat and navigation advice for new players.
- Alabaster Dawn early access overview: what is playable now and what remains on the roadmap.
- Alabaster Dawn review: a broader assessment of the current Early Access package.
- Best roguelike games 2026: comparison context for players who want more run-based games.
- Best indie games under $20 in 2026: a wider value-focused list for budget-conscious players.
References
- Alabaster Dawn on Steam: official Early Access description, combat systems, and roadmap boundary.
- Alabaster Dawn appdetails API: official Steam metadata checked during research.
- Alabaster Dawn official roadmap: Radical Fish's planned Early Access update structure.
- Somu's Dream on the official Alabaster Dawn Wiki: current Layer, room, currency, and exit rules.
- Blessings on the official Alabaster Dawn Wiki: current pools, rarities, and examples.
- Steam news for Alabaster Dawn: current 0.2.0 development status.
Was this guide helpful?
About the author

Senior Critic & Analyst
Former game data analyst turned critic with 11 years covering indie and mid-tier games. Based in Austin. Runs spreadsheets on games most people just play.
- 11 years games criticism
- Former game economy analyst
- Roguelike and strategy specialist
Keep reading
Alabaster Dawn Complete Guide: 5 Weapons, Builds & Tips
General · 13 min
Alabaster Dawn Dungeons Guide: Exploration and Settlements
General · 8 min
Alabaster Dawn Skill Tree: Best Builds and Tips 2026
Guides · 10 min

Alabaster Dawn Review: CrossCode's Shadow, Its Own Light
Reviews · 9 min

Alabaster Dawn Tips: 8 Weapons, 4 Elements, and More 2026
Guides · 9 min

Alabaster Dawn Early Access: CrossCode Fans Need to Know
General · 8 min
Game deals · affiliate links
Disclaimer
This article is published for informational and entertainment purposes. It does not constitute professional financial, legal, or technical advice. Game performance, online services, patch schedules, and store listings change. Verify critical details (pricing, system requirements, regional availability) with publishers and storefronts before you buy. Affiliate links, where present, help support our editorial work and are labelled in our affiliate disclosure.
Comments
Loading comments…