ARC Raiders · Guides
ARC Raiders Maps Guide: All 6 Zones and Extractions
ARC Raiders maps guide covering all 6 zones with extraction points, key POIs, difficulty ratings, and what sets Stella Montis apart as the endgame map.

This ARC Raiders maps guide covers all six zones, what the terrain asks of you, where extractions cluster, and how to sequence your map progression.
Six zones. One underground base. Every run you pick a zone, drop in, and try to get back to Speranza with something worth keeping. The maps are not interchangeable: each one has different terrain logic, loot distribution, extraction point availability, and recommended entry level. Running Stella Montis at level 10 because it sounds interesting is a fast way to lose a full kit.
TL;DR: ARC Raiders has six zones: Blue Gate (beginner mountain pass), Dam, Spaceport, Buried City, Riven Tides (coastal and vertical), and Stella Montis (Level 25+ endgame, smallest footprint but highest loot value). Each has its own terrain logic, loot distribution, and extraction mix, so sequence your progression by recommended level rather than by which name sounds interesting. Storms disable Raider Hatches and cut the active extraction count on every map.
Key Takeaways
- 6 zones total: Dam, Blue Gate, Spaceport, Buried City, Stella Montis, Riven Tides
- Stella Montis is endgame: Level 25+, smallest zone, highest loot value, hardest ARC units
- 4 extraction types: cargo elevators (~90s), metro stations, airshafts (~60-70s), Raider Hatches (15s, key required, silent)
- Raider Hatches are disabled during Electromagnetic Storm conditions
- Riven Tides rewards verticality play: elevation control matters more here than in flatter zones
How Zones Work in ARC Raiders
Before the zone breakdown: every map runs on the same core structure. You insert from Speranza, move through ARC-controlled terrain, collect loot, and find an extraction point to call your ride out. The extraction call is loud: a cargo elevator siren broadcasts across the zone. Everyone knows where you are the moment you activate it.
The zones differ in how much cover exists between you and the extraction point, how far loot concentrates into discrete areas versus spreading across open terrain, and how dense the ARC patrol routes are. Difficulty scales with zone level, but zone level is a guideline, not a lock.
For extraction mechanics specifically (how to actually use each type, what happens if you miss a Raider Hatch window, and how the alarm radius works) the ARC Raiders extraction guide covers the full breakdown.
All 6 Zones
Dam (Alcantara Power Plant)
Difficulty: Entry to mid
Terrain: Waterlogged industrial, toxic zones, narrow corridor interiors
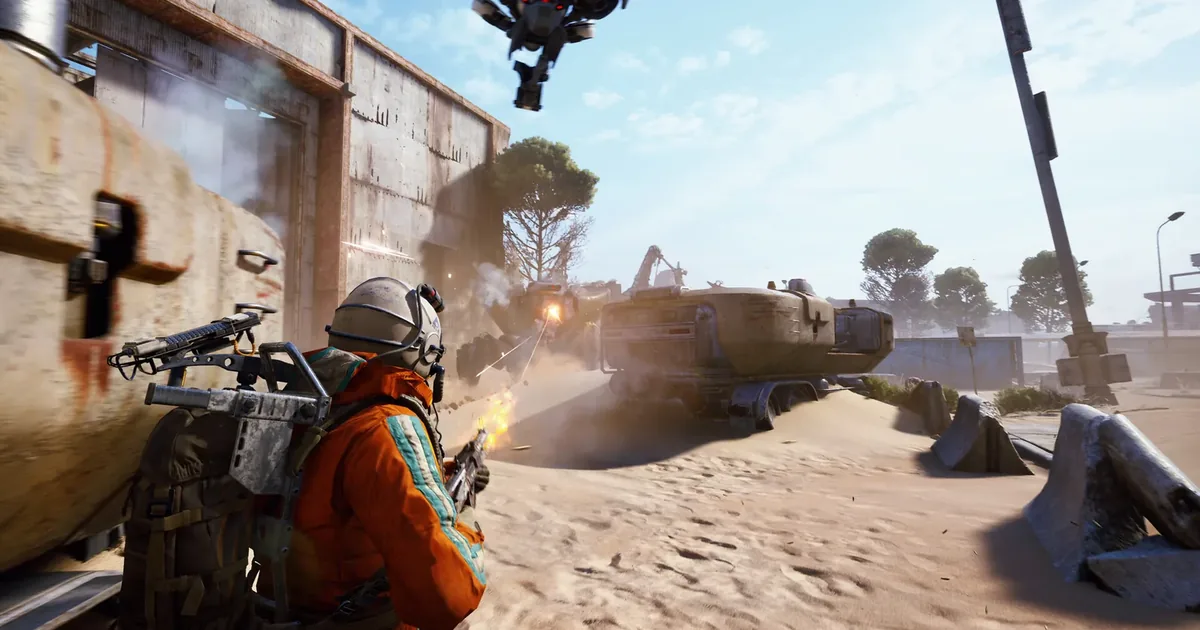
The Dam is a former Raider stronghold: the ARC machines took it, and the environment still shows signs of the prior occupation. Toxic waterlogged sections restrict movement paths in certain areas, pushing Raiders into predictable choke points. The interior corridors of the power plant itself are close-quarters, which makes shotguns and SMGs more relevant here than on open-terrain maps.
Loot concentrates in the plant's interior zones and along the upper catwalks. The terrain rewards methodical clearance over fast movement: players who rush through the corridors without checking elevation angles tend to take damage from ARC units positioned above them.
Multiple cargo elevator extraction points are distributed across the zone. The interior extraction points are typically more defensible on approach but harder to reach from certain loot-dense areas. For a full breakdown of patrol routes, loot priority locations, and the extraction sequence specific to this zone, the ARC Raiders Dam guide covers it in detail.
Blue Gate
Difficulty: Entry
Terrain: Mountain pass, elevated terrain, natural chokepoints
Blue Gate is functionally the new player zone. A mountain pass with perilous mountain ranges as the primary terrain feature: the environment channels players through defined routes rather than offering full open-terrain navigation. The zone teaches extraction timing and patrol avoidance without overwhelming a player who's still learning the insertion and extraction flow.
New Raiders should spend a few sessions here before moving to Spaceport or Buried City. The ARC Raiders beginner guide covers the full early progression sequence including when to push into harder zones.
Spaceport (Acerra Spaceport)
Difficulty: Mid
Terrain: Industrial, large open areas, launch infrastructure
The Spaceport is the first zone that punishes players who played Blue Gate as a pure corridor shooter. Acerra Spaceport has Exodus shuttle infrastructure: large open areas between structures, launch pads, and clearings between hangar buildings that create long sightlines. Players used to the close-range angles of the Dam or the narrow passes of Blue Gate will get picked off crossing open ground.
Loot quality steps up here. The hangar interiors and shuttle staging areas have higher-value items than any entry-level zone. ARC units are more aggressive, and the open terrain means audio discipline matters more: movement noise carries differently across the launch pads than through interior corridors.
This is where loadout choices start mattering in a measurable way. The ARC Raiders skill tree guide covers which upgrades pay off most for the mid-tier zone difficulty.
 Open terrain at Acerra Spaceport: the first zone where crossing a clearing without a plan means eating damage from ARC units positioned at distance.
Buried City
Difficulty: Mid
Terrain: Arid wasteland, sand dunes, narrow streets, old-world architecture
The Buried City is the most distinct visual zone in the game: arid wasteland with exposed sand dunes, narrow winding streets, and old-world architecture that creates a maze-like layout in certain district areas. It's the only zone with metro station extraction points, which function similarly to cargo elevators in mechanics but have different placement logic across the map.
The narrow streets work in the player's favor when retreating and against them when trying to push through. ARC units that set up in multi-story ruins gain height advantage that's hard to counter at ground level. Movement through the street network requires knowing which routes open up and which dead-end, making map knowledge more valuable here than in the more straightforward layouts of Blue Gate or Spaceport.
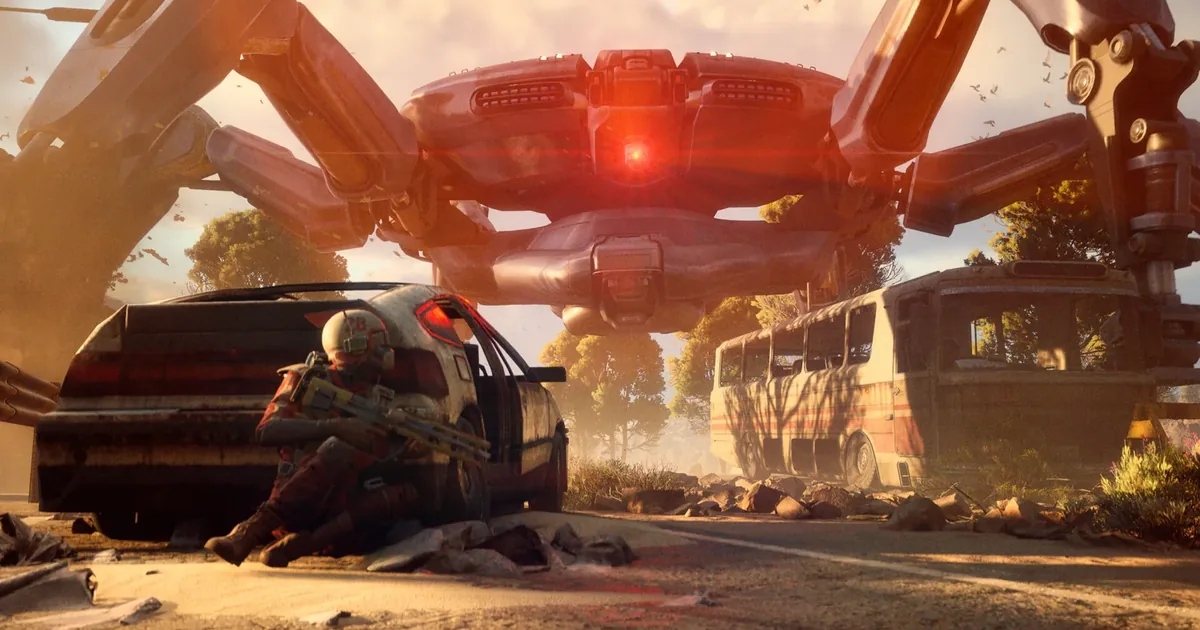
Stella Montis
Difficulty: Endgame (Level 25+ recommended)
Terrain: Snow-covered mountain, compressed map footprint, high-value loot
Stella Montis is where the zone design flips the formula. It's the smallest zone by map footprint (only 692 discoverable markers compared to the broader marker counts of mid-tier zones) but it concentrates the highest-value loot and the most dangerous ARC units into that smaller area. Every encounter matters more because the zone doesn't give you the space to disengage and reset.
The compressed footprint means every encounter matters more: you can't disengage and reset the way you can in larger zones. Slower, more deliberate movement pays off here more than aggressive pushes that work in Spaceport.
Running Stella Montis below the recommended level is technically possible but expensive in kit terms. The loot quality offsets the risk at appropriate levels: below that, you'll spend more on loadout replacement than you extract in value.
GODEEPER: Getting to Level 25+ for Stella Montis is faster with the right skill tree investment: Detection Radius Reduction first, Safe Pocket Capacity second. ARC Raiders skill tree tier list →
Riven Tides
Difficulty: Mid to late
Terrain: Coastal, beaches, cliffs, flooded industrial zones
Riven Tides is the map that most rewards vertical play. Beaches, cliffs, and flooded industrial facilities create a zone where elevation is a strategic resource, not just an aesthetic choice. Players who use high ground to control sightlines across the coastal flats or the flooded sections fight a different game than players who stay at sea level.
The flooded areas introduce movement restrictions similar to the Dam's toxic zones: certain paths are cut off or slowed, which concentrates Raiders and ARC units through predictable corridors. The cliff sections offer the best sightlines in the game for mid-range engagements, but reaching them takes time that leaves you exposed during the approach.
Extraction points are distributed across beach access points and elevated industrial platforms. The elevated extraction points are harder to reach but less predictable for ambushes; beach extractions are faster to reach but more exposed.
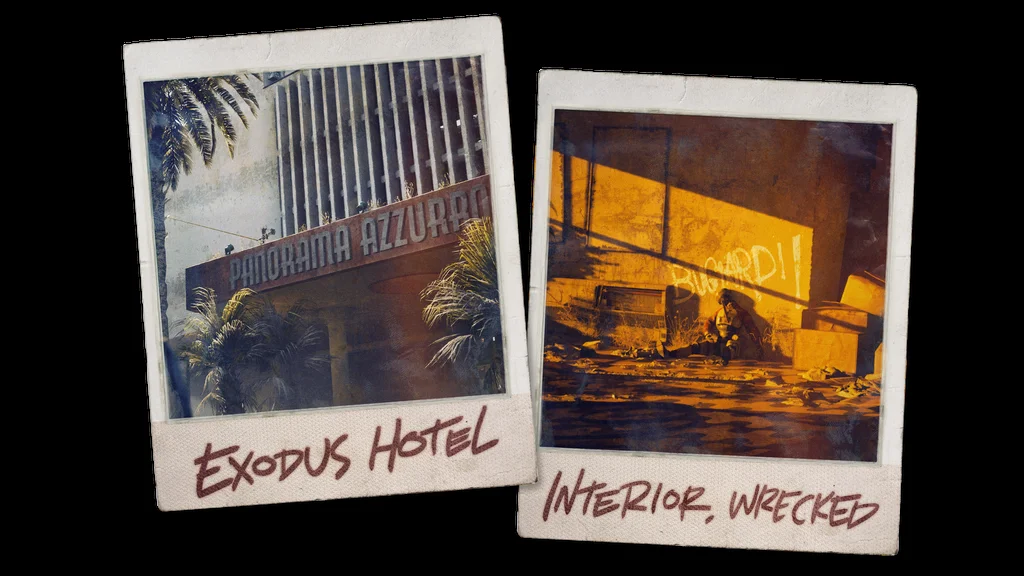 Official Embark Studios scout report cards for Riven Tides: the Exodus Hotel structure and its flooded interior are two of the zone's key loot cluster areas.
Step-by-Step: Running a New Zone for the First Time
Using this ARC Raiders maps guide, here is how to approach a zone you haven't run before without losing your kit to avoidable mistakes.
1. Check map modifiers before inserting. Electromagnetic Storm conditions change what extractions are available: Raider Hatches are disabled and fewer extraction points are active. Don't plan a Hatch exit if the storm is running.
2. Run your first session without a loot objective. Identify the patrol routes and all extraction point locations. A dead run that teaches you where three cargo elevators are is worth more than a lucky loot extraction you can't replicate.
3. Note the terrain layer that applies to this zone. Interior corridors (Dam), open sightlines (Spaceport), street networks (Buried City), coastal cliffs (Riven Tides). Each layer changes which weapons are relevant and how patrols move.
4. Find two extraction fallbacks before you start looting. Know your primary and secondary exit before your inventory is full. Stella Montis and Riven Tides have fewer total extraction points: fallbacks matter more there than in larger zones.
5. Move at the zone's pace, not your preferred pace. Spaceport punishes rushing open ground. Dam rewards slow methodical clearance. Buried City rewards knowing which dead-end streets to avoid. Let the terrain set the tempo.
6. On second and third runs, add one loot route per session. Build map knowledge incrementally. Players who try to learn the full zone on run one and loot aggressively usually just learn where they died, not how to avoid it.
Zone Progression Recommendation
Running all six zones in difficulty order is the cleanest progression path:
- Blue Gate: Learn extraction, patrol timing, basic ARC behavior
- Dam: Apply interior tactics, manage terrain hazards
- Spaceport: Adapt to open terrain, extend effective engagement range
- Buried City: Navigate street logic, use metro extractions
- Riven Tides: Develop vertical play, coastal terrain management
- Stella Montis: Endgame extraction for high-value runs (Level 25+ recommended)
Stella Montis is the only zone with a publicly stated level recommendation. The others scale broadly with progression: player skill and map knowledge matter as much as character level across the first five zones.
Extraction Points per Zone
All zones have multiple extraction point locations. The specific count and type distribution varies:
- Cargo elevators: available on all zones, loudest alarm, ~90 second extraction timer
- Metro stations: Buried City only, mechanics similar to cargo elevator
- Airshafts: available on most zones, ~60-70 seconds, engine noise less broadcast than elevator siren
- Raider Hatches: available on most zones (not during storm conditions), 15-second window, silent, requires a single-use Raider Hatch Key
The silent extraction from a Raider Hatch is the strongest move when it works. The 15-second window is unforgiving: if you have the key and miss the window, the key is consumed without extraction. Practice the activation timing before you spend a good key on a high-value run.
GODEEPER: Every extraction type in detail: timers, alarm radii, the activation sequence, and how to hold position during the countdown. ARC Raiders extraction guide →
Tips for Learning New Zones
First run on any zone: don't fight. Learn the patrol routes and extraction point locations before committing to loot routes. A dead run that teaches you where three cargo elevators are is worth more than a lucky extraction that you can't replicate.
Check extraction point density before loading. Maps with more extraction points give more exit options if your primary gets ambushed during activation. Stella Montis's compressed footprint means fewer total extraction points: know your fallback before you need it.
Audio discipline matters more in open zones. Movement noise carries differently across Spaceport's launch pads than through Dam's interior corridors. In tighter zones like Buried City, the street network provides cover that open-terrain maps don't: adjust movement speed accordingly.
Storm conditions affect every zone. When an Electromagnetic Storm modifier is active, Raider Hatches are disabled and fewer extraction points are available than normal. If you're planning a Raider Hatch extraction, check the map modifier before inserting.
Frequently Asked Questions
How many maps are in ARC Raiders? Six zones: Dam, Blue Gate, Spaceport, Buried City, Stella Montis, and Riven Tides. Each has distinct terrain, patrol density, loot distribution, and extraction point types.
What is the hardest map in ARC Raiders? Stella Montis: designed for Level 25+ players. It's the smallest zone by landmass with 692 discoverable markers but concentrates the highest-value loot and most dangerous ARC units into that compressed area.
What are all the extraction point types in ARC Raiders? Four types: cargo elevators (~90s, loud siren), metro stations (Buried City only, ~90s), airshafts (~60-70s, less broadcast), and Raider Hatches (15-second window, silent, requires a single-use key). Full breakdown in the ARC Raiders extraction guide.
Which ARC Raiders map is best for beginners? Blue Gate: a mountain pass that funnels players through the core systems before the terrain complexity of mid-tier zones. Follow it with the ARC Raiders beginner guide for the first few runs.
Does each map have multiple extraction points? Yes. Every zone has multiple extraction point locations across different types. Raider Hatches are disabled during Electromagnetic Storm conditions, and storms also reduce the total active count compared to normal.
What is Riven Tides in ARC Raiders? A coastal zone with beaches, cliffs, and flooded industrial areas. It rewards vertical play: elevation control matters more here than in flatter zones. Mid-to-late difficulty, distinct from the inland industrial maps.
Related Reading
- ARC Raiders beginner guide: the extraction loop, loot zones, and vendor basics every new Raider needs before picking a map.
- ARC Raiders extraction guide: all four extraction types, their alarm radii, and when a Raider Hatch Key is worth it.
- ARC Raiders Dam guide: a full zone breakdown for the close-quarters Alcantara Power Plant.
- ARC Raiders Spaceport map guide: open-terrain loot routes and patrol behavior on Acerra Spaceport.
- ARC Raiders Stella Montis guide: how to survive the Level 25+ endgame zone and its compressed high-value loot.
- ARC Raiders Augments Guide: Best Frames Ranked: ARC Raiders augments guide: the three frames (Combat, Looting, Tactical) and the best Mark III picks....
- ARC Raiders Crafting Guide: Workbenches, Recipes, Materials: ARC raiders crafting guide: workbench recipes, the Ferro stack, how to level vendor relationships, and.
- ARC Raiders Endgame Guide: Trials, Expeditions & Season 4: ARC Raiders endgame starts at purple loadout: Trials scoring thresholds, Season 4 challenge breakdowns, Expeditions,.
- ARC Raiders Frozen Trail: What the October Expansion Adds: ARC Raiders Frozen Trail is the next big expansion, due October 2026.
- ARC Raiders Electromagnetic Storm: What It Does and When: ARC Raiders electromagnetic storm: what the modifier does, which extractions it disables, and how to.
References
- ARC Raiders on Steam: official store page with map and zone information
- ARC Raiders Official Site: Embark Studios' game page with zone and map documentation
- ARC Raiders beginner guide
- ARC Raiders extraction guide
- ARC Raiders skill tree guide
Was this guide helpful?
Keep reading


Disclaimer
This article is published for informational and entertainment purposes. It does not constitute professional financial, legal, or technical advice. Game performance, online services, patch schedules, and store listings change. Verify critical details (pricing, system requirements, regional availability) with publishers and storefronts before you buy. Affiliate links, where present, help support our editorial work and are labelled in our affiliate disclosure.
About the author

Senior Critic & Analyst
Former game data analyst turned critic with 11 years covering indie and mid-tier games. Based in Austin. Runs spreadsheets on games most people just play.
- 11 years games criticism
- Former game economy analyst
- Roguelike and strategy specialist