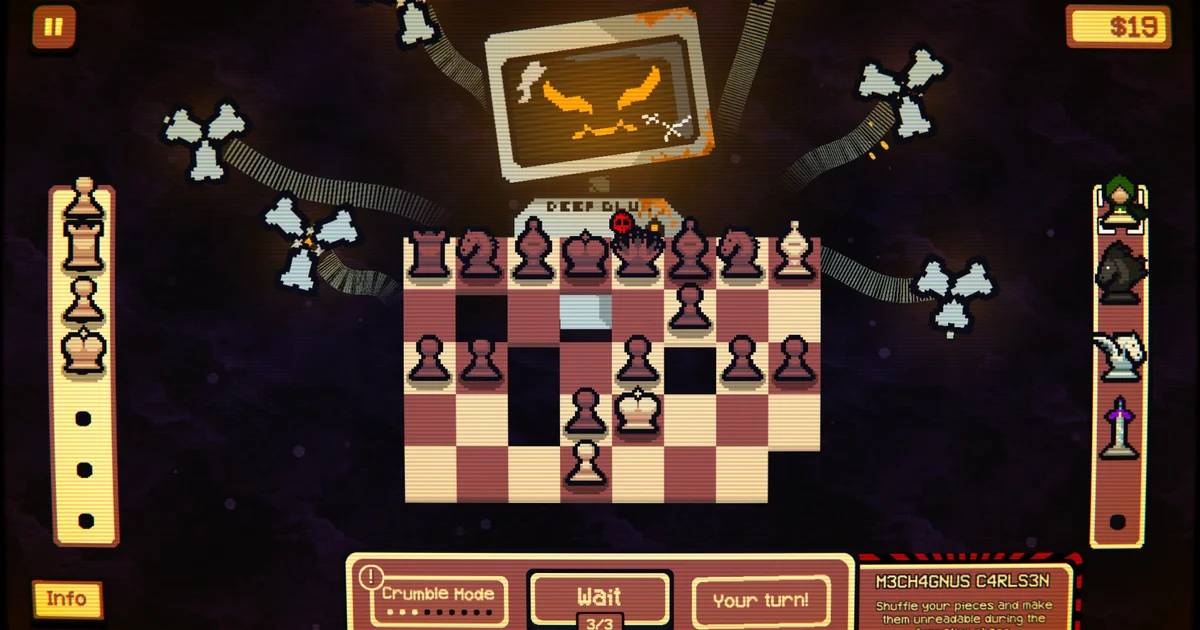
This Gambonanza tier list covers the three gambit categories and every piece type. The game launched May 1 with 150+ Gambits, and most tier lists don't exist yet — the community is still mapping what actually wins runs. These ratings are based on the mechanics the game itself documents: movement rules, the Crumble Mode counter, and how the reserve changes what works.
Two caveats upfront. First, this is a gambit-category tier list, not a per-gambit list. 150+ items is too large a pool to rate individually without weeks of community data, and anyone claiming that specificity right now is guessing. Second: tiers shift based on what the rest of your gambit pool looks like. A B-tier gambit alone can become S-tier in combination. The ratings below assume you're picking your first or second gambit without a full build direction locked in.
TL;DR: Economic Gambits are the safest S-tier pick for any run. Clone Gambits are S-tier with reserve mastery, A-tier without it. Reserve-Interaction Gambits are situational A-tier. For pieces: Queen leads, Knight second, Bishop and Rook are solid support, Pawns need an Economic Gambit attached to matter. Max Piece expansion ($25) is the priority shop purchase once your build direction is clear.
Key Takeaways
- Economic Gambits work in any run — the safest first pick regardless of experience level
- Clone Gambits have the highest ceiling but require a reserve deployment plan before they pay off
- Queen is the strongest baseline piece; upgrade it first when your build direction isn't clear
- The $25 Max Piece expansion is the most impactful shop purchase in most runs
- Pawn rating assumes no Economic Gambit — with one active, Pawns jump two tiers
Gambit Tier List
Gambonanza organizes its 150+ Gambits into three functional categories. Each category has a different power curve and a different skill floor. The tier assignment below reflects how consistently each category performs across the full range of runs — not just the ideal scenario.
S Tier
Economic Gambits
Economic Gambits convert pawns into gold-generating pieces on capture. Every time a converted pawn captures an enemy piece, you earn coin, no additional setup required. They work in any board configuration and pair with any gambit direction.
The reason they're S-tier for every player, not just beginners: coin buys every other advantage. Max Piece expansion, piece upgrades, gambit rerolls — it all runs on coin. A run where the economy is tight from Stage 2 onward is a run where you can't react to bad gambit draws. Economic Gambits are the closest thing Gambonanza has to a universal floor-raiser.
Take one in your first gambit selection if the pool offers it. The only reason not to is if you're already past Stage 3 with a build that doesn't need coin support, which for most runs is rarely true.
A Tier
Clone Gambits
Clone Gambits duplicate pieces when they land on specific tile types. In Stage 4 and 5, once the board is large enough to support capture chains, a well-timed clone can produce positions that would be impossible on a 5×5 opening board.
The ceiling is genuinely high. A-tier instead of S-tier because the payoff requires a working reserve deployment plan before the clone effect matters. You hold a piece off-board, drop it onto a clone tile at the exact right moment, and duplicate it into a capture chain. Without that rhythm established, the gambit sits in your pool doing partial work at best.
Take Clone Gambits when you're already in Stage 2 or later with a functioning reserve approach. In Stage 1 gambit selections while you're still learning reserve timing, the added complexity outweighs the ceiling.
Reserve-Interaction Gambits
Reserve-Interaction Gambits change how pieces behave on the specific turn they're deployed from reserve — a first-capture bonus, modified movement on deployment turn, or a board effect tied to the landing position. The modifier only activates on that deployment turn, which means the value is entirely determined by whether your deployment timing is precise.
When it works: S-tier results. A knight dropped from reserve at the exact moment an enemy steps into fork range, triggering a deployment-turn movement bonus, produces capture chains that standard piece movement can't replicate.
When it doesn't: dead weight. A Reserve-Interaction Gambit taken without a deployment plan just adds noise to your decision-making.
A-tier because the ceiling is real and worth learning, but the floor is low enough that it shouldn't be your first pick when reserve deployment is still uncertain.
B Tier
Mixed-Category Gambits (single-effect modifiers)
The remaining gambits in the pool — the ones that modify capture conditions, add tile effects to specific pieces, or alter board behavior after a capture without fitting cleanly into Economic, Clone, or Reserve-Interaction categories — land here collectively. They're not weak, they're narrow.
A gambit that adds a tile effect to every bishop capture is excellent if you have three bishops and a board configuration that lets them roam. It's situational otherwise. These are the gambits where build synergy determines tier placement, not the gambit itself.
B-tier as a default. Upgrade to A if the rest of your build calls for it.
Piece Tier List
Every piece can be upgraded in the shop and enhanced by Gambits. The tiers below reflect baseline performance — how useful each piece is with no gambit modification and no shop upgrades.
S Tier
Queen
The Queen covers diagonals and files simultaneously with unrestricted range, making it the strongest capture generator at baseline and the safest upgrade target in the shop ($3-5). It performs well regardless of which gambit direction your run takes.
Gambit builds centered on other pieces can outperform a queen-heavy approach in specific combinations. But when your gambit sequence hasn't clarified a stronger direction yet, queen upgrades don't waste coin. The rest of the piece ranking is partly measured against what the queen does for the same investment.
A Tier
Knight
The Knight's L-shape jump is the only movement type in Gambonanza that bypasses occupied tiles. On a board where the crumble counter is climbing and every other piece is blocked by positioning, the knight can still reach captures. That movement property scales across all five stages and interacts well with both Clone and Reserve-Interaction Gambits.
Knights are the correct second upgrade priority after queens in most runs. The jump movement means they're less dependent on open files than bishops and rooks.
Bishop
Bishops have unlimited diagonal range, same as the queen's diagonal coverage but without the file coverage. On the larger Stage 4 and 5 boards, bishops generate multiple capture threats per turn from safe positions. The problem is the early game: a 5×5 board limits diagonal range and pushes bishops into positions where their coverage overlaps badly.
A-tier for the late-game value. Just don't over-invest in bishop upgrades before Stage 3 when long diagonals barely exist yet.
B Tier
Rook
Rooks cover files and ranks with unlimited range but no diagonal coverage. On an open board, a rook staring down a file captures everything in its path. On a cluttered early-stage board, rooks get blocked constantly and generate fewer captures than a queen for the same coin.
B-tier because the performance gap between early and late stages is large. After Stage 3, board crumble opens files and rooks become significantly more useful. Holding rook upgrades until then is usually the right call.
C Tier (without Economic Gambit)
Pawn
Pawns move one tile diagonally to capture — limited range, easy to work around, and the first piece to fall behind the Crumble Mode counter. A board with excess pawns and no capture threats is a board that crumbles fast.
Without an Economic Gambit: C-tier. With one active: A-tier immediately, because every pawn capture generates coin and suddenly the limited movement range is converting a liability into income. The tier list rating for Pawns assumes no Economic Gambit. If you have one, adjust the pawn rating upward by two tiers for that run.
Shop Priority Tier List
The shop between stages has a fixed economy and limited coin. The spend order that consistently produces winning runs:
1. Max Piece expansion ($25) — buy first when build direction is clear
More pieces on the board means more capture threats per turn. More capture threats means fewer turns end without a capture. Fewer turns without a capture means the Crumble Mode counter stays at 0. The Max Piece expansion is the purchase that makes everything else work better. Buy it as soon as your gambit direction is clear — typically Stage 2 or Stage 3.
2. Queen upgrades ($3-5) — buy when queen is your primary piece
Queen upgrades have the broadest return because the Queen is already the most active capture generator. If queens are central to your build, this is the second priority. If your build has pivoted toward knights or bishops, redirect spend accordingly.
3. Piece upgrades for your build's core piece ($3-5)
If you're running Clone Gambits with knight-reserve interactions, upgrade knights. The spend should follow the build, not the default priority order. The default order assumes you haven't established a direction yet.
4. Rerolls ($2) — only when the pool fights your build
Rerolls are cheap but spending them reflexively burns coin the Max Piece expansion needs. The trigger for a reroll is a gambit pool that actively conflicts with your direction, not one that's merely suboptimal. If the offered gambits are B-tier but don't break anything, take the B-tier pick and save the $2.
GODEEPER: New to the reserve system and Crumble Mode mechanics? The full mechanics breakdown is in the tips guide — covers deployment timing, shop spend order, and what the Crumble Mode counter actually tells you. Gambonanza Tips & Tricks: How to Win Your First Run →
Boss-Specific Tier Adjustments
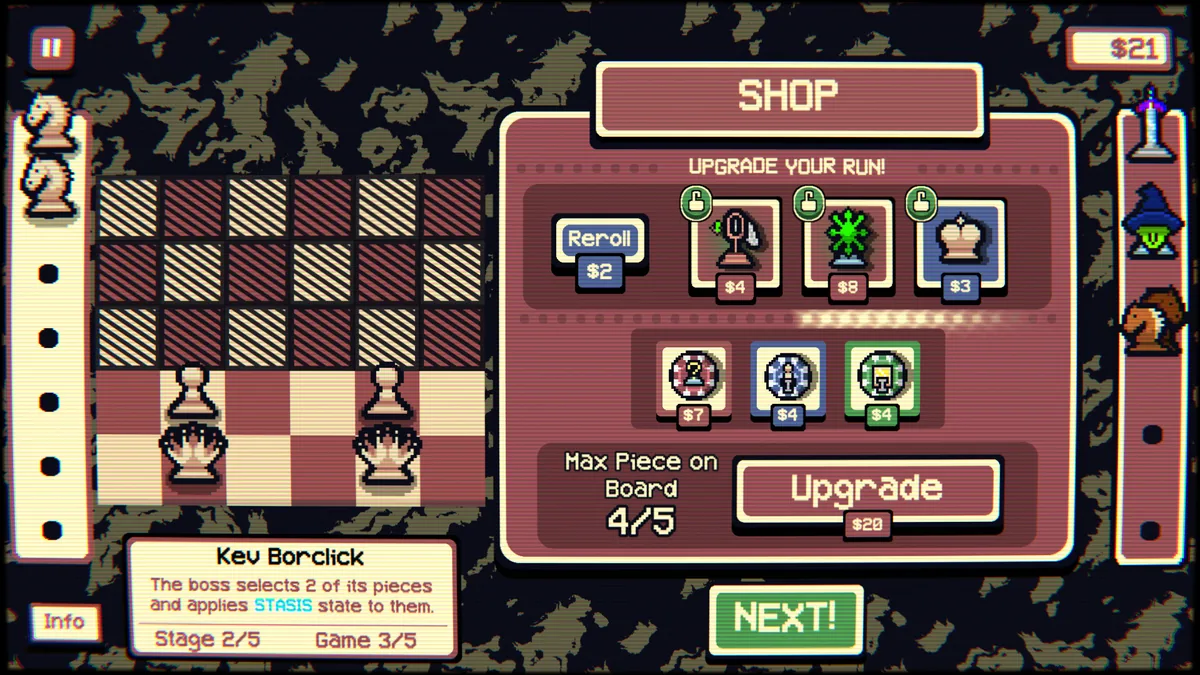
Each stage boss changes which pieces and gambits are worth investing in for that stage. The most documented example from the community is Kev Borclick (Stage 2), who applies STASIS to two of his own pieces each turn.
STASIS modifies piece movement on the affected pieces. If you've built toward rook-based capture lanes, STASIS on the rook files breaks those lanes. Bishops with STASIS on diagonal paths have the same problem. The boss preview appears in the shop before you spend coin — reading it changes which piece upgrades make sense for that specific stage.
This isn't a Gambonanza-specific tip — boss reactions are built into the game's information flow. Blukulélé shows the boss ability before you spend specifically so your spend can respond to it. Players who skip the boss preview and upgrade by habit are leaving advantage on the table every stage.
As more bosses are documented by the community (Stage 3 through 6 are still being mapped), tier adjustments for specific boss encounters will become possible. For now: read the boss preview, then spend.
GODEEPER: For everything Gambonanza offers past the first run — the full collection screen breakdown, how Strain difficulty modifiers work, and what the 200-item unlock path looks like. Gambonanza Review: Chess Balatro or Something Better? →

Summary
| Category | Tier | Notes |
|---|---|---|
| Economic Gambits | S | Works in every run, stabilizes coin economy |
| Clone Gambits | S/A | S with reserve mastery, A without it |
| Reserve-Interaction Gambits | A | High ceiling, low floor — requires deployment plan |
| Mixed single-effect Gambits | B | Build-dependent; can be A with the right context |
| Queen | S | Best baseline piece, safest upgrade spend |
| Knight | A | Jump movement bypasses blocked tiles |
| Bishop | A | Late-game diagonal coverage, weak early |
| Rook | B | File coverage improves after board crumble opens lanes |
| Pawn | C/A | C alone, A with Economic Gambit active |
Frequently Asked Questions
Q: What is the best gambit in Gambonanza? A: Economic Gambits are the safest S-tier pick for any run. They generate coin on pawn captures without requiring a specific board strategy, which stabilizes the economy for everything else. Clone Gambits have a higher ceiling but require reserve mastery before they pay off.
Q: What is the best piece in Gambonanza? A: The Queen at baseline. Highest movement range, covers diagonals and files simultaneously, and performs well regardless of which gambit direction the run takes. The Knight is second due to its jump movement that bypasses blocked tiles.
Q: When should I use Clone Gambits? A: When you already have a reserve deployment plan — ideally Stage 2 or later. Taking a Clone Gambit in Stage 1 without a reserve rhythm adds complexity before the board is large enough for the payoff.
Q: What's the shop spend priority in Gambonanza? A: Max Piece expansion ($25) first once your build direction is clear. Piece upgrades ($3-5) second on your build's core piece. Rerolls ($2) only when the gambit pool conflicts with your existing direction.
Q: Does the pawn rating assume Economic Gambit is active? A: No. C-tier rating assumes no Economic Gambit. With one active, Pawns jump to A-tier — every pawn capture generates coin and the limited movement range becomes an economic asset.
References
- Gambonanza on Steam — store page, review score, and feature list
- Blukulélé on itch.io — developer page with devlog updates
- Gambonanza Tips Guide — run fundamentals, reserve timing, and shop spend order
- Gambonanza Review — full analysis of the gambit system, board design, and replayability
- Die in the Dungeon Dice Tier List 2026 — same approach for Die in the Dungeon's dice pool (another roguelike build-priority ranking)