
GameBrief · General
Solarpunk Progression Guide: Mid to Late Game 2026
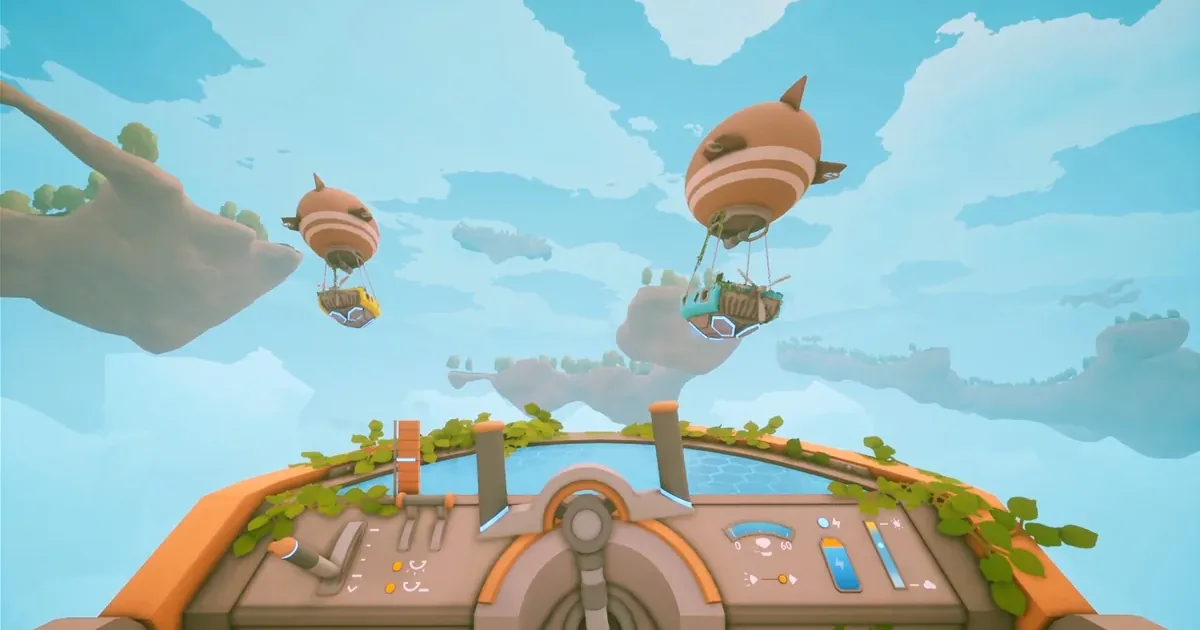
Solarpunk progression hits a recognizable wall around the time you first build the Airship Dock and realize the game's back half is entirely gated by four crops you haven't planted yet. The early hours feel open. The mid-game is a sequencing problem, and one specific oversight (planting Wheat before you think you need it) accounts for more stalled runs than anything else.
TL;DR: The Solarpunk progression guide in brief: Research Tiers 4-7 are gated by Wheat, Sunflower, and Corn in that order, and none of them grow on the starting island. Get your Airship built at Tier 3, start those crop rows immediately, and run Blueprint Tiers 2-3 in parallel to unlock Battery storage and Transport Drones. The drone is the single biggest quality-of-life unlock in the game, so don't ignore the Tradebot. Six common mistakes below will tell you exactly where most players stall.
What does mid-to-late Solarpunk progression look like? (quick answer)
Solarpunk's progression runs on two separate tracks: the Research Table (building and crafting recipes) and the Tradebot Blueprint system (automation and energy infrastructure). Mid-game, roughly Tiers 4-6, is about getting off-island crops growing and animals producing reliably. Late game, Tiers 7-8 and Blueprint Tier 3+, is about building an automated resource loop that stops demanding your attention every few minutes. Cyberwave estimates about 20 hours to clear the main content arc, and that clock runs faster once the automation loop is actually working.
Research Table tiers 4 through 8: what each one costs
The Research Table uses a simple gate mechanic: complete all items in the current tier, then pay one material to advance. You can't skip tiers, and the materials required for tiers 5 onward are the same crops that unlock new content. Plant too late and the delays compound. Here's the mid-to-late game unlock sequence:
- Tier 3 (unlock cost: 1x Iron Bar): Airship Dock blueprint, magnetic fishing rod, and advanced storage structures. This is where the game opens up. The Airship Dock is the most important unlock on this tier.
- Tier 4 (unlock cost: 1x Copper): Home decor and decorative shelving. Not a dramatic tier for base utility, and Copper isn't on your starting island: it's on a small island to the northeast, reachable only once your Airship Dock is built. The ore vein there never depletes, so once you've made the trip once you can keep coming back. Do not hold copper in the furnace for anything else when Tier 4 is ready.
- Tier 5 (unlock cost: 1x Wheat): Animal-related items and basic animal pen structures. Wheat only grows on second-ring islands. You won't advance this tier until you've flown out, collected seeds, and grown your first harvest.
- Tier 6 (unlock cost: 1x Sunflower): Growbox, cooking station, and animal shelters. This is the first cooking unlock, which makes food management significantly easier. Sunflower seeds come from the same islands as Wheat.
- Tier 7 (unlock cost: 1x Corn): Advanced decorative items and Diamond Tools. Corn appears on third-ring islands in most seeds, meaning Airship range upgrades are required before you can even locate it.
- Tier 8 (unlock cost: unlisted at time of writing): Music Pack and additional specialized crafting items.
The move that saves the most time: on your first airship return trip, plant Wheat and Sunflower seeds immediately, even if you don't have the Tier 5 unlock yet. The crop cycle runs regardless, and arriving at Tier 4 with a mature row already growing cuts 2-3 in-game days off the wait.
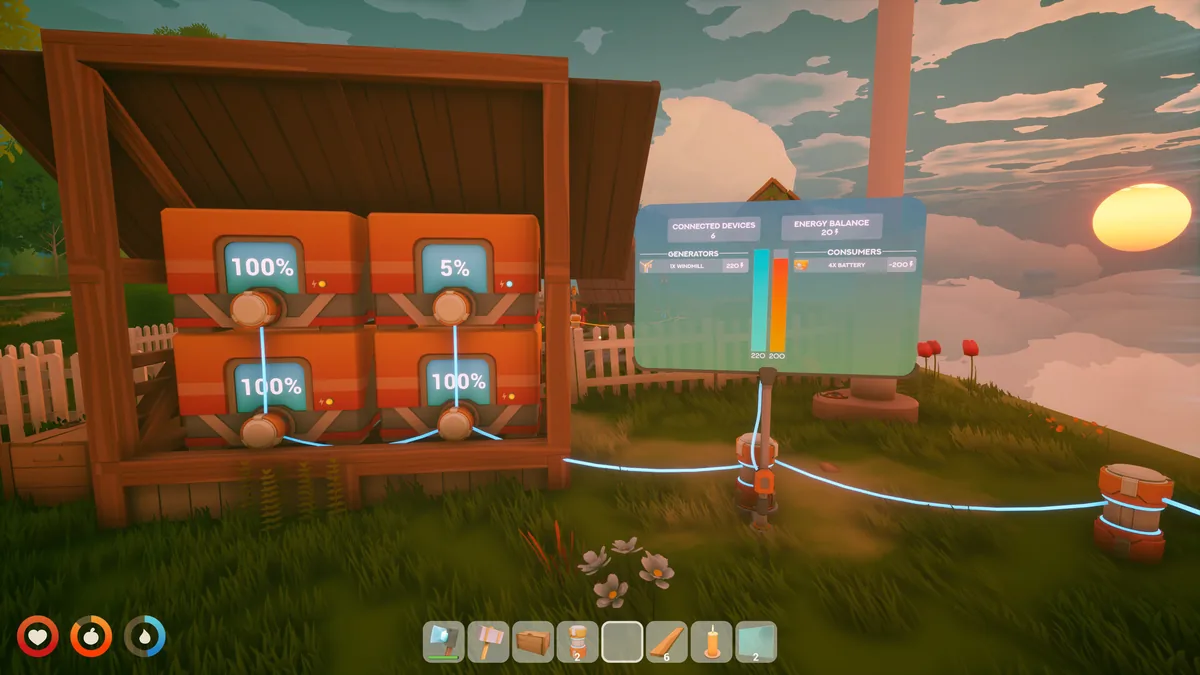 This screen shows Solarpunk's energy grid panel rather than the Research Table UI. Reaching Tier 5 still comes down to 1x Wheat, the first unlock material you can't source from your starting island.
Tradebot Blueprint tiers: the automation unlock path
The Tradebot is easy to ignore in the early game, which is exactly why so many players hit a wall in mid-game automation. Blueprint tiers unlock through crop and material trades, not the Research Table, so they run on their own schedule. The tiers that matter most:
- Blueprint Tier 1: Energy Workbench and Solar Panel. The Workbench is mandatory for any further energy construction, so build it immediately.
- Blueprint Tier 2 (unlock cost: 1x Silicon): Battery, Advanced Dock, Animal Transport. The Battery is the single most important mid-game item. Without battery storage, solar generation disappears at night and your drills, sprinklers, and Research Table all lose power. Unlock Tier 2 as soon as you can source Silicon.
- Blueprint Tier 3 (unlock cost: 1x Cobalt): Transport Drone, Windmill, Lights Pack. The Windmill outputs 210W and doesn't care about weather or the day/night cycle, which makes it the best passive energy source available. The Transport Drone draws 300W but carries 16 items per trip and handles resource hauling between remote drills and your base without you touching it.
GODEEPER: Setting up your energy grid correctly before mid-game is what separates a smooth run from constant power interruptions. Solarpunk Base Layout Guide: Animal Care and Zoning 2026 →
Cobalt is gated behind Airship Level 3, which requires completing delivery chains for Bread and Eggs. That means a working Wheat farm and a functioning chicken setup have to come first. The mid-game isn't strictly linear, but this chain is the one most players trace back when they're wondering why Transport Drones still feel out of reach.
Scaling your crop base past the starting island
Farming in Solarpunk isn't something you set up once and check off. Every research tier, every Tradebot trade, and every animal care system traces back to crop availability. By mid-game, a single row of each plant type won't cut it.
The crop bottleneck hierarchy, in order of severity:
- Cotton: Never stops being the most demanded resource. Cloth feeds construction, animal care, and backpack upgrades throughout the entire game. Plant 2-3 rows as early as possible and keep replanting.
- Wheat: Required for Tier 5 unlock, Bread (for delivery quests), and chicken feed. Wheat only grows on second-ring islands, so your first airship trip should return with as many Wheat seeds as you can carry.
- Sunflower: Tier 6 gate and an alternative animal feed ingredient. Sunflowers grow alongside Wheat on second-ring islands. Collect both on the same trip.
- Corn: Tier 7 gate, requires third-ring island access. Plan your Airship range upgrades with this destination in mind.
The practical setup for mid-game: a 4-row automated farm covering Cotton, Wheat, Sunflower, and Berries (for food and water), each row covered by a Sprinkler (40W, waters a 2x4 area). Place the sprinkler at the center of the row, not the end. Edge coverage on larger layouts is inconsistent, and the 2x4 area means a 4-block-long row gets full coverage from a single central unit.
Automated water troughs for animals connect to the same energy grid as sprinklers. Once animals are producing eggs, milk, or truffles, the trough-sprinkler combo covers the routine maintenance loop without manual intervention.
How to set up the mid-game energy grid
A weak energy grid is the single most reliable way to turn mid-game momentum into frustration. The research station, drill, and sprinklers together draw more power than three solar panels can reliably supply, and that's before storms or nightfall cuts generation further.
Verified power draw numbers from in-game values:
| Device | Power Draw |
|---|---|
| Drill | 120W |
| Sprinkler | 40W |
| Transport Drone | 300W |
| Research Table (active) | varies |
| Source | Output |
|---|---|
| Solar Panel | 70W |
| Windmill | 210W |
| Basic Generator | 120W |
Three solar panels (210W combined) can power one drill (120W) while charging a battery for night operation, but only barely. Add a fourth panel or a Windmill before putting any drones online. The 3:1 solar-to-battery ratio works for early setups, but late-game automation blows past it quickly.
Connect all power sources into a single unified grid. Running separate networks for different base sections is the most common infrastructure mistake, and it hides true consumption until something stops working at 2am in-game.
Wax briquettes are roughly four times more fuel-efficient than wood in generators. If you have beehives running (minimum three to maintain production), use wax for generator fuel during weather events that cut solar output.
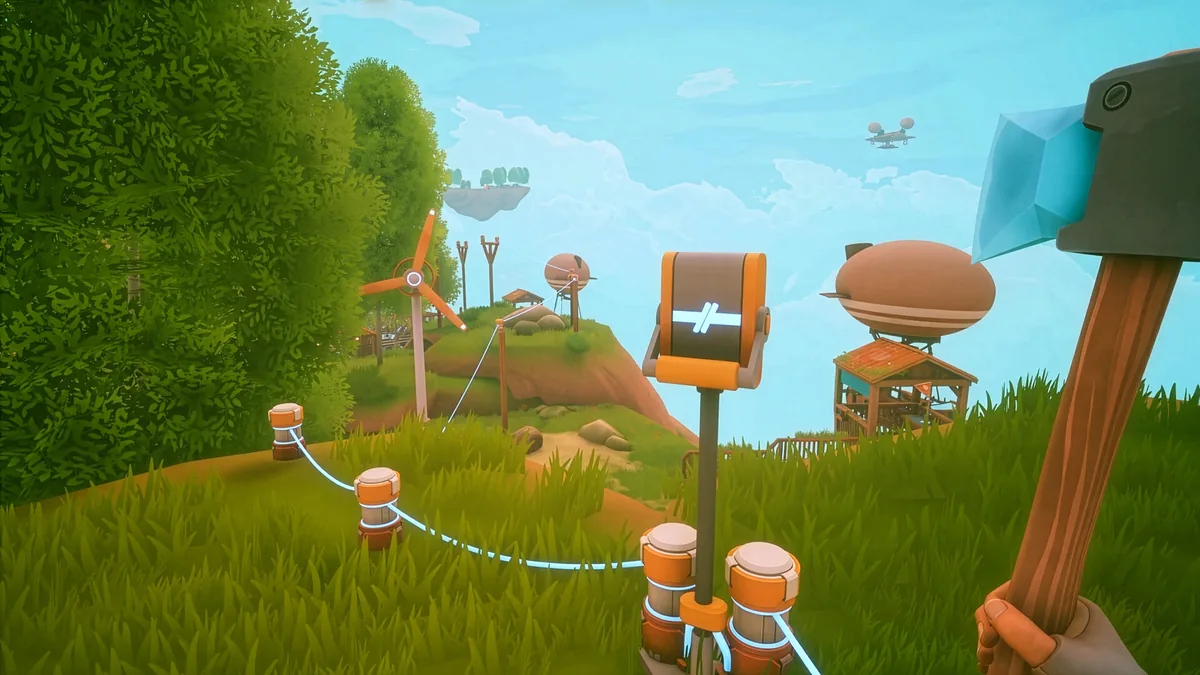 A Solarpunk energy setup connecting a windmill to battery storage over a unified grid. Late-game automation draws from the same kind of setup: each Transport Drone alone pulls 300W, so three active drones plus a drill needs at least two Windmills or six solar panels with battery backup to run cleanly.
GODEEPER: If you're still getting familiar with the early base and haven't hit Tier 3 yet, this covers the nine things the game doesn't explain upfront. Solarpunk Tips: 9 Things Every New Player Must Know →
Animal care at scale
Animals need food, water, and shelter all at once. Drop any one of those three and production stops. It's not a gradual reduction. Eggs, milk, and truffles just stop the moment the needs meter slips.
A few things most guides miss:
- Pathfinding blocks production. An animal that can't physically reach its trough registers unmet needs even when resources are present. If animals stop producing despite a full setup, reload the save to reset pathfinding and check that nothing's blocking the path to food and water.
- Wheat isn't the only feed option. Sunflowers work as alternative feed when Wheat runs short. If your Wheat harvest is committed to Bread deliveries for the Airship Level 3 chain, route Sunflower into the feed system until the delivery is done.
- Keep two animal species running for late-game crafting. Eggs, milk, and truffles each feed different crafting recipes. You don't need large herds, but two active species is worth the extra pen space.
- Shelter coverage must match your pen footprint. Shelters cover a fixed area. If the pen extends past that zone, animals sleeping at the edges register unmet needs overnight without you realizing why.
Tiers 5 and 6 together unlock the full animal care infrastructure, which is why Wheat is the real bottleneck for this system. Proper pens and shelters aren't buildable until both tiers clear.
6 mid-game mistakes that stall progression
1. Saving Copper for tools instead of unlocking Tier 4. Stone tools (200 durability) handle all mining through mid-game without issue. Iron tools are better, but the 500 durability upgrade isn't worth delaying a tier unlock. Keep your Copper for furnaces, energy infrastructure, and the Tier 4 advance. Save the tools for when you have surplus.
2. Building the Airship before the Battery is in place. The Airship Dock draws power. Rushing to build the dock and ship before Blueprint Tier 2 (Battery) is set up leaves your base dark every night while the construction timer ticks. Get the Battery first. Then start the dock.
3. One isolated power network per section. Separate wings, separate power lines. It's a natural way to build, and it causes chronic confusion. A split grid hides the real consumption balance until something stops working mid-night. One unified grid per island.
4. Waiting until after the tier unlock to plant gated crops. The material you need to advance a tier is the same crop that takes a full growth cycle to produce. Wait until Tier 4 is done to plant Wheat and you've added that entire wait on top. Plant as soon as seeds land in your inventory.
5. Treating the Tradebot as an afterthought. Blueprint tiers run independently of the Research Table, and most players are behind by the time they notice. Blueprint Tier 2 (Battery) and Tier 3 (Transport Drone, Windmill) are available earlier than they feel. Check the Tradebot after every significant harvest.
6. Scaling the base before the farming core is stable. Every new structure needs cloth. If Cotton production isn't deep enough to support construction, builds stall the moment the supply dips. Cotton rows first, expansion second.
Key Takeaways
- Research Tiers 5, 6, and 7 are gated by Wheat, Sunflower, and Corn in that order. None grow on the starting island. Get the Airship running at Tier 3 or the whole mid-game stalls.
- Blueprint Tier 2 (Battery) is the most important Tradebot unlock. Don't wait on it. Tier 3 (Transport Drone) comes next and changes how remote resource nodes work.
- One unified energy grid. Three solar panels plus a battery minimum before adding any automation draws.
- Cotton bottlenecks never go away. Multiple rows in rotation throughout the entire run.
- Animal needs: food, water, shelter simultaneously. Pathfinding failures stop production even with a full setup. Reload saves to reset.
- Sleep restores solar generation for the next day. It doesn't move crop timers. Use it when you're out of nighttime tasks.
Related Reading
- Solarpunk Base Layout Guide: Animal Care and Zoning 2026: The power-grid zoning approach and animal needs system explained at the layout level, useful for setting up the automated island section.
- Solarpunk Tips: 9 Things Every New Player Must Know: Covers the first-day priorities and early research decisions that set up mid-game correctly.
- Solarpunk Review: Floating Island Survival 2026: Full review of Cyberwave's cozy survival builder, including assessment of how the progression curve feels across the full 20-hour arc.
References
- Solarpunk on Steam (Cyberwave, rokaplay)
- All Research Upgrades in Solarpunk (Destructoid)
- Solarpunk Research Table and Blueprint Unlocks Explained (allthings.how)
- Solarpunk Copper Guide: Find Ore and Smelt Copper Bars (GAMES.GG): Copper island location and ore vein details cross-referenced for this update.
Frequently Asked Questions
What unlocks Research Table Tier 5 in Solarpunk? Tier 5 requires 1x Wheat to advance. Wheat doesn't grow on your starting island, so you need to reach a second island via airship and bring seeds back before the tier unlock is even possible.
What is the best order to unlock Tradebot blueprint tiers? Prioritize Blueprint Tier 2 (1x Silicon) early to unlock Battery storage and the Advanced Dock, then push Blueprint Tier 3 (1x Cobalt) for Transport Drones and Windmills. The Transport Drone alone transforms how you handle remote resource nodes.
How many Transport Drones do you need for late-game automation? One drone per active drill is the practical ratio. Each Transport Drone draws 300W and holds 16 items per trip, expandable with circuit upgrades. Running three drills means three drones and roughly 900W of additional power draw, so plan your battery bank accordingly.
Why do my animals stop producing resources in Solarpunk? Animals require all three needs met simultaneously: food, water, and shelter. If pathfinding blocks access to the trough or water source, production stops even when items are present. Reload the save to reset pathfinding, and check that no structure is blocking the animal's path to its resources.
When should I start building the Airship in Solarpunk? The Airship Dock unlocks at Research Tier 3 (requires 1x Iron Bar to advance). Start building it as soon as you have the Dock blueprint, because Wheat, Quartz, and other key Tier 5-6 unlock materials only exist on second-ring islands. Every day you delay airship construction delays the entire mid-game research tree.
What crops do I need to stop stalling at Research Table tiers? You need Wheat (Tier 5), Sunflower (Tier 6), and Corn (Tier 7) in active crop rotation before you even hit those tiers. Cotton remains a bottleneck throughout because it feeds cloth production. Running all four crops by the time you reach Tier 4 is the safest strategy.
Does sleeping advance crop growth timers in Solarpunk? No. Sleeping skips the night and restores solar panel generation for the next day, but it does not advance crop growth, furnace processing, or any crafting timer. Use sleep only when you have nothing to do at night and need to restore solar power quickly.
Where do you find Copper in Solarpunk? On a small island northeast of your starting island, reachable only after building the Airship Dock at Tier 3. The ore vein there never depletes, so one trip sets you up for repeat runs whenever you need more Copper.
Was this guide helpful?
About the author

Critical game theorist with a background in film criticism. Writing for print and digital outlets since 2015. Specialises in genre analysis and design heritage.
- Background in film criticism
- 10 years games coverage
- Genre theory and design history specialist
Keep reading

Disclaimer
This article is published for informational and entertainment purposes. It does not constitute professional financial, legal, or technical advice. Game performance, online services, patch schedules, and store listings change. Verify critical details (pricing, system requirements, regional availability) with publishers and storefronts before you buy. Affiliate links, where present, help support our editorial work and are labelled in our affiliate disclosure.
Comments
Loading comments…