
GameBrief · General
Solarpunk Base Layout Guide: Animal Care and Zoning 2026
Reviewing
Solarpunk
Cyberwave · rokaplay, Metaroot
Solarpunk base layout decisions stick with you for 20 hours. The game won't punish bad placement outright. It'll just let you build yourself into a corner where expanding one zone means demolishing another. Most of that friction is avoidable if you zone intentionally from hour one.
This guide goes past what the beginner tips cover. You already know to build solar panels early and sprinkler your crops. This is about structuring your island so the second half, when you've got Forester Bots, Sky Turbines, Pig Shelters, and Wireless Power Bases all running at once, doesn't turn into a cable-tracing nightmare.
TL;DR: Zone by elevation (power on top, production middle, farming and animals on flat ground). Animals need all three needs (Hunger, Thirst, Shelter) fully met at the same time to produce anything; it's pass or fail, not a partial meter. A Wireless Sprinkler draws 6W and covers a 5m radius. The Forester Bot alone draws 400W, so build your Sky Turbine before committing to full tree automation. Keep automation within 50m of a Wireless Power Base or run physical cables.
Solarpunk base layout: how vertical zoning works
Every floating island has terrain variation, and that variation isn't decorative. High ground gets unobstructed sky access, which matters for Solar Panels and the Sky Turbine alike. Putting energy infrastructure at the top prevents shading overlap between panels and gives wind devices room to work without obstacles blocking wind paths.
A three-zone approach works consistently across different island shapes:
The top tier (highest elevation) is where Solar Panels, Windmill, Sky Turbine, and Battery clusters belong. Run your main power trunk from here down to a Wireless Power Base. One Wireless Power Base has a 50-meter draw radius; any device within 10 meters of a consumer connects automatically. For most islands this covers everything, but if you expand outward onto adjacent flat plateaus, you'll need a second base or physical cable runs.
The mid tier (mid-elevation, near crafting) is for the Crafting Table, Energy Furnace, Workbenches, and Chicken Incubator. These are high-draw fixed devices you visit constantly, so keeping them near main storage chests cuts down on inventory trips. The Energy Furnace draws 200W continuously while running, so make sure it's on the same grid segment as your heaviest generation.
The bottom tier (flat ground, near water) is where crop plots, Feeding Troughs, Water Troughs, Pig Shelter, Chicken Coop, Sheep Shelter, and Rain Collectors go. Animals belong here because Water Troughs (20-unit capacity) auto-fill during rain, and flat ground gives you room for a proper farming grid without terrain cutoffs breaking crop rows.
GODEEPER: If power grid planning feels like the main challenge, Outbound's van-based energy system teaches similar zoning logic in a mobile format. Outbound Energy Management Guide →
The most common early mistake is mixing zones: putting animal pens next to workbenches to save space, then realizing you can't expand either without demolishing the other. Give each zone its own footprint and expand outward.
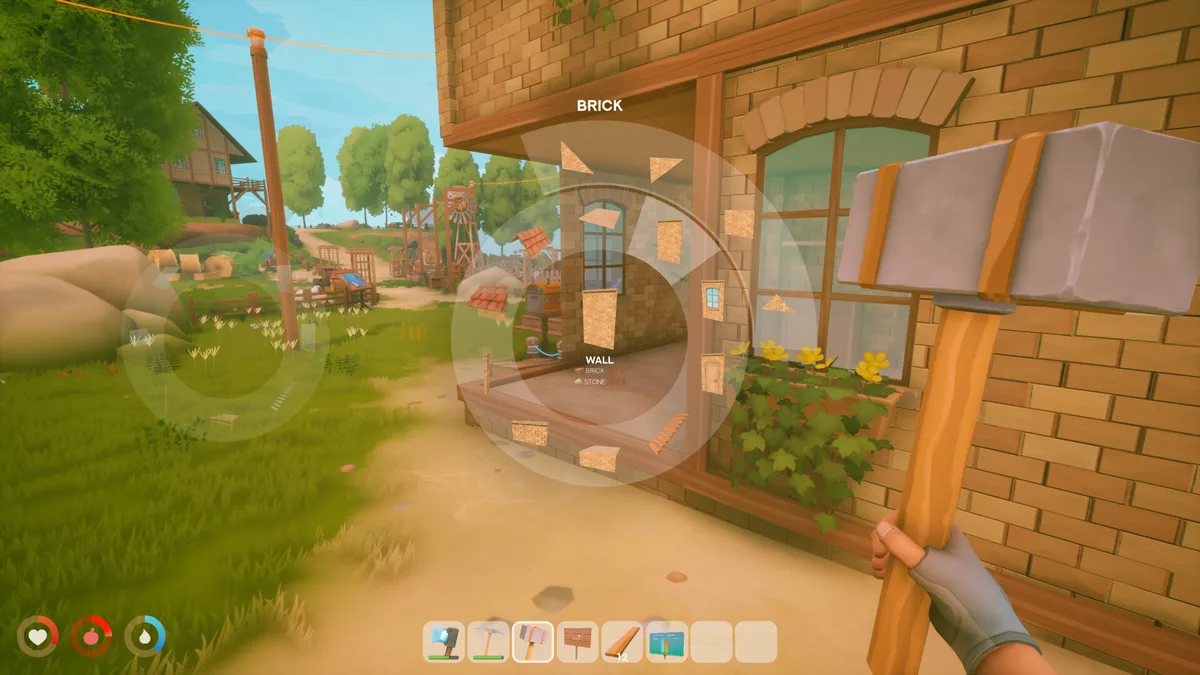 Solarpunk's building interface, placing a brick wall section on a house. This shows the construction tools referenced in this guide rather than a full island zoning overview.
Animal needs: the three-need system and why it matters
Solarpunk doesn't have a citizen happiness meter in the city-builder sense, but it has something functionally similar: an animal needs system where production is a binary switch. Animals produce nothing until all three needs (Hunger, Thirst, Shelter) are fully satisfied at the same time. Neither the game's own store description nor the community wikis document an exact numeric scale for this; what's confirmed is that it's pass or fail, with no partial credit for two out of three. Once all three are met, resources appear in the basket at their shelter.
Hunger is handled by Feeding Troughs, which must stay stocked. Animals will follow players holding their preferred food, which is actually useful during base reorganization if you need to move them. The "Better Animal Feed" research unlocks cheaper recipes that matter once you're running two or three species at once.
Thirst is the one that sneaks up on you. Water Troughs hold 20 water units and fill from a water can manually, or automatically during rain. Build at least one Rain Collector near your animal pens. In dry stretches, a single Water Trough drains faster than you'd expect with multiple animals competing for it.
Shelter requires one dedicated building per animal, not one shared structure. Two pigs need two Pig Shelters. The Pig Shelter unlocks at tier 6 of the Research Table, costing 5x Carrot and 5x Wood to research, so it's a mid-to-late gate. Don't expect to have a productive pig pen in your first few hours.
For a mixed pen of 2 chickens and 2 pigs, 3 Feeding Troughs and 3 Water Troughs is the practical minimum. One circuit of the pen per in-game day keeps everything topped, which leaves the rest of your time for building and exploring.
What each animal produces when all needs are met:
- Chickens: eggs (basket at the Coop holds up to 4 at once)
- Pigs: truffles (spawn near the Pig Shelter; you need 10 for the Airship Level 4 trade)
- Sheep: milk
- Beehives: beeswax and honey (no taming required; just place the hive)
Truffles are worth flagging specifically because they're a hard progression gate. You can't buy them from TraderBot or find them on other islands. Pig care is the only path to the Airship Level 4 upgrade. Players who push into late-game content without a pig pen often discover this at the worst possible time.
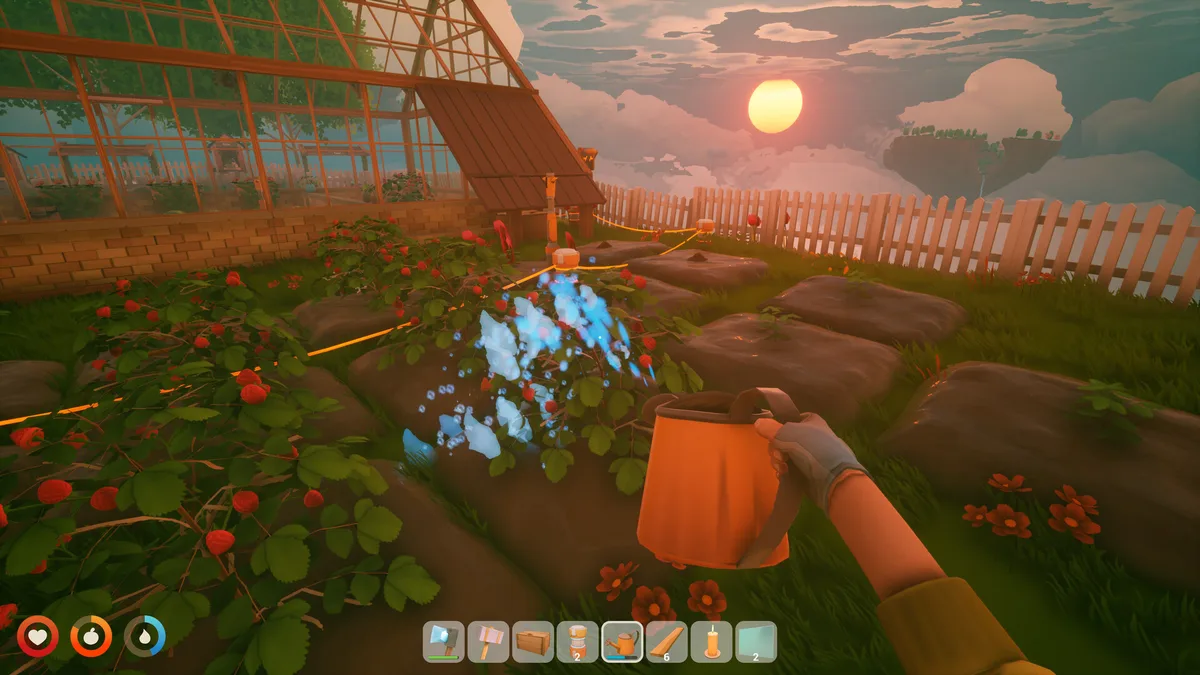 Tending crops near a greenhouse at dusk. This shows farming rather than an animal pen; see the animal needs section above for Pig Shelter and Chicken Coop setup.
Power numbers that change your planning
The energy system looks straightforward until you try running a Transport Drone and a Forester Bot at the same time. These are the exact draw and output figures from the game's energy wiki:
Generation:
- Solar Panel: 100W (clear sky), 70W (cloudy), 10W (rain), 5W (storms), 0W at night
- Windmill: 99W (calm) to 300W (storm), across nine intensity steps
- Sky Turbine: 600-700W depending on wind, peaks during storms
- Energy Generator: 120W steady (burns wood or wax briquettes)
Consumption:
- Forester Bot: 400W
- Transport Drone: 300W
- Energy Furnace: 200W
- Chicken Incubator: 200W
- Automatic Drill: 120W
- Powered Water Trough: 50W
- Sprinkler: 40W
- Recycler: 25W
- Wireless Sprinkler: 6W
The Forester Bot at 400W is the number that surprises people. Four Solar Panels generate exactly 400W on a clear day, so the Bot alone saturates your solar grid before you've added anything else. Add a Transport Drone (300W) and you're at 700W for just those two devices, with the Drill and Furnace still offline. The Sky Turbine at 600-700W is the answer, not the Windmill; 300W peak isn't enough once the Bot is running.
Generator fuel efficiency is worth knowing: 16 wood pieces run for 11 minutes 50 seconds; 3 wax briquettes run for 12 minutes. Briquettes are roughly four times more efficient by weight, which is why running multiple Beehives as a late-game fuel source makes sense even after solar and wind are covering most of your load.
Step-by-Step: building a mid-game automated island
Step 1: Place 4 Solar Panels on the highest point of your island in staggered rows so they don't shade each other. Add 2 batteries nearby. That's 400W daytime generation with overnight buffer. Run a cable trunk down to a central Wireless Power Base at mid-island.
Step 2: Set up crop plots on flat ground before expanding production. One Wireless Sprinkler per 5-meter crop cluster (6W each). Plant wheat and carrots first; both are needed for animal feed and research. Farm from Day 1 to catch the first rainfall and get the growth timer started early.
Step 3: Build your animal pens as a connected loop. Place shelters, troughs, and baskets so they form a short walking circuit: Coop next to Feeding Trough, Water Trough nearby, Pig Shelter adjacent, back to start. This compresses the daily feeding check to about one minute. Put Rain Collectors close enough to serve the Water Troughs.
Step 4: Set up your first Transport Drone outpost near an Ore Vein. Give it its own 2 Solar Panels and 1 Battery; at 300W draw, the Drone needs its own generation rather than sharing the main base grid. It carries 16 items per trip. Install the circuit upgrade to double that once it becomes available.
Step 5: Add the Forester Bot only after you've unlocked the Sky Turbine. The Bot draws 400W continuously. One Sky Turbine at 600-700W handles the Bot plus the rest of the base during active wind. During calm periods, the Windmill (up to 300W) plus batteries handle lighter loads. Don't assume the Bot will run all night on stored power; shut non-critical devices overnight if your battery bank is small.
Step 6: Wire in sensors once the base is established. A Daytime Sensor puts devices on a daylight-only circuit. A Rain Sensor wired into your sprinkler circuit stops watering during rain (less critical with 6W Wireless Sprinklers, but standard Sprinklers at 40W each do add up). Controllable Logic Blocks let you cut specific grid segments manually during high-draw periods.
Tips for keeping the loop efficient
Set your Drill on an Ore Vein, not an Ore Node. Nodes are destroyed permanently when mined; Veins regenerate indefinitely. Reserve Nodes for one-off crafting needs before you have drills running.
Sleeping doesn't speed up crafting. That's the planning mistake that trips up most players. Sleeping skips to morning and restores solar generation, but a furnace run started before bed finishes at its own pace. Start long crafting jobs first, then sleep. You won't gain any time by rushing to bed mid-process.
Leave the starter island sooner than feels comfortable. One player in the demo spent 13 hours "just farming and building" before their first flight, and spent that whole time without backpack upgrades and research unlocks sitting on other islands. The starter island is a launchpad, not a destination.
Switch to Wireless Sprinklers as soon as you can. Standard Sprinklers cover a 2x4 plot at 40W each, and edge tiles get inconsistent watering in non-standard layouts. Wireless Sprinklers cover everything within 5 meters for 6W total. The efficiency gap is significant enough that the research investment pays for itself quickly.
Scale feed before you scale animals. One wheat field supporting 2 chickens is fine. One wheat field supporting 2 chickens, 2 pigs, and 2 sheep is a food shortage waiting to happen. Animal count only grows sustainably when your feed surplus already exists ahead of demand.
GODEEPER: Shapez 2's automation logic uses similar throughput-matching principles, where output rates only matter if your belt routing keeps devices fed. The mental model transfers. Shapez 2 Automation Guide →
Common layout mistakes and fixes
If cables are everywhere and nothing connects cleanly, the fix is usually a Wireless Power Base (50-meter radius, 50W draw). One base covers a full island provided you haven't spread across multiple plateaus. Add a second only when a device is out of range, not as a preemptive measure.
If animals have all three shelter structures but still won't produce, check each need individually rather than assuming they're all met. Even one need just short of full counts as unmet; production doesn't start until all three actually are. Thirst is usually the silent culprit in dry weather: Water Troughs drain faster than Feeding Troughs with multiple animals sharing them.
If the Forester Bot keeps going offline, it's an energy budget problem. The Bot draws 400W continuously, and a solar-only grid can't maintain that through nighttime or heavy rain. Add batteries or a second generation source, either a Windmill (wind-variable) or an Energy Generator (steady at 120W), before building the automation loop around the Bot.
If drones aren't picking things up, check the dock position. The Forester Bot and Transport Drone both operate within 3.5 meters of their dock. Moving the dock after placement means items outside that radius go unnoticed. Rebuild docks closer to the target resource rather than trying to extend range.
Related Reading
- Solarpunk Game Review 2026: Full verdict on whether the energy system and base-building loop hold up for 20+ hours, including co-op design notes.
- Solarpunk Tips: 9 Things Every New Player Must Know: Early-game survival checklist covering the first few hours, airship prep, and energy setup from scratch.
- Outbound Energy Management Guide: Similar power-zoning decisions in a survival game where your mobile base has a fixed energy budget per day.
- Shapez 2 Automation Guide: Belt-routing and throughput logic that applies to Solarpunk's drone and farming automation.
- Best Indie Games Under $20 in 2026: Context for where Solarpunk sits in the cozy survival tier by value.
- Solarpunk Progression Guide: Mid to Late Game 2026: Solarpunk progression guide covering research tree tiers 4-8, when to automate, how to scale past.
Frequently Asked Questions
How do I make animals produce resources in Solarpunk? Animals need all three needs (Hunger, Thirst, and Shelter) fully satisfied at the same time; it's pass or fail rather than a partial meter, and no official source documents an exact numeric scale for it. Once all three are met, resources appear in the basket at the shelter. Stock a Feeding Trough, fill a Water Trough (it refills automatically during rain), and build the correct shelter for each animal species.
What is the best base layout for Solarpunk? Zone vertically: energy buildings (solar panels, turbines) on highest ground for clear sky access, production workstations in the mid-level zone, and farming plus animal pens on flat ground near water sources. Keep automation devices within 50m of a Wireless Power Base to avoid long cable runs.
How much power does a Solarpunk base need? A mid-game base drawing a Drill (120W), two Sprinklers (80W), and a Transport Drone (300W) needs 500W of continuous generation. Four Solar Panels at 400W daytime output plus two batteries covers this with some buffer. Add a Windmill or Sky Turbine once you add a Forester Bot (400W).
How do I get truffles in Solarpunk? Build a Pig Shelter (tier 6 Research Table, costs 5x Carrot and 5x Wood). Keep pigs' Hunger, Thirst, and Shelter needs all fully met at once. Truffles spawn near the shelter when all needs are satisfied. You need 10 for the Airship Level 4 trade with TraderBot.
Does sleeping speed up crop growth in Solarpunk? No. Sleeping skips nighttime and restores solar generation, but it does not accelerate crop growth, furnace processing, or crafting timers. Start long crafting jobs before sleeping; they finish at their own pace regardless of time of day.
What is the Wireless Sprinkler range in Solarpunk? The Wireless Sprinkler covers every crop within 5 meters and draws only 6W. A standard Sprinkler covers a 2x4 plot at 40W. One Wireless Sprinkler replaces up to five standard sprinklers in a compact farm layout, which is a significant power saving at scale.
Can animals share water troughs in Solarpunk? Yes. Multiple species can use the same Feeding Trough and Water Trough. For 2 chickens and 2 pigs, 3 Feeding Troughs and 3 Water Troughs is the recommended minimum. Each Water Trough holds 20 water units and refills automatically in rain.
References
- Solarpunk on Steam - official store page, release date, price, features list
- Solarpunk Energy Wiki (solarpunk.wikily.gg) - exact power output and consumption figures per device
- Solarpunk Animal Mechanics (solarpunkgamewiki.com) - animal needs system, shelter requirements, production mechanics
- How to Get Truffle in Solarpunk (primagames.com) - Pig Shelter research tier and truffle spawning details
- Ultimate Solarpunk Guide (intoindiegames.com) - fuel efficiency data, automation outpost configurations
Was this guide helpful?
About the author

Critical game theorist with a background in film criticism. Writing for print and digital outlets since 2015. Specialises in genre analysis and design heritage.
- Background in film criticism
- 10 years games coverage
- Genre theory and design history specialist
Keep reading

Disclaimer
This article is published for informational and entertainment purposes. It does not constitute professional financial, legal, or technical advice. Game performance, online services, patch schedules, and store listings change. Verify critical details (pricing, system requirements, regional availability) with publishers and storefronts before you buy. Affiliate links, where present, help support our editorial work and are labelled in our affiliate disclosure.
Comments
Loading comments…