GameBrief · General
Solarpunk Tips: 9 Things Every New Player Must Know

Reviewing
Solarpunk
These Solarpunk tips cover the specific mechanics that catch new players off guard in Cyberwave's floating-island survival game. The full review covers whether it's worth buying. This guide covers what you need to know in the first few hours to avoid the mistakes that cost you an afternoon of progress.
TL;DR: Run 3 solar panels per battery cell early. Place wind turbines at max altitude for 2.5x output. Demolishing returns 100% of materials, so your early layout costs nothing to redo. Build the Research Table before anything else or your progression stalls. Wheat isn't on the starting island, so plan your first farming setup around berries and cotton.
What are the best Solarpunk tips for new players? (quick answer)
The energy system isn't forgiving on default settings, but it's completely transparent once you know the rules. Three solar panels per battery cell is the baseline for early stability. Place wind turbines as high as you can reach, not at ground level. Build the Research Table immediately after the Crafting Table, because it unlocks everything that makes the mid-game work. Those three things prevent most of the early-game frustration players run into.
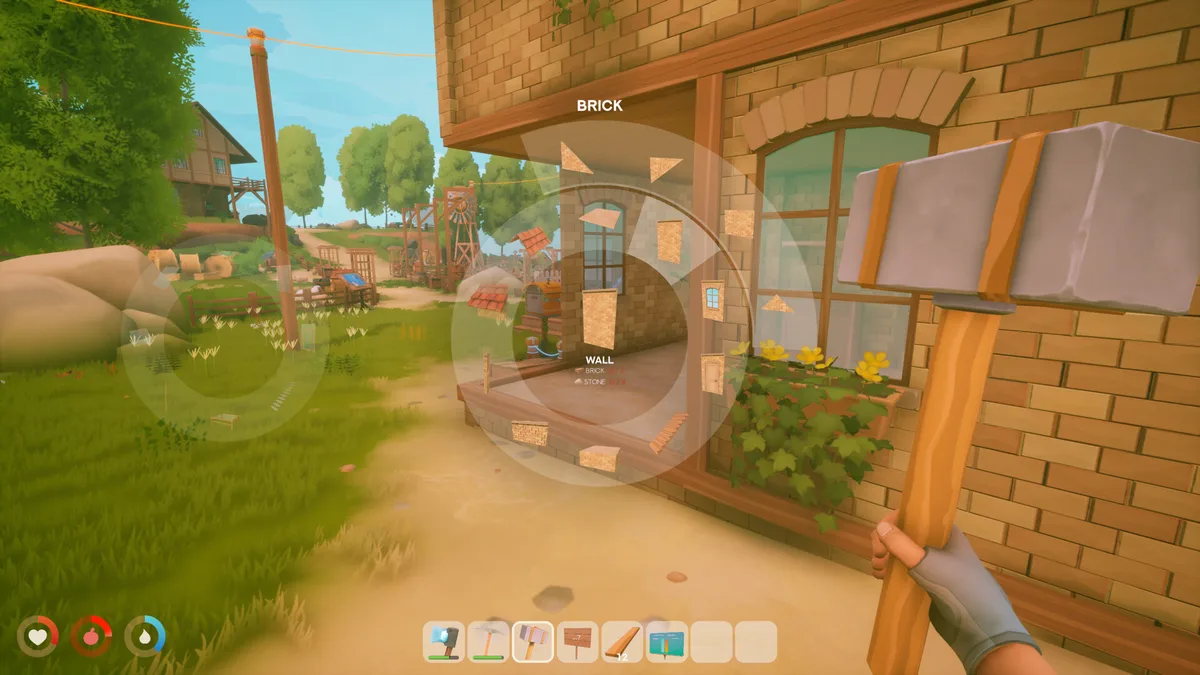
Build the Research Table before you build anything permanent
The game's first instinct is to start placing walls and floors. Resist that.
The Research Table is what Solarpunk calls "arguably the most important object in your settlement." It unlocks advanced systems: better energy, automation recipes, airship components, crop upgrades. Without it, you're building with the starting toolkit indefinitely.
Go in this order: Crafting Table, then Research Table, then storage and a bed, then start your base layout. Players who skip the Research Table and spend an hour building a home end up tearing it down anyway once they unlock better building pieces. Since demolishing returns all materials, the teardown doesn't cost you anything. But the time is gone.
Collect berries, sticks, stones, and wood on your first pass across the island. Craft the Survival Guide early, too. It explains systems the game doesn't surface in the HUD, and you'll find yourself consulting it more than you expect.
The 3:1 solar-to-battery rule (and why it matters at night)
Solar panels stop producing energy after sunset. That part's obvious. What catches new players is the daytime charge rate: a single solar panel can't charge a battery cell fast enough during the day to cover the night drain. The threshold is 3 solar panels per battery cell.
Below that ratio, your battery enters a slow drain cycle. It might not empty completely each night, but by day 3 or 4, the shortfall compounds and your automation stops. The Network Display tells you exactly how much power you're generating versus consuming in real time. Check it before you expand automation.
 The energy grid requires at least 3 solar panels per battery cell in early game. The Network Display shows real-time input vs. output.
The power tiers, based on verified generator stats:
- Solar Panel: up to 5 kW, daylight only
- Advanced Solar Array: up to 15 kW, daylight only
- Windmill: 2 to 8 kW, weather dependent
- High-Altitude Wind Turbine: 10 to 25 kW, weather dependent
- Hydroelectric Waterwheel: constant 12 kW, near water only
Once you have a Hydroelectric Waterwheel, it becomes your baseload generator. Until then, solar plus battery is the foundation.
GODEEPER: Outbound's energy management loop runs on similar principles but with a van-mounted battery instead of a fixed grid. Outbound Energy Management Guide →
Place wind turbines at maximum altitude, not ground level
Most beginner guides skip this entirely, which is a real gap.
Wind output scales with altitude. At sea level (Z:0), wind turbines get a 0.5x multiplier to wind speed. At Z:150, that multiplier reaches 2.5x. A single Advanced Wind Turbine placed at maximum altitude puts out the same power as five of the same turbine on the ground. Same material cost either way.
Build a tower or use stairs to reach elevated terrain, then place your turbines there. The game doesn't tell you this directly. The community worked it out through comparison testing.
For a stable mid-game power grid, a 60/40 split between high-altitude wind turbines and unobstructed solar panels covers most weather scenarios. Solar handles clear days. Wind picks up the slack during storms and at night, when solar's dead but wind often picks up.
Use demolish freely: 100% material return is not an accident
Every building component returns all its materials when demolished. No waste, no loss. Cyberwave designed it this way.
Your starting island layout doesn't matter. Place your Crafting Table wherever. Build storage in a corner. Try a roof configuration, hate it, tear it down. The resource cost is zero.
Players who treat the early base as permanent waste hours on placement. The sensible approach: build functionally, get the Research Table and energy system running, then redesign once you know what you need. Flat roofs first, complex geometry later. The material return policy exists to make iteration painless.
 Stairs are the only way to reach elevated terrain on your starting island. Build them early to access higher-altitude wind turbine placement.
Stairs do more than connect floors. They get you to elevated sections of the island that hold better turbine placement and sometimes resource patches that aren't reachable from ground level.
Soft Mode changes the game's stakes, not its depth
Standard mode drops your inventory on death and applies full hunger, thirst, and lightning damage. Soft Mode removes the death penalty, reduces lightning damage, and cuts hunger and thirst drain.
What Soft Mode doesn't change: progression speed, building options, energy system complexity, exploration scope, available content. It's not a tutorial mode. It's the same game with lower survival pressure.
If you want the survival loop to have teeth, play Standard. If you want to focus on building, farming, and exploring without the hunger bar eating your attention, play Soft. The game was designed around coexistence rather than combat, so neither mode is the "wrong" choice. Pick the one that matches what you're here for.
GODEEPER: Read the full Solarpunk review for a breakdown of the energy system's long-term depth and where the survival loop holds up versus where it plateaus. Solarpunk Game Review →
Your first farming setup: berries and cotton, not wheat
Wheat isn't on the starting island. New players sometimes spend time searching for it, or hold off on farming until they think they can run a full crop rotation. That wait costs you.
Berries and cotton are available from the start. Plant berries for food. Plant cotton because it feeds into crafting recipes earlier than most players expect. Once crops are in the ground, use the downtime: lay out your home, set up storage, run cables for the energy grid.
The farming loop rewards multitasking. Crops take real time to grow. Players who hit the airship fastest are the ones stacking tasks rather than waiting on timers.
Manual watering is part of the early loop until you research crop sprinklers. The Motorized Water Pump pressurizes your water supply for irrigation. Automate irrigation before you automate anything else. It's the most time-consuming daily task, and clearing it frees up a lot of mental space.
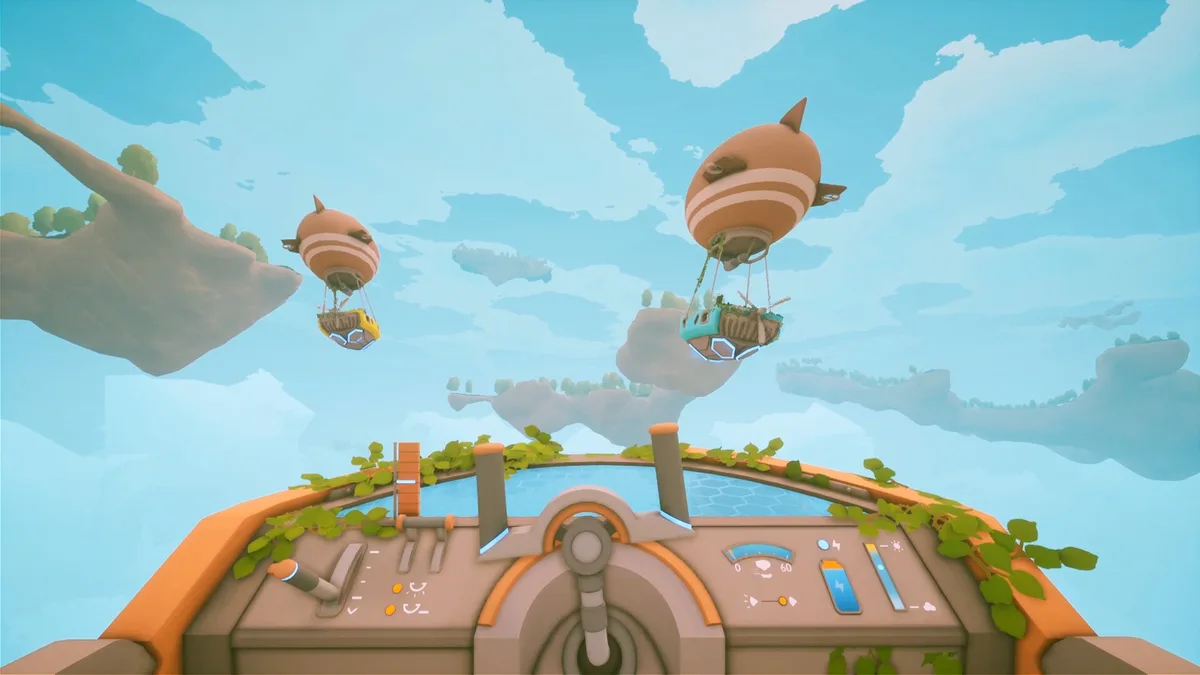
The airship is your real progression gate
The first half of Solarpunk has one destination: build your airship and reach the next island. Research Table, Airship Dock recipe, then the airship itself.
In solo play, this is clean. In co-op, each player must build their own airship. The host doesn't share airship access. If you're playing with others, coordinate so everyone is working toward their own airship at the same time, or you end up with three players watching one person explore for an hour.
The airship controls are genuinely awkward at first. This isn't a minority opinion. Give yourself a few minutes on your home island to get a feel for them before trying to land somewhere new. The controls become readable fast, but the first landing is rough for almost everyone.
Build extra battery capacity before you expand automation
The Heavy-Duty Grid Battery upgrade sequence: 2,200 base capacity, then 3,500, then 5,500, then 8,000 units.
The mistake is adding automation systems before your battery reserve can cover overnight demand. The Logistics Control Center for drone deliveries draws constant power. If the battery can't sustain both the base overnight draw and the automation draw, you wake up to a stalled factory and dead plants.
Add one battery upgrade before adding any significant automation. Build capacity ahead of demand.
Use the Survival Guide: it's not decoration
Most players craft the in-game Survival Guide, skim it once, and forget it exists. That's a mistake.
It covers things the HUD doesn't surface: animal breeding mechanics, water purification, what the research tiers unlock, structural stability rules for buildings. The clean water process alone justifies keeping it open: boil water in the oven, then research a carafe to carry it. Not obvious at all, and the Survival Guide explains it.
When you're confused about a mechanic, check the Survival Guide before spending 30 minutes experimenting. It's the closest thing to a built-in tutorial the game has, which, given how much Solarpunk leaves unexplained, is worth taking seriously.
Key Takeaways
- Research Table first, base layout second; demolishing returns 100% of materials
- Minimum 3 solar panels per battery cell for stable early power
- Wind turbines at maximum altitude output 5x more than ground-level placement (2.5x vs 0.5x altitude multiplier)
- Soft Mode removes death penalty and survival pressure but not content depth
- Wheat is not on the starting island; start with berries and cotton
- Each co-op player must build their own airship independently
- Add battery capacity before expanding automation
- Main progression takes around 20 hours; sandbox continues after
Related Reading
- Solarpunk Game Review: Floating Island Survival 2026: full verdict on the energy system, co-op design, and where the long-term loop holds up.
- Outbound Energy Management Guide: another survival game where power management is the central challenge, with comparable resource-planning lessons.
- Outbound Co-op Guide: multiplayer survival co-op mechanics explained, useful context for Solarpunk's shared-session design.
- Shapez 2 Tips Guide for Beginners: logistics and automation thinking that transfers directly to Solarpunk's drone and factory systems.
- Solarpunk Base Layout Guide: Animal Care and Zoning 2026: Optimal zoning for citizen happiness, animal care building placement, and the resource density principles that keep late-game districts from stalling.
- Best Indie Games Under $20 in 2026: for players who want to compare Solarpunk's value against other survival and building games in the same tier.
- Solarpunk Progression Guide: Mid to Late Game 2026: Solarpunk progression guide covering research tree tiers 4-8, when to automate, how to scale past.
References
- Solarpunk on Steam
- Steam Community Guide: Read Before You Play Solarpunk
- Solarpunk Official Co-Op Gameplay Trailer (IGN Fan Fest 2026)
- Solarpunk Energy System Wiki
- PixelNitro: Solarpunk Building Guide
Frequently Asked Questions
How many solar panels do I need per battery in Solarpunk? The stable early-game threshold is 3 solar panels per battery cell. Below that, the battery drains faster than it charges during daylight, and automation cuts out before nightfall. Once you unlock advanced solar arrays (up to 15 kW), the ratio improves, but early on, 3:1 is the rule.
Does Solarpunk have a soft mode and what does it change? Yes. Soft Mode removes the death penalty, reduces lightning damage, and lowers hunger and thirst drain. It does not change progression speed or lock content. New players focused on building and exploration should start there.
Can you get wheat on the starting island in Solarpunk? No. Wheat requires reaching a later island by airship. Use berries and cotton for your first farming setup.
Do you lose materials when you demolish buildings in Solarpunk? No. Demolishing returns 100% of materials. Place and rearrange freely without resource penalty.
Does each co-op player need their own airship? Yes. Only the player who built an airship can use it. Each co-op player must research and build their own independently.
What is the best early energy setup in Solarpunk? Energy Workbench first to unlock crafting. Then solar panels in open sky, cables to a battery, a Network Display to monitor output, and a Drill to start automation. Three solar panels per battery cell minimum.
How long does Solarpunk take to complete? Around 20 hours for main progression. Sandbox mode continues after with no defined endpoint. Most players log 30 to 50 hours before the core systems plateau.
Was this guide helpful?
About the author

Senior Critic & Analyst
Former game data analyst turned critic with 11 years covering indie and mid-tier games. Based in Austin. Runs spreadsheets on games most people just play.
- 11 years games criticism
- Former game economy analyst
- Roguelike and strategy specialist


Disclaimer
This article is published for informational and entertainment purposes. It does not constitute professional financial, legal, or technical advice. Game performance, online services, patch schedules, and store listings change. Verify critical details (pricing, system requirements, regional availability) with publishers and storefronts before you buy. Affiliate links, where present, help support our editorial work and are labelled in our affiliate disclosure.