GameBrief · General
Shapez 2 Automation Guide: Belt Routing and Advanced Tips
Reviewing
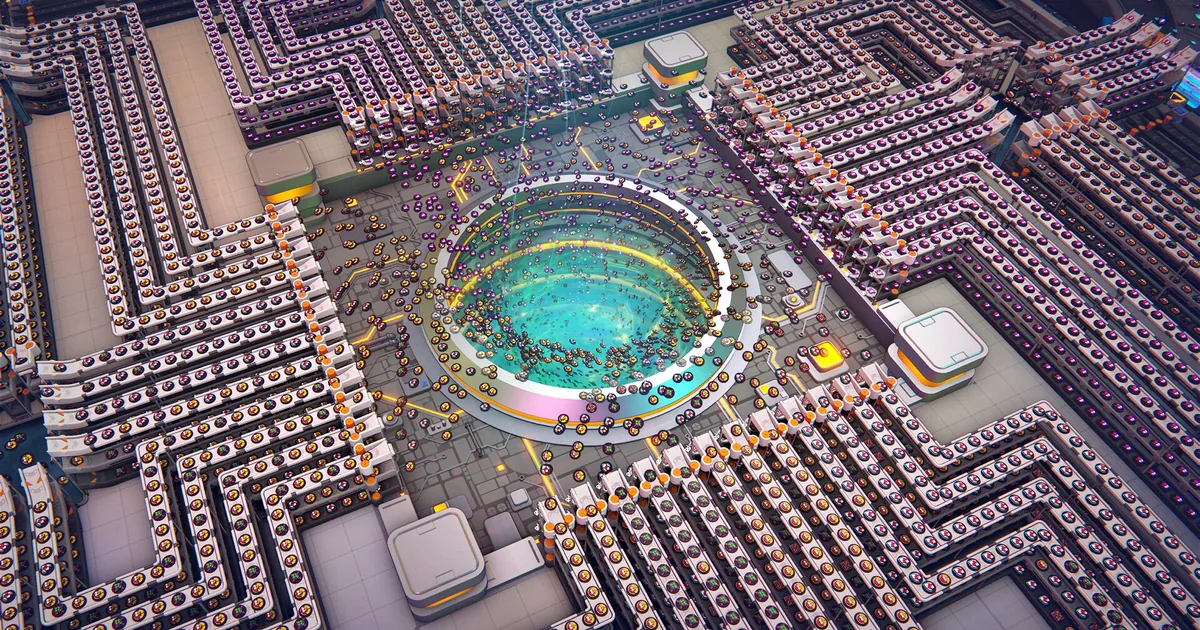
shapez 2 - Factory
tobspr Games · tobspr Games
This Shapez 2 automation guide covers how belt routing actually works, the splitter and merger mechanics that trip up most players, and the factory layouts that keep throughput stable as research demands scale up. The 38-minute average session time on the site's Shapez 2 content suggests players are spending time working through real automation problems, not skimming. This guide is for that 38-minute player.
TL;DR: Belt splitters and mergers distribute items in round-robin order, not by demand. Throughput collapse starts when one branch can't consume as fast as it's receiving. Fix it at the bottleneck, not the source. For mid-game and beyond, a balanced 4-belt bus avoids most routing problems before they start.
Shapez 2 automation guide: how the belt system works (quick answer)
Shapez 2's belt system moves shapes from extraction to processing to delivery. Each belt carries one item at a time through cells. Splitters divide that flow; mergers combine it. The game doesn't manage this automatically. Every routing decision is yours, and every bad one shows up as backup that propagates upstream until production stalls.
The key fact most players miss: splitters and mergers work on round-robin rotation, not on demand. This matters for mixed-input lines and for understanding why backpressure spreads.
GODEEPER: Core game mechanics, research unlocks, and Manufacture Mode explained for new players. Shapez 2 Complete Guide 2026 →
Key takeaways
- Splitters and mergers distribute items in round-robin order
- Backpressure propagates upstream when a belt can't accept new items
- Belt balancing (splitter-merger ladders) prevents uneven load across parallel lines
- Underground belts let you cross belt paths without connecting them
- Bottlenecks are almost always downstream, not upstream
- A main bus layout scales further than a spaghetti layout
How splitters work
A basic splitter takes one input belt and sends items to two output belts alternately. Item 1 goes left, item 2 goes right, item 3 goes left, and so on. This is round-robin, not load-balanced. If the right output belt is full and can't accept an item, the splitter holds item 2 until it can, which means item 3 (which would go left) also waits even though the left belt is empty.
This is how backpressure works: one blocked output stalls the entire splitter, which stalls the input belt behind it.
Practical implications:
If you split a belt into two branches that process at different speeds, the faster branch will stall waiting for the slower one to clear. You'll see the faster branch go idle intermittently rather than running at capacity. The fix is either making both branches process at the same rate or using separate input belts for each branch.
Splitter types available:
- 1-to-2: Basic split, most common
- 1-to-3: Available after research unlocks; rotates between all three outputs
- Smart splitters (research unlock): filter-based routing; send specific shape types to specific outputs
Smart splitters change the routing problem entirely. Instead of designing for balanced throughput, you design for shape type. One input belt carries everything; the smart splitter directs each shape type to the building that needs it. This is how late-game factories handle 8+ shape types on a single bus without manually separating lines.
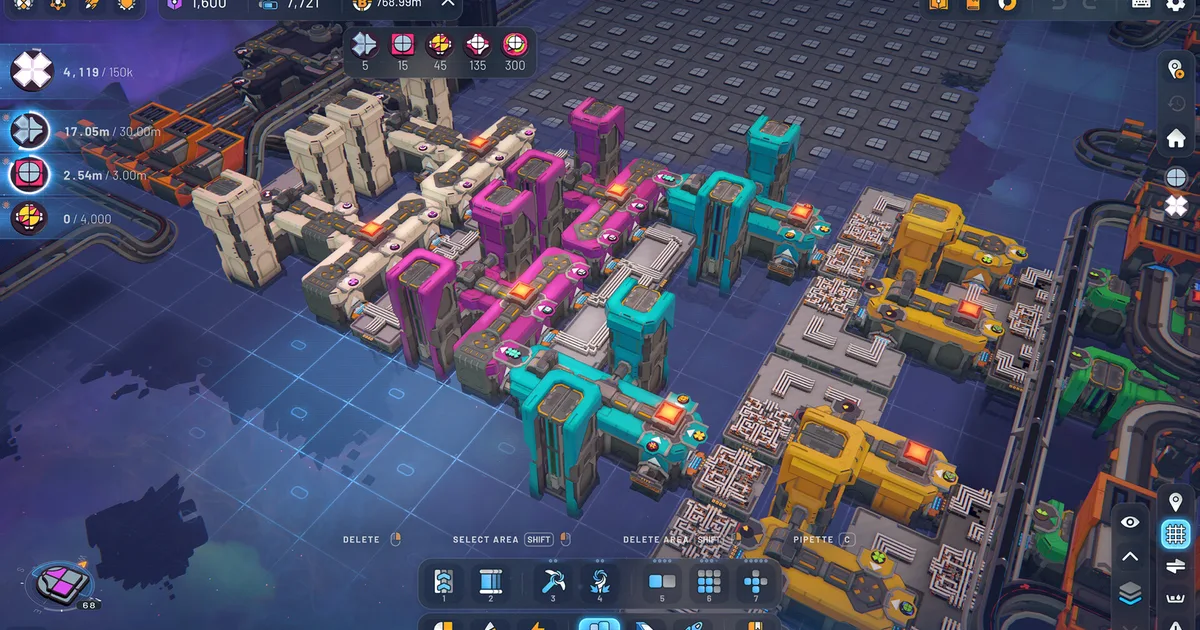
 A balanced 4-belt layout from a single input: 1-to-2 splitter, each output splits again, all four output belts run in parallel. Each carries 25% of input throughput.
How mergers work
Mergers do the reverse of splitters: two or three input belts become one output belt. Items from each input are interleaved in round-robin order. If one input is empty, the merger waits briefly then pulls from the other input.
Unbalanced mergers are one of the most common causes of output stalls. If input lane A is full and input lane B is empty, the merger outputs items from A, waits for B, outputs one from A again, waits for B again. The effective output rate drops to roughly half what it would be with both lanes full.
When mergers cause problems:
Any time you combine two production lines that run at different speeds. Say one branch cuts shapes at 6/second and the other paints at 4/second. The merger's output rate is governed by the slower branch, but the round-robin interleaving means the faster branch also gets throttled.
The fix: don't merge production lines of different speeds. Either bring both branches to the same throughput rate before merging, or keep them separate all the way to the delivery point.
Belt balancing: what it is and when to use it
Belt balancing distributes an input evenly across multiple parallel output belts using a series of splitters and mergers called a balancer. The goal is that every output belt carries exactly the same fraction of the input.
A 4-belt balancer looks like this:
- Input belt hits a 1-to-2 splitter
- Each of those outputs hits another 1-to-2 splitter
- You now have 4 belts each carrying 25% of input
- Optional: feed those 4 belts through a 4-to-4 balancer ladder (cross-connect with splitters and mergers) to fully equalize any transient imbalances
Why bother? In a long factory run, small imbalances accumulate. One building processes slightly faster than its neighbor and gradually empties its input buffer faster. Without balancing, you'll find some buildings at 100% utilization while parallel buildings at the same tier sit idle. A balancer at the input ensures all buildings in a row receive equal supply.
When you need a balancer: when you have 3+ parallel buildings doing the same job and you notice uneven utilization. You don't need a balancer for a single building or a two-building row; a basic splitter handles that.
Overflow management
Overflow happens when a production line generates output faster than the next step can consume it. The output belt fills. The building stops outputting. The input belt backs up. The chain propagates to whatever is feeding that building.
Three ways to handle it:
The simplest is a buffer. Place a storage building or loop at the output of a fast producer. It absorbs surplus without stalling the building and drains slowly as the downstream catches up. Good for small mismatches, not sustained ones.
The correct fix for sustained overflow is adding parallel capacity downstream. If a cutter is outpacing the painter it feeds, add a second painter. Both painters share the cutter's output, and the effective consumption rate doubles. A buffer just delays the same stall from happening later.
Sometimes the easiest move is slowing down the upstream producer. If you're one research tier ahead of your delivery quota, you don't need maximum throughput yet. Design for the current quota and extend when you get there.
Overflow loops: Some players route overflow back to the start of the same production line rather than discarding it. This works in specific cases (when the item can be re-processed), but creates a feedback loop that can stall the entire line if the downstream stays full too long. Use a directional valve (research unlock) to prevent backflow, or skip loops until you understand the throughput math.
Building an effective main bus
A main bus is a central belt highway that runs the length of your factory. Buildings branch off the bus on both sides. Processed output merges back to a delivery bus or a secondary segment of the main bus.
The main bus works because it's linear and readable. Every building's relationship to the bus is obvious. Adding a new branch doesn't require understanding what's happening five branches down. When something stalls, you walk the bus until you find the stalled building.
Main bus rules that prevent problems:
Input side: Each branch off the main bus gets its items from a splitter, never from tapping the main bus directly. Tapping the belt directly disrupts flow for everything downstream.
Output side: Each branch's output merges back to the delivery bus from the side, never blocking the main bus. The main bus carries raw/in-process materials; the delivery bus carries finished shapes.
Width: Design the bus wider than you think you need. Extending a bus later means either rebuilding or routing belts around existing infrastructure. Two belt widths for each major shape type, from the start, avoids most mid-game rebuilds.
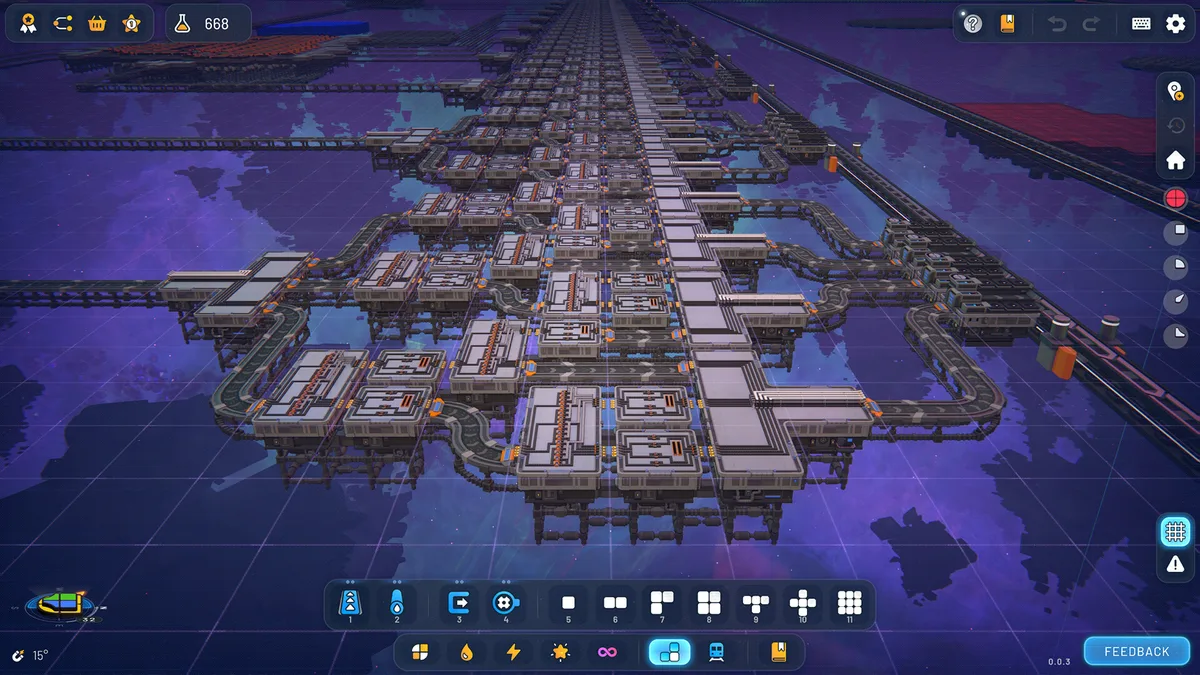 A mid-game main bus: each building row branches off the central belt with splitters on both sides. Output returns to a separate delivery bus at the top.
Underground belts: the full picture
Underground belts pass items underground over a span of multiple cells, emerging at the exit point without connecting to surface belts in between. They let two belt lines cross without interfering.
What most guides don't mention: the underground belt span length is not infinite. Each underground entry-exit pair has a maximum length, and that length increases through research upgrades. In early game, an underground span of 4 cells is typical; by mid-game you can cross much larger gaps. If you route an underground belt and it won't connect, you've exceeded the span limit for your current research tier.
Practical applications:
- Crossing two perpendicular belt lines (the most common use)
- Running a belt along the back edge of a building row where the building's exit is in the way
- Creating a hidden return loop from overflow back to storage
- Passing a delivery belt under a section of processing buildings to bring finished shapes to a specific output point
Underground belts don't buffer. Items pass through at belt speed. If the output side is blocked, the underground belt backs up the same way a surface belt does. They solve routing problems, not throughput problems.
Common automation mistakes
Spaghetti routing: Running belts around each other wherever they fit, without a clear layout plan. Works at 20 buildings. Becomes impossible to debug at 100. The fix isn't being smarter about the routing. It's committing to a bus layout before you hit 30 buildings.
Merging before processing: Combining two different shape types onto one belt and then trying to filter them apart later. Smart splitters can handle this, but basic ones can't. If you find yourself filtering downstream, you probably should have kept the lines separate upstream.
Building at the bottleneck, not the constraint: When a factory stalls, players often add more extractors or more input belts. The problem is almost never the input side. Walk downstream to find the building that's outputting at less than its rated throughput. That's your bottleneck. Fix it there.
Not using underground belts for building exits: A row of cutters with their exit belts blocked because the belt path runs into the next row's input side. Two underground segments let the exit clear the row boundary. This is the single most space-efficient routing tool in the game and it's underused.
Designing for peak demand instead of current quota: The most common reason a factory becomes unreadable. You build for tier 8 throughput when you're on tier 3 quota. The factory works but it's three times larger than necessary, which makes every expansion harder. Build for 2 tiers ahead at most. Extend when you get there.
GODEEPER: How Manufacture Mode changes the factory design problem at mid-game. Shapez 2 Manufacture Mode Guide: How It Works in 1.0 →
Throughput targets by research tier
Shapez 2 doesn't publish official throughput numbers in-game, but community testing via the r/shapez2 subreddit and tobspr's Tips and Tricks announcement from April 30 2026 suggests these practical targets:
| Research tier | Shapes/minute needed | Belt lines needed |
|---|---|---|
| 1-3 | 40-80/min | 1 main belt |
| 4-6 | 150-300/min | 2-3 parallel belts |
| 7-9 | 500-800/min | 4-6 parallel belts with balancing |
| 10+ | 1000+/min | Full main bus with smart splitters |
These are starting points, not hard numbers. Your specific shape requirements vary by run. The value of this table is the structure: early game is a single-line problem; late game is a parallelism problem.
All Shapez 2 guides
- Shapez 2 Complete Guide 2026: hub covering all core systems including belt routing, Manufacture Mode, shape stacking, and factory-building fundamentals.
- Shapez 2 Beginner Tips Guide 2026: starting guide for new players covering the research loop, first factory layout, and shape priorities for the early tiers.
Related Reading
-
Shapez 2 Complete Guide 2026: the hub for all Shapez 2 content, including the full mechanics overview, Manufacture Mode, and the factory-building principles that guide every system.
-
Shapez 2 Beginner Tips Guide 2026: starting guide for players new to Shapez 2, covering the research loop and the first factory layout decisions before automation becomes necessary.
-
Die in the Dungeon Complete Guide 2026: dice-based roguelite with resource management decisions that follow the same bottleneck-first logic as factory throughput planning.
-
All Hail the Orb Complete Guide 2026: another automation-adjacent game where resource chains and prioritization decisions reward the same systems thinking.
-
Shapez 2 Best Mods 2026: Top Workshop Picks & Install: Shapez 2 best mods: the Workshop picks worth installing, from OptiBelt performance to blueprint and time-control tools, plus.
-
Shapez 2 Blueprints: Save, Share & Import to the Library: Shapez 2 blueprints guide: save factories to the library, copy and paste with blueprint codes, import .spz2bp files,....
-
Shapez 2 Manufacture Mode Guide: How It Works in 1.0: Shapez 2 manufacture mode: Dimensional Waste, Trade Stations, and the path to the Grand Vortex.
-
Shapez 2 Shape Stacking Guide: Layers & The Stacker: Shapez 2 shape stacking explained: how the Stacker layers shapes, why left input goes on.
-
All Hail the Orb Stamina Guide: Super Beds Explained 2026: All Hail the Orb stamina limits cultist output without showing you why.
-
All Hail the Orb Automation: Max Cultist Efficiency Guide: All Hail the Orb automation guide: optimal cultist distribution by stage, idle session checklist, stamina.
References
- Shapez 2 on Steam: official store page, patch notes, Workshop mod library, and release notes from tobspr Games
- tobspr Games Tips and Tricks announcement: April 30 2026 developer post covering beginner automation patterns and early factory layout recommendations
Frequently Asked Questions
How do belt splitters work in Shapez 2? Splitters divide incoming belt flow into two or three output lanes using round-robin distribution. Each item goes to the next output in sequence. If one output is blocked, the splitter stalls until it clears. It doesn't redirect to the open output. This is the most important mechanical detail for avoiding backpressure.
What causes throughput collapse in Shapez 2? Throughput collapse starts when a downstream building can't accept items as fast as they're arriving. The belt in front of that building fills, which backs up to the splitter or merger behind it, which stalls other branches sharing that input. Fix: identify the actual bottleneck building and add capacity there.
How do mergers work in Shapez 2? Mergers combine two or three belt lanes into one output using round-robin interleaving. If one input is empty, the merger waits for it rather than pulling only from the available lane. This causes effective output rate drops when one input lane runs slower than the other. Keep input lanes at matched rates before merging.
What is belt balancing in Shapez 2? Belt balancing uses splitter-merger combinations to distribute input evenly across multiple parallel output belts. A 4-belt balancer ensures each output belt carries 25% of input throughput, preventing uneven building utilization in long parallel rows.
How do I fix a backlogged factory in Shapez 2? Find where items are first stacking, then walk the belt backward to find the first building not outputting at full rate. That building is the bottleneck. Add a parallel building beside it or increase its processing rate rather than adding more input supply.
What is the best belt layout for early game in Shapez 2? A main bus: one central belt carries raw shapes, branches split off to processing buildings, output merges back to a delivery bus. It's readable, debuggable, and extends naturally. Avoid loops and spaghetti routing until you understand where belt crossings cause problems.
When should I use underground belts in Shapez 2? Use them to cross two belt lines without connecting them, to route behind building rows without blocking exits, or to pass a delivery belt under a section of factory. They don't buffer and they respect the span limit for your research tier. They solve routing geometry, not throughput.
Was this guide helpful?
About the author

Senior Critic & Analyst
Former game data analyst turned critic with 11 years covering indie and mid-tier games. Based in Austin. Runs spreadsheets on games most people just play.
- 11 years games criticism
- Former game economy analyst
- Roguelike and strategy specialist
Keep reading


Disclaimer
This article is published for informational and entertainment purposes. It does not constitute professional financial, legal, or technical advice. Game performance, online services, patch schedules, and store listings change. Verify critical details (pricing, system requirements, regional availability) with publishers and storefronts before you buy. Affiliate links, where present, help support our editorial work and are labelled in our affiliate disclosure.