GameBrief · Guides
Shapez 2 Manufacture Mode Guide: How It Works in 1.0
How does Shapez 2 manufacture mode work? It's the 1.0 endgame progression layer added in April 2026, and it functions differently from the Classic Mode delivery quotas you've been clearing. Manufacture Mode chains are permanent: every Polishing block, every Trade Station, every Dimensional Waste route stays in place because later tiers consume what the earlier ones produce. This guide covers how to start the chain, what each station does, and the structural rules that punish the rebuild-as-you-go approach Classic Mode lets you get away with.
TL;DR: Manufacture Mode unlocks after you've cleared the Classic Mode pipeline. The chain runs Dimensional Waste Receiver → Polishing Station → Trade Stations → research infrastructure (Donation + Research Stations) → alternate recipes → scaled refined chains → Grand Vortex Assembler. Do not delete earlier production once it's working; later tiers depend on it. Most players should not touch Manufacture Mode in their first 10 hours.
Shapez 2 manufacture mode? (quick answer)
Manufacture Mode is the 1.0 progression layer that introduces persistent, scaling factory infrastructure. The core mechanic: every station tier consumes the output of the previous tier permanently. A Polishing Station built on day one is still feeding refined material into a Trade Station on day twenty. Unlike Classic Mode, you cannot delete the foundation once you've built on top of it.
The progression chain at a glance:
- Dimensional Waste Receiver pulls raw waste input
- Polishing Station refines waste into the first usable output
- Trade Stations consume polished output, unlock alternate recipes
- Donation Station + Research Station generate research progress
- Scaled refined chains produce higher-tier outputs
- Grand Vortex Assembler is the endgame target
Key takeaways
- Manufacture Mode is post-Classic Mode content. Don't start it before you're comfortable with belts, painting, and Space Belts.
- The chain is permanent. Buildings can be deleted, but deleting upstream breaks downstream.
- Trade Stations are the economic core. Each tier requires the previous one to keep producing.
- Dimensional Waste is the starting input. Variants matter: each Polishing Station wants a specific type.
- Research scales efficiency, not output. Alternate recipes unlock through donations.
- The Grand Vortex Assembler is the endgame goal but reaching it takes 20+ hours of Manufacture work for most players.
- Plan for scale before building. Leave room for expansion at every tier.
What Manufacture Mode adds in 1.0
Shapez 2 spent 20 months in Early Access before the 1.0 release on April 23, 2026. Classic Mode was the foundation: belt routing, shape stacking, painting, multi-layer factories. Manufacture Mode is what 1.0 added on top.
The Steam community confirmed the design intent: Manufacture Mode is for players who've already learned how to build factories without rebuilding them. The progression assumes mastery of the basics. Trade Stations, Vortex mechanics, and the research infrastructure all sit above the Classic Mode skill ceiling. If you can't build a self-balancing painted-shape factory without crossing belts over themselves, you're not ready for Manufacture Mode yet.
The most important structural difference is permanence. In Classic Mode, the level 3 belt factory becomes redundant once you hit level 5. Tear it down, reuse the space, build the next thing. Manufacture Mode reverses that: your level 3 Polishing Station is still feeding into your level 5 Trade Station, which is still feeding into your level 7 Research Station. Delete the wrong thing and three tiers above it stops producing.
This permanence is also why Manufacture Mode rewards planning more than Classic Mode does. A bad layout in Classic Mode costs you 30 minutes of rebuild. A bad layout in Manufacture Mode costs you the entire downstream chain.
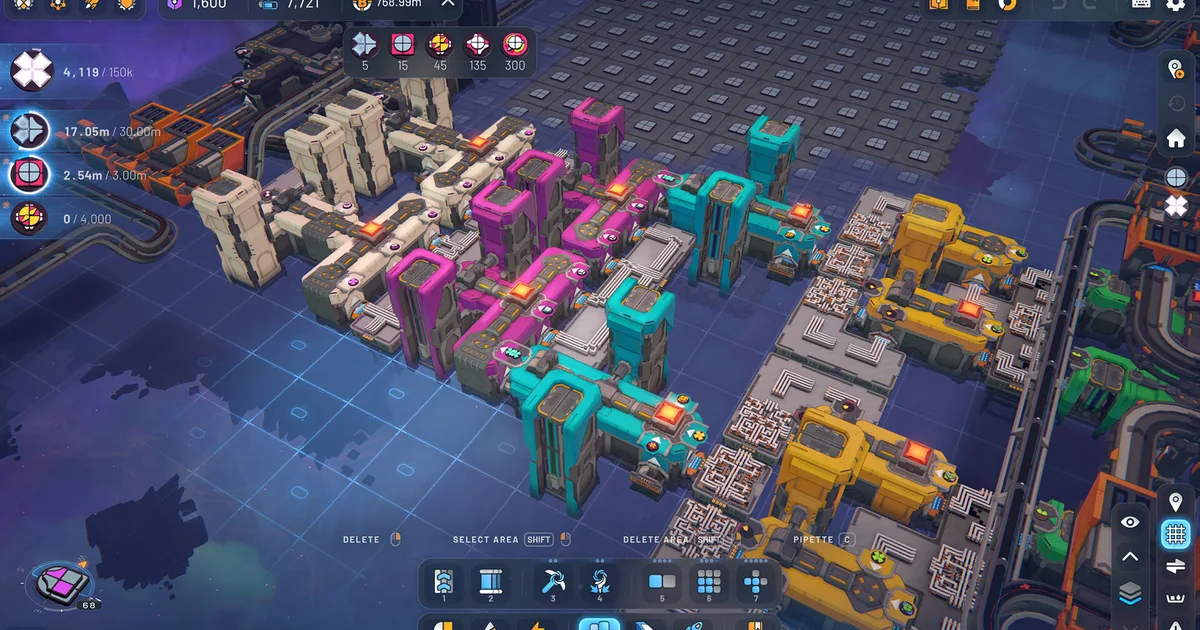
 A scaled production block churning out a single refined shape across many parallel machines. Manufacture Mode rewards this kind of repeatable, expandable layout over a cramped one-off setup.
Step-by-step: starting your Manufacture chain
The first hour of Manufacture Mode determines whether your factory will scale or whether you'll rebuild it three times. Here's the order.
Step 1: Place the Dimensional Waste Receiver. This is your input. Pick a location with room for at least three Polishing Stations adjacent and two empty belt lanes running away from it. You will need that space.
Step 2: Identify the waste variant required. Each Polishing Station wants a specific Dimensional Waste type. Check the recipe panel before building. Building the wrong Polishing Station and feeding it the wrong waste variant is the most common first-hour mistake.
Step 3: Build one Polishing Station, route the matching waste type in. Run it. Confirm it produces refined output. Confirm the output belt is going somewhere it can be consumed or stored.
Step 4: Connect to the first Trade Station. Trade Stations consume the polished output. Place the Trade Station with adjacent space for expansion: you'll be adding more Trade Station tiers later, and they should sit next to each other for belt routing.
Step 5: Scale the starter Polishing block before adding the next Trade Station tier. This is where Classic Mode players go wrong. They build one Polishing Station, connect to one Trade Station, and then chase the next tier. By tier 3, the original Polishing Station is the bottleneck. The fix: scale to three or four Polishing Stations producing the same refined output before stepping up to the next Trade Station tier.
Step 6: Add Donation + Research Stations. Once Trade Station tier 2 is online, the Donation Station and Research Station unlock. These generate research progress and unlock alternate recipes. The alternate recipes typically reduce inputs needed for higher-tier production, so research time pays back into reduced bottleneck pressure.
Step 7: Build the next refined chain tier. Each subsequent tier follows the same pattern: scale the previous output, route it to the new station, leave space for the next tier. Do not delete any earlier infrastructure.
GODEEPER: Manufacture Mode assumes you've mastered Classic Mode routing. If your belts cross over themselves or you're rebuilding for layout reasons, learn the basics first. Shapez 2 Beginners Guide: 12 Essential Tips for 1.0 →
Trade Stations: the economy core
Trade Stations are the structural hub of Manufacture Mode. Every refined chain feeds them, every research tier comes from them, every alternate recipe is unlocked through them.
What Trade Stations do:
- Accept refined materials produced by Polishing chains
- Convert refined materials into Trade Station tier progress
- Unlock the next Trade Station tier when threshold is met
- Provide access to alternate recipes that reduce input requirements
- Connect to the Donation Station and Research Station infrastructure
Each Trade Station tier requires materials from the previous tier. Tier 2 consumes Tier 1 outputs. Tier 3 consumes both Tier 1 and Tier 2 outputs. This is the chain dependency that makes deleting earlier infrastructure dangerous.
The practical building pattern: place Trade Stations in a row or grid with consistent spacing, leave 2-3 building widths between them for belt routing, and never put a Trade Station in a corner. Corners limit your expansion options when the next tier needs to connect.
Research output from the Donation and Research Stations unlocks alternate recipes for specific Trade Station inputs. The alternate recipes are usually more efficient (lower input requirements, same output) but require you to redirect production. Plan for redirection when building: your initial chain will not be your final chain.
The Grand Vortex Assembler
The Grand Vortex Assembler is what every Manufacture Mode chain is feeding toward. It's the endgame target, the closest thing Shapez 2 has to a victory condition.
Reaching it requires:
- A fully built Trade Station progression (multiple tiers)
- Significant Research Station output to unlock the necessary alternate recipes
- Scaled refined chains producing high-tier outputs at sustained throughput
- A factory large enough to feed the Grand Vortex Assembler's input requirements
For most players, the Grand Vortex Assembler is 20-40 hours of Manufacture Mode work from the first Polishing Station. The exact time depends on how aggressively you scale and how often you rebuild (which you shouldn't).
The Grand Vortex Assembler's output is also where some of the late-game alternate recipes feed back into earlier chains, creating optimization loops. The endgame is not "build the Grand Vortex Assembler and stop." It's "build the Grand Vortex Assembler and then optimize the whole chain backwards from there."
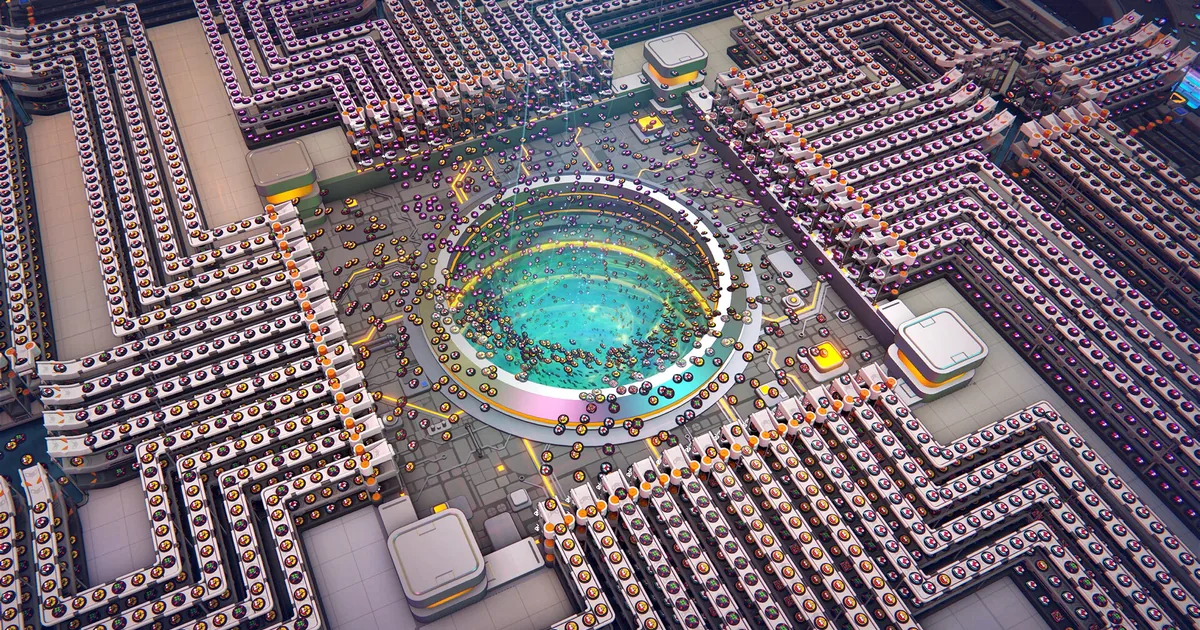
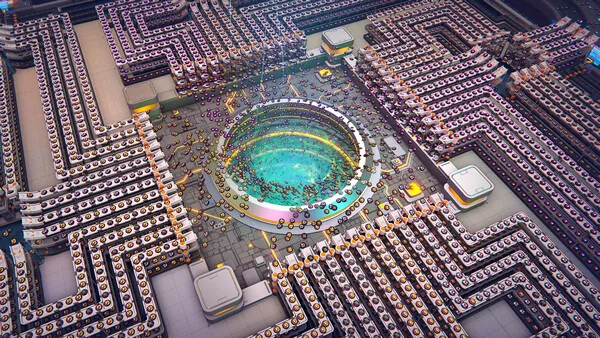
 A full Manufacture Mode factory seen from above: distinct production clusters feeding each other in sequence. The chain is permanent, so each cluster has to keep running for the ones downstream of it to work.
Tips and common mistakes
The mistakes that cost Manufacture Mode players the most time are also the most preventable.
Don't delete a working chain to "clean up the layout." It feels like you're improving things. You're breaking them. Build new infrastructure with deliberate spacing the second time, leave the working chain alone.
Plan for at least 3-4x the initial Polishing Station throughput. The first tier you build will become the bottleneck for everything that comes later. Building 4 Polishing Stations from the start costs you a few minutes; building 1 and then rebuilding 3 more around it later costs you significantly more time.
Use Space Belts for cross-factory transport. Long-distance belt routing slows down the entire chain. Space Belts are the proper solution for getting refined output from one part of your factory to another. They unlock through Classic Mode progression and become essential in Manufacture Mode.
Donate consistently, not in bursts. Research progress accumulates better with sustained Donation Station input than with periodic dumps. Build the donation routing into your main chain so it produces alongside Trade Station feed.
Read the Trade Station recipe panel before building. The recipe panel shows exactly what inputs each tier requires and what outputs it produces. Building the wrong refined chain for a Trade Station tier you don't have yet is a common failure mode.
GODEEPER: Advanced belt routing techniques (splitters, overflow management, multi-lane balancing) are necessary for sustained Manufacture Mode throughput. Shapez 2 Automation Guide: Belt Routing Advanced →
Frequently Asked Questions
Q: What is Manufacture Mode in Shapez 2? A: Manufacture Mode is the 1.0 endgame progression layer added in April 2026. It introduces Dimensional Waste, Polishing Stations, Trade Stations, and research infrastructure that feeds into the Grand Vortex Assembler. Unlike Classic Mode delivery quotas, Manufacture Mode chains are permanent: earlier factories feed later station tiers, so deleting old production breaks the chain downstream.
Q: When should I start Manufacture Mode in Shapez 2? A: Start Manufacture Mode after you're comfortable with belts, platforms, Space Belts, trains, painting, crystals, and throughput from Classic Mode. Most players should not engage with Manufacture Mode in their first 10 hours.
Q: What is Dimensional Waste in Manufacture Mode? A: Dimensional Waste is the starting input. You pull it from a Dimensional Waste Receiver, then feed the specific variant required by the first Polishing Station. Polishing produces the first refined output that feeds Trade Stations.
Q: Can I delete buildings in Manufacture Mode? A: Technically yes, but you usually shouldn't. Deleting an early Polishing block can break a Trade Station upgrade three tiers later. Plan for scale before you build.
Q: How long does Manufacture Mode take? A: Reaching the Grand Vortex Assembler takes 20-40 hours from the first Polishing Station for most players. The chain is deep, and research takes time to compound.
Q: Do mods affect Manufacture Mode? A: Steam Workshop mods can modify Manufacture Mode mechanics, recipes, and station behavior. The 1.0 release includes full mod support. Most beginners should complete vanilla Manufacture Mode at least once before adding mods.
References
- Shapez 2 on Steam: official store page, patch notes, and community guides
- tobspr Games official site: developer info, dev blog, mod tools
Related Reading
The Shapez 2 Complete Guide Hub is the entry point for every Shapez 2 guide on the site, from beginner basics through Manufacture Mode endgame.
The Shapez 2 Beginners Guide covers the Classic Mode foundation that Manufacture Mode assumes you've mastered: belt routing, shape stacking, multi-layer factories.
The Shapez 2 Automation Guide digs into the advanced routing techniques you need for sustained Manufacture Mode throughput: splitters, overflow handling, and multi-lane belt balancing.
-
Shapez 2 Shape Stacking Guide: Layers & The Stacker: Shapez 2 shape stacking explained: how the Stacker layers shapes, why left input goes on top, and how....
-
Shapez 2 Best Mods 2026: Top Workshop Picks & Install: Shapez 2 best mods: the Workshop picks worth installing, from OptiBelt performance to blueprint and time-control tools, plus.
-
Shapez 2 Blueprints: Save, Share & Import to the Library: Shapez 2 blueprints guide: save factories to the library, copy and paste with blueprint codes, import .spz2bp files,.
Was this guide helpful?
About the author

Senior Critic & Analyst
Former game data analyst turned critic with 11 years covering indie and mid-tier games. Based in Austin. Runs spreadsheets on games most people just play.
- 11 years games criticism
- Former game economy analyst
- Roguelike and strategy specialist
Keep reading


Disclaimer
This article is published for informational and entertainment purposes. It does not constitute professional financial, legal, or technical advice. Game performance, online services, patch schedules, and store listings change. Verify critical details (pricing, system requirements, regional availability) with publishers and storefronts before you buy. Affiliate links, where present, help support our editorial work and are labelled in our affiliate disclosure.