GameBrief · General
Shapez 2 Complete Guide 2026: Automation, Belts, Manufacture
Shapez 2 complete guide: belt routing, shape stacking, Manufacture Mode, mods, and every guide on the site. Hub for 1.0 players and returning veterans.

Reviewing
Shapez 2
tobspr Games · tobspr Games
This Shapez 2 complete guide covers every system in the game: belt routing, shape stacking, Manufacture Mode, and automation. Shapez 2 is a factory builder about one thing: getting the right shape, in the right combination, to the right place. Everything else (belts, splitters, Stackers, Painters, Manufacture Mode) is in service of that problem. The game released 1.0 on April 23 2026 after 20 months in early access, and tobspr Games shipped three major additions with the launch: Manufacture Mode, full mod Workshop support, and 83 new achievements.
This hub collects every Shapez 2 guide on the site. Start with the basics if you're new, jump to automation if you're rebuilding your factory for the fifth time.
TL;DR: Shapez 2 is a factory builder where you process geometric shapes through automated production lines. 1.0 added Manufacture Mode (structured production challenges), Workshop mod support, and 83 achievements. The key skill is throughput management: plan belt speeds before placing buildings. Shape stacking is the critical mid-game unlock. For beginners, the tips guide covers the 12 mistakes that slow early progress.
Shapez 2 complete guide: how the game works (quick answer)
You mine shapes, process them through buildings, and deliver the output. Buildings cut shapes, rotate them, paint them, stack layers, and merge the results. Belts connect everything.
The challenge is not knowing what you want to produce; the game tells you that. The challenge is designing a production line that hits the delivery rate without backing up, overflowing, or running out of input. That's what factory building optimization is.
Shapez 2 has two primary modes: the main campaign (which presents increasingly complex shape deliveries as you progress) and Manufacture Mode (added in 1.0, which gives structured production challenges with specific constraints). Both use the same core building mechanics; Manufacture Mode adds goal-oriented pressure.
GODEEPER: The 12 essential beginner tips covering belt routing, the overflow problem, and what to build first. Shapez 2 Beginners Guide: 12 Essential Tips for 1.0
Key takeaways
- Belt throughput planning before building saves more rebuilds than any other habit
- Shape stacking (the Stacker building) is the skill gate that separates early and mid game
- Manufacture Mode is a separate structured mode, not a replacement for sandbox play
- Workshop mod support is live in 1.0: tools, visual aids, and gameplay extensions available
- 83 achievements added in 1.0 for players who want concrete goals
Beginner tips and setup
The fastest way to fail in Shapez 2 is to place buildings and then figure out belts. Production backing up at any point in the chain stops everything downstream.
The correct approach: plan belt paths from extractor to delivery before placing anything. Consider what speed each building produces at, and whether the next building can keep up. Shapez 2 doesn't penalize a slow factory; it penalizes a factory where one bottleneck halts the whole line.
Three habits that prevent most early rebuilds:
Always place a trash building near new processing lines. Overflow is common when you're learning. A trash connection lets you discard excess while you figure out what's backing up, rather than stopping the entire factory.
Use splitters intentionally. Splitters divide flow. A 1:1 splitter cuts your throughput in half on each branch. If you need both branches at full speed, you need two extractors feeding one merger feeding one splitter, not one extractor splitting. This sounds obvious, it isn't.
Name your delivery targets. Shapez 2 lets you label buildings. Once you have 10+ production lines running, labels are the only thing that keeps you from spending 10 minutes tracing belt paths to find which line feeds which delivery.
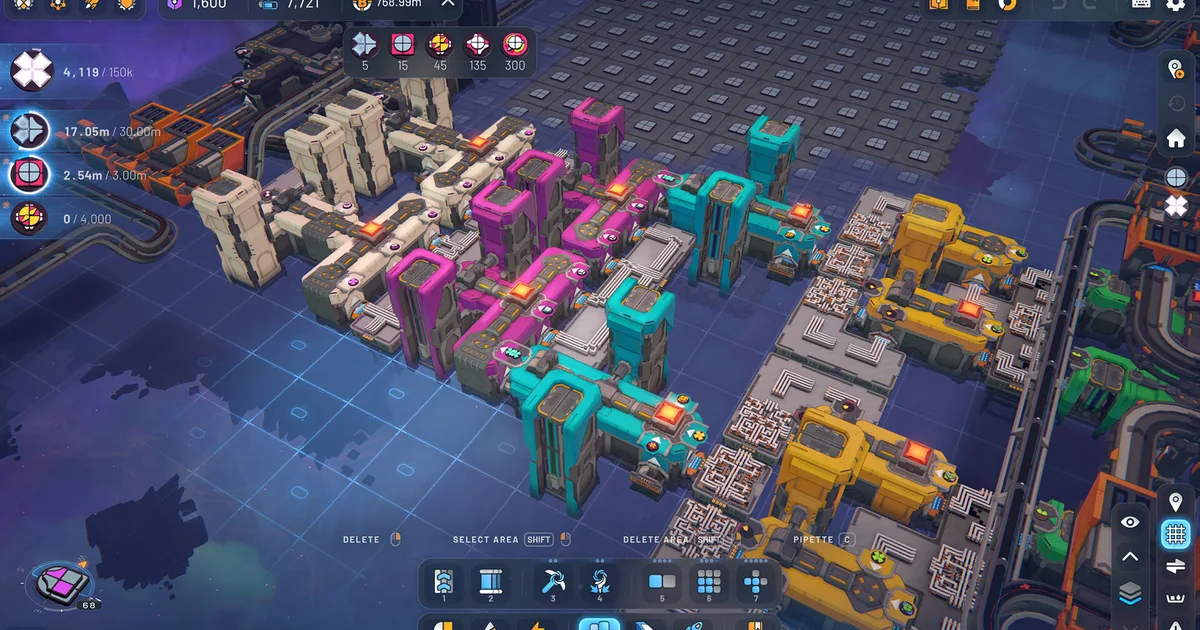
 Early factory layout with explicit belt routing. Plan paths before placing; the three-minute planning step saves the twenty-minute rebuild.
Belt routing and automation
Belt routing is the discipline of Shapez 2. Once your factory is big enough that a single line doesn't cut it, the question becomes how to route shapes across a large factory without creating crossing conflicts, throughput bottlenecks, or accidental merges.
Advanced belt routing relies on dedicated corridor lanes. Assign north-south lanes for horizontal main buses, east-west lanes for per-production-line branches. Buildings feed into and pull from the main bus, never crossing other lines in the middle.
The "main bus" layout borrowed from Factorio works in Shapez 2 with adjustments. Because shapes have more variety than ores, a Shapez 2 bus needs dedicated lanes for each shape type, not just each resource type. Mixing shapes on the same belt creates sorting problems that get complicated fast.
Splitter geometry matters. A long T-junction that splits a belt for 20 buildings produces different throughput behavior than a series of short splits. Test large layouts with a small batch before committing to a factory-scale deployment.
GODEEPER: The 12 essential beginner tips covering belt routing, throughput planning, the overflow problem, and what to build first. Shapez 2 Beginners Guide: 12 Essential Tips for 1.0
- Shapez 2 Automation Guide: Belt Routing and Advanced Tips: Shapez 2 automation guide: how belt routing and splitters work, the overflow fixes that scale,...
Manufacture Mode
Manufacture Mode is Shapez 2's structured mode, added in the 1.0 release. Where sandbox mode gives you an open factory floor and increasing shape complexity, Manufacture Mode gives you specific production challenges with defined inputs, output targets, and sometimes explicit constraints on what buildings you can use.
It's designed for players who want external goals to drive their factory design. The challenges escalate in complexity and start requiring multi-stage production lines to complete at the required rate.
Manufacture Mode doesn't share a save with sandbox mode. If you start a Manufacture Mode challenge, it's a separate session. Progress in one doesn't carry to the other; they're parallel modes using the same building vocabulary.
For players returning from early access: Manufacture Mode is the most significant new gameplay addition in 1.0. If your sandbox factory is running well and you want something to optimize against, this is where that pressure comes from.
- Shapez 2 Manufacture Mode Guide: How It Works in 1.0: Shapez 2 manufacture mode: Dimensional Waste, Trade Stations, and the path to the Grand Vortex...
Shape stacking and layers
Shape stacking combines multiple shapes into a single composite output. The Stacker building takes two inputs and produces one output with the layers merged. A four-layer stack requires three sequential Stacker operations.
The output of a stack is determined by which shapes are in which layers, in which order they're stacked, and whether each layer has been painted first. Later game deliveries specify exact layer configurations; stacking order matters, not just which shapes are included.
The Cutter building divides a shape into its quadrant components. This is the input prep step before stacking: you cut specific quadrants from different shapes to get the pieces you need, then stack them in the right order to produce the target.
Shape stacking is the most common skill wall for new players because it requires planning backward: start from what you want to deliver, figure out what stack configuration produces it, then figure out which cuts produce the right quadrant shapes for each stack input.
 The Stacker building merges two shape inputs into one layered output. Later deliveries require 3-4 layers, which means 2-3 sequential Stacker stages.
- Shapez 2 Shape Stacking Guide: Layers & The Stacker: Shapez 2 shape stacking explained: how the Stacker layers shapes, why left input goes on...
Throughput planning: a worked example
Here's the situation most new players hit at hour 3: you need to deliver 10 red circles per minute to a delivery zone. You have an extractor pulling shapes, a painter painting them red, and a delivery belt. Everything looks right. But the delivery meter never fills.
The bottleneck is almost always the painter. An extractor can pull a shape every 2 seconds. A painter processes a shape every 4 seconds. If you run one extractor into one painter, the painter can only keep up with half the input. The extractor backs up, the belt backs up, the delivery slows.
The fix: two extractors, two painters, one merger feeding one delivery belt. Both painters process at 4 seconds each; combined output matches the delivery requirement.
This is the planning-before-building habit in practice. Before you place any building, ask: what's the slowest building in this production chain? That building determines your maximum throughput. Everything else either matches it or creates waste.
Belt speed versus building speed. Belts move faster than buildings process. This is the source of almost all overflow problems. A conveyor belt can carry 30 shapes per minute; most basic processing buildings handle 15. If you feed a 30-speed belt into a single building, the overflow backs up within 60 seconds. The solution is either to split the belt before the building (so only half the shapes hit it) or to add a second building to process the other half.
Buffer zones. Between two production stages with different speeds, add a short buffer belt. It absorbs the timing mismatch without immediately backing up the input. This doesn't solve throughput mismatches but buys you time to identify them before the whole factory jams.
How shape stacking actually works (step by step)
The Stacker building is one of the most powerful tools in Shapez 2 and one of the most confusing for new players. Here's the concrete process:
A circle shape has one layer. If you stack a circle on top of a square, you get a two-layer shape where the bottom layer is the square and the top layer is the circle. The delivery target will specify which configuration it wants, and the order matters.
To stack a circle on a square: feed the square into the right input of the Stacker and the circle into the left. The right input goes on the bottom; the left goes on top. Swap the inputs and you get the reverse stack.
Four-layer shapes require chaining three Stackers in sequence: Stack A + B in Stacker 1 to get AB. Stack C + D in Stacker 2 to get CD. Stack AB + CD in Stacker 3 to get ABCD. This means four separate production lines feeding into three Stacker stages. The factory footprint for a four-layer delivery is larger than most players expect when they first encounter the requirement.
The Cutter building is the prerequisite for most stacking. If you need the top-right quadrant of a circle (just one quarter of it), the Cutter splits a shape along the horizontal or vertical axis into two pieces. Multiple cuts let you isolate any quadrant. Plan your cutting before planning your stacking.
Common mistakes in factory building
Not using trash buildings early. Every production line should have a trash building accessible on the first day you build it. When something backs up and you don't have trash, the entire line locks until you manually reroute.
Main bus with too few lanes. If you start with a two-lane main bus, you'll hit the lane limit around hour 8. Plan for at least four lanes from the start, even if you don't fill them immediately.
Ignoring the Rotate building. Most shapes that look like they need a custom cutting sequence can be rotated instead. A half-circle on the wrong side is a Rotate building away from being correct. Check rotation before cutting.
Not naming delivery targets. This costs nothing and saves 10+ minutes per hour at scale. Name every delivery zone the moment you place it.
Mods and community tools
Shapez 2 has full Workshop mod support as of 1.0. Early access mods required manual installation; Workshop mods install through Steam directly.
What's available in the mod community: throughput calculators that display live shapes-per-minute for any belt segment, visual aids that highlight bottlenecks in large factories, building organization tools that add labels and categories to the building panel, and gameplay extensions that add new shape types or building mechanics not in the base game.
The 1.0 modding API is more stable than early access. Early access mods frequently broke between updates; 1.0 mods are built against a more stable base and are more likely to work without manual intervention after game updates.
- Shapez 2 Best Mods 2026: Top Workshop Picks & Install: Shapez 2 best mods: the Workshop picks worth installing, from OptiBelt performance to blueprint and...
Is Shapez 2 worth buying?
If Factorio or Satisfactory worked for you, yes. Shapez 2 is less combat-intensive and more focused on pure logistics, which makes it the better pick for players who want to think without the pressure of resource depletion or enemy waves.
The shape stacking system in the mid-game is genuinely interesting design. The moment when a delivery target shows you a four-layer composite shape and you have to work backward through six production stages to figure out how to build it is exactly the kind of puzzle the game does well. That moment hits around hour 8-10 for most players.
Manufacture Mode adds meaningful replay value beyond the base campaign. If you finish the campaign and want structured challenges to run against, it's there. If you prefer open-ended factory building without external goals, you can ignore it. The two modes don't interfere with each other.
There's a free demo on Steam. If you've never played a factory builder before, start there before buying.
- Shapez 2 Review: Why You Can't Delete Your Factory: Shapez 2 review: Overwhelmingly Positive from 14,810 reviews at 1.0.
All Shapez 2 guides
- Shapez 2 Beginners Guide: 12 Essential Tips for 1.0: belt routing basics, throughput planning, overflow handling, and the 12 mistakes that slow early progress.
- shapez 2 1.0 Arrives April 23: Manufacture Mode and Mods: launch coverage: what tobspr Games shipped in the 1.0 release including Manufacture Mode, Workshop support, and 83 achievements.
- Shapez 2 Blueprints: Save, Share & Import to the Library: Shapez 2 blueprints guide: save factories to the library, copy and paste with blueprint codes,...
Related Reading
- All shapez 2 coverage: every shapez 2 guide, review, and news post published on GameBrief, in one index.
- Shapez 2 Beginners Guide: 12 Essential Tips for 1.0: the foundational guide for new players covering throughput, routing, and common first-factory mistakes.
- Black Jacket Complete Guide 2026: another deep-systems indie game with similar emphasis on coherent strategy over brute force; different genre, same design thinking.
- All Hail the Orb Advanced Automation Guide: if Shapez 2's automation loop appeals, this covers a different automation-focused game with comparable depth.
- Die in the Dungeon Complete Guide 2026: strategic roguelite for Shapez 2 players who want a change of pace while keeping the systems-thinking orientation.
References
- Shapez 2 on Steam: official store page and Workshop mod library from tobspr Games
- r/shapez2 on Reddit: community factory layouts, belt routing discussions, and mod recommendations
- shapez 2 is $29.99 on Steam with no active discount right now. Loaded (sponsored) is worth a quick price check before buying at full price, since third-party keysellers sometimes undercut Steam even outside of sale windows.
Frequently Asked Questions
What is Shapez 2? A factory builder where you design automated production lines to process geometric shapes and deliver them to targets. Released 1.0 April 23 2026 by tobspr Games. Major 1.0 additions: Manufacture Mode, Workshop mod support, 83 achievements.
How do belts work? Belts move shapes between buildings. Splitters divide flow, mergers combine it. The key skill is throughput planning: buildings process at fixed speeds, and belt speed must match or the factory backs up.
What is Manufacture Mode? A 1.0 structured mode that gives specific production challenges with defined goals. Separate from sandbox mode. Designed for players who want goals rather than open factory building.
What is shape stacking? The Stacker building merges two shapes into one layered output. Later game deliveries require specific multi-layer stacks. Understanding which cuts and stack orders produce which targets is the main mid-game skill.
How do I fix belt overflow? Place a trash building at the input to discard excess, or route excess onto a dedicated bypass belt. Trash is faster to set up; bypass routing is better for stable large factories.
Does Shapez 2 have mods? Yes, full Workshop mod support in 1.0. Throughput calculators, visual aids, building tools, and gameplay extensions are available through Steam Workshop.
Is Shapez 2 better than Shapez 1? More complex in every dimension: more operations, more mechanics, layer stacking, and new modes. Better for players who found Shapez 1 too simple. New players should try the demo first.
About the author

Senior Critic & Analyst
Former game data analyst turned critic with 11 years covering indie and mid-tier games. Based in Austin. Runs spreadsheets on games most people just play.
- 11 years games criticism
- Former game economy analyst
- Roguelike and strategy specialist
Keep reading


Disclaimer
This article is published for informational and entertainment purposes. It does not constitute professional financial, legal, or technical advice. Game performance, online services, patch schedules, and store listings change. Verify critical details (pricing, system requirements, regional availability) with publishers and storefronts before you buy. Affiliate links, where present, help support our editorial work and are labelled in our affiliate disclosure.