GameBrief · Guides
All Hail the Orb Automation: Max Cultist Efficiency Guide
Reviewing
All Hail the Orb
LeGingerDev · GrabTheGames
All Hail the Orb automation is the entire late-game. The clicking phase ends. What replaces it determines how fast you reach Stage 6's 1 billion Devotion requirement.
Most guides cover the alchemy priority order (unlock Crystal Conduit before the rest). This guide goes further: how to distribute cultists between rooms, how stamina cycles affect your actual output rate, what to configure before stepping away for a long session, and when active clicking stops being worth your time.
TL;DR: Two to three cultists in the Library at all times. Devotion Resonance Crystal and Crystal Conduit first from the Alchemy Bench. Check the Bench on every dungeon visit, not on a schedule. Before going idle: verify Crystal Conduit is active, Library is staffed, Grotto Auto Harvest is unlocked, and Super Beds is running if available. Active clicking still pays with Devotion Resonance Crystal active: but the all hail the orb automation loop handles overnight progress on its own once those four conditions are met.
Key takeaways
- Library needs 2-3 cultists assigned from unlock through the end of the run: 1 cultist creates a Knowledge bottleneck that delays alchemy by hours
- Devotion Resonance Crystal and Crystal Conduit together convert the Devotion loop from mixed manual/passive to fully passive: get these before anything else
- Stamina cycles affect actual output; without Super Beds, cultists idle during recovery more often than you'd expect
- Grotto Auto Harvest and Cultist Statue Upgrades+ remove the two most-forgotten manual tasks
- Before going idle: Crystal Conduit active, Library staffed, Grotto Auto Harvest unlocked, Super Beds running
- Active clicking has diminishing returns but never zero returns: Devotion Resonance Crystal fires on every click session
- All automation carries over post-story after the April 22, 2026 patch
Overview: What peak all hail the orb automation looks like
The finished automation loop has three layers running simultaneously.
The Devotion layer runs through Crystal Conduit: Life Crystals tick passively, Life Crystal Upgrades+ lets them self-improve over time, and Devotion Resonance Crystal means every click session fires chain spawns at 10% per click. Active and idle play both feed the counter. They don't replace each other: both matter throughout the run.
The Knowledge layer is just the Library: cultists reading, Speedy Transit removing travel overhead between Library and Cultist Quarters, Eureka Moments firing passively at 0.01% per book read. Knowledge gates every alchemy unlock. Under-staff the Library and the whole unlock chain stalls behind it.
The maintenance layer is everything that stops you from babysitting: Grotto Auto Harvest removes the collection check-in, Cultist Statue Upgrades+ handles statues automatically, Super Beds shortens stamina recovery. These are invisible improvements in a 30-minute session and they compound into a real gap across a 3-4 hour run.
GODEEPER: All nine alchemy discoveries ranked by priority, their exact effects, and the unlock sequence for Grand Opus. All Hail the Orb Alchemy Recipes: Complete List of All 9 →
Step-by-Step
1. Library first, always
When the Library becomes available, build it and assign cultists immediately. Don't wait until the Obelisk stage makes it convenient. Knowledge is the slowest resource in the game, which means every hour of Library delay is an hour you won't recover: alchemy discovery unlocks are gated on Knowledge, and the alchemy loop is the rest of the game.
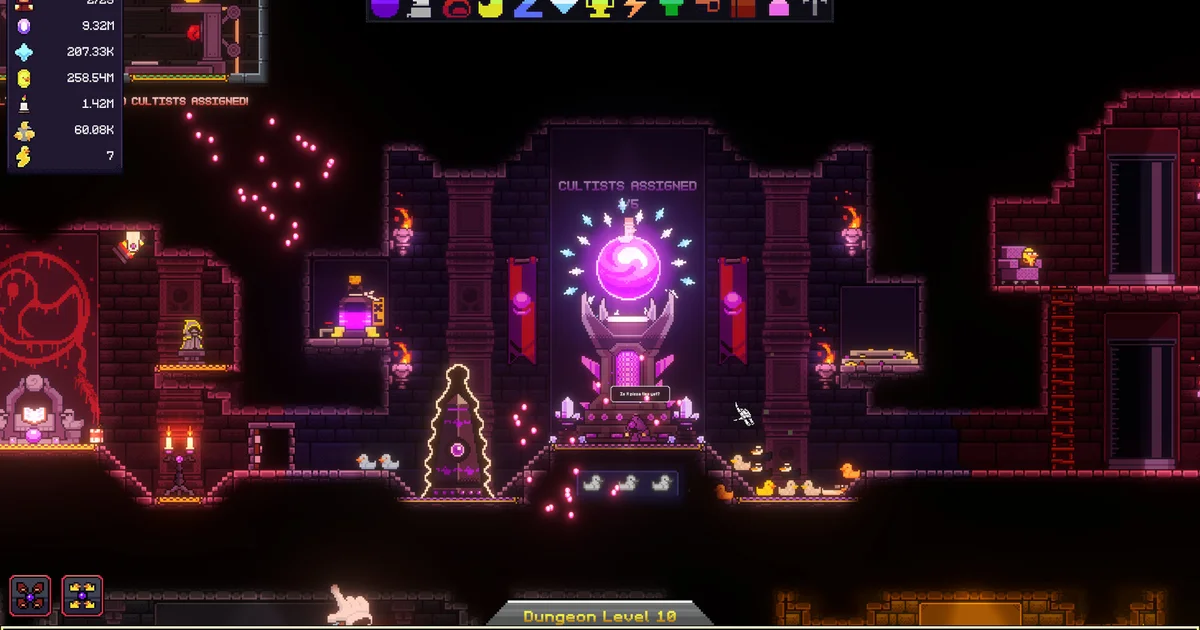
Target: 2-3 cultists assigned to the Library from the moment it opens. Two is the floor. Three is better if you have the roster for it. Under two creates a Knowledge bottleneck that most players don't notice until they're wondering why the Alchemy Bench hasn't shown a new discovery in an hour.
2. Devotion Resonance Crystal first from the Bench
When the Alchemy Bench appears at Obelisk stage 3 or 4, your first target is Devotion Resonance Crystal. Each orb click has a 10% chance to trigger a chain of additional Resonance Crystal spawns. In active sessions, roughly every 10th click fires a chain, and those chains generate Devotion noticeably faster than single spawns. The effect shows in the Devotion counter within minutes of unlocking it.
Nothing else in the Bench changes the Devotion rate this fast. Grab it first.
3. Crystal Conduit second
Crystal Conduit makes the Life Crystal system generate Devotion without clicking. Before it, Life Crystals require player interaction. After it, they tick passively. That's the transition point where the all hail the orb automation loop becomes self-sustaining between sessions.
The pairing with Devotion Resonance Crystal matters: active clicking fires chains (Resonance Crystal), passive accumulation continues when you're not clicking (Conduit). The two together mean the Devotion counter advances regardless of whether you're actively playing.
Unlock Crystal Conduit immediately after Devotion Resonance Crystal. Don't wait.
4. Speedy Transit: the invisible improvement
Speedy Transit creates a portal between the Library and the Cultist Quarters. Without it, cultists assigned to the Library travel between the two locations to route Knowledge output. That transit time is a tax on Knowledge generation that runs the entire game. The effect is invisible in a 20-minute session and compounds across a full run.
If you've had the Library running for two stages without Speedy Transit, the Knowledge deficit is real: you just can't see it. Unlock Speedy Transit as soon as it appears at the Bench.
5. Cultist assignment by stage
The ideal distribution shifts as your roster grows and rooms expand:
Early game (stages 1-2): All cultists go to primary Devotion generation. Library is not available yet. Don't split attention across optional rooms before Devotion is stable.
Mid game (stages 3-4, Library active): 2-3 cultists in Library. Remainder split between main Devotion rooms and the Grotto. Once Grotto Auto Harvest is unlocked, the Grotto operates unattended: cultists there continue contributing without check-in management.
Late game (stage 5+): Library stays at 2-3 cultists for Knowledge accumulation (Omniscient achievement requires 400,000 Knowledge). Remaining cultists distribute across whatever rooms are generating the highest Devotion per hour. After Crystal Conduit and Life Crystal Upgrades+ are both active, Life Crystal rooms become primary Devotion sources: assign accordingly.
The one thing that doesn't change: Library staffing. Keep 2-3 cultists there regardless of stage.
6. Life Crystal Upgrades+: the compounding unlock
Life Crystals generate Devotion passively once Crystal Conduit is active. They can be upgraded for higher output per tick. Without Life Crystal Upgrades+, those upgrades require manual application. With it, Life Crystals self-upgrade as resources allow.
This doesn't sound dramatic, but it compounds directly with Crystal Conduit. The passive Devotion loop from Crystal Conduit grows stronger over time on its own, without any input from you. It's the unlock that makes the overnight idle session actually pay off.
Unlock Life Crystal Upgrades+ after the core three (Resonance Crystal, Conduit, Speedy Transit).
7. The idle session checklist
Before stepping away from an active session (whether for 30 minutes or overnight) run through this:
- Is Crystal Conduit active? If not, fix this first. Without it, Devotion stops accumulating the moment you stop clicking.
- Is the Library at 2-3 cultists? One cultist starves Knowledge generation and stalls alchemy unlocks.
- Is Grotto Auto Harvest unlocked? For long sessions, the Grotto check-in is the thing you'll forget. Auto Harvest makes it irrelevant.
- Is Super Beds active? If it's available, stamina recovery runs faster while you're away: cultists get back to work sooner, and the session produces more.
- When did you last visit the Bench? New discoveries appear when resource thresholds cross, not on a schedule. A quick check before stepping away catches whatever's been sitting there.
With all five in place, the all hail the orb automation loop runs extended idle sessions without you.
 Library with 3 cultists assigned is the correct configuration for mid-to-late game. Knowledge generation requires sustained staffing, not burst assignments.
Tips for managing your all hail the orb automation loop
Active clicking still has value: use it during focus time
Once Crystal Conduit is running, the game advances without you. But Devotion Resonance Crystal fires on every click, and active sessions generate Devotion noticeably faster than pure idle. Click when you're already at the keyboard. Let automation handle the rest.
Active sessions are best for clicking during stage transitions (when you need a Devotion boost to accelerate a milestone) and for running through the Alchemy Bench (the Bench visit takes 30 seconds and pays off across hours).
Stamina cycles are silently limiting your output
Cultists lose stamina as they work and need recovery time before returning to tasks. Most players don't track this at all. Without Super Beds, the effective output rate of each cultist is lower than it looks: they spend a portion of each hour in recovery instead of working.
Super Beds isn't the flashiest alchemy discovery, but in long sessions it's the one that quietly adds the most idle-session Devotion. Unlock it before you dismiss it.
The Bench visit rule
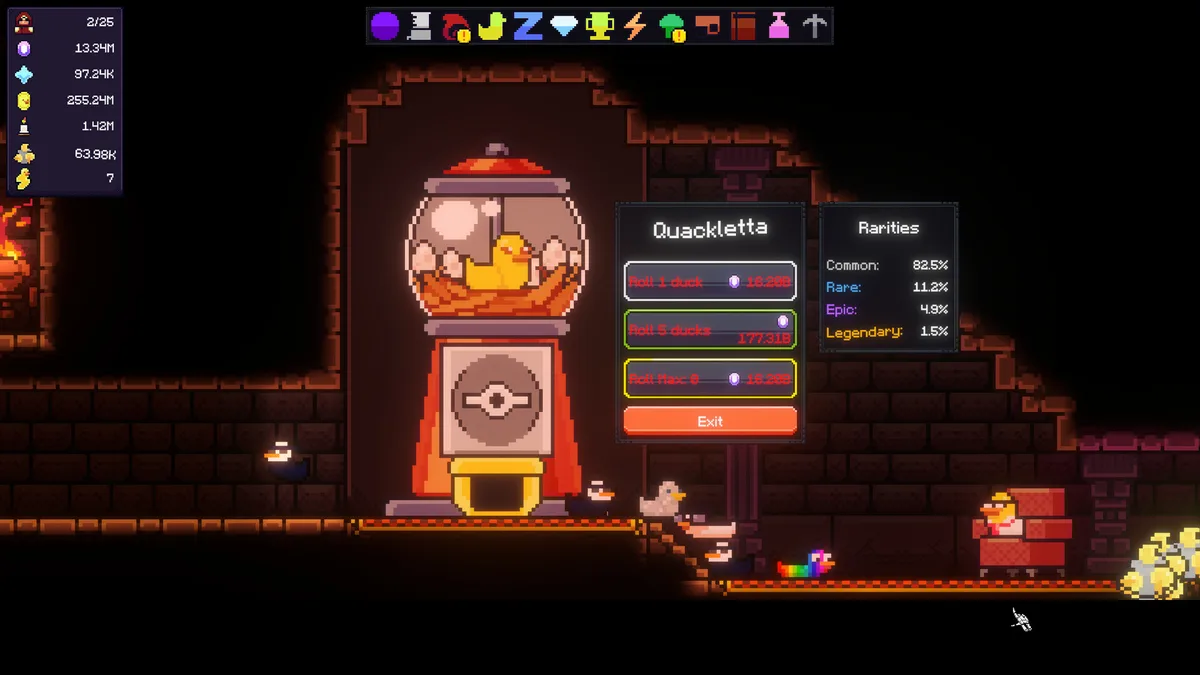
New discoveries appear at the Alchemy Bench when your resource counts cross thresholds, not on a schedule. Check the Bench on every dungeon visit, not once per stage. A discovery that's been available for two hours is two hours you didn't get.
The check takes 10 seconds. It's worth doing every time you open the dungeon screen.
GODEEPER: How each alchemy discovery interacts with the Library chain and the full Obelisk stage timing. All Hail the Orb Best Build Guide: Optimal Strategy 2026 →
Knowledge bottleneck: how to diagnose it
If you're at stage 3 or 4 and the Alchemy Bench hasn't shown a new discovery in over an hour, check your Library staffing first. The most common cause of a stalled automation loop is one cultist (or zero) in the Library generating Knowledge at a rate that can't keep up with discovery thresholds.
The fix: add a second cultist to the Library and monitor for 20 minutes. If the Bench produces a new discovery, the bottleneck was Knowledge. If it doesn't, your Devotion is the actual constraint: check whether Crystal Conduit is active.
Obelisk advance timing for automation
Each Obelisk stage advance resets dungeon elements. If your automation loop isn't stable enough to recover quickly, an advance costs more time than it saves.
The benchmark that works: hold a stage advance until your passive Devotion (Crystal Conduit + Life Crystals) can cover a stage rebuild in under an hour of idle time. With the full alchemy loop running, this benchmark passes naturally and advancing becomes a simple decision.
Don't advance because you're bored waiting. Advance when the rebuild time is fast enough that it's a non-issue.
 Crystal Conduit and Life Crystal Upgrades+ together create the compounding passive loop: once both are active, the Devotion counter advances meaningfully overnight.
Frequently asked questions
How many cultists should go in the Library? Two to three is the right range. Under two creates a Knowledge bottleneck that delays alchemy unlocks. Over three returns diminishing value unless you're chasing the Omniscient achievement.
When does active clicking stop being worth it? Not entirely. Devotion Resonance Crystal fires on every click. But the gap between active and idle production narrows significantly once Crystal Conduit is running. Use active time for clicking and Bench visits; let idle time run the passive loop.
What is the best idle setup? Crystal Conduit active, Library at 2-3 cultists, Grotto Auto Harvest unlocked, Super Beds running. With those four in place, the run advances during any session longer than 30 minutes.
How does stamina affect cultist output? Cultists enter recovery after working and don't return to tasks until stamina restores. Super Beds shortens the recovery window, increasing the proportion of time each cultist is actively working rather than resting. The effect is subtle per cultist and significant across a full roster over hours.
What unlocks Life Crystal Upgrades+? A resource threshold. The Bench detects when your counts are sufficient and makes it available. The exact threshold depends on your accumulation rate, but it typically appears mid-game after Cultist Statue Upgrades+ is already active.
Does automation carry over post-story? Yes. After the April 22, 2026 patch, all automation systems stay active after the Stage 6 finale. Cultist assignments persist, alchemy discoveries remain, and the Library keeps running.
What is Prayer of Fertility for? It adds a 5% mushroom growth bonus per click, which feeds the dungeon resource loop. Useful but not urgent: unlock it after the core three discoveries are active.
Related Reading
- All Hail the Orb Complete Guide 2026: Hub for all All Hail the Orb guides: alchemy, automation, secrets, endings, and achievement tips.
- All Hail the Orb Ending Explained: What Happens After: All Hail the Orb ending explained: the 1B Devotion finale, April 22 post-story patch, and.
- All Hail the Orb Review: A Three-Hour Cult Classic: All Hail the Orb review: a pixel-art clicker about summoning cultists and exploring a dungeon.
- How Long to Beat All Hail the Orb: Story, 100%, Routes: How long to beat All Hail the Orb: story ends at ~3 hours, but the.
- All Hail the Orb Alchemy Guide: 9 Discoveries Ranked: All Hail the Orb alchemy unlocks at Obelisk stage 3.
References
- All Hail the Orb on Steam: official store page and community hub
- LeGingerDev on Steam: developer page
- All Hail the Orb alchemy recipes complete list: all 9 discoveries with effects and priority order
- All Hail the Orb best build guide: automation priority order and Obelisk timing
- All Hail the Orb tips guide: beginner orientation and 100% completion checklist
Was this guide helpful?
About the author

Senior Critic & Analyst
Former game data analyst turned critic with 11 years covering indie and mid-tier games. Based in Austin. Runs spreadsheets on games most people just play.
- 11 years games criticism
- Former game economy analyst
- Roguelike and strategy specialist


Disclaimer
This article is published for informational and entertainment purposes. It does not constitute professional financial, legal, or technical advice. Game performance, online services, patch schedules, and store listings change. Verify critical details (pricing, system requirements, regional availability) with publishers and storefronts before you buy. Affiliate links, where present, help support our editorial work and are labelled in our affiliate disclosure.