
GuideMeccha Chameleon
Meccha Chameleon Map Guide: 19 Maps and Hiding Routes
About the game
Meccha Chameleon
lemorion_1224 · lemorion_1224
Meccha Chameleon map guide coverage has changed quickly because the game kept adding official stages after launch. The current roster is 19 maps, from Mansion and Indoor Country to Kyoto and Art Museum. This guide gives you the current list, a repeatable Hider route, a Hunter sweep order, and a practical cue for every official map.
TL;DR: Learn Mansion or Indoor Country first, then choose a spot by five checks: silhouette, color, material, lighting, and traffic. The 19 official maps are separate from Steam Workshop maps. Update 4.1.0 added Kyoto and Art Museum and reworked Greece and Egypt, so old map videos need a version check before you copy a route.
Meccha Chameleon map guide: quick answer
The 19 official Meccha Chameleon maps are Mansion, Indoor Country, Sewer, Backrooms, Penguin Hotel, Sugarland, Osaka, Cold Storage, Brick Loft, Egypt, HIKAKIN Museum, Death Burger, Greece, Garten of Banban, Exit 8, Deep Sea, Shopping Mall, Kyoto, and Art Museum. The modes and maps guide covers the four modes alongside the older map list, while this page focuses on route decisions. The game has no biome tier or permanent map progression. Each round asks you to read the room you loaded, find a believable surface, and survive the Hunter's sweep.
The word "best" needs a little caution here. A hiding spot that works with four players can become obvious with ten, and a spot that survives a first sweep may fail once the Hunter knows the route. Treat the cues below as starting routes. Check the live light and surrounding props before you paint, then keep a backup position in mind.
Key takeaways
- The current official roster has 19 maps. Workshop maps belong to a separate community pool.
- Mansion and Indoor Country are the most forgiving maps for learning color, pose, and route planning.
- Sewer, Cold Storage, and Art Museum reward material and lighting matches as much as color matches.
- Backrooms, Osaka, and Exit 8 punish predictable routes because Hunters can recycle a small set of sightlines.
- Deep Sea, Shopping Mall, Kyoto, and Art Museum were later additions, while Greece and Egypt received an official rework in Update 4.1.0.
- Plump is a body type, not a map. The roster count should not include it.
Overview
Meccha Chameleon maps are rooms and environments, not zones with unlocks or level requirements. Steam lists the game as an online PvP hide-and-seek title with Steam Workshop support. Official updates add stages, rework older spaces, and adjust the round systems around them, but the map itself does not give your character a permanent bonus. The multiplayer guide covers how lobby size and host stability change the pressure on each route.
That makes route planning more important than memorizing one viral corner. A good Hider spot has a readable object shape, a nearby palette, matching material, useful light, and a reason the Hunter would walk past it. A good Hunter route visits the high-traffic center, then checks the places where a Hider can break a silhouette or sit outside normal eye level. The advanced tips guide covers the clone and pose choices that sit on top of this map read.
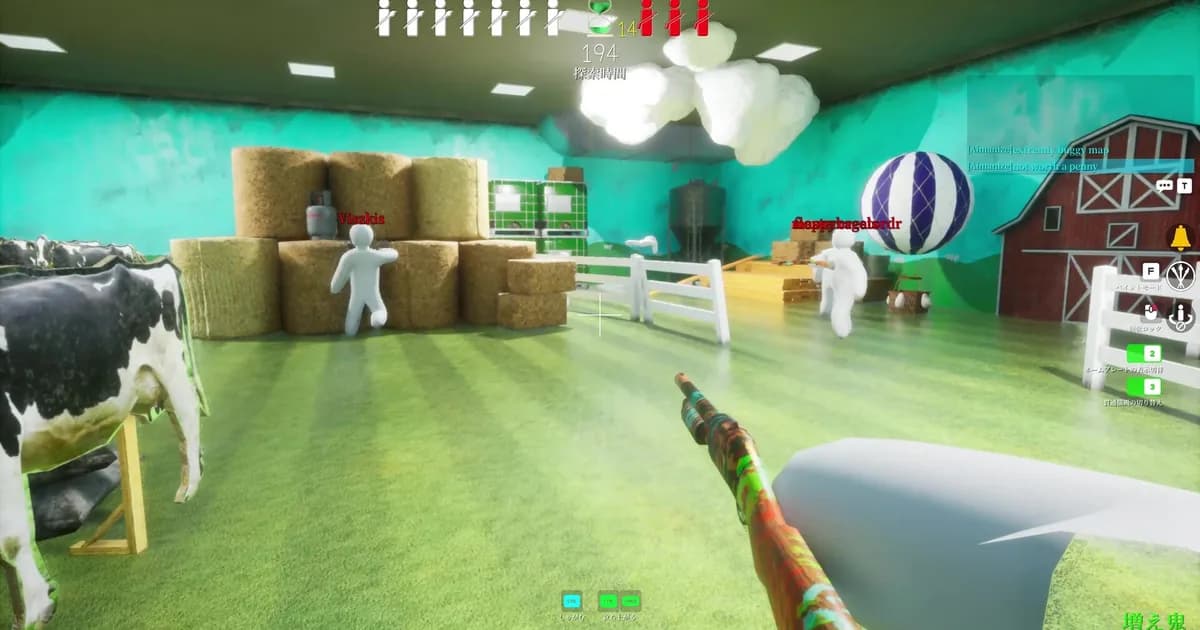
The official screenshots show why the five checks matter. A farm room has hay, fences, a cow, a barn facade, and bright green walls. A Hider can match several of those surfaces, but each has a different shape and traffic pattern. You should pick the object first, then paint for the exact light where it sits.
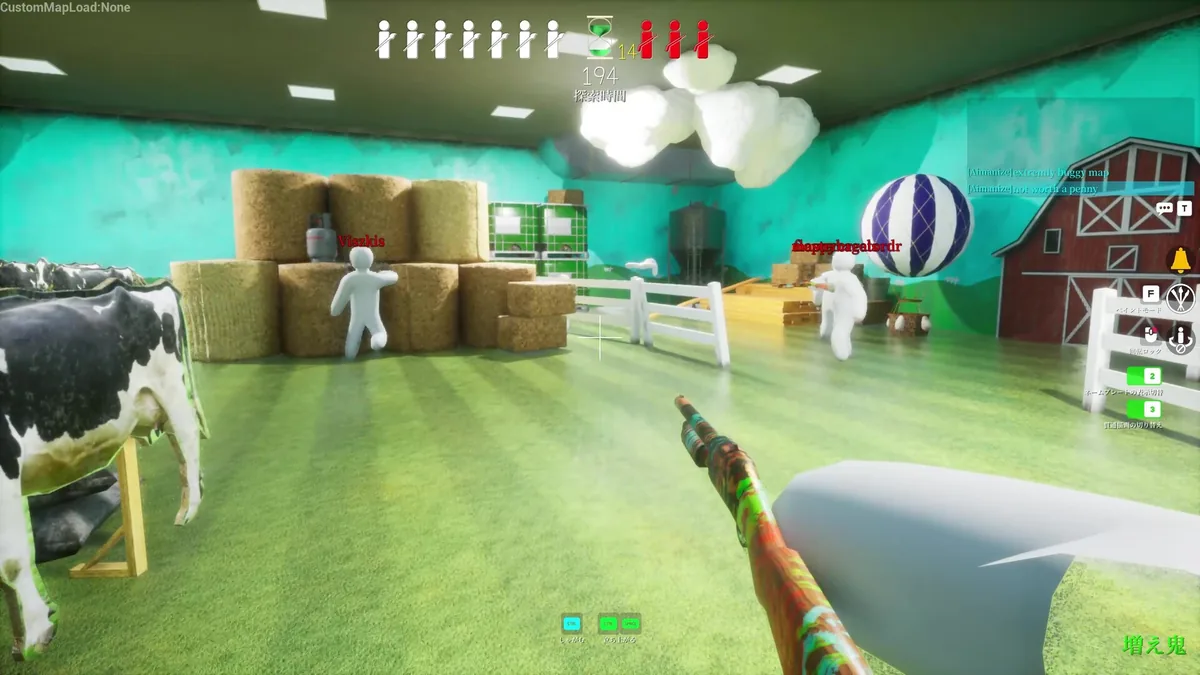 An official farm screenshot shows several route choices in one room: hay bales, a fence, a cow prop, and open floor that a Hunter can clear quickly.
Step-by-step
Use this five-step routine at the start of every Meccha Chameleon map. It works for a first match on Mansion and still helps when a later map gives you more vertical clutter.
1. Name the map and its pressure. Ask whether you are dealing with an open room, a repeated corridor, a vertical space, or a busy prop field. Open rooms punish movement. Corridors punish repeat routes. Vertical maps punish anyone who only checks eye level.
2. Pick an object before opening the paint wheel. Choose a vase, shelf edge, brick section, pipe, sign, plant, bench, or other visible surface that already belongs in the room. A random wall color gives the Hunter a blank shape to question.
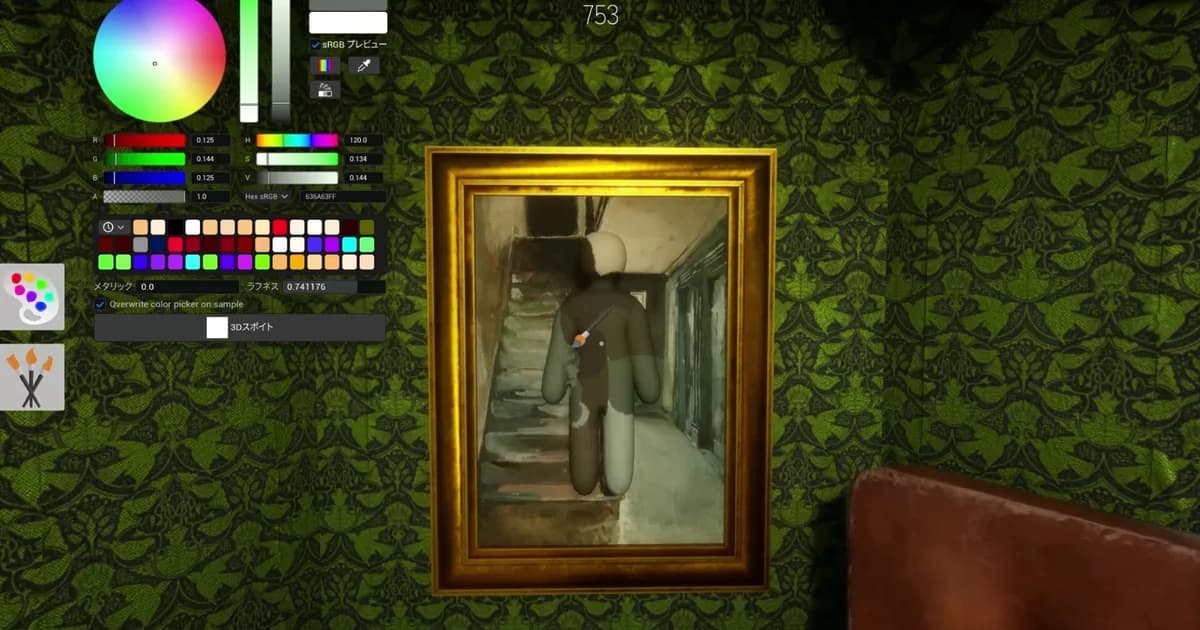
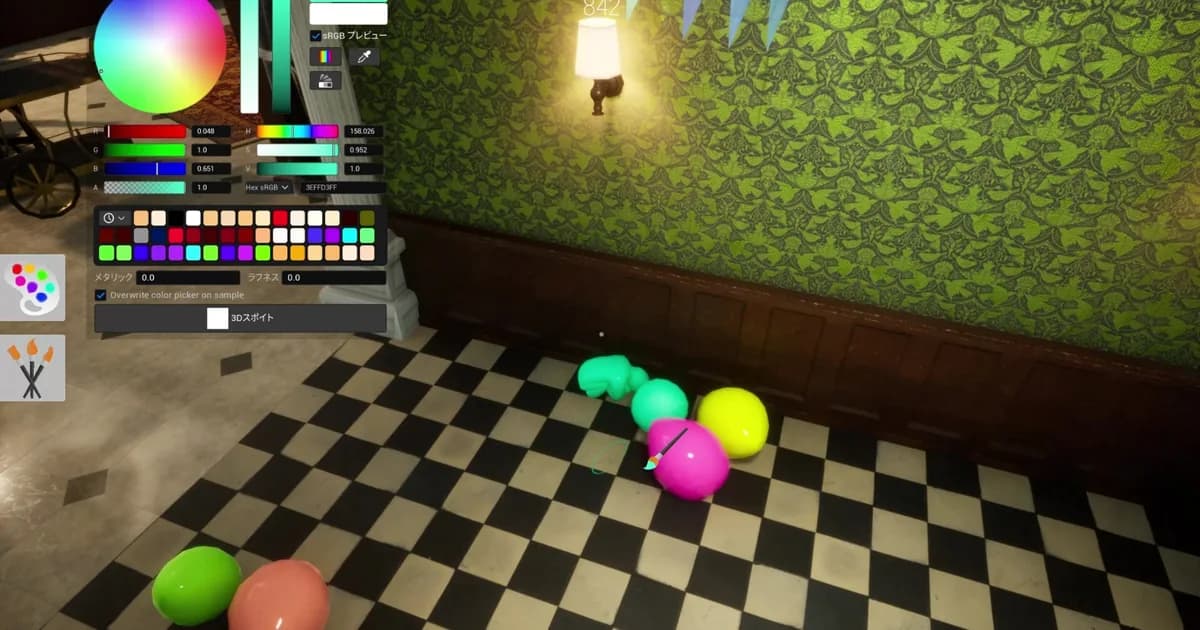
3. Sample the live surface. Use the eyedropper on the exact part of the prop where your body will sit. The same map can contain a warm lamp side, a cold shadow side, and a reflective edge. Match roughness and metallic response when the object makes those differences visible.
4. Check the route behind you. Look toward the likely Hunter approach. If your chosen spot is perfect from one angle and a white edge from the doorway, move before the round starts. Keep a second spot nearby so you can shift when a taunt, shot, or teammate reveals the lane.
5. Commit to stillness and a reset point. Once the round begins, stop adjusting unless the route has genuinely changed. If the Hunter clears your area, remember which angle exposed you and use that information on the next round. A map guide is most useful when it turns each loss into a specific correction.
If you are still learning the paint controls, keep the camouflage guide open while you test the route. If your group is split between PC and Switch 2, the multiplayer guide covers the room code and region checks before the round starts.
GODEEPER: Your route only works when the paint matches the surface. Meccha Chameleon Guide: How the Camouflage System Works breaks down color, material sliders, scoring, and line-of-sight decisions.
The 19 official Meccha Chameleon maps
The current list below separates the official roster from Workshop content. Patch notes verify the later additions and the Update 4.1.0 rework, while the community map index is useful for keeping the full 19-map list in one place. The complete guide hub is the cluster's broader landing page if you want the painting and safety context alongside the map list.
| Map | Route read |
|---|---|
| Mansion, also called Hide-and-Seek Mansion | Decor clusters, party rooms, stair landings, and ceiling checks |
| Indoor Country | Hay, farm props, fences, green crates, and room transitions |
| Sewer | Pipes, barrels, graffiti, shadows, and overhead geometry |
| Backrooms | Repeated yellow halls, offices, desks, and long sightlines |
| Penguin Hotel | Ice colors, plush furniture, ballroom clutter, and service spaces |
| Sugarland | Saturated candy colors, rounded props, and candy-cane shapes |
| Osaka | Signs, lanterns, storefronts, lanes, and compact urban routes |
| Cold Storage | Metal shelving, meat props, utility corners, and cold blue values |
| Brick Loft | Exposed brick, iron stairs, pipes, and vertical furniture lines |
| Egypt | Sandstone, pillars, tomb shapes, and hard shadow bands |
| HIKAKIN Museum | Museum displays, frames, plinths, and branded prop clusters |
| Death Burger | Counters, menus, kitchen shapes, and carnival-style clutter |
| Greece | White walls, blue trim, sunlit surfaces, and strong contrast |
| Garten of Banban | Bright school or playroom props, signage, and color blocks |
| Exit 8 | Repeated underground corridor details and anomaly checks |
| Deep Sea | Coral, shells, seaweed, wreck clutter, and saturated water colors |
| Shopping Mall | Planters, escalators, glass rails, shops, and open atriums |
| Kyoto | Lattice, upper decks, signs, and vertical sightlines |
| Art Museum | Paintings, benches, plinths, spotlight pools, and pale walls |
The "19" count is for environments. It does not count the four modes, the Plump body type, clones, or the user-made maps in Workshop.
Map-by-map hiding routes
These are route cues rather than promises of a permanent best spot. The community map pages describe example locations, and the official patch history shows that maps can be reworked. Use the named object as a test case, then verify its light and Hunter angle in your own lobby. Compare the roster against the site's current modes and maps coverage when an older video uses a different name.
Mansion, Indoor Country, and Sewer
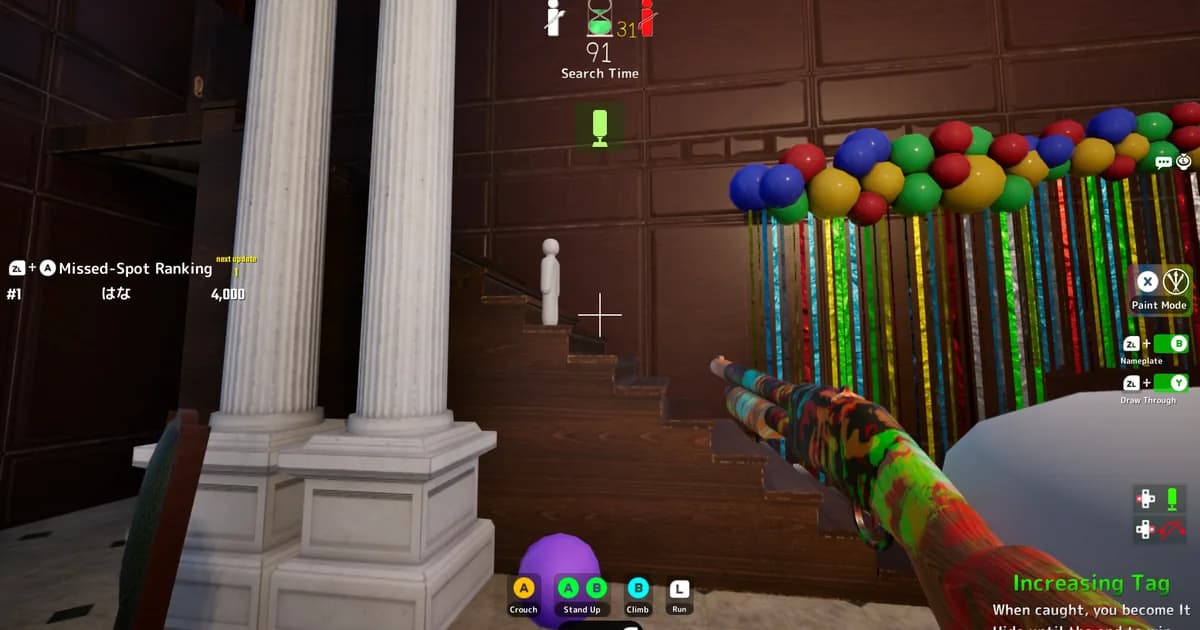
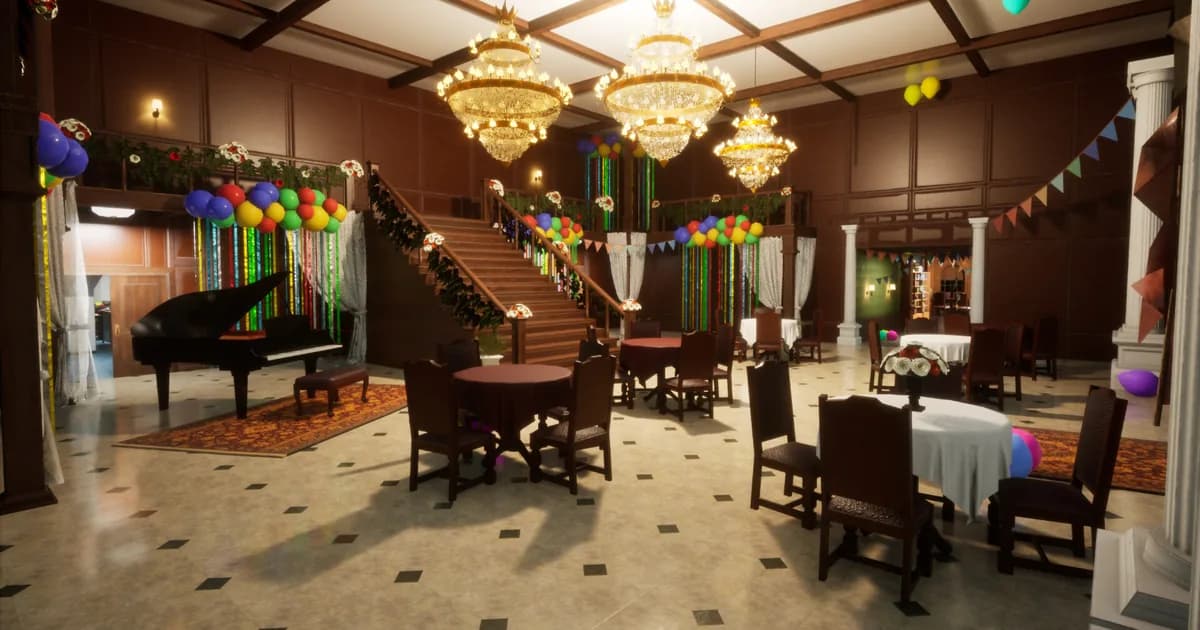
Mansion: Start with the party room, a decorated corridor, or a prop cluster, then check one position above normal eye level. The community map index calls out balloons, a ceiling pillar, bookshelf rows, and the horse statue as examples. Stair landings and open center floors see more traffic, so use them as crossings rather than places to sit still. The official horse screenshot below is a useful reminder that prop mimicry needs the right material as well as a brown outline.
Indoor Country: The farm room gives you hay bales, fences, cow standees, crates, a barn facade, and large green surfaces. Use a short path from the hiding area to a shadow or prop cluster, then stop. Hunters can pre-aim room transitions, so crossing the open green floor after the round begins is usually harder to sell than becoming part of the nearby farm clutter.
Sewer: Dark pipes, barrels, graffiti, and low light create strong vertical options. Community examples include a barrel top, a pipe overhang, a second graffiti wall, and a drain shadow. Hiders should sample the exact dark value where they sit. Hunters should look up and down instead of clearing the center at one camera height.
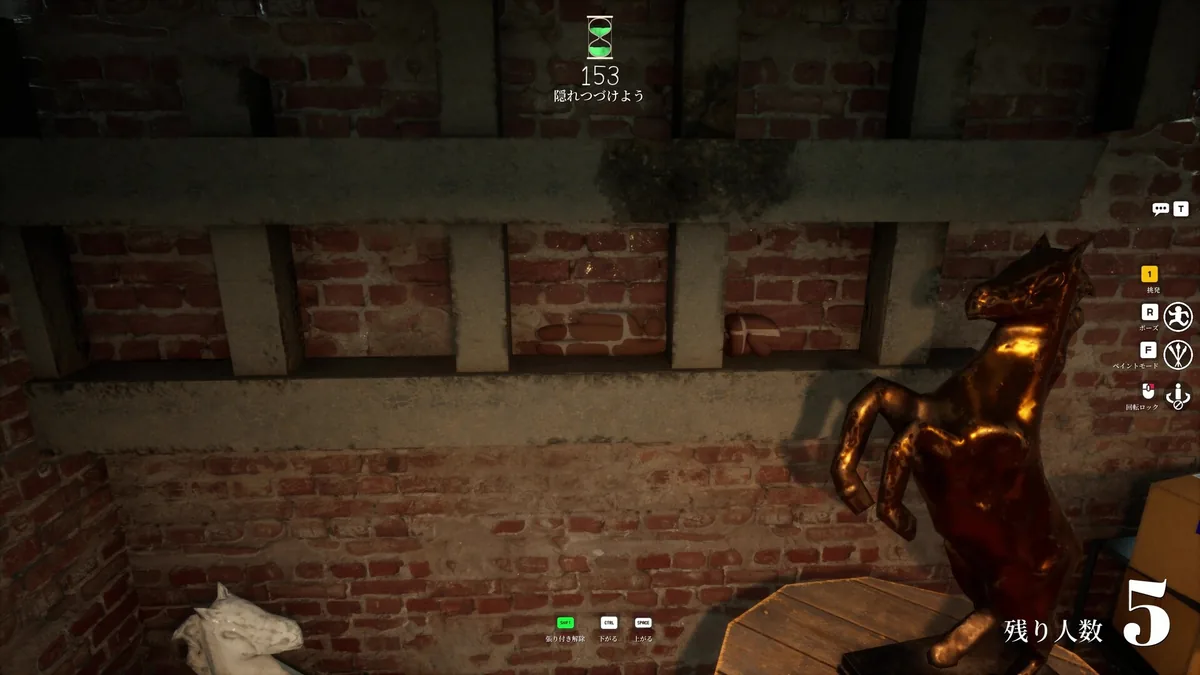 A horse statue beside a brick wall illustrates a Mansion-style prop route: match the statue's material and silhouette, then account for the nearby brick contrast.
Backrooms, Penguin Hotel, Sugarland, and Osaka
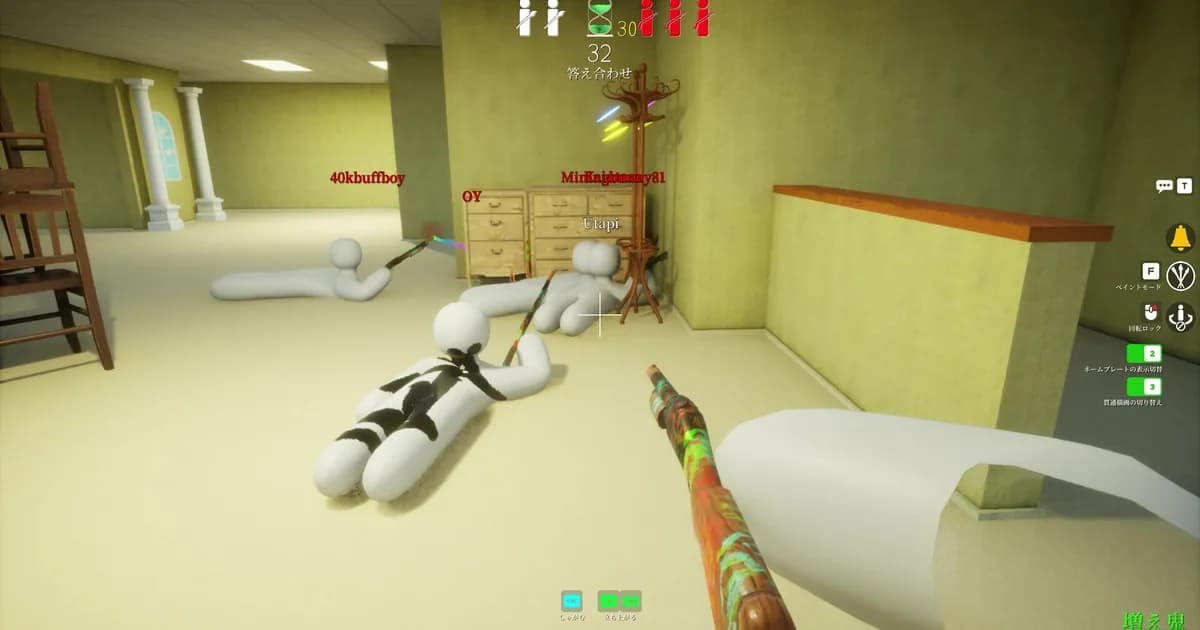
Backrooms: Repeated yellow walls make this map a test of patience. A clean office corner, an EXIT sign, a vending machine, or a fluorescent fixture can work as a starting disguise, but the same hallway pattern also gives Hunters a repeatable sweep. Break the route with a room change or a height change. Community reports regularly describe Backrooms as difficult once the Hunter knows the layout, so do not depend on a single wall-clip idea.
Penguin Hotel: Blue-white surfaces, ice decor, plush rooms, and the ballroom give you many colors to sample. Busy patterns help only if the repeat lines up with your body. The ballroom has open sightlines, so cross it quickly and finish near furniture or a vertical break. In a larger lobby, choose a quieter service or room area over the most obvious central decoration.
Sugarland: Use the map's saturated pink, mint, and chocolate-brown palette to find a color block with a matching curve. Candy-cane tips, rounded sweets, and repeated trim are useful pose tests. The Hunter can spot a flat blob against a bright candy surface, so paint the shadow edge and keep your route short.
Osaka: Osaka is compact, with signs, storefronts, lanterns, lanes, a truck area, and other dense urban clutter. Pick early because Hunters can recycle the same paths quickly. An alley nook or sign cluster makes a more useful route than open pavement. Keep a second nearby object ready because a small map leaves fewer safe resets.
Cold Storage, Brick Loft, Egypt, and HIKAKIN Museum
Cold Storage: Metal shelves, meat props, and blue-gray values leave fewer decorative distractions. Use a shelf underside, utility corner, or a low object only after checking the Hunter's lane. The community index describes Cold Storage as an expert map because positioning matters more than clutter. Hunters should pre-aim the long shelf lanes, then check the low edges they naturally skip.
Brick Loft: Exposed brick, iron stairs, old furniture, and pipes create a strong vertical route. A recessed brick section can work when your paint follows the mortar shadow. The second floor gives Hunters a height advantage, so do not assume being above the room is enough. If you use an industrial pipe, make sure the pose follows its direction rather than floating beside it.
Egypt: Sandstone and tomb shapes reward a careful shadow match. Use pillars, recesses, and hard bands of light to break the round shape, then avoid the brightest open floor. Update 4.1.0 reworked Egypt, so a route copied from a pre-4.1 video needs a fresh test.
HIKAKIN Museum: This collaboration map has displays, frames, and branded objects that tempt players into obvious landmark disguises. Use a quieter display edge or the side of a plinth when the main room is busy. A famous prop gets checked because the Hunter knows everyone wants to copy it, so give the route a less memorable second choice.
Death Burger, Greece, Garten of Banban, and Exit 8
Death Burger: Counters, menu boards, kitchen equipment, and amusement-park clutter offer lots of horizontal and vertical lines. A counter edge can hide a body when the material matches, but the Hunter will often check food-service shapes first. Move the route toward a less obvious machine, sign shadow, or back-of-house corner if the lobby has several experienced players.
Greece: White walls and blue trim create a simple palette that makes value errors obvious. Sample the shaded side of a wall or architectural edge rather than painting bright white and hoping the room hides the mismatch. The Greece rework in Update 4.1.0 is another reason to verify older route footage.
Garten of Banban: Bright school or playroom colors create large blocks and recognizable props. Use a color cluster that already contains several similar shapes, then keep your pose aligned with the prop. The collaboration map is a poor place to stand in the center of an empty room, where a bright character silhouette becomes the first thing the Hunter tests.
Exit 8: Treat this as a repeated-corridor route. Choose one wall detail or fixture, observe the approach, and keep an anomaly check in mind when you play the Hunter side. The map's repeated layout makes predictable movement especially easy to remember, so change your route between rounds instead of returning to the same sign.
Deep Sea, Shopping Mall, Kyoto, and Art Museum
Deep Sea: Coral, shells, seaweed, wreck debris, and bright underwater props give you saturated colors and irregular shapes. A coral or shell cluster is easier to sell when your pose follows the object. Bright joke props draw early attention, so rotate away from obvious landmarks after the first sweep. The official map arrived in Update 3.6.0.
Shopping Mall: Planters, shops, escalators, glass rails, and the open atrium create different route heights. Use a planter edge or store clutter when the sample matches the live light. The atrium floor and escalator landings are transit spaces, so Hunters can clear them quickly. Glass and metal also expose a roughness mistake even when your color is close.
Kyoto: Lattice, upper decks, signs, and roof lines create vertical sight cones. A large glowing sign or stair landmark can fool a new Hunter once, then become the first place they check. Use the upper route only when your silhouette fits the geometry, and rotate after the group learns the landmark. Kyoto was one of the two maps added in Update 4.1.0.
Art Museum: Paintings, benches, plinths, and spotlight pools create a direct lesson in material and value. The community index calls out bench and plinth undersides as examples because Hunters stare at the famous canvases first. If you use a painting, match the repeat and the spotlight. A pale wall with the wrong value exposes you from across the gallery. Art Museum was the second new map in Update 4.1.0.
Hunter route: clear a map without repeating yourself
A reliable Hunter route is a checklist, not a single lap. Start with the central or most obvious traffic lane, then clear the map in four passes: eye level, high geometry, low geometry, and clutter clusters. On a compact map such as Osaka, shorten the route and revisit the same lane from a changed angle. On Backrooms or Exit 8, use fixed landmarks to track what you have already cleared.
Watch for three kinds of mismatch. A silhouette can be right while the material is wrong. A color can be right while the light is wrong. A spot can be excellent until a teammate moves nearby and changes the expected shape. The official gameplay screenshots show how much visual noise a Hunter has to compare, which is why a disciplined route beats random shooting.
After a shot or taunt reveals a Hider's area, clear the nearest alternative objects before moving on. That stops the same corner from getting a free second chance. If the lobby uses clones, remember that the advanced tips guide covers why a decoy is tied to the Hider's survival rather than being a disposable extra life. The camouflage guide's scoring section also explains why an exposed but well-painted Hider can still be a risky target.
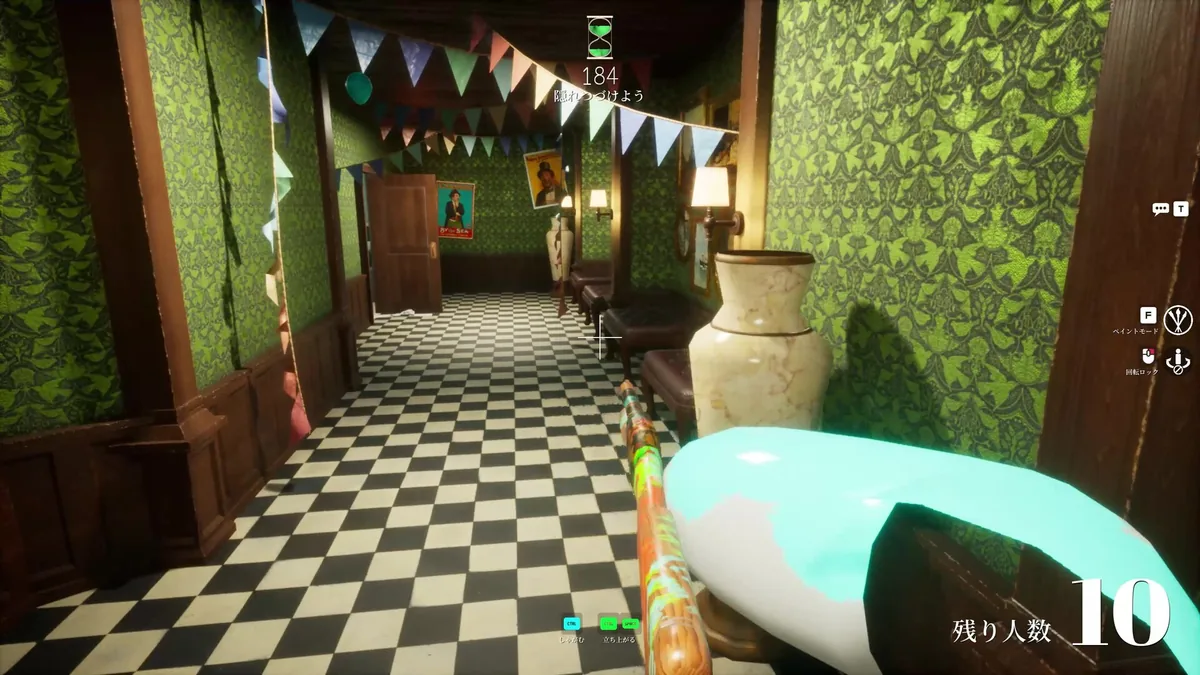 A decorated corridor shows why a Hunter should check sightline breaks, wall patterns, and furniture edges instead of only scanning the center of the hall.
Tips for better map routes
Change one variable after each failed hiding attempt. If the Hunter found you because the pose was wrong, keep the route and change the pose. If the paint matched but the doorway exposed a white edge, keep the object and move deeper into its shadow. If a spot worked once and failed after the lobby learned it, keep the map read and choose a less obvious object.
The Meccha Chameleon multiplayer guide explains why a private room is useful for testing a map route, especially when a group is learning join codes or trying a new platform mix. Start with an official map before adding Workshop content. Custom maps are separate from the 19-map roster and may change what a normal route looks like. For the PC side of that experiment, the Meccha Chameleon mods guide separates code mods from Workshop maps.
For Hiders, practice one low route and one high route on every map you play often. For Hunters, practice clearing the same map in two orders so the lobby cannot predict your first sweep. On maps with bright landmarks, decide whether you want to use the joke spot once or avoid it entirely. The right answer changes with the group.
GODEEPER: If the route is for a friend group, use the room and cross-play checklist before you test a new map. Meccha Chameleon Multiplayer: Friends, Codes & Crossplay covers join codes, regions, voice settings, and failed lobby fixes.
Frequently Asked Questions
How many official maps are in Meccha Chameleon? There are 19 official maps in the current roster. Steam Workshop maps are separate user-created content, so a map list that includes Workshop entries is counting a different pool.
What is the easiest Meccha Chameleon map? Mansion and Indoor Country are the most forgiving starting points because their props and color blocks are easy to read. That is a practice recommendation, not a permanent difficulty setting.
What is the best map for Hunter practice? Backrooms and Osaka are useful because their repeated or compact routes make it easy to see whether your sweep is disciplined. Cold Storage is better when you want to practice checking low utility corners and shelf lanes.
Does Update 4.1.0 change the map list? Yes. Update 4.1.0 added Kyoto and Art Museum and reworked Greece and Egypt. Older videos may still show the previous layouts or the earlier official map count.
Are Workshop maps part of this guide's 19 maps? No. This guide counts official environments only. Workshop maps are a separate community category, and you should test unfamiliar downloads privately before joining a public room.
Is there a fixed best hiding spot on each map? No. Player count, Hunter route, lighting, pose, and version changes all affect a spot. Use the route cues here to choose a test position, then keep a nearby backup and change it when the lobby learns the pattern.
Related Reading
- Meccha Chameleon Achievements Guide (2026): Steam Status: the verified Steam achievement status, useful when you are tracking completion alongside map practice.
- Meccha Chameleon camouflage guide
- Meccha Chameleon advanced tips guide
- Meccha Chameleon multiplayer guide
- Best Meccha Chameleon mods and Workshop picks
References
- MECCHA CHAMELEON on Steam
- Official MECCHA CHAMELEON Steam news hub
- Official BIG UPDATE 4.1.0 notes
- Meccha Wiki official map index, an unofficial community-maintained roster and spot index
- Developer account on X
- Meccha Chameleon subreddit
Was this guide helpful?
About the author

Indie & JRPG Critic
Indie game evangelist and lifelong JRPG fan covering small studios since 2017. Mumbai-born, London-based. Writes the way she talks.
- 7 years indie games coverage
- JRPG and visual novel specialist
- Narrative design focus
Keep reading
Meccha Chameleon Multiplayer: Friends, Codes & Crossplay
General · 12 min
Meccha Chameleon Achievements Guide (2026): Steam Status
General · 13 min
3 Best Meccha Chameleon Mods for Better Hiding (2026)
General · 15 min
Meccha Chameleon Complete Guide: Modes, Maps, Tips
General · 13 min
Meccha Chameleon Advanced Tips: Clones, Poses, Hunter Play
General · 9 min
Meccha Chameleon Modes and Maps: Every Confirmed Map
General · 9 min
Game deals · affiliate links

Disclaimer
This article is published for informational and entertainment purposes. It does not constitute professional financial, legal, or technical advice. Game performance, online services, patch schedules, and store listings change. Verify critical details (pricing, system requirements, regional availability) with publishers and storefronts before you buy. Affiliate links, where present, help support our editorial work and are labelled in our affiliate disclosure.
Comments
Loading comments…