
GameBrief · General
Voidling Bound Beginner Guide: 6 Mistakes to Avoid
Reviewing
Voidling Bound
Hatchery Games
This Voidling Bound beginner guide covers what the game expects you to figure out on your own. Most players who hit a wall didn't misplay the combat. They misread which system they were actually in. The game hands you evolution, breeding, and splicing as three separate mechanics and barely explains how they connect. Each one feeds into the next in a specific order, and jumping ahead costs resources you can't easily get back.
This Voidling Bound beginner guide covers the gene and splice systems at the level the game skips, what to prioritize in your first several hours, and the six mistakes that reliably cause early-game grief.
TL;DR: Start with Kwipeck, put your first attribute point in Vitality, and run story missions before touching the Splicing Station. Evolving is automatic; breeding improves your gene pool; splicing is permanent and locks out breeding. Each system feeds the next. Spliced Voidlings can't breed by default, so don't splice anything you still need as a parent. Releasing a Voidling pays out Mutagens scaled to its rarity plus Research Samples, both of which you need for hub upgrades.
What is the Voidling Bound gene system? (quick answer)
Genes are the underlying traits that define what a Voidling is: its base stats, the ability slots available to it, and its elemental tendency. Every creature you hatch carries genes from its egg's source. When you breed two Voidlings, the offspring inherits from both parents. Higher-quality genes generally mean better ability slots and stronger starting stats, which is why veteran players maintain dedicated breeding pairs rather than splicing their best specimen the moment they get one.
The game doesn't label this system clearly. The database is where you actually see gene information, and the running advice to open it whenever an ability name or species appears is worth following. The Voidling Bound complete guide maps how genes connect to the wider evolution and endgame systems. Most early mistakes come from treating Voidlings as interchangeable, when each one carries a specific gene pool that determines its ceiling.
Voidling Bound current status: September 2026
Voidling Bound is a full release from June 9, 2026, and Steam currently lists 2,146 English reviews at 94% positive, 138 recent reviews at 91% positive, and 35 achievements. The official store still describes the core loop as hatch, evolve, upgrade, and reclaim corrupted planets, so the beginner priorities in this guide remain aimed at the live single-player build. The launch overview covers the systems added around release.
The latest developer update, posted September 12, says Hatchery Games is taking its time with the next major content update and has not announced a date yet. Treat future creature, Abyss, or multiplayer speculation as unconfirmed. The multiplayer status guide records what is and is not confirmed about co-op. The latest concrete balance change in the official notes remains the July 20 off-element damage adjustment, which makes single-element Essence builds work at 25% effectiveness instead of zero.
Step-by-step: your first Voidling Bound session
1. Choose Kwipeck and set a forgiving difficulty: Kwipeck's balanced kit teaches movement, shooting, and melee without requiring a specialized build. The monster guide shows how its kit compares with the later species. Start on Adventurer if you want room to learn, then raise the setting once dodge and parry timing feel natural.
2. Put the first attribute point into Vitality: early health and stamina give you more time to learn enemy patterns. Do not spend points across every stat before you know whether your first Voidling is leaning toward a Strength, Essence, or mobility build.
3. Hatch an early egg and compare ability slots: keep a replacement only when its slots or nature offer a real improvement. The gene and splice guide explains why a promising parent is worth protecting. Releasing weak duplicates returns Mutagens and Research Samples, which are more useful than a crowded roster during the opening missions.
4. Follow story missions before farming the Abyss: the early campaign unlocks the hub systems, species options, and upgrades that make later breeding worthwhile. Treat the first hour as setup for the gene and splice systems rather than a race to optimize.
Choosing your first species and setting up
The five starting species each have a defined combat role. For a first run, the role matters less than the learning curve.
- Kwipeck: The balanced pick. Nothing in its kit requires specific timing or positioning to use. Good for learning how ability slots work.
- Gilick: Close-range pressure. Stronger early damage ceiling but less forgiving if you're still learning dodge timing.
- Kerapin: Defensive. Slower to deal damage but survives more punishment.
- Gwigoon: Minion-based. The weakest solo kit but sets up well for later Abyss compositions.
- Anami: Agility-focused, hit-and-run. High skill ceiling, strong once you know the game.
Pick Kwipeck unless you already have a strong preference for one of the others. It teaches the combat rhythm without punishing you for ability slot misreads. The Voidling Bound review gives the broader context for how that forgiving opening fits the game's Abyss endgame.
Difficulty setting: There are four tiers, Collector (Baby), Adventurer (Easy), Fighter (Normal), and Wrangler (Hard). Adventurer is the second-lowest, not the middle option, but it's still the right pick for a first run. The tiers mostly change enemy count, health, and damage, with only a slight bump to Mutagen drop rates at the top end. A well-upvoted tips thread on r/VoidlingBound sums it up bluntly: difficulty barely affects your rewards, so play whichever tier is actually fun. The complete guide hub is the better place to jump once you want the full progression map. You can change it anytime in the settings, even mid-mission, so nothing here locks you in. The Abyss will give you plenty of scaling difficulty later regardless of starting choice.
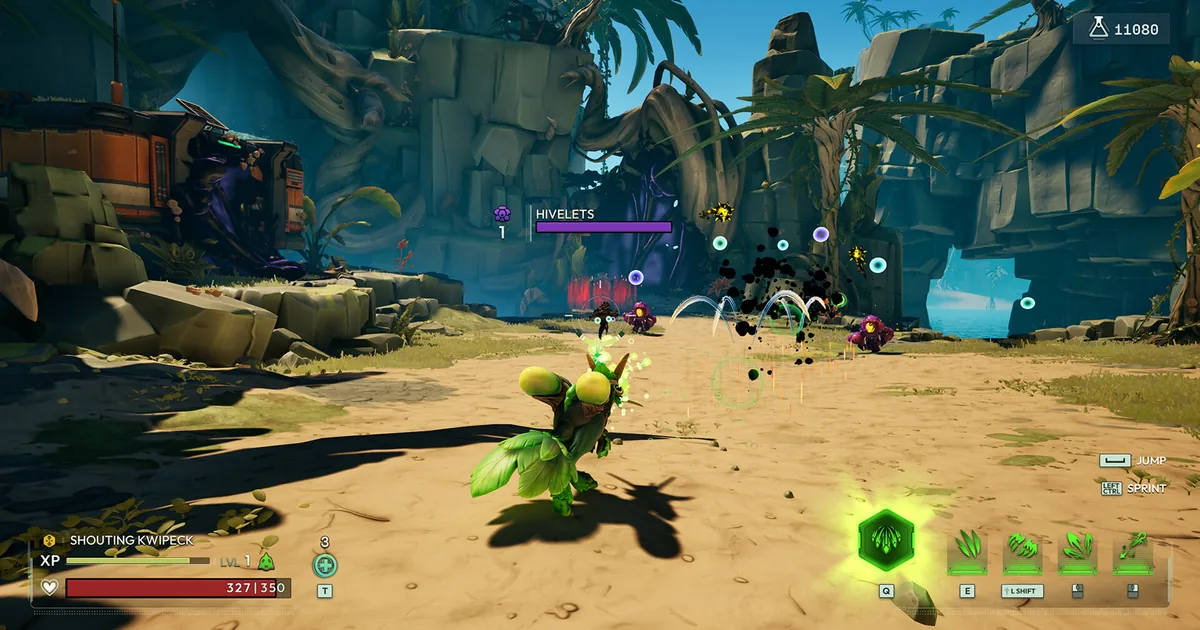
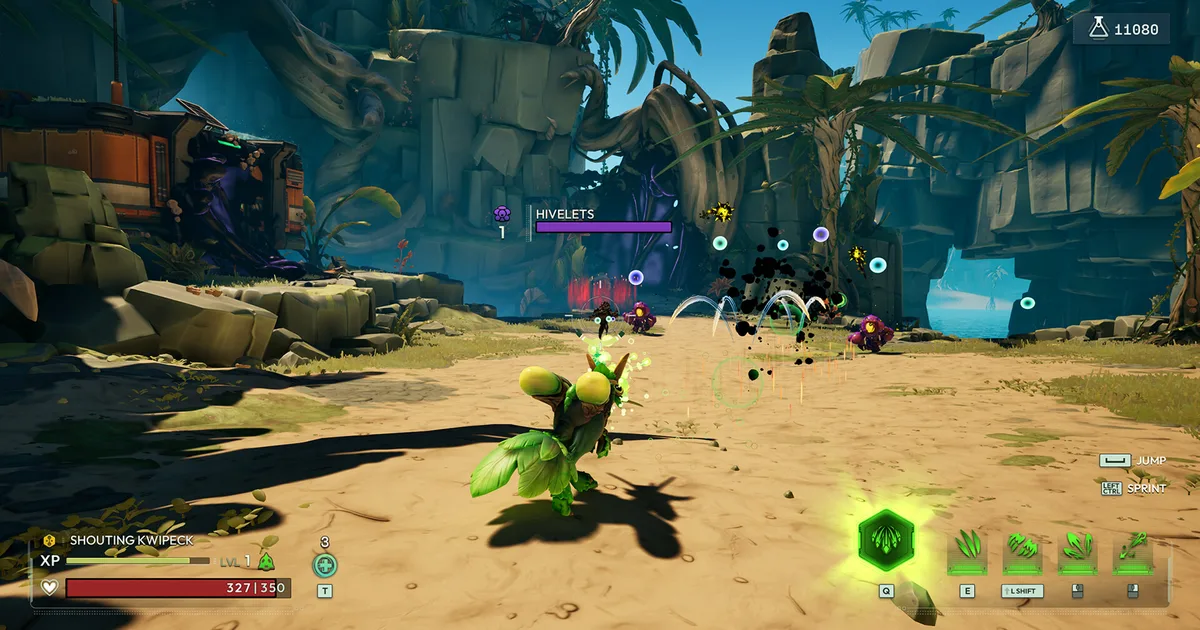
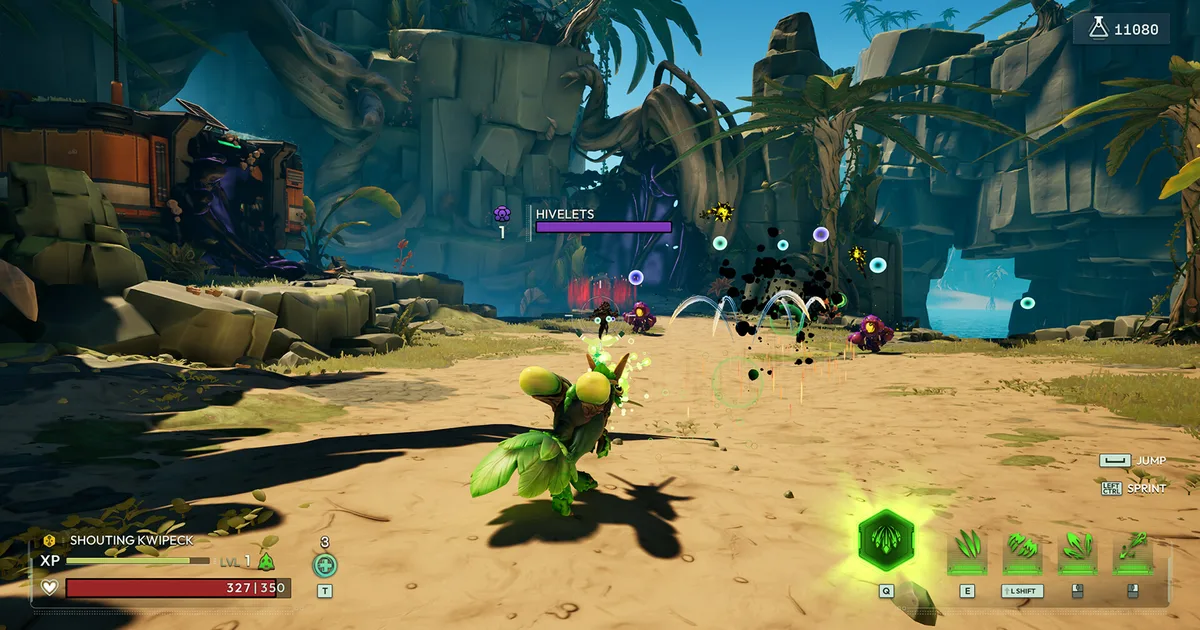
 Shouting Kwipeck, one of Kwipeck's Exotic-rarity evolutions, handling a Hivelets swarm without needing precise dodge timing. Even several evolutions in, Kwipeck's kit stays readable, which is exactly why it's the forgiving first pick.
What each of the 9 species actually plays like
The starter picks above cover the five species you'll run into earliest. Voidling Bound has nine species total, and the other four (Ur-Sek, Nimiod, Morfang, and Packuran) show up once you're further into Solum and Aulis. The full monster guide expands the evolution branches beyond the quick comparisons here. Here's what each one's base kit actually does, pulled from the game's own species descriptions rather than Reddit shorthand:
- Kwipeck: fast-firing SMG primary, a rocket secondary, a dash for its defensive ability, and a two-slash-plus-beak melee. Its ultimate drops multiple large AoE explosions where you aim. Balanced and readable, which is why it's the tutorial pick.
- Gilick: shotgun primary, a high-damage slam secondary that closes distance, and a counter-stance defensive ability that deals minor damage around it and briefly turns Gilick invulnerable when hit. Its ultimate is a high-damage cone burst. Built for close range.
- Kerapin: mid-range burst primary, a delayed-explosion mine secondary, and a defensive shield you can still attack through. Its ultimate rolls Kerapin around at high speed before tossing explosive charges outward. The defensive pick.
- Gwigoon: generates charges with its primary and spends them on its secondary to create duplicates, letting it fight from range or alongside its own minions. The weakest species solo, but a real asset once you're building a summon-heavy Abyss squad.
- Anami: small, fast, and built around homing attacks and high mobility, staying out of melee range while chipping enemies down with elemental abilities. High skill ceiling once you know how to kite.
- Ur-Sek: actually two creatures in a symbiotic pair, the heavier Ur and the faster Sek, each with its own version of every ability. Swapping between them on the ultimate also heals Ur-Sek, and it has the fastest ultimate charge rate of any species.
- Nimiod: plays nothing like the rest. It has infinite jumps that drain stamina instead of reloading, drops turrets that restore stamina and add damage when you're near them, and its tertiary charges while airborne before slamming down for heavy damage. Built around area denial and elemental status stacking.
- Morfang: a dedicated close-range hunter built for relentless melee pressure and ambush openers. Pair it with the Neutral element's Bleed status (more on that below) and its Fatal Wound perk turns Bleed into an execute under 50% health.
- Packuran: the heaviest species in the game, specializing in continuous laser beams, kinetic attacks, and close-range pressure, with some evolutions adding minion swarms or miniature wormholes.
Reddit shorthand for these tends to compress them into one-liners (Kwipeck as "run n gun," Nimiod as "AoE king," Packuran as "laser beams"), and that shorthand roughly tracks the official kit descriptions above, just without the specifics. For endgame builds that turn those kits into actual Abyss carries, use the Voidling Bound builds guide.
GODEEPER: For the complete evolution trees, how the gene pool shapes what builds are possible per creature, and every named variant per species, the evolution guide covers the full roster. Voidling Bound Monster Guide: Evolution and Tips 2026 →
How early game progression actually flows
The first ten hours have a structure the game doesn't announce, but following it keeps you from hitting dead ends later. The launch guide is useful for the initial unlock order, while this section focuses on practical priorities.
First 15 minutes: Finish the tutorial, set difficulty, and drop your first attribute point into Vitality. Not because Vitality is the best offensive choice, but because the health and stamina gains keep you alive long enough to actually learn how combat works. Dying repeatedly in early missions teaches you nothing if you're fighting around a 200 HP pool.
First half hour: Run two or three story missions. Don't browse menus. Voidling Bound's combat rhythm is something you learn by doing, not by reading. You need to practice dodge timing, figure out the parry window, and get comfortable switching between shoot, slash, and slam before any of the deeper systems make sense.
Around 30-45 minutes: Hatch your first egg from an infested location and compare its ability slots to your starting Voidling. If the slots are meaningfully different, it's worth raising. If they're similar or weaker, release it now rather than later. Every release pays out Mutagens scaled to rarity plus Research Samples, and that adds up fast once you're clearing out duplicates instead of hoarding them.
First hour and beyond: Open the database whenever a species, element, or ability name comes up that you don't recognize. The single most common beginner error is assuming two Voidlings of the same element play the same way. They don't. Same element with different ability slots is basically a different creature.
By your second or third hour: the Atlas Terminal opens up as a mission hub. From here you can pick specific missions instead of following story order, replay old ones for materials, check which objectives you're still missing per mission, train Voidlings, and farm resources without being forced into the next main story beat. The complete hub keeps the mission and evolution references together. It's also where you should check a mission's element and faction before deploying, since Voidling Bound has 27 missions total, 11 Corruption Cleansing, 15 Survival, and 1 Abyssal Incursion, split across three planets plus the Abyss, and matching your Voidling's element to the local faction saves you from fighting through Weak-multiplier damage the whole run. Some missions hide a Golden Egg, a one-time collectible that guarantees a specific unique Voidling variant with exclusive genes instead of the random rolls you get from infested-location eggs. It's an easy thing to miss because the Splicing Station and breeding loop get most of the early attention, but Golden Eggs are one of the more efficient sources of unique genes in the game.
Egg types in Voidling Bound: Normal, Silver, and Golden
The progression walkthrough above already mentions Golden Eggs, but there are three separate egg tiers, and knowing what each one guarantees changes how you spend Research Samples. The gene and splice guide has the deeper breeding context.
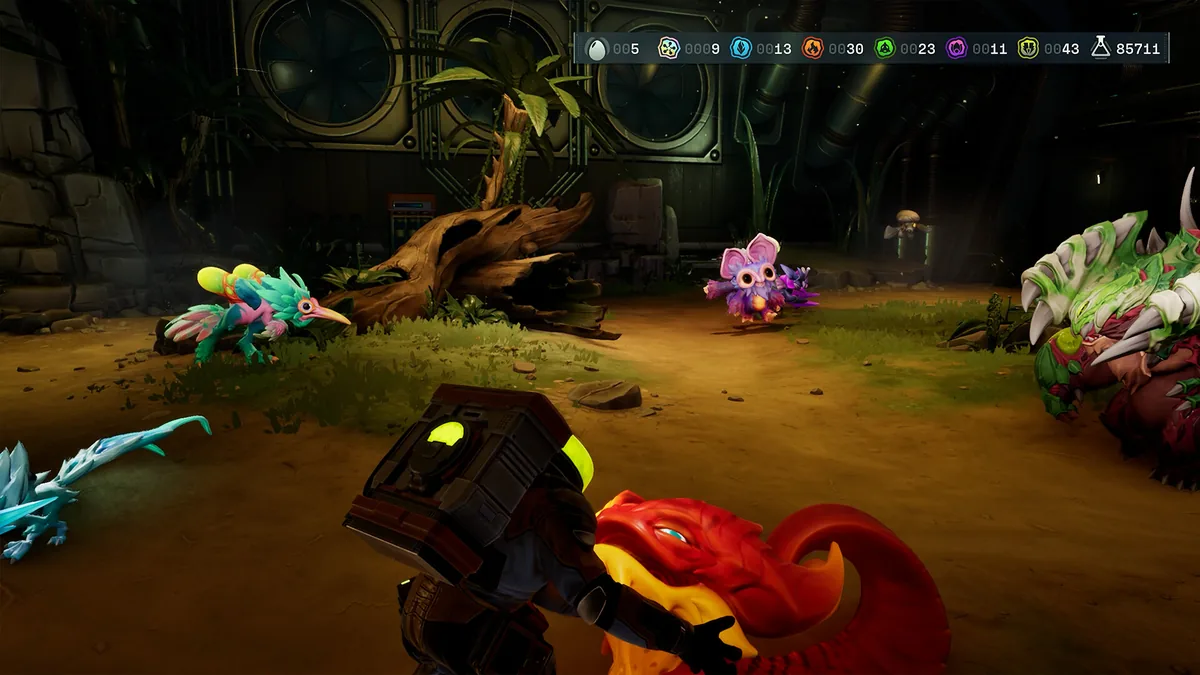
Normal Eggs are what you'll find most often during Cleansing missions, and every mission reward that includes an egg pays out this type. Henry sells them too, for 500 Research Samples each, if you want to buy a specific species instead of hoping for one on a run. The monster guide covers which species are worth targeting before you spend those samples. According to the wiki's own sample of 300 hatched Normal Eggs: roughly 75% come out with no Nature at all, 15% land a Normal-rarity Nature, 5% get Notably, and 5% hit Exceptional.
Silver Eggs guarantee a Nature, full stop. They show up randomly during missions in place of a Normal Egg, Rachael sells upgrades that raise how often you find them, and Henry sells them outright for 2,500 Research Samples. From a 200-egg sample, the wiki's breakdown comes out to 0% with no Nature, 90% Normal, 5% Notably, and 5% Exceptional, meaning the Nature-rarity odds are close to unchanged from Normal Eggs, you just can't whiff and get nothing.
Golden Eggs are one-time collectibles tied to specific missions. Each one hatches a fixed, unique voidling variant at Mutated rarity, the wiki's top evolution tier, the same tier a fully self-evolved voidling reaches. Community advice on r/VoidlingBound repeatedly describes Golden Egg voidlings as weaker than ones you evolve yourself, but the wiki doesn't confirm or explain that claim anywhere. The review puts the collectible chase in context with the rest of the endgame. Treat it as an open question rather than settled fact: the genes are unique and worth collecting, but don't assume a Golden Egg pull automatically beats a voidling you've bred and leveled with intent.
Attribute points: what each stat does and what to prioritize
Attribute points are permanent. There's no respec at launch. Before you spend points, know what you're committing to. The builds guide is the natural follow-up once you have enough points to specialize.
Vitality covers health (200 to 1,600 HP at max), armor (0 up to a peak of 203 at level 28, dipping slightly to 202 by level 29), and your stamina pool (300 to 1,700). Health does more than pad your bar, too: drop below 75% and incoming damage is cut by 20%, below 30% it's cut by 40%, and below 15% it's cut by 60%, so a Voidling near death is quietly tankier than one at full health, not just more fragile. Stamina matters beyond survival as well, since dodge and dash both pull from it. Start here.
Strength scales melee attack power linearly and pushes critical hit damage from 1.5x up to 4.3x at max. It's the right offensive pick for Morfang melee and any species where you're spending more time in close range than at distance. The species guide helps match that stat to the right kit.
Essence is the stat for elemental and status-effect builds. At max, it takes elemental damage bonus from 0% to 99% and scales status effect multiplier from 1.0x to 3.8x. A Cyber or Organic build running Static or Poison hits dramatically different numbers at 12 Essence versus 4. The best-builds guide has the practical breakpoints for this path. If your species leans into elemental attacks, this is where your damage actually comes from. One patch note worth knowing before you commit: as of the July 20, 2026 update, off-element damage now scales at 25% effectiveness instead of doing zero, so a single-element Essence build no longer does nothing against a faction it's weak against. It's still worse than matching the element, but it's not a dead build the way it used to be.
Recuperation is the one most beginners ignore until the Abyss breaks them. At max it cuts cooldowns by 49%, pushes ultimate fill rate to 2.28x, drops stamina recharge from 2.00 to 1.06 seconds, and multiplies healing by 2.4x. On ability-heavy kits, that cooldown reduction changes your entire combat rotation.
Agility scales fire rate (1.0x to 2.04x), movement speed (6.75 to 9.18 m/s), and critical hit chance (5% to 81%). High Agility paired with Strength's crit damage multiplier creates a high-variance offensive build that spikes hard against single targets.
The rule: pick one offensive attribute (Strength or Essence depending on your element), then one survival attribute (Vitality if you keep dying, Recuperation if your abilities feel unavailable). Spreading evenly produces a Voidling that does nothing well.
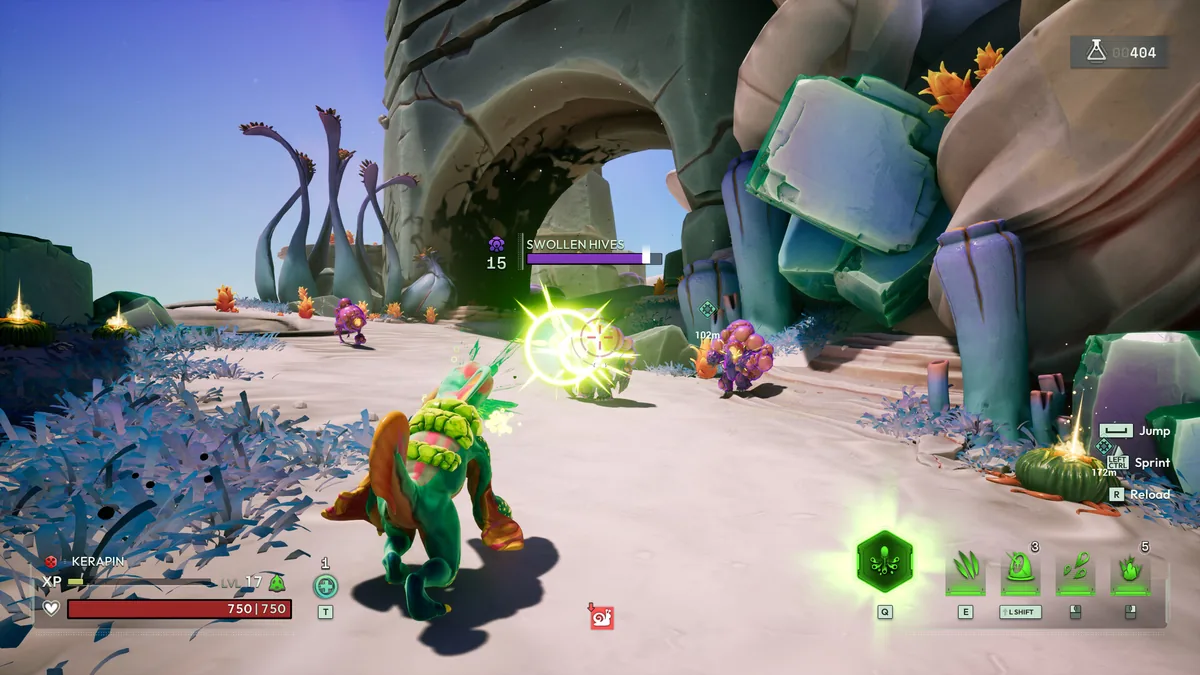 A level 17 Kerapin holding a full 750 HP bar against a Swollen Hives enemy. Kerapin's defensive kit is built to survive fights like this rather than end them fast, a tradeoff worth knowing before you commit attribute points to a squishier pick.
GODEEPER: Once you're through the early game, the builds guide covers the specific Essence and Strength breakpoints that define the community's three top-tier options. Voidling Bound Builds: Top Gene Combos and Splices 2026 →
The Nature system: Strong, Witty, Healthy, Tenacious, and Agile
Egg hatches and breeding can roll a Nature on top of a Voidling's base attributes, and the game shows this as a colored symbol under the creature's name without ever spelling out what the symbols mean. The gene guide explains how Nature quality fits into breeding decisions. Here's the actual mapping, confirmed on the wiki's Natures page:
| Attribute | Nature | Color |
|---|---|---|
| Strength | Strong | Orange |
| Essence | Witty | Purple |
| Vitality | Healthy | Green |
| Recuperation | Tenacious | Blue |
| Agility | Agile | Yellow |
Every Nature comes in one of three rarities: Normal adds +1 to the attribute, Notably adds +3, and Exceptional adds +5. That's a meaningful chunk once you remember leveling alone caps an attribute at 20 and Modules from mutating only add up to 4 more. An Exceptional Nature is worth more raw points than either of those sources alone.
Breeding two Voidlings with different Natures has a chance to produce a Dual Nature, a single creature boosting two attributes at once instead of one. Rarity and Nature type inherit separately during breeding, so pairing an Exceptional Witty parent with a Normal Strong one can still land an Exceptional Strong offspring. The ten possible pairings each have their own name:
| Strong | Witty | Healthy | Tenacious | Agile | |
|---|---|---|---|---|---|
| Strong | Ferocious | Robust | Enduring | Athletic | |
| Witty | Ferocious | Lively | Resourceful | Elegant | |
| Healthy | Robust | Lively | Rugged | Spry | |
| Tenacious | Enduring | Resourceful | Rugged | Relentless | |
| Agile | Athletic | Elegant | Spry | Relentless |
This is also where the most repeated tip from the r/VoidlingBound community pays off: hold onto any Voidling that hatches with an Exceptional Nature, even a low-rarity one, because you only need one Exceptional example of each Nature to eventually breed your way to Exceptional versions of everything. The monster guide shows how Nature choices interact with the evolution roster. Releasing those for a quick Mutagen payout gives up a genuinely hard-to-replace piece of your eventual breeding program.
The gene and splice systems: a plain-language explanation
The game uses "breeding," "splicing," and "evolution" as distinct terms but doesn't explain how they relate, or when each one actually becomes available. The complete guide hub links the deeper breakdowns, while this section gives the unlock order in plain language. Here's the actual flow, including the unlock points the game never surfaces in its UI.
Evolution is automatic. As you play and advance your Voidling, it follows branching paths that change its elemental alignment and unlock new abilities. You're choosing directions, not activating a separate system. This happens naturally during your normal mission runs, and it's also how you raise your Wrangler Level, the account-wide progression stat that gates upgrade purchases from NPCs. Wrangler Level increases from unlocking new genes through evolution and from finding unique voidling variants in Golden Eggs. A well-upvoted r/VoidlingBound tips thread simplifies this to "based solely on evolutions unlocked," which is close but not the full picture: the wiki explicitly credits Golden Eggs too.
Breeding uses the Breeding Station at the hub and combines two parent Voidlings to produce an offspring. The Breeding Station itself unlocks after you complete Reclaim Sanctuary, Solum's second main mission. The gene and splice guide goes deeper on inheritance. The offspring inherits genes from both parents. Better parents mean better offspring gene pools. This is where you build toward a creature with high-quality starting traits before you commit to splicing it. Releasing lower-quality Voidlings for Research Samples and reinvesting in better eggs is how the breeding loop works.
Splicing is the final step, and the most unforgiving one. The Splicing Station unlocks after you complete Subterranean Expedition, Solum's fourth of five main missions, noticeably later than breeding. (If you've seen the rough community shorthand that breeding opens "about a third of the way through the second planet" and splicing "about two-thirds through," that's this same gap, just estimated instead of named.) The Voidling Bound review explains why this irreversible-feeling decision changes the endgame loop. Splicing lets you combine ability genes from different species onto a single creature, and each attempt can edit up to 14 genes across morphology, modules, abilities, and up to 3 perk slots, so a single splice changes more than "swap one ability." The cost is 5 Polychrome Mutagen, crafted by fusing 5 elemental Mutagens in the Polychrome Converter. Worth knowing before you start evolving toward Mutated rarity: fully evolving one species line from Common through Mutated costs 1 + 3 + 6 + 10, 20 elemental Mutagens total, on top of whatever you spend on Polychrome later. Here's where people go wrong: spliced Voidlings can't breed by default. That restriction doesn't lift unless you buy the Spliced Breeding upgrade from the Breeding Station, which requires Wrangler Level 45 and 10,000 Research Samples.
One thing that changed since launch: as of the July 2, 2026 patch, Neutral is now a selectable Main Element at the Splicing Station, confirmed in that update's official patch notes. Before the patch it wasn't a valid splice target, and players worked around it with a trick the community and the wiki both call Neutral Splice Breeding (NSB), credited to a player named Reeceyclone who shared it on the official Voidling Bound Discord: repeatedly breed a spliced Voidling with a common one of the same species until an offspring happens to hatch Neutral while keeping the spliced abilities. If you're following an older guide that describes that workaround, it's no longer necessary, though the wiki still documents it for anyone curious how it worked.
Neutral is worth knowing about because it applies Bleed, a fast-ticking damage-over-time effect that deals damage every 0.25 seconds, the fastest tick rate of any status effect in the game. On its own, Bleed is just solid single-target damage. But pair it with Morfang's Fatal Wound perk, unlocked on Morfang's Mutated evolution or copied onto another species through splicing, and Bleed does something sharper: it executes enemies once they drop below 50% health. That's a perk-gated interaction, not something every Bleed application does, but it's a bigger deal in the Abyss than it sounds on paper once you have it.
Splice a good specimen too early, and you've turned your best breeding parent into a combat-only dead end. Breed the creature with the gene pool you want, keep that breeding stock unmodified, then splice a separate copy for fighting. That order matters.
Six mistakes to avoid in the first few hours
1. Chasing rarity before understanding ability slots. A rare evolution that doesn't fit your playstyle is less useful than a common one you know how to use. The launch guide gives the broad progression context. Learn what a species' ability slots actually do before deciding whether a rare version of it is worth pursuing.
2. Mixing up the three systems. Evolution, breeding, and splicing are separate mechanics with separate costs and separate consequences. Treating them as interchangeable leads to spending Polychrome Mutagen on a creature you still need as a breeding parent.
3. Skipping story missions to optimize. The Voidling Bound combat rhythm requires actual practice. Menu browsing and database reading don't substitute for learning dodge timing and parry windows against real enemies. Run the missions.
4. Picking your elemental path based on appearance. Element branches define damage type and faction matchups throughout the game, including in the Abyss. The builds guide compares the elemental paths against practical endgame goals. Plasma hits all four enemy factions at Effective multiplier with no weaknesses, which is why it's the safest general-purpose choice. Cyber deals Highly Effective damage against GenBots and Crystallines at 1.5x but has exploitable gaps against other factions. Picking an element because the visual looks good, then discovering it has poor matchups in Abyss, is a common regret.
5. Over-investing in optimization before level 20. There's a breeding level cap at 20, and Hatchery Games has kept patching well past launch: balance and bug fix passes landed June 12, June 22, and July 20, with hotfixes in between on July 3 and July 21. The July 2 patch mattered most for splicing specifically, since it added Neutral as a selectable Main Element at the Splicing Station (more on that below). Optimizing hard into a build before you understand how the current patch rewards it is a good way to regret it later. Learn the systems first, then commit.
6. Ignoring what releasing actually pays out. Low-rarity Voidlings with weak gene pools have no long-term value in your roster. Releasing one grants Mutagens scaled to its rarity (1 for Rare, 2 for Superior, 3 for Exotic, 5 for Mutated, confirmed on the wiki's Mutagens page) plus Research Samples, which fund the Cerebrum Enhancer's per-species skill upgrades and Rachael's hub shop. The wiki doesn't document the exact Research Sample formula, but multiple players on r/VoidlingBound independently report it scales with the Voidling's level rather than its rarity or ability score: one calculated it costs roughly 1,100 Research Samples to raise a common Voidling to level 20 through training, and only gets 750 back on release at that level, while another reported 1,200 to 1,600 back at level 20 depending on the specimen. Treat the exact numbers as community-reported rather than confirmed, but the practical takeaway holds either way: release fodder Voidlings early rather than spending training time on them first. A pile of unused Commons and Rares sitting in your roster isn't doing anything for you.
A couple of smaller things worth knowing that don't fit the mistake format: auto-sprint is off by default, so turn it on in the options menu unless you like holding a button down for hours. And don't stress about clearing all 3 stars on every mission unless you're a completionist, the stars are optional rewards, not a gate to progression.
The Abyss: portal colors and why Elites feel unkillable
Once you're deep enough to reach the Abyss, the endgame's escalating dive, two mechanics trip up players who haven't seen them explained: portals and Elites.
Portals aren't random, and the game never explains any of them. There are four confirmed colors: Cyan is the most common type and leads to a map matching the two factions shown on its icon. Yellow has a plus symbol and leads to a healing map with no enemies, useful when you're low. Orange has a skull and leads straight to a boss map. Red skips you ahead several Abyss Levels outright instead of leading to the next sequential map. Reading the icon before you commit to a portal is a real decision, not flavor, and it's the single most repeated piece of advice in the r/VoidlingBound tips thread this guide draws from.
Elites are the tougher enemy variant you'll start seeing regularly once you're diving deep, and they come in two tiers: Elite Tier 1 grants one random Modifier, Elite Tier 2 grants three at once. Both tiers also boost the enemy's speed, damage, and armor, which is the actual mechanism behind community shorthand describing Elites as taking "drastically reduced damage." They're not immune to anything. They're carrying a real armor buff on top of their base stats. The Modifier pool itself is long: confirmed types include Ascending, Duplicating, Healing, Invisible, Invulnerable, Mortar, Regeneration, Shielded, Slowing, Spreading, Teleporting, Toxic, and Haunted, and a Tier 2 Elite carrying three of these stacked together can turn into a genuinely dangerous fight if you don't recognize what you're looking at early.
What to work toward after the first few hours
Once you've run enough story missions to understand the combat and hatched your first round of eggs, the medium-term goals are:
Establish a breeding pair. Two Voidlings with the strongest gene pools you've found become your permanent parents. You don't evolve or splice them. The actual inheritance mechanic is more specific than "stats get combined": for each attribute, the offspring inherits one parent's value, picked randomly between the two if they differ, at up to 50% of that value by default. Henry sells six tiered upgrades that raise the inherited share, culminating in Void Resonance Treatment at Wrangler Level 50, which brings it to 100%. Total inherited attributes are capped at 80 of a possible 100 points, leaving room for the 20 points you'll add yourself through leveling. Breeding is also the only way to unlock Dual Natures (see the Nature system above), so a real breeding program is worth setting up once you know which two Voidlings you're building around.
Unlock the Splicing Station. Confirmed above: it's gated behind Subterranean Expedition, Solum's fourth of five main missions. Don't rush it, but keep it in view as your next milestone.
Prioritize the right facility upgrades first. If you're unsure where to spend early Research Samples, one experienced player's breakdown on the same r/VoidlingBound thread is a reasonable default: the gym for easy passive leveling and Rachael's healing biogel first, then Cerebrum Enhancer points into whichever one or two species you've committed to for the campaign. Their read on Cerebrum trees specifically: most species only have one or two branches worth fully investing in, they cited Kwipeck's dash tree and Gilick's slam tree, which gets a cooldown refresh on kill, as standouts. That's one player's opinion rather than a wiki-confirmed ranking, but it lines up with the general advice above to focus on one or two species instead of spreading thin.
Replay missions for eggs and stars. Both Corruption Cleansing and Survival missions can reward eggs, and first-time completions pay out extra on top of the base rewards. Going back through earlier zones once you're stronger for their remaining stars and any uncollected Golden Eggs is a legitimate source of eggs, not just padding.
Identify your Abyss carry. The builds that work in the Abyss are generally Nimiod pylon-network (Essence-heavy), Plasma Packuran (mixed-faction safety), or Morfang melee (Strength-heavy). Knowing which direction you're building toward helps you spend attribute points intentionally.
Know what's waiting past the early game. Evolution, breeding, and splicing aren't the whole picture. Once you unlock the Training Room from Michael, you can passively level Voidlings by placing them in training equipment instead of grinding missions for XP. And once you reach the Abyss, Catalyzers become the real power system: equippable modifiers, up to 5 per Voidling, in Weak, Common, Potent, and Strong rarities plus rare Corrupted versions with a real downside, bought from Leon using Polychrome Mutagen. None of that matters in your first ten hours, but knowing it exists means Rachael's shop won't feel like a dead end once you outgrow it.
Don't try to hit all of these in your first session. One Voidling you actually understand outperforms five you've touched once.
Related Reading
- Voidling Bound Complete Guide: Evolution, Builds, Splicing: the complete guide hub for Voidling Bound, covering evolution, gene splicing, builds, and the review verdict.
- Voidling Bound Monster Guide: Evolution and Tips 2026: All 9 species at launch, how evolution branches work, and the gene pool factors that determine your Voidling's ceiling.
- Voidling Bound Builds: Top Gene Combos and Splices 2026: The three community-verified Abyss builds with specific attribute allocations, splicing recommendations, and elemental matchup data.
- Is Voidling Bound Multiplayer? Co-Op Status in 2026: Whether you can tame and battle alongside friends, and what's confirmed for co-op.
- Voidling Bound: Monster Taming Meets Third-Person Shooter: The launch overview covering what separates this game from other monster-taming titles and what Hatchery Games changed in the launch patch.
- Voidling Bound Review: Monster Taming Meets the Abyss: the review verdict for Hatchery Games' shooter and its Abyss endgame.
Frequently Asked Questions
What is the best starting species in Voidling Bound? Kwipeck is the most forgiving pick for a first run. It has a balanced kit, nothing punishing in its ability slots, and teaches you combat rhythm without forcing a specific playstyle. Once you know how ability slots work, Gilick or Anami open up better early pressure options.
How does the gene system work in Voidling Bound? Genes in Voidling Bound control a Voidling's inherited traits: its base stats, ability slots, and elemental affinity. When you breed two Voidlings, the offspring pulls genes from both parents. Better parent genes mean better starting stats and potentially rarer ability slots in the offspring, which is why building a dedicated breeding pair matters before you splice.
What should I invest attribute points in first? Put your first point into Vitality. It increases your health pool from 200 to up to 1,600 HP at max and also expands your stamina pool, which matters for movement and dodge timing. Once you survive missions reliably, shift into your primary offensive stat: Strength for melee-heavy species like Morfang, Essence for elemental and status-effect builds.
What is the difference between evolution and splicing in Voidling Bound? Evolution is the branching progression path that changes a Voidling's elemental alignment and unlocks new abilities over time. You follow it naturally as you play. Splicing is a station-based system you unlock after the Subterranean Expedition mission, where you combine gene fragments from different species to build a custom hybrid. Splicing costs 5 Polychrome Mutagen and is mostly permanent.
When should I start splicing in Voidling Bound? Wait until you have an Abyss carry bred from good parents. Spliced Voidlings cannot breed by default, so splicing your best specimen early locks you out of using it as a parent. Build breeding stock first, then splice a combat copy.
How do I get more Mutagens in Voidling Bound? Mutagens drop from enemies in infested locations and as mission completion rewards. The breeding guide also covers how Research Samples and Mutagen spending interact. Polychrome Mutagens specifically require fusing 5 elemental Mutagens in the Polychrome Converter back at the hub. They are rare enough that each splice should be intentional rather than experimental.
What does releasing a Voidling do in Voidling Bound? Releasing a Voidling grants Mutagens scaled to its rarity, 1 for Rare up to 5 for Mutated, plus Research Samples that fund Cerebrum Enhancer upgrades and hub improvements. Low-rarity Voidlings with weak gene pools are worth releasing once you have better specimens, with no other penalty.
What is the Atlas Terminal in Voidling Bound? The Atlas Terminal opens after a few hours as your mission hub. The launch overview places it in the progression. Use it to replay missions, check objectives, train Voidlings, farm resources, and find uncollected Golden Eggs.
What does Wrangler Level do in Voidling Bound? Wrangler Level gates upgrade purchases from NPCs, including the Spliced Breeding upgrade at level 45. It increases when you unlock new genes through evolving Voidlings and when you find unique variants in Golden Eggs, not just from evolutions alone.
What does a red portal do in the Voidling Bound Abyss? Red portals skip you ahead several Abyss Levels at once instead of leading to the next sequential map. Cyan is the common default, Yellow leads to a no-enemy healing map, and Orange leads straight to a boss fight.
What is an Exceptional Nature in Voidling Bound? Exceptional is the rarest of three Nature rarity tiers and adds +5 to whichever attribute the Nature boosts, compared to +1 for Normal and +3 for Notably. Breeding lets you combine an Exceptional Nature from one parent with a different Nature from the other.
References
- Voidling Bound on Steam: official store page, reviews, and patch notes
- Voidling Bound Steam Community: September 12 developer update and current official announcements
- Voidling Bound official launch trailer: Hatchery Games' launch overview
- Voidling Bound Beginner Guide: Species, Ability Slots, and First-Hour Setup: species role breakdown and first-hour progression structure
- Voidling Bound Breeding Guide: Eggs, Splicing, and Level 20 Cap: breeding mechanics and Mutagen economy
- Voidling Bound by Hatchery Games on Steam: community reviews and Very Positive rating context
- Voidling Bound Splicing Station (Official Wiki): splice cost, gene count, and Neutral Element unlock requirements
- Voidling Bound Patch Notes, July 2 2026 (Steam Community): source for the Neutral Element splicing addition
- Voidling Bound Patch Notes, July 20 2026 (Steam): source for the off-element damage scaling change
- Voidling Bound Golden Eggs (Official Wiki): Golden Egg mechanics and how they differ from standard hatches
- Voidling Bound Attributes (Official Wiki): full per-level stat tables and the health damage-reduction thresholds
- Voidling Bound Missions (Official Wiki): full mission list, main mission order per planet, and count by type
- Voidling Bound Rarity and Mutagens (Official Wiki): Mutagen rewards for releasing Voidlings by rarity
- Voidling Bound Natures (Official Wiki): the five Nature types, rarity tiers, and Dual Nature combinations
- Voidling Bound Eggs (Official Wiki): Normal, Silver, and Golden Egg types with sampled Nature hatch rates
- Voidling Bound Breeding Station (Official Wiki): attribute inheritance mechanics, unlock mission, and upgrade tiers
- Voidling Bound Wrangler Level (Official Wiki): what Wrangler Level gates and how it increases
- Voidling Bound The Abyss (Official Wiki): portal colors and Elite enemy mechanics
- Voidling Bound Status Effects (Official Wiki): Bleed tick rate and Elite Tier status effects
- Voidling Bound Species (Official Wiki): official ability descriptions for all 9 species
- r/VoidlingBound: "What tips do you all have for the game": community-sourced beginner tips referenced throughout this guide
Was this guide helpful?
About the author

News Reporter
Games journalist and news hound with 7 years covering industry moves, studio announcements, and patch notes. Chilean. Writes tight, edits tighter.
- 7 years games journalism
- Industry and esports specialist
- Early access coverage
Keep reading
Disclaimer
This article is published for informational and entertainment purposes. It does not constitute professional financial, legal, or technical advice. Game performance, online services, patch schedules, and store listings change. Verify critical details (pricing, system requirements, regional availability) with publishers and storefronts before you buy. Affiliate links, where present, help support our editorial work and are labelled in our affiliate disclosure.
Comments
Loading comments…