GameBrief · Guides
LegionBound Adventure Mode Guide: Route, Build, Win

Reviewing
LegionBound
Spicy Garlic Games
LegionBound Adventure Mode is where the game's systems stop being practice and start being a campaign. The map, the camp, the loop decision, the Endbringer: it's a different structure than Battle Mode, and the players who stumble into it expecting the same kind of run are the ones who keep losing in the middle sections before they've even seen the boss.
This guide covers how legionbound adventure mode actually works: what the map asks you to decide, which camp buildings to prioritize, how many loops to run before committing to the Endbringer, and why the Tax Collector setup handles first runs better than anything more specialized.
TL;DR: Adventure Mode is LegionBound's campaign: a map to route, a camp to build, looping runs to farm, and the Endbringer waiting at the end. Run a few loops to bank synergy chains and Ascensions before you commit to the boss, prioritize camp buildings that accelerate recruitment and gold, and start with the Tax Collector loop (its 4-class chain completes early) before trying specialized Warrior-group builds. Losses usually happen in the mid-loop sections, not at the Endbringer itself.
Key takeaways
- Spend 15-20 Battle Mode sessions before starting Adventure Mode: not because it's locked, but because routing decisions assume synergy knowledge
- The map has three types of nodes: encounters (combat), shops, and rest stops: route toward the Endbringer via shops, not rest stops, if you're already running high health
- Camp buildings persist through loops: this is the core reason looping is worth it
- Fight the Endbringer when you're clearing elites without taking damage, not when you've hit a specific loop count
- Tax Collector with a four-class party is the correct first Adventure Mode build
How Adventure Mode is structured
Battle Mode is a single run with no map. You build a synergy, endure waves, and the run ends when you die or complete the session.
Adventure Mode is a campaign. There's a map (a connected web of encounter nodes) and you move through it by completing each node you land on. At the far end of the map, the Endbringer is waiting. Between you and it: combat encounters, shops, rest stops, and camp moments where you spend keystones on buildings.
The core structural difference is that Adventure Mode runs have persistence inside them. Camp buildings don't reset between loops. The skill tree you've unlocked from previous runs applies from the start. The map gives you choices about which encounters to take, which costs to avoid, and when to push toward the Endbringer versus looping back for another pass at the map.
Players who've only done Battle Mode often try to run Adventure Mode like a longer Battle Mode. The map routing asks something different: you're not just building a synergy: you're also deciding how to spend limited exposure to encounters and which passive bonuses to stack via the camp.
When to switch from Battle Mode
The honest answer: after 15-20 Battle Mode sessions, depending on how quickly your synergy knowledge builds up.
Adventure Mode doesn't lock until a specific achievement. You can open it earlier. The problem is that routing decisions in Adventure Mode require knowing which class combinations are worth committing to, because the map gives you limited opportunities to correct a bad early choice. If you hit the first elite node with a party that doesn't have the right synergy because you picked wrong at node 2, you're in trouble: and if you don't yet know which combinations work, you can't recognize the mistake until you're taking the damage.
Battle Mode teaches synergies in shorter runs where a wrong choice costs 20 minutes, not an hour. That's why it's the right place to build the foundation. By the time you know which 3-4 class combinations work in Battle Mode, the Adventure Mode routing decisions start making sense.
From the LegionBound tips guide: the synergy window from Battle Mode doesn't just transfer: it becomes the map-reading lens. Players who've done the Battle Mode work can look at a node cluster and immediately see whether the encounter types there will support their party composition.
Reading the Adventure Mode map
The map is a branching set of encounter paths. From any given position you usually have 2-3 routes forward, each leading to different node types.
 The upper-right path leads to an elite encounter with a shop behind it: higher risk, but the shop reward compounds. If your party is already cleared for elites, this route is usually worth taking.
Five node types appear across the map. Standard combat encounters are the baseline: you'll clear most of them regardless of routing, and they provide the gold and experience that fuels everything else. Elite encounters hit significantly harder but drop better rewards; take them when your party is running clean on the current loop, skip them when you're already limping.
Shop nodes are where routing gets strategic. Spending gold from recent encounters on upgrades and class additions here changes the equation for everything that follows. A shop sitting behind an elite encounter is usually worth fighting through: the upgrade compounds across the rest of the map in a way that rest stop health recovery doesn't. Rest nodes recover health and are worth routing toward when you're below 50%, but if your party is in good shape they're mostly dead routing choices compared to the shops.
Camp moments aren't movement nodes at all. They trigger at certain progression points and let you spend accumulated keystones on buildings. You get roughly five per run, and the buildings you place here persist through loops.
The routing principle: shops and elites create leverage; rest nodes recover what you've lost. Default toward shops when your party is in good shape. Route toward rest nodes when you're already hurt.
GODEEPER: How synergy groups work across all 30 classes, including which combinations hold up through elite encounters. LegionBound Synergy Guide →
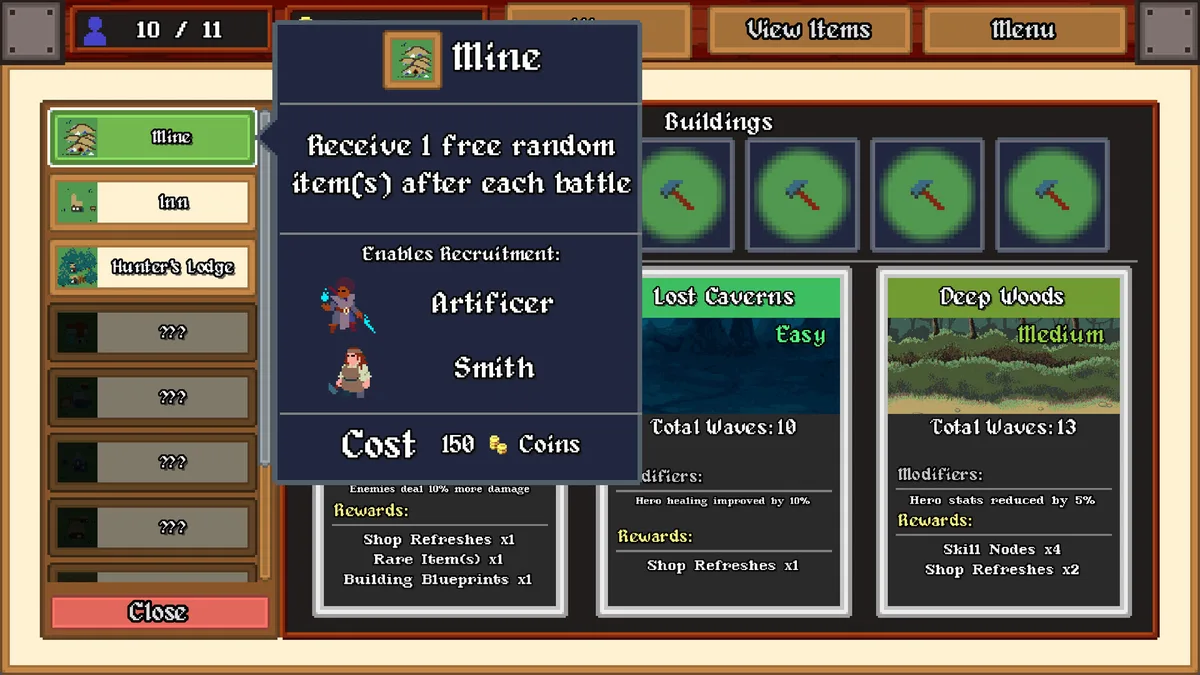
Camp building: which structures first
LegionBound Adventure Mode camp buildings are permanent within a run and stack with each loop. They're passive bonuses that apply to every encounter going forward, which means buildings you unlock on loop 1 pay off through loop 2 and the Endbringer fight.
 Three keystones spent, two left: the health regeneration building is the right fourth pick because elite encounters on loop 2 deal enough damage that passive recovery matters more than flat attack bonuses at this point.
For a standard first run, the order is: flat damage bonus first, gold generation or shop discount second. The flat damage bonus affects every encounter from the moment you place it through the Endbringer fight. A 20-encounter run compounds that bonus significantly. Gold generation or shop discount multiplies every shop visit you take afterward: either one is fine, grab whichever the map offers.
Third and fourth keystones go to health regeneration and the second damage building, in that order, unless your health situation is already critical by the time you're spending keystone three. If elite encounters are grinding you down in standard nodes, swap health to the third slot. Fifth is situational: take whatever fits your party's damage type if the Endbringer is close, or gold generation again if you're looping.
The buildings reset when the run ends, not between loops. Everything you build persists through loops 2, 3, and beyond: which is why the first two keystone picks matter so much. A flat damage bonus from keystone 1 that you got on loop 1 is applying to every loop 2 encounter you take.
The LegionBound Adventure Mode loop system: when to fight the Endbringer
Looping means reaching the Endbringer's position and choosing to loop back to the start of the map instead of fighting. You keep your camp buildings, your party composition, and your progress on the skill tree. The map resets (encounter nodes refresh, shops repopulate) but with harder encounter difficulty.
The Endbringer also scales with each loop. This creates a genuine trade-off: more loops mean a stronger party with more camp buildings, but also a harder Endbringer. There's no infinitely correct loop count: only a party-specific answer.
The signal to fight is clearing elite encounters on the current loop without taking significant damage. Not barely surviving: handling them cleanly. If that's where you are, the Endbringer is within range.
The wrong reason to fight is having done two loops and feeling like it's "time." Loop count doesn't matter. The Endbringer scales to match it, so there's no mechanical advantage to a specific loop number. What matters is whether your party can sustain through the fight pattern.
From the LegionBound Endbringer guide: the Endbringer's primary mechanic shifts each loop. On loop 1, it prioritizes damage output. On loop 2, it introduces a sustained attrition pattern. On loop 3 and beyond, it adds targeted disruption. A party that cleared loop 2 elites easily has the damage ceiling to handle loop 2 Endbringer mechanics: but might struggle with loop 3 Endbringer if the disruption synergy doesn't match the composition.
For most first Adventure Mode runs: fight after loop 1 or loop 2. Loop 1 if you got through the map cleanly and have three camp buildings active. Loop 2 if the first pass felt rough and you know you need more keystone opportunities.
GODEEPER: Phase-by-phase breakdown of the Endbringer fight, including how its pattern shifts across loop counts. LegionBound Endbringer Guide →
The Tax Collector setup for first runs
The Tax Collector class is the most forgiving first LegionBound Adventure Mode build because it solves the shop routing problem. Tax Collector generates bonus gold from combat encounters. In a mode where shop nodes are the highest-leverage routing choices, having extra gold means more upgrades per shop visit, which compounds across the full map.
The four-class party structure (fill all four slots instead of focusing on two or three) works specifically well with Tax Collector because it gives routing flexibility. If the map's encounter distribution favors physical damage nodes on one loop, you can lean into those classes. If the next loop skews toward magic damage encounters, you have the class coverage to adapt.
From the LegionBound advanced builds guide: the Tax Collector's gold generation is strongest in Adventure Mode rather than Battle Mode because Adventure Mode's loop structure creates multiple shop windows. A single Battle Mode run might have two or three shop opportunities; a two-loop Adventure Mode run might have six or seven. Each one gets the gold bonus.
The practical setup: Tax Collector as your primary source of economy, two offensive classes that complement each other's damage types, and one support class that handles the health pressure from elite encounters. From the LegionBound synergy guide, the physical-damage pairs that work in Battle Mode generally hold up in Adventure Mode without modification.
What to do when your LegionBound Adventure Mode run reaches the Endbringer unprepared
Sometimes the routing works out so that you're at the Endbringer with a party that isn't ready: you hit the transition before you expected, or the second loop left you more damaged than anticipated.
If this happens, check whether looping is still available. If it is, loop. A third loop with the camp buildings you already have is almost always a better outcome than a failed Endbringer attempt.
If looping isn't available and the Endbringer is the only remaining node, fight: but understand what you're working with. The Endbringer fight's first phase is manageable even for underequipped parties; the difficulty spike comes in phase two. Know which of your classes has the best survival utility and prioritize keeping those alive through phase one.
Common LegionBound Adventure Mode mistakes
Routing toward rest nodes when healthy. Rest nodes are recovery tools, not neutral choices. Every rest node you take instead of a shop or elite is a missed upgrade opportunity. If you're above 70% health, route through the shops.
Spending keystones on situational buildings. The temptation to take a building that counters a specific encounter type you just struggled with is real. Don't. The flat damage bonus and gold generation buildings pay off across every encounter; situation-specific buildings pay off in one.
Looping past readiness. Looping once when you should fight costs a loop. Looping twice when you should fight makes the Endbringer significantly harder. Use the "clearing elites without taking damage" signal and trust it.
Four-class party without Tax Collector. Other four-class setups work. They're just harder to route correctly because gold is tighter. Tax Collector's economy advantage is specifically strong in Adventure Mode, and first-run routing benefits from the margin it creates.
Not checking camp building persistence. Players who don't realize buildings persist through loops often make sub-optimal late-loop building choices. Always build as if the bonus will apply to 15 more encounters: because if you loop, it will.
Frequently asked questions
When should I start LegionBound Adventure Mode? After 15-20 Battle Mode sessions. The synergy knowledge from Battle Mode directly informs routing decisions in LegionBound Adventure Mode.
How many loops before fighting the Endbringer? Fight when you're clearing elites cleanly, not after a specific loop count. One to two loops is typical for a first LegionBound Adventure Mode run.
What's the best first LegionBound Adventure Mode build? Tax Collector with a four-class party. Economy advantage, routing flexibility, and the most forgiveness for early routing mistakes.
Do camp buildings reset between loops in LegionBound Adventure Mode? No. They persist for the entire run, including through loops. This is why early keystone choices matter.
What do keystones do in LegionBound Adventure Mode? Unlock camp building slots. You earn approximately five per run by completing level clusters. Prioritize flat damage and gold generation with the first two.
What happens when you fail the Endbringer? You lose the run. Permanent skill tree progress carries over to the next run; in-run camp buildings and party composition do not.
How is LegionBound Adventure Mode different from Battle Mode? Battle Mode is a self-contained synergy run. LegionBound Adventure Mode is a map campaign with routing choices, camp persistence, and a looping boss structure. The synergy knowledge transfers; the routing and camp decisions are new.
Related Reading
- LegionBound Ascension Chain: Timing, Risk, Recovery 2026: LegionBound ascension chain guide. Second and third merge timing, high-wave hero protection, and how to recover when an....
- Shapez 2 Manufacture Mode Guide: How It Works in 1.0: Shapez 2 manufacture mode: Dimensional Waste, Trade Stations, and the path to the Grand Vortex Assembler. The 1.0....
- LegionBound Warrior Group: All 14 Classes & Synergies: LegionBound Warrior group: all 14 classes in the largest synergy loop, how the circular subclass chain works, and....
- LegionBound Barkeep Group: All 11 Classes & Synergies: LegionBound Barkeep group guide: all 11 classes in the mid-size synergy loop, the subclass chain, and the Rogue-Duelist-Gunslinger....
- LegionBound Tax Collector Group: All 4 Classes Loop: LegionBound Tax Collector group guide: the only synergy loop you can fully complete, all 4 classes and subclasses,....
- Legionbound Battle Mode Guide: Endurance Runs 2026: Legionbound Battle Mode explained: how endurance scaling works, when to use it over Adventure Mode,.
- LegionBound Tier List 2026: Ranking All 30 Classes: LegionBound tier list ranking all 30 classes from S to C: synergy chain value, Ascension.
- LegionBound Ascension Guide: How to Merge Heroes (2026): LegionBound Ascension explained: how to trigger your first merge by wave 5, stack Ascensions with.
- Legionbound Launches on Steam: 50 Heroes, 30 Classes: Legionbound launches April 27 on Steam: an autobattler where you field 50 heroes from 30.
References
- LegionBound on Steam: store page, reviews, patch history
- Spicy Garlic Games: developer page
- LegionBound tips guide for beginners: synergy basics and Battle Mode foundations
- LegionBound synergy guide (all 30 classes) class matchups and build paths
- LegionBound Endbringer guide: phase breakdown and preparation checklist
- LegionBound advanced builds guide: late-game class chains and looping optimization
- LegionBound complete guide hub: all classes, synergies, ascension, and battle/adventure mode guides
Was this guide helpful?
About the author

Indie & JRPG Critic
Indie game evangelist and lifelong JRPG fan covering small studios since 2017. Mumbai-born, London-based. Writes the way she talks.
- 7 years indie games coverage
- JRPG and visual novel specialist
- Narrative design focus


Disclaimer
This article is published for informational and entertainment purposes. It does not constitute professional financial, legal, or technical advice. Game performance, online services, patch schedules, and store listings change. Verify critical details (pricing, system requirements, regional availability) with publishers and storefronts before you buy. Affiliate links, where present, help support our editorial work and are labelled in our affiliate disclosure.