GameBrief · General
Rift Wizard 3 Tips: 9 Rules for Surviving Early Runs

Reviewing
Rift Wizard 3
These Rift Wizard 3 tips cover the mechanics that determine whether your first dozen runs survive past realm 5. The game's a turn-based grid roguelike with 500+ spells, 400 spell upgrades, and 300 craftable items: there's no shortage of things to buy. What kills new players isn't ignorance of spells they haven't found yet. It's misreading the systems that govern every run from the start.
TL;DR: Build for damage variety from the first realm, not for a specific school. Get a translocation spell before realm 3. Check enemy resistances before entering a rift. Prioritize spawners first in any room. Mana potions scale with how many spells you have charged, so a large spellbook gets more from each one. The new crafting system gives passive bonuses from fused components, not from leveling or equipment. Pick your two spell upgrades (from four options per spell) before moving on.
What are the best Rift Wizard 3 tips? (quick answer)
The single most important habit for new players: check the rift preview before entering. You can back out with ESC after seeing an enemy list and pick a different realm. A room of fire-immune enemies when you're running a fire-heavy build is a run-ender if you commit blind. The second habit: buy a translocation spell before realm 3, full stop. Blink or any equivalent movement spell isn't a nice-to-have. It's how you avoid taking 150 damage in one turn from being surrounded.
Key Takeaways
- Check rift previews before committing: press ESC to back out and pick a different realm
- Damage variety is non-negotiable: enemies have hard counters, and a single-school build stalls
- Get a translocation spell by realm 3 (Blink or equivalent)
- Kill spawners first: they out-produce your damage output if ignored past turn 3
- Mana potions scale with spellbook size: more charged spells = more return per potion
- Crafting is now the passive bonus system: fuse components from level drops for artifacts
- Each spell gets two upgrade picks from four options: choose before you move on
The Open Build System and Why It Punishes Tunnel Vision
Rift Wizard 3 has no classes. No skill trees that lock you into a path before you understand what the path costs. Every spell, every upgrade, and every item comes from one shared pool priced in skill points, and you buy from it freely each run. That's the series' signature design decision, and it's the reason narrow builds fail.
The pool contains every damage school: fire, ice, arcane, lightning, dark, nature, holy, and more. Enemies resist specific schools. Fire-immune Legheads appear early. Void Children laugh at certain arcane approaches. If you spend your first four skill points on one school because you found a strong spell in it, you're buying into a build that will hit a wall within five realms.
The correct frame is toolkit, not theme. Aim for one reliable single-target nuke, one area-clear or room-control spell, one movement or escape option, and one summon for threat absorption. What schools they belong to matters less than whether they cover those four roles. The game has 500+ spells precisely to let every run build that toolkit from whatever options appear.
GODEEPER: Synergy hunting across a large item pool is also the core skill in Rune Dice. Rune Dice Relics Guide: Best Builds and Relic Priority 2026 →
How to Read and Use the Rift Preview System
Every rift entrance shows you an enemy list before you step through. Most new players skip this and step through immediately. That's the fastest path to dead runs.
The preview tells you what resistances you'll face and what threats are in the room. Enchanters buff everything near them. Summoners spawn additional enemies faster than you can clear. Gates produce a constant stream until destroyed. A room with two gates, an enchanter, and a fire-immune majority is a different priority order than a room of scattered melee demons with no special units.
Before each rift:
- Read the enemy list
- Identify any enchanters or summoners (these die first, always)
- Note resistance flags and compare to your damage schools
- If the room has hard counters to more than 40% of your damage output, back out and pick a different rift
- If you have to enter a bad matchup, identify the highest-priority kill target before you step in
This preview habit alone extends runs. The few seconds it costs aren't wasted; they're the closest thing the game has to safe preparation time.
 The spell pool. Your first four skill points are well spent on unlocking four 1-point spells across different schools, not upgrading one spell to tier 2.
Spawner Priority and Room Control
Every experienced Rift Wizard player has the same first-priority reflex: kill the spawner before anything else. Not the strongest enemy. Not the one currently targeting you. The spawner.
Spawners produce enemies at a rate that outpaces clearing if left alone past turn 3. A room that starts with 8 enemies becomes 14 by turn 5 if the spawner runs. Your mana runs out. Your options collapse. The run ends not because any individual enemy was too strong but because you let the room's economy tip against you.
The tactical sequence for any room with a spawner:
- Enter with your fastest ranged damage aimed at the spawner's position
- If the spawner isn't in direct line of sight, use a blindcast spell (Thunder Strike is the classic option) or reposition with your translocation spell to get the shot
- If the spawner is behind an enchanter, the enchanter dies first because a shielded spawner is almost as bad as an uncontested one
Summons are useful here precisely because they absorb threat while you cross the room to deal with gates and spawners. Earthen Sentinel and comparable early conjuration options keep enemies occupied for 2-3 turns. That's often enough to reach and destroy the spawner without taking significant damage.
Translocation Spells Are Not Optional
New players treat Blink and similar movement spells as nice-to-haves. They're not. They're survival mechanics.
In a grid-based game, one wrong turn can leave your wizard surrounded with no escape. A single turn of being petrified, stunned, or boxed in can result in 150-200 damage from multiple attackers. At the HP pools most builds carry in the first eight realms, that's 60-80% of your health bar gone in one turn.
Blink solves this. The Sightless upgrade on Blink, which lets you teleport without line of sight to the destination, is one of the most powerful single upgrades in the game. It lets you escape from completely surrounded positions. Buying it before realm 3 isn't pessimistic; it reflects the actual failure mode of the game.
Other translocation spells work if Blink isn't in the pool. Any spell that moves your wizard to a non-adjacent tile does the same job. What you can't do is rely on conventional movement to escape bad positions in time.
GODEEPER: Board positioning and movement decisions are also the central skill in Die in the Dungeon. Die in the Dungeon Tips: Dice, Board, and Build Basics →
Mana Potions Scale With Spellbook Size
Most guides for the original game buried this mechanic in footnotes. In Rift Wizard 3 it works the same way and the implication shapes how you should spend your first four skill points.
A mana potion restores all charges on all spells in your book simultaneously. Two spells, both depleted, returns two charges. Eight spells with two charges each, all sixteen burned: one potion returns sixteen charges.
The larger your spellbook and the more charges you've burned, the more efficient each potion becomes. So instead of upgrading a single spell to tier 2 with your first points, unlock four different 1-point spells across multiple schools. Four separate charge pools make your first potion significantly more valuable than one upgraded 2-point spell would.
The efficiency compounds. A build with 8-10 spells across 4 schools can use one mana potion as a full combat reset. A build with 3 spells, only one depleted, gets one charge back per potion. The game rewards broad spellbook construction partly for this reason, and it's not subtle about it.
The New Crafting System: How Passive Bonuses Work Now
Rift Wizard 3 changes how you get passive bonuses. Instead of a separate passive skills system, passive and equipment bonuses come through crafting: you find components during runs and fuse them to create magical artifacts.
Your passive loadout isn't predictable at run start. What components you find dictates what artifacts you can make, and those artifacts can substantially change what a build is capable of. A run where you find components that craft into fire damage amplification plays differently than the same run with defensive artifact components.
A few notes for new players:
- Don't hold components waiting for a theoretically perfect artifact. Use what you can build with what you have.
- Some artifact combinations will push an already-strong spell into absurdity. If your best spell gains a passive synergy from crafting, that's the direction to invest in.
- Components drop from levels, not the spell shop. You can't plan for specific artifacts the way you plan for specific spells.
A good component find mid-run can shift your spell priority for the next two realms. That unpredictability is the point.
Spell Upgrades: Take Both Picks Deliberately
Each spell you purchase can be upgraded twice. For each upgrade, you pick from four options. That's new to Rift Wizard 3 compared to the earlier games' simpler upgrade paths, and it expands customization within a single spell considerably.
The mistake new players make is upgrading the first option they see without reading the other three. The four options for any given upgrade typically include a damage boost, a utility bonus (radius, targets, duration), a synergy activator that pairs with other spells, and a survivability modifier. For your primary damage spell, the synergy activator is usually worth examining before the raw damage boost.
You have two upgrade picks per spell for the entire run. Use both. Don't leave upgrade slots open because you're saving them for something hypothetical. The game rewards building what you have now, not what you hope to find later.
HP Management and Potion Economy
HP potions have diminishing returns the smaller your maximum HP pool. 40 HP restored means more at 120 max than at 60 max. Early investment in HP-boosting spells or artifacts, when available, stretches your healing supply further across the 20-level campaign.
A few practical notes:
- Don't hoard consumables. Your inventory has limits, and a consumable unused at death is zero value.
- Use offensive consumables in the first five realms when encounters are structurally harder per unit of HP you have. Later realms, where your build is more developed, you'll clear more efficiently per resource spent.
- Health and mana potions used early and replaced later aren't wasted. The risk curve in the first five realms is steeper than the resource cost suggests.
The high-damage single-target nukes, Death Cleave and Mega Annihilate class spells, serve a specific purpose: bosses with 400+ HP regenerate or apply enough pressure that chip damage is too slow. Against standard mobs the room-clear methods are fine. Against major threats you need something that ends the fight in two turns, not ten.
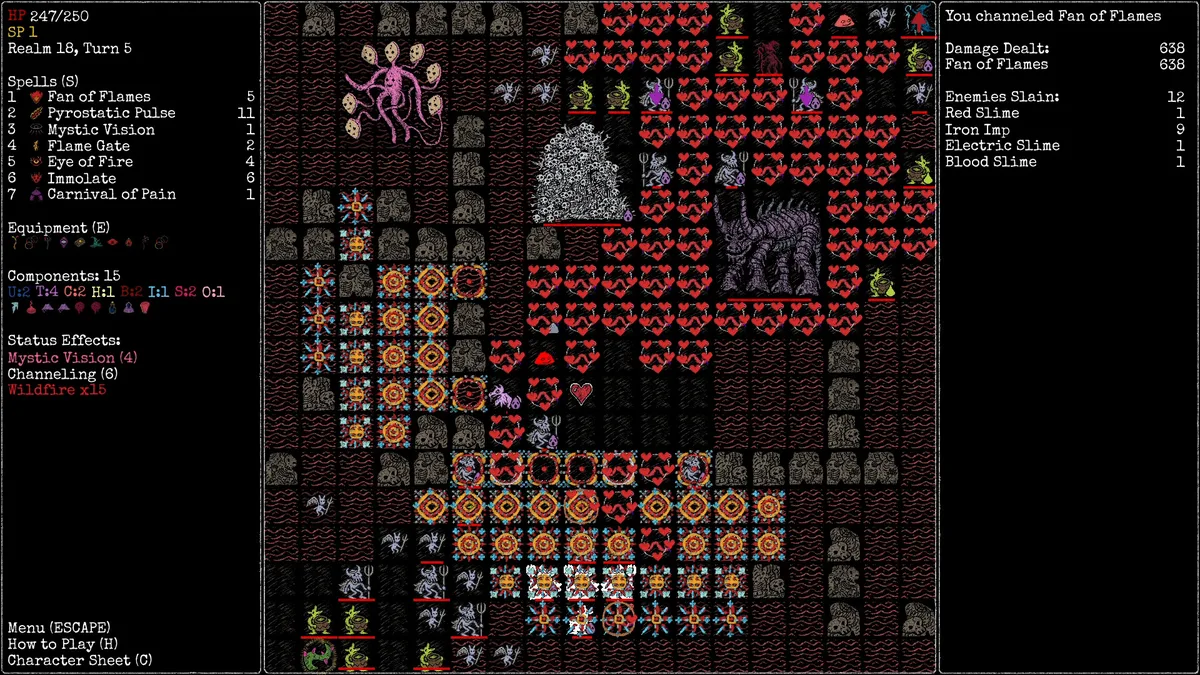 Area-of-effect spells against packed corridors. Line-of-sight control matters: the alcove on the left is where you want to be standing when you cast.
Three Starting Approaches That Survive Early Realms
The open build system means dozens of viable directions exist. These three are the most forgiving for players learning the game's counter system.
Diverse toolkit (safest for new players): Spend first 4 points on 4 different 1-point spells: one from fire or arcane for damage, one from translocation (Blink), one death or dark option, one summon for a frontline threat. This gives you a spell for every problem by realm 3 and makes mana potions immediately efficient.
Summon-forward (easier combat decisions): Buy Ice Drake or a similar early conjure. Add Dragon Lord for tankiness and charge bonuses. Add Scalespinner to reduce drake-on-drake damage. The summons absorb threat while you position and cast from safety. Less decision-making in individual rooms, trades off into later-realm scaling pressure.
Nightmare Aura snowball (high ceiling, trickier start): Nightmare Aura turns ghost-spawning enemies into allies. Adding Ghostfire means your Fireball casts produce ghost armies that self-perpetuate. The build scales hard but requires finding both spells in the pool, making it an intermediate choice rather than a reliable first-run approach.
All three have hard counters. Enemy summoners destroy summon-forward builds. High-HP shielded enemies slow down the ghost-army snowball. The diverse toolkit approach remains viable longest because it doesn't rely on any single mechanic going uncontested.
Related Reading
- Rift Wizard 3: Hardcore Wizard Roguelike Hits EA June 23: What the game is, what the open build system means, and the developer background on the three-person team shipping Rift Wizard 3 into Early Access.
- Die in the Dungeon Tips: Dice, Board, and Build Basics: Board positioning and dice-face priority for another build-first roguelike where individual mechanical decisions compound across a run.
- Rune Dice Relics Guide: Best Builds and Relic Priority 2026: Synergy-hunting across a large relic pool, covering relic priority by class and the build combinations that reach late-game in Rune Dice.
- Die in the Dungeon Relic Tier List: Best Picks and Synergies: All 142 relics ranked with the synergy patterns that carry most winning runs.
- Best Roguelike Games 2026: 6 Picks for Every Budget: Wider genre context with 6 tested picks across deckbuilder, dungeon-crawler, and auto-battler subgenres.
Frequently Asked Questions
How many spells are in Rift Wizard 3? Rift Wizard 3 launches in Early Access with 500+ spells, 400 spell upgrades, and 300 craftable items. The developers plan to add more during the one-year EA period.
What kills most new players? Single-school builds that hit the first hard counter at realm 4 or 5. The second most common death is positional: no translocation spell when the map boxes you in.
Do mana potions get better with more spells? Yes. Each potion restores all charges on all spells. The more spells you have depleted, the more you recover per potion.
Can I change my build mid-run? Yes. The spell shop appears at the end of each realm with a new selection. You can buy in any direction. Pivoting to cover a gap in your toolkit is a normal strategic move, not a mistake.
What is the crafting system? You find components in levels and fuse them to create magical artifacts with passive bonuses. This replaces the passive skill system from earlier games and makes your passive loadout vary based on what you find.
Is Rift Wizard 3 connected to Rift Wizard 1 or 2? Each game is standalone. Same setting and character concept, separate spell pools and mechanics.
How long is a run? 20 levels with a final boss (Mordred). A winning run takes 1-3 hours depending on build complexity and familiarity with the enemy roster.
References
Was this guide helpful?
About the author

Senior Critic & Analyst
Former game data analyst turned critic with 11 years covering indie and mid-tier games. Based in Austin. Runs spreadsheets on games most people just play.
- 11 years games criticism
- Former game economy analyst
- Roguelike and strategy specialist


Disclaimer
This article is published for informational and entertainment purposes. It does not constitute professional financial, legal, or technical advice. Game performance, online services, patch schedules, and store listings change. Verify critical details (pricing, system requirements, regional availability) with publishers and storefronts before you buy. Affiliate links, where present, help support our editorial work and are labelled in our affiliate disclosure.