
GuideTabletop Tavern
Tabletop Tavern Strategy Guide: Advanced RTS Tips 2026
This Tabletop Tavern strategy guide picks up where the faction guide ends. If you're new to the game, the release and launch overview covers the basics. This guide covers the two systems that decide whether your army holds or collapses in difficult campaign tiers: morale chain-breaks and attrition management.
Sponsored

About the game
Tabletop Tavern
TJ
Both systems are visible in the game's own stat tooltips. Both decide more fights than raw unit count. Most failed runs look like an army composition problem from the outside, but the actual cause is usually one of these two mechanics going wrong at the wrong moment.
Updated 2026-10-05: Refreshed the current auto-resolve, charge, Renown, review, and faction references against the official update feed.
TL;DR: Morale collapses cascade from flanked units to adjacent ones: manage flanks first. Army composition needs all 5 roles covered (frontline, spear, ranged, flankers, support). Formation depth beats width when facing cavalry. Rest depleted units between fights, check Renown in the current build, and use manual control when the matchup needs charge or facing decisions.
BESTPRICE: Want Tabletop Tavern? These stores list it: Buy on Kinguin →
Tabletop Tavern strategy guide: what actually decides late-campaign runs (quick answer)
Two variables determine whether a well-recruited army reaches the boss intact:
Flank control: When cavalry or fast outrider units hit your backline, morale on the flanked unit collapses quickly. When that unit routs, the collapse can cascade to adjacent units in the same formation within seconds. An army that had the damage advantage five seconds ago can be routing half its frontline thirty seconds later because of one uncontrolled flank. Every other positioning decision is downstream of keeping cavalry away from your flanks.
Attrition management: Units carry damage between fights. A unit at 55% health that goes through another encounter at 55% health will be at maybe 35% after, and the campaign doesn't wait for you to fully heal. Reserve slot upgrades exist specifically to pull depleted units from rotation and let them recover. Runs that ignore this arrive at boss encounters with their whole army degraded.
Every Tabletop Tavern strategy discussion eventually lands here because these two failure modes appear in more mid-to-late-campaign run collapses than anything else.
Sponsored

Key takeaways
- Morale cascade from flanked units is the leading cause of sudden army collapse, not DPS shortfall
- Formation: wide when you outnumber; deep when the enemy has cavalry or fast flankers
- Five army roles: frontline, spear (cavalry counter), ranged, outriders/flankers, heavy support
- Reserve slot upgrades are the highest-priority meta unlock
- Check the current Renown interface rather than following an old vault-banking priority order
- Manual override needed when fighting cavalry-heavy armies and for boss fights
The morale chain-break system
Morale is the underexplained system in most Tabletop Tavern runs. The damage exchange is visible. Morale is slower to read until it suddenly isn't.
Individual units have morale stats that decay under specific triggers:
- Taking flanking hits (being attacked from behind or side)
- Watching adjacent units rout
- Sustained high casualty rate without a position shift
When morale on a unit hits the break threshold, the unit routes. That routing triggers a morale check on adjacent units in the same formation. If those units are already under stress (from flanking or casualties), they can break too. A chain break is three or four units routing in rapid succession from a single cavalry charge that reached your backline.
What this means for positioning:
Cavalry units, which field 16 models and carry charge bonuses, are the primary morale chain-break vector. A cavalry unit that hits your ranged backline or a damaged frontline unit at low morale can collapse the formation's morale stack before the engagement even concludes.
Formation depth is the direct counter. Deep formations give cavalry and fast flankers less room to maneuver behind your line. Wide formations expose your backline to the cavalry threat faster.
The rule: go wide when you outnumber the enemy and cavalry isn't a major part of their roster. Go deep when the enemy has Vikings, cavalry-heavy Empire builds, or any faction with fast outriders. Most players default to wide because it looks aggressive. Against cavalry-centered armies, that's exactly wrong.
GODEEPER: The faction guide covers which of the 8 factions rely on cavalry and which emphasize morale-stable infantry. Knowing which roster you're fighting before positioning saves a lot of post-battle regret. Tabletop Tavern Faction Guide: All 8 Factions →
Army composition: the five roles
Every army that survives the late campaign covers five roles. Drop one and you'll hit a matchup that exploits the gap:
Frontline infantry: Holds the battle line and absorbs sustained hits. Ashguard, Dwarves, and high-armor infantry fill this. Their job is staying in contact and not routing, which gives your damage dealers time to work. Model count matters here: elite infantry (36 models, high armor) holds longer than cheap infantry (84 models, low individual stats) against high-tier attackers, even though cheap infantry fields more bodies.
Spear units: The specific counter to cavalry charges. Spears negate charge bonuses and make cavalry engagements far more expensive for the attacker. Runs without spear units are exposed to cavalry-heavy matchups in a way that nothing else compensates for.
Ranged dealers: Sustained damage from behind the frontline without engaging in melee. Elf archers, crossbowmen, and equivalent units. Their primary job is targeting high-priority enemy units (cavalry, elite infantry) before they reach the frontline. Positioning them behind your heaviest infantry keeps them out of flanking range.
Outriders or flankers: Your own fast units that threaten enemy backlines. They pressure ranged units and artillery, which degrades the enemy's damage output over the course of the fight. They're also the unit type that creates morale chain-break opportunities in the enemy formation.
Heavy support or artillery: High-value damage on specific priority targets. Monsters (4-12 models, very high stats per model) and artillery cover this role. They're expensive to recruit and heal, but targeting them at the right moment swings encounters that your normal damage output would take twice as long to resolve.
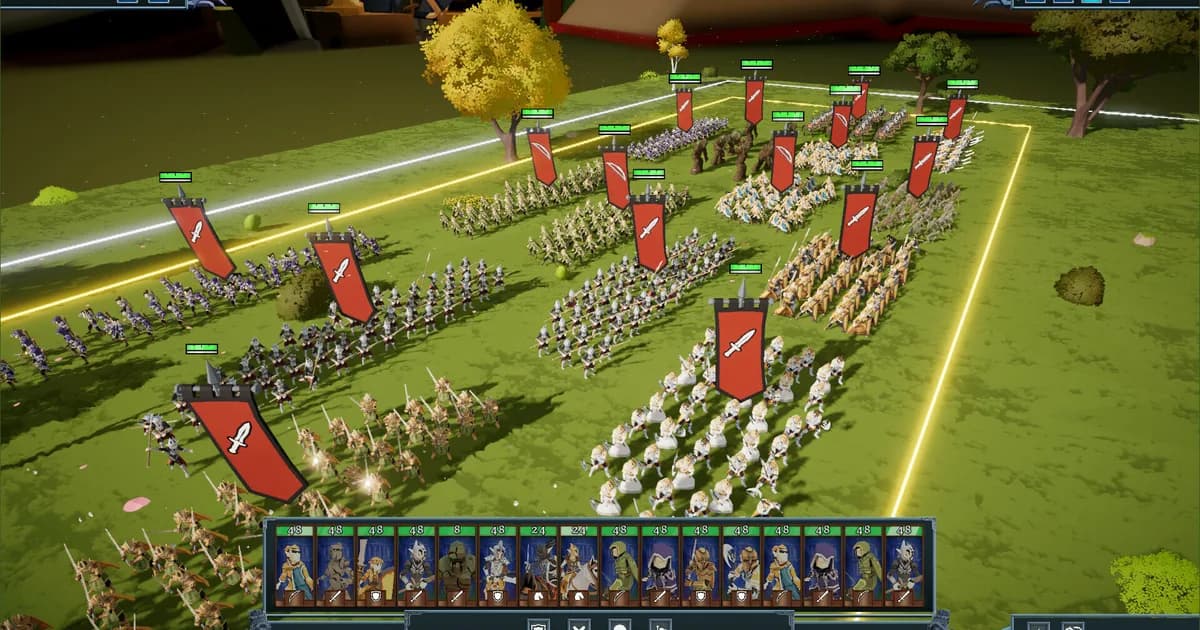
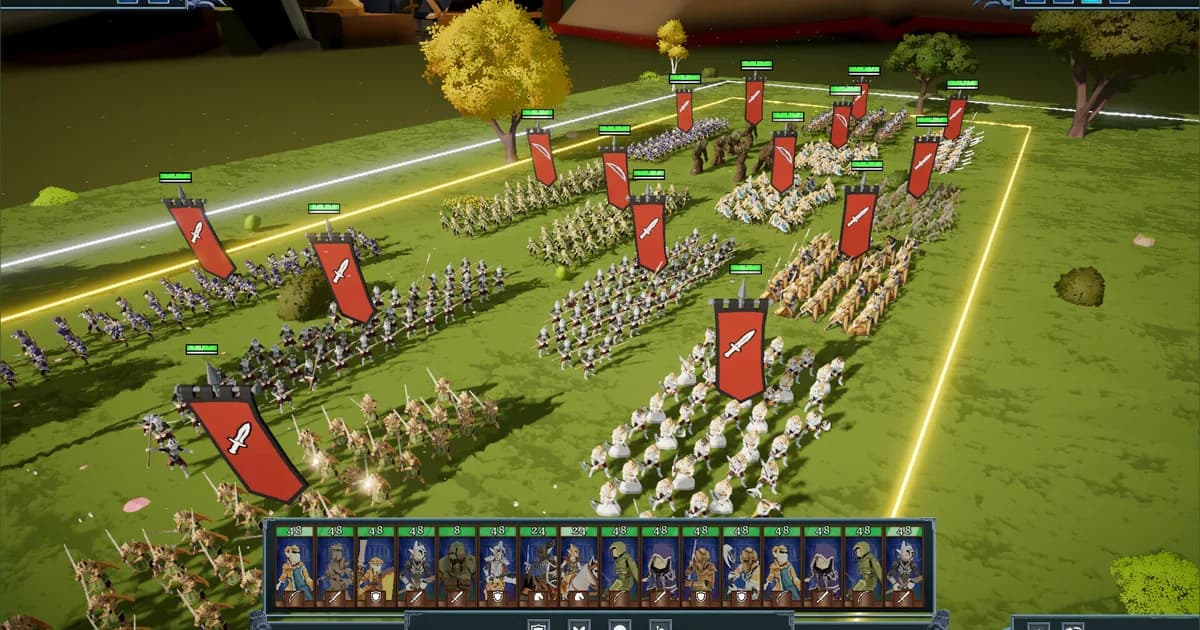
Pre-battle formation: each banner marks a unit block. Covering all five roles here, not just stacking frontline infantry, is what survives a diverse late-campaign matchup.
Formation depth and width: when to use each
Formation decisions happen before the engagement starts and are hard to adjust mid-fight. Getting it wrong means taking a whole engagement at a disadvantage.
Wide formation: Spread your units across a broader front to engage multiple enemy units simultaneously. Correct when your army is stronger unit-for-unit than the enemy, when you have the numbers advantage, or when the enemy has few fast units. Wide puts more of the enemy in combat faster, which shortens fights.
Deep formation: Compact your units into fewer columns with more depth behind the frontline. Correct when the enemy has cavalry, fast flankers, or when your units have lower morale tolerance than the enemy. Deep makes it harder for cavalry to hit your backline because there's less room to maneuver.
A specific failure mode: running wide against Vikings. Vikings' Jomsviking elite infantry hits hard with charge bonuses in the opening seconds. A wide formation gets hit across multiple contact points simultaneously, and if the Jomsvikings get good charge rolls, morale pressure starts across your whole line at once. Deep formation against Vikings means they punch into one column hard, but your other units aren't getting the charge pressure. You can triage a single broken unit; you can't triage four simultaneous breaks.
GODEEPER: For the full breakdown of how each faction's unit pool and charge bonuses work, the tips guide covers opening-game decision-making and which factions new players should avoid until morale is understood. Tabletop Tavern Tips: 9 Things to Know First →
Attrition: managing damage between fights
Unit damage carries between encounters. A unit that enters fight three at 55% health is not fighting at 55% capacity: it's fighting with reduced morale tolerance because damaged units break faster under pressure. A unit at 35% health is effectively a liability.
The meta-progression failure most runs share: never building reserve slots, so all units fight every battle, and attrition compounds across the run without any mechanism to interrupt it.
Reserve slots (first meta upgrade to prioritize) let you pull damaged units from rotation. A unit that rests for one encounter recovers partial health and full morale. You lose that unit's contribution for one fight, but it re-enters the next encounter healthy rather than degraded.
The tradeoff math: a healthy unit at 95% is more valuable than a degraded unit at 60% even accounting for the single fight it sat out. Units that arrive at boss encounters at 80%+ health across the board clear bosses that teams arriving at 40-50% across the board cannot.
Practical implications for run management: After each encounter, check unit health before deciding to rest. Units below 60% health are candidates for reserve if the next fight is expected to be difficult. Units below 40% should rest unless you have no other option.
The between-fights shop and roster screen: gear and potions are priced individually, and the deployed count (6/10 here) is the same slot budget that reserve management works against.
When to override auto-resolve
Auto-resolve works well for early and mid-campaign encounters against clearly outmatched opponents. It becomes unreliable in specific situations:
Enemy cavalry-heavy armies: Auto-resolve doesn't position defensively against cavalry charges. Your formation goes default wide and the cavalry often gets clean backline hits. Manual control lets you form deep before engagement and intercept the cavalry with your spear units before it reaches your ranged line.
Elite vs. elite encounters: Auto-resolve doesn't exploit morale rout moments well. When an enemy unit breaks, manually redirecting your flankers and ranged to pile onto adjacent units before their morale recovers exploits the cascade window. Auto-resolve fires at static targets.
Boss fights with abilities: Boss units have special abilities that have timing windows. Auto-resolve can't prioritize or time responses to abilities. Manual control is necessary for any boss fight above the early campaign tiers.
The general rule: auto-resolve when the outcome is not in doubt. Switch to manual when cavalry is a factor, when the enemy has morale-fragile but high-damage elites that create dangerous collapse scenarios if not handled correctly, or when you're understrength going into an encounter and need to manage risk precisely.
Meta-progression: check Renown first
The old vault-banking advice is not a reliable current progression formula. Official update 1.9.15 renamed an achievement to “Talk of the Tavern” and reworded it around Renown rather than the old depositing-gold mechanic. The same notes added a warning to prevent accidentally resetting Renown.
Read the current Renown and upgrade interface after each run. Do not assume reserve slots, gold generation, potion capacity, or shop improvements retain an old universal order without checking the live build.
Step-by-Step: stabilize a late run
1. Read the roster and facing. Identify cavalry, artillery, ranged threats, and any trait that changes the matchup before choosing auto-resolve.
2. Set the formation. Use a stable frontline, protect the backline, and leave room to answer a side or rear charge.
3. Check the current progression screen. Review Renown after the fight and verify the live upgrade wording before following an older economy route.
Related Reading
- Tabletop Tavern Faction Guide: All 8 Factions 2026: covers all 8 factions, the Faction Overhaul changes to model counts, and which rosters suit different playstyles
- Tabletop Tavern Tips: 9 Things to Know First: foundational tips including early faction picks, the five army roles overview, and when to invest in meta upgrades
- Tabletop Tavern Review 2026: full assessment of the game's current state, what makes it stand out from Total War-adjacent games, and where the EA roughness shows
- Tabletop Tavern Complete Guide: current overview of factions, systems, and launch status.
- Tabletop Tavern Release Date Guide: launch and current store context.
- Tabletop Tavern Tips: practical run habits and current patch caveats.
- Tabletop Tavern Faction Guide: current eight-name roster and faction recommendations.
- Tabletop Tavern Patch 1.9.20: official auto-resolve and formation update context.
- Tabletop Tavern Patch 1.9.20: auto-resolve and formation context; the official 1.9.15 Renown change is cited in References.
- Tabletop Tavern Review Guide: value and replayability context for the strategy loop.
Frequently Asked Questions
How does the morale system work? Morale breaks trigger from flanking hits, watching adjacent units rout, and sustained casualties. A broken unit's rout applies morale pressure to nearby units, which can cascade. Formation depth and spear coverage against cavalry are the two primary controls.
When should I use manual control? Against cavalry-heavy armies, elite vs. elite fights where morale cascade opportunities exist, and for boss fights. Auto-resolve for straightforward numerical advantage encounters.
What's the best army composition? Five roles: frontline infantry, spear (cavalry counter), ranged dealers, outriders, and heavy support. Dropping any one role creates exploitable matchup weaknesses in later campaign tiers.
How does formation depth vs. width work? Wide when you outnumber and cavalry is not a factor. Deep when facing cavalry, fast flankers, or Raven Host charge pressure. The failure case is defaulting to wide against a fast melee army.
What meta upgrades matter most? Current patch notes refer to Renown and warn about resetting it. Check the live progression interface before using an older vault-banking priority order.
Why do good armies fall apart suddenly? Usually morale cascade from an uncontrolled flank. The damage exchange looks fine, then cavalry reaches the backline, one unit routs, adjacent units break from the rout check, and three or four units leave the field in fifteen seconds.
How does the Faction Overhaul change strategy? Elite infantry now holds lines visibly better than cheap infantry because of the model count and stat redesign. Builds that relied on cheap unit spam before the Overhaul are less viable; high-tier unit investment now delivers clearer returns.
References
- Tabletop Tavern on Steam: official store page, current Very Positive review label and pricing
- r/TabletopTavern community: active community formation and army discussion
Was this guide helpful?
About the author

GameBrief's byline for metroidvanias, RPGs, comparisons and design history. Places each game in its genre and argues both sides before picking one.
- Metroidvanias and RPGs
- Comparisons and design history
- Sources listed per article
Keep reading
Tabletop Tavern Review: Roguelike RTS Gets It Right
General · 9 min
Tabletop Tavern Faction Guide: All 8 Factions Ranked
General · 14 min
Tabletop Tavern Tips: 9 Ways to Win More Runs 2026
General · 9 min
Tabletop Tavern Complete Guide: All 8 Factions and Tips
General · 15 min
Tabletop Tavern Release Date: Roguelike RTS Lands June 11
General · 7 min
Tabletop Tavern Update 1.9.20: Faster Battles and No Stutter
News · 4 min
Sponsored
Disclaimer
This article is published for informational and entertainment purposes. It does not constitute professional financial, legal, or technical advice. Game performance, online services, patch schedules, and store listings change. Verify critical details (pricing, system requirements, regional availability) with publishers and storefronts before you buy. Affiliate links, where present, help support our editorial work and are labelled in our affiliate disclosure.
Comments
Loading comments…