
GuideRisk of Rain 2
Risk of Rain 2 Prismatic Trials Guide: Seed and Rewards
A shared-seed speedrun with two real rewards. Scout the seed once, then run it clean.
VerdictUse your first attempt on a seed to scout, break the crystals from a safe angle, save health for the stage-two Elite, and stop once Slicing Winds and the Scythe are yours unless you like leaderboards.
Risk of Rain 2 Prismatic Trials is a solo speedrun of two stages on Rainstorm, on a seed every player shares for 72 hours. That makes it a route puzzle more than a build test: the same items, spawns and bosses wait for everyone, so a scouting run pays off. Clear it once and you unlock Mercenary's Slicing Winds and Harvester's Scythe; after that it is a leaderboard.
Sponsored

About the game
Risk of Rain 2
Hopoo Games
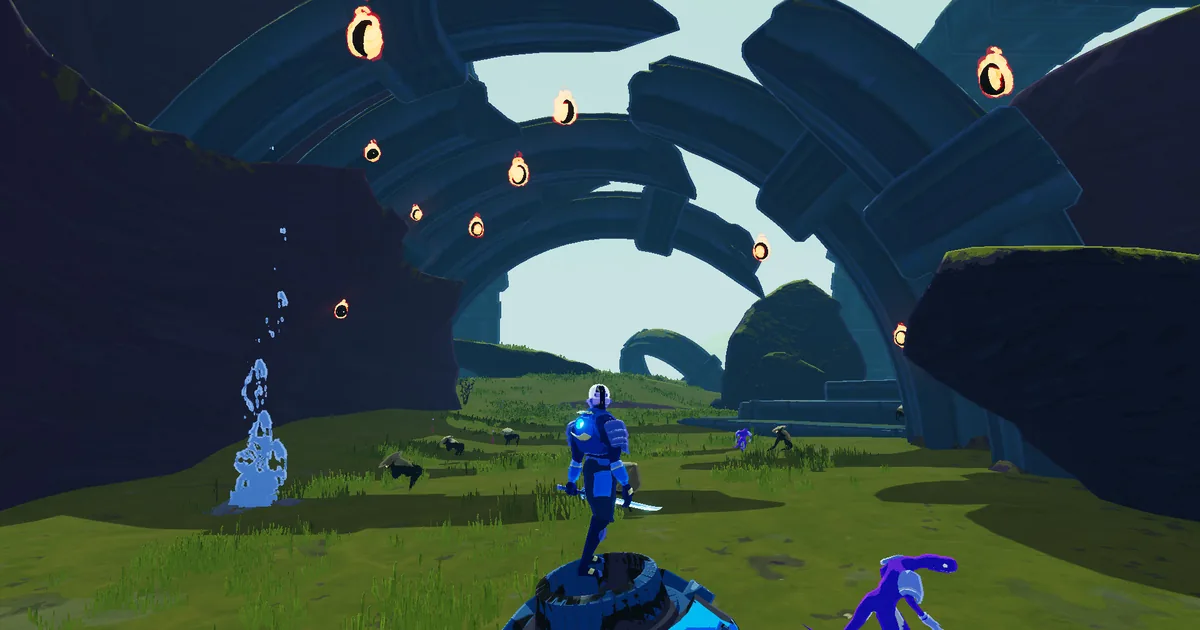 A Prismatic Trial is a route puzzle as much as a combat run. The fastest clear comes from learning what the seed will do, then removing wasted movement. Screenshot: Risk of Rain 2 Steam store page
Sponsored

How to win Risk of Rain 2 Prismatic Trials (quick answer)
Pick the survivor and loadout that suit the current seed, then clear the first stage with as few detours as you can. Find the Time Crystals, break three of them from a safe spot, and kill the Teleporter boss. The teleporter charges instantly once the boss dies, so there is no holdout.
Do it again on stage two, where the boss is always an Elite. Mods block the mode entirely, and Karma, the optional Mithrix difficulty from October 8, is always off here. The Risk of Rain 2 stages guide helps you recognize the maps; the complete guide hub covers ordinary runs.
The survivor choice is one of the few variables you control. Everything else starts with the current seed. Image: Risk of Rain 2 Wiki (riskofrain2.wiki.gg). Game art is the property of Gearbox Publishing.
BESTPRICE: Want Risk of Rain 2? Eneba sells a Steam key: Buy on Eneba →
Step by step: route a Prismatic Trial
- Check the current seed and artifact set. Treat the opening attempt as reconnaissance if you do not already know the layout. Note the stage pair, item drops, monster spawns, and the safest Time Crystal order.
- Choose a survivor for the route. Mobility, reliable early damage, and a skill that handles the seeded boss are more valuable than a generic tier-list position. The Risk of Rain 2 survivors guide covers the full roster.
- Buy only what advances the route. Starting cash and interactable drops are part of the seed. Take an item that fixes the current combat problem instead of crossing the map for a theoretical upgrade.
- Mark the three Time Crystals. You need all three to start the Teleporter Event. Destroying one early can be correct if the explosion is safe; delaying a crystal until after the boss is not an option.
- Trigger the teleporter with an escape path. The crystal blast deals moderate damage to players and monsters. Do not stand on the boss side of the crystal if the detonation leaves you in a bad position.
- Kill the boss, then leave. The teleporter charges instantly once its boss is defeated. Use the missing holdout time to start the next stage route rather than waiting for a bar that no longer exists.
- Treat stage two as the final exam. The boss is always an Elite, so save enough health and damage for an affix fight instead of arriving with a clean route and an empty inventory.
The three-day seed explained
A new Prismatic Trial seed is generated every three days. It is shared across players and platforms, which is why a route discovered by one player can be practiced by everyone before the next rotation. The seed affects the stage rotation, interactable locations and drops, boss selection, monster spawn timing, and the activated artifacts.
The seed does not remove every decision. Player choices can change some outcomes. Visiting a shop or choosing one route over another can alter where a later object appears, even though the underlying seed is the same. Think of the run as a fixed deck with branches, not a video that must be copied frame for frame.
This fixed structure creates two useful practice passes:
- Reconnaissance: move quickly enough to find the crystals and record the item route, enemy timing, and boss behavior.
- Optimization: repeat the same path, remove dead movement, and change one decision at a time so you know whether the change helped.
Community posts and videos can reveal a route, but the Risk of Rain 2 interactables guide is the safer reference for what an object does. A seed tells you where an object is; it does not make a shrine, printer, or shop automatically worth the time it costs.
Time Crystals and the instant teleporter
Each stage has a set of Time Crystals. Destroy three to initiate the Teleporter Event. A crystal explodes when destroyed and deals moderate damage to players and monsters, so crystal order is part of the route. A crystal beside a group of enemies can soften the pack, while a crystal beside the survivor can end a good attempt before the boss begins.
The fastest route is not always the straightest line between three crystals. Consider four questions before pressing the attack:
- Will the blast hit you, the boss, or a monster you need to keep alive?
- Does destroying this crystal force a climb or a fall that costs more time than the detour saves?
- Can you reach the next crystal with your current movement skill available?
- Is the item or chest on this side worth taking before the event starts?
The teleporter charges instantly after the Teleporter Boss is defeated. That rule changes the end of a stage. You do not need to stand inside a zone while enemies continue spawning, and there is no reason to wait for a normal teleporter percentage once the boss is dead. Move as soon as the victory state is clear.
Survivor and skill selection
The only pre-run choices are the survivor and the survivor's skill loadout. This makes the mode unusually good at exposing whether a kit can solve a specific route without a pile of items. A survivor who can reach high crystals, clear a crowded room, and damage the seeded boss from a safe angle has a practical advantage even if a general survivor tier list would rank another kit higher.
Pick a loadout with three properties:
- Early damage: the first stage still has a time cost, and a weak opening creates a bad snowball.
- Route movement: vertical gaps and crystal locations can make a slow kit lose more time than it gains from a slightly higher damage ceiling.
- Boss reliability: the second-stage Elite cannot be treated as a normal target. Keep a skill that works when an affix changes the safe distance.
Mercenary is the mode's most visible reward survivor because Slicing Winds is tied to the challenge, but that does not make Mercenary mandatory for every seed. Use the kit you can execute consistently. The Risk of Rain 2 Mithrix guide is a good example of why movement and attack tells matter more than a theoretical build; the same principle applies on a shorter clock.
Items, equipment, and the DLC rule
Prismatic Trials treat all items and equipment as unlocked, even if the survivor has not unlocked them in a normal run. That keeps the possible reward pool the same for the competition. It also means a Prismatic attempt can show you an item you have not yet earned outside the mode without adding it to your normal unlocks automatically.
All content from Survivors of the Void, Seekers of the Storm, and Alloyed Collective is enabled in the mode even for players who do not own those DLCs. The rule applies to the trial's possible content, not to a promise that a normal run's DLC ownership has changed. If you are using the Risk of Rain 2 items and artifacts guide, read its tier advice as a normal-run reference and then adjust for the current seed's fixed drops.
Artifacts are also part of the shared seed. Do not assume the same artifact set will be active next week, and do not build a route around an artifact that is not present today. The Risk of Rain 2 Eclipse guide explains a different difficulty mode, but its discussion of cumulative restrictions is useful when an artifact removes a safety net or changes how you value healing.
Slicing Winds is one of the two named Prismatic Trial rewards and becomes a Mercenary skill after the relevant challenge is completed. Image: Risk of Rain 2 Wiki (riskofrain2.wiki.gg). Game art is the property of Gearbox Publishing.
The dedicated rewards
The wiki lists these two unlocks as the mode's only in-game purpose:
- Slicing Winds: a Mercenary special skill that hits up to three enemies at once, eight times each.
- Harvester's Scythe: an item that adds 5% critical strike chance and heals you on every critical strike.
These rewards are reasons to learn the mode, not reasons to expect a random item chest to hand them over. The challenge route is separate from ordinary item unlock progress. The Risk of Rain 2 achievements guide can help you separate Steam Challenges from survivor skill and item requirements.
Harvester's Scythe turns critical strikes into recovery, but the current seed still decides whether the item is a sensible detour. Image: Risk of Rain 2 Wiki (riskofrain2.wiki.gg). Game art is the property of Gearbox Publishing.
Second-stage boss and advanced routes
The second stage boss is always an Elite. That is a fixed rule worth planning around because the affix changes the final fight's safe range and incoming damage. Save health, movement, and a reliable damage skill for this encounter instead of assuming the run is won once the three crystals are found.
An advanced route can appear when the second stage is Sky Meadow. The wiki notes that a player can enter an artifact portal by submitting an artifact code and skip the teleporter event, but this is a special route with its own requirements and costs. Do not make it the default recommendation until the current seed proves that the portal is faster and safer than the three-crystal boss route.
The Risk of Rain 2 stages guide covers Sky Meadow and hidden-realm routing in the broader game. Prismatic Trials reward the same map knowledge, but the timer makes a normally interesting detour a potential loss.
Mods, leaderboards, and repeat attempts
Prismatic Trials cannot be accessed while mods are installed. Disable mods before treating a missing mode or failed entry as a save problem. The Risk of Rain 2 mods guide covers the broader mod workflow, but the trial itself is a no-mod activity because the shared seed depends on a controlled ruleset. The leaderboard has had its hiccups: Gearbox's V1.3.5 bug-fix update in November 2024 fixed a reported issue where it showed no times at all.
Do not judge the first attempt only by its time. Record where you spent time and why:
- a long climb to a crystal,
- an item or chest that did not improve the boss route,
- a crystal blast taken at the wrong health threshold,
- a missed movement cooldown,
- an Elite affix that changed the final approach.
The seed lasts three days, so each mistake can become a practice target before the rotation changes. If a route only works when every monster follows a perfect line, it is not finished. A good time has a margin for one bad spawn and one imperfect dodge.
Common Prismatic Trials mistakes
- Treating the run like a normal stage. You have two stages and a fixed clock, so wandering for every object is usually a loss.
- Ignoring the three crystals. A teleporter cannot start until all three are destroyed.
- Standing on a crystal when it breaks. The blast damages the player as well as monsters.
- Waiting through a nonexistent holdout. The teleporter charges instantly after the boss dies.
- Bringing mods to diagnose the mode. Mods block access entirely.
- Copying an old seed route. The rotation changes every three days.
- Saving everything for the final boss. A weak first stage leaves too little time and health for the Elite second boss.
Our take
We'd spend the first attempt on each seed as a scouting run: note the stage pair, the crystal order and the item worth a detour, then run it clean. Pick a survivor with reliable movement over a theoretical tier-list winner, and save health for the Elite at the end. Once Slicing Winds and the Scythe are unlocked, play on only if the leaderboard is fun for you; the mode has nothing else to give.
How we checked this
- On 2026-10-15 we read the Risk of Rain 2 wiki (riskofrain2.wiki.gg) pages for Prismatic Trials, Prismatically Aligned, Mercenary, Harvester's Scythe and Karma as raw wikitext, and the Steam patch notes that mention the mode.
- We didn't play a trial for this guide; seed rules and rewards are the wiki's.
Frequently Asked Questions
What are Prismatic Trials?
They are solo-only two-stage Rainstorm runs with a shared seed, random artifacts, fixed item and enemy patterns, and a leaderboard-style time goal.
How often does the seed change?
Every three days. The same seed is used across players and platforms during that period.
How do I start the teleporter?
Destroy three Time Crystals. Their explosions can hurt the survivor, so activate them from a safe position.
Can I play with friends?
No. Prismatic Trials are solo-only.
Are items unlocked in the mode?
Yes. All items and equipment are treated as unlocked for the trial's possible drops, even if normal-run unlocks are incomplete.
Can I use mods?
No. Installed mods prevent access to Prismatic Trials.
Related Reading
- Risk of Rain 2 Hallowed Concepts Reveals Acolyte, Enforcer: Risk of Rain 2 Hallowed Concepts adds two new Survivors, Acolyte and Enforcer, confirmed September
- Risk of Rain 2 Stages Guide: Maps, Loops and Routes: environment and hidden-realm recognition.
- Risk of Rain 2 Survivors Guide: All 20 Characters Ranked: survivor and skill-loadout context.
- Risk of Rain 2 Items and Artifacts: Tiers and All 20 Explained: item and artifact basics.
- Risk of Rain 2 Interactables: Shrines, Printers, Scrappers: what route objects do before you spend time on them.
- Risk of Rain 2 Eclipse Guide: All 8 Modifiers Explained: a separate challenge mode with cumulative modifiers.
- Risk of Rain 2 Simulacrum Guide: Waves and Rewards: the other major alternate mode and its wave loop.
References
- Risk of Rain 2 wiki: Prismatic Trials: seed, stage, crystal, reward, and access rules.
- Risk of Rain 2 wiki: Alternate Game Modes: mode context.
- Risk of Rain 2 wiki: Mercenary: Slicing Winds details.
- Risk of Rain 2 wiki: Harvester's Scythe: reward effect details.
- Risk of Rain 2 on Steam: official game context.
- Risk of Rain 2 wiki: Karma: why the Mithrix difficulty setting never applies here.
Was this guide helpful?
About the author

Systems & Economy Desk
GameBrief's byline for roguelikes, strategy and simulation. Reads patch notes, wiki tables and Steam stats and puts the numbers on the page.
- Roguelikes, strategy and simulation
- Builds, progression and economy
- Sources listed per article
Keep reading

Risk of Rain 2 Simulacrum Guide: Waves and Rewards
General · 10 min

Risk of Rain 2 Mithrix Guide: All 4 Phases and Escape
General · 15 min
Risk of Rain 2 Interactables: Shrines, Printers, Scrappers
General · 10 min

Risk of Rain 2 Acolyte and Enforcer: Every Skill and Unlock
General · 9 min

Risk of Rain 2 Acolyte Build: Best Items and Loadout
General · 8 min
Risk of Rain 2 Eclipse Guide: All 8 Modifiers Explained
General · 10 min
Sponsored
More game deals
Disclaimer
This article is published for informational and entertainment purposes. It does not constitute professional financial, legal, or technical advice. Game performance, online services, patch schedules, and store listings change. Verify critical details (pricing, system requirements, regional availability) with publishers and storefronts before you buy. Affiliate links, where present, help support our editorial work and are labelled in our affiliate disclosure.