
GuideRisk of Rain 2
Risk of Rain 2 Simulacrum Guide: Waves and Rewards
Simulacrum is a crowd test inside a shrinking bubble. Build for area damage and stay with the Focus.
VerdictTake area damage and movement from the early orbs, follow the Focus after every boss wave, and treat wave 50 as a checkpoint for Void Fiend, not the finish.
Risk of Rain 2 Simulacrum is the endless wave mode from Survivors of the Void, and it rewards a different build than a normal run. You fight inside a bubble that holds back the Void Fog, so crowd damage and movement beat a single-target boss killer. Wave 50 is the milestone most players chase, since it is one way to unlock Void Fiend, but the waves keep coming after it.
Sponsored

About the game
Risk of Rain 2
Hopoo Games
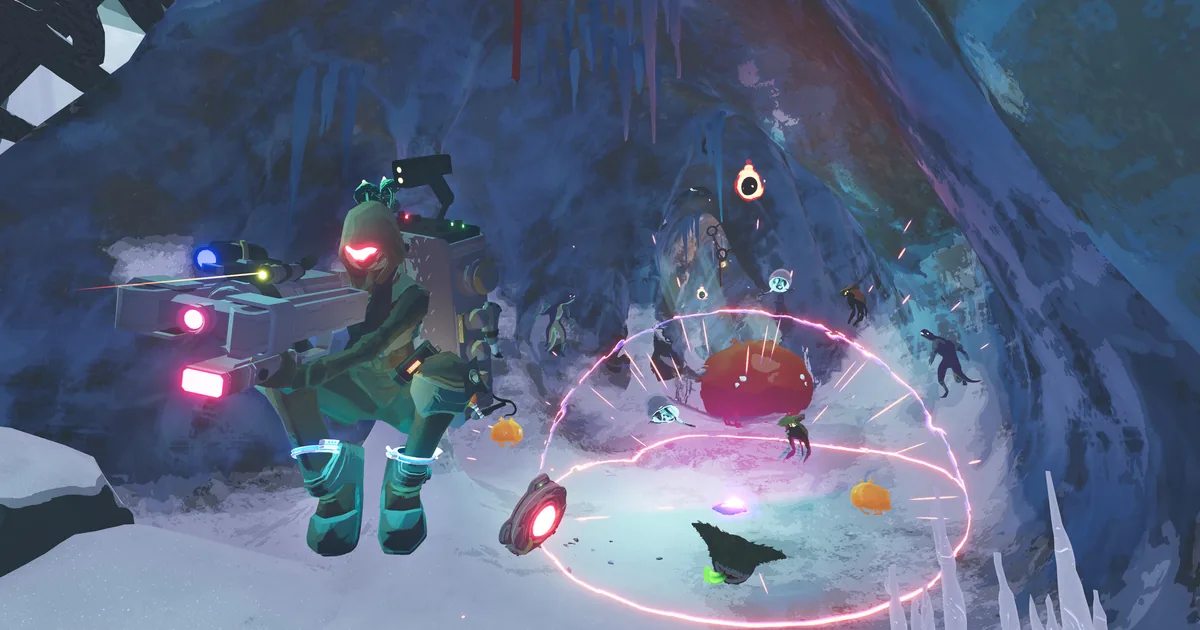 Simulacrum ships with Survivors of the Void, and this shot comes from that expansion's store page. The object that matters is the Assessment Focus, not a teleporter. Screenshot: Risk of Rain 2: Survivors of the Void Steam store page
Sponsored

How to play Risk of Rain 2 Simulacrum (quick answer)
Start the mode with Survivors of the Void, interact with the Assessment Focus, and stay inside its bubble while you kill every enemy. The bubble opens to a 62-meter radius. When a wave ends, each player gets a Void Potential orb, dead players respawn, and a ten-second countdown starts before the next wave.
Every fifth wave is a boss wave, after which the Focus moves and the team follows it. Every tenth wave gives the enemies an item and, once cleared, opens a portal to another environment. Karma, the optional Mithrix difficulty added on October 8, is always off here. The Risk of Rain 2 complete guide hub has the normal run overview.
Void Fiend is the major unlock associated with the Simulacrum milestone, but you still need a build that can survive the waves before the reward matters. Image: Risk of Rain 2 Wiki (riskofrain2.wiki.gg). Game art is the property of Gearbox Publishing.
BESTPRICE: Want Risk of Rain 2? Eneba sells a Steam key: Buy on Eneba →
Step by step: a safe Simulacrum run
- Choose a survivor you can steer through crowds. The Risk of Rain 2 survivors guide is the roster reference, but reliable movement and a way to damage several targets matter more than a universal tier label.
- Activate the Assessment Focus immediately. The starting cylinder protects you from the Void Fog. The first wave does not begin until the Focus is activated.
- Fight inside the bubble. Do not leave for a distant chest or enemy unless the wave is already safe. The Fog grows more dangerous while the Focus shrinks.
- Use the ten-second reward window deliberately. Open the Void Potential for your player, take the item or equipment that fixes the next weakness, and check the arena before the countdown ends.
- Prepare for wave five. A boss wave brings stronger and more numerous enemies, then moves the Focus. Save a mobility skill and learn where the next safe platform is.
- Treat wave ten as a build check. Enemies gain an item and the completed wave opens a portal. Do not let a reward animation or a distant interactable leave the team outside the bubble.
- Repeat the cycle without chasing perfect loot. Simulacrum scales forever. A merely useful item taken safely is better than a perfect item that costs the run.
The Assessment Focus and Void Fog
The Assessment Focus is the center of the mode. At the beginning, it expands the protected area so the player can fight. Killing all enemies completes the wave. If the last enemies die to Void Fog before the player does, the wave can still complete, but that is a recovery rule rather than a plan.
The safe zone can shrink when enemies remain alive too long, and the Fog rapidly punishes anyone who wanders outside it. The Focus moves after boss waves, so the run has two kinds of positioning: dodge the current wave and keep a route toward the next Focus location. A movement skill spent on a low-value target can leave the whole team behind when the bubble relocates.
This is why the Risk of Rain 2 interactables guide is useful context but not a direct Simulacrum map. The mode has a different interactable economy, and several normal-run objects are missing. There is no ordinary teleporter event, and the available portals are part of the mode's environment transition rather than random exits.
Wave schedule and milestones
Common waves
Common waves are the baseline loop. Enemies arrive, the director spends its credits, and the team must clear the spawn while the bubble protects the arena. After the clear, each participating player receives a white Void Potential orb. The orb gives the player a choice from the common reward pool, with a small chance to offer higher rarity.
The reward is personal. In multiplayer, each player gets an orb rather than one shared item choice. That makes communication important without forcing the team to divide a single chest drop. The Risk of Rain 2 multiplayer guide has the broader co-op context; the key Simulacrum rule is to spend the reward before the Focus becomes the urgent problem.
Boss waves every five
Every fifth wave is a boss wave with stronger and more numerous enemies. Clearing it grants a green orb under the default reward pattern, then the Assessment Focus moves to another position in the same environment. Follow the Focus as a group. A player who stays behind to loot can be outside the next bubble before the team has time to recover.
Boss waves can roll Augments that change the enemy family or rules for that wave. Lunar and Void variants are especially important because the threat is different from a normal boss spawn. Do not assume the green reward means the next wave will be ordinary. Read the modifier, identify the enemy that can break your formation, and move before the Fog makes the decision for you.
Wave ten and environment transitions
At the beginning of every tenth wave, enemies receive an item from a repeating rarity cycle: common, common, uncommon, uncommon, then legendary. The item can change how familiar enemies attack, so do not rely on the same dodge rhythm after a wave-ten transition. The Risk of Rain 2 items and artifacts guide covers item categories; in this mode, the important question is whether an enemy item changes the danger of the current arena.
After the tenth wave is completed, a portal takes the team to another environment. The team must activate the Assessment Focus again to begin the first wave in that location. Use the transition to regroup, not to assume the next arena will offer the same sight lines or vertical escape route.
Void Potential rewards explained
Void Potential is the reward object that makes Simulacrum more than a sequence of ordinary teleporter events. Each player who participated in the wave receives an orb, alive or dead. The reward color follows the wave or boss augment that produced it:
- White: common-wave rewards, mostly common items with smaller chances for higher tiers.
- Green: the normal boss-wave reward, weighted toward uncommon items with legendary and boss-item possibilities.
- Blue: lunar item or equipment choices when a lunar augment produces the reward.
- Purple: Void item choices when a Void augment produces the reward.
- Red: from wave 11, a boss wave can roll Mithrix alone; beating him gives a red orb.
The exact choice is less important than the weakness it repairs. Take area damage when waves are taking too long, movement when the next Focus relocation is dangerous, and sustain when the Fog or chip damage is forcing repeated retreats. The Risk of Rain 2 Eclipse guide explains a more restrictive mode, but its warning about cumulative difficulty applies here too: a good early item is not proof that the late run is solved.
A normal cheat-death item is not a substitute for movement. Simulacrum revives dead players at wave completion, but the wave still has to end first. Image: Risk of Rain 2 Wiki (riskofrain2.wiki.gg). Game art is the property of Gearbox Publishing.
Environments, missing systems, and mode-specific rules
The wiki lists seven possible environments, and Commencement is the only one that can never be the first. They can appear in random order, and a later transition can return to an environment with only one intermediate location between visits. The stages are modified for the mode with missing sections and extra launch pads to make movement through the Fog less punishing.
Several normal-run assumptions do not apply:
- There is no standard teleporter to charge.
- Ordinary random portals do not spawn; the environment-transition portal is special to the mode.
- Family Events do not occur.
- Drones are not part of the normal Simulacrum loop.
- Items that normally activate during a teleporter event activate during waves instead.
The Risk of Rain 2 stages guide is still useful for recognizing terrain, but it should not be treated as a literal Simulacrum map. The arena's safe space, enemy spawn angles, and Focus movement matter more than the route you would use in a normal run.
Build priorities for high waves
Simulacrum rewards builds that solve crowds. Area damage such as on-kill explosions, chain attacks, and persistent zones gets more value when enemies arrive continuously. Single-target damage still matters for boss waves, but a build that deletes one target while ten others fill the bubble can lose to time and Fog.
Damage that keeps moving
Prefer attacks that work while strafing, jumping, or rotating around the Focus. Stationary channels can be excellent in a normal teleporter zone and awkward when the bubble shrinks or a boss augment changes the ground. The Risk of Rain 2 items guide has the broad item list; judge each pickup by how often it works without freezing your movement.
Sustain and recovery
Healing, barriers, armor, and a way to recover after a bad wave all matter because the mode does not give you a clean stage reset every few minutes. Do not spend every reward on damage if the next wave will leave you one hit from death. A slower clear that keeps the player inside the bubble is usually stronger than a glass build that must gamble on every spawn.
Multiplayer roles
In co-op, divide attention rather than splitting the team across the environment. One player can pull enemies into a safe line while another handles airborne targets, but everyone needs a route back to the Focus. Wave completion respawns dead players, yet it does not protect a player who dies after the bubble has already vanished.
Wave 50, Void Fiend, and beyond
Wave 50 is the most visible goal because completing it is one of two ways to finish the Dragged Below challenge and unlock Void Fiend; the other is beating the Planetarium boss in a normal run. It is not a final boss or a victory screen. The mode is designed to continue with stronger enemies and more demanding item choices.
Before wave 50, focus on repeatable decisions rather than a one-time burst: keep area damage online, do not arrive at a boss wave with every movement skill cooling down, and treat the Focus relocation as part of the fight. After wave 50, the same fundamentals matter more. Malachite and Celestine elites need the stage count that only arrives after five environment transitions, so they never spawn before wave 51.
The Risk of Rain 2 achievements guide is the better checklist for unlock goals. The Alloyed Collective bosses guide covers the wider current roster, but Simulacrum's wave bosses are not simply the normal teleporter roster repeated without changes.
Gearbox's launch trailer for Survivors of the Void, the expansion that added Simulacrum and Void Fiend, flashes "Unleash New Survivors" at 0:19 and "Harness the Void" at 0:37, then closes on a pulsing void portal at about 1:01.
Common Simulacrum mistakes
- Leaving the bubble for loot. A reward is worthless if the Focus shrinks before you return.
- Building only for Mithrix. A high single-target ceiling does not clear crowds or airborne enemies.
- Ignoring the fifth-wave relocation. The boss is only half of the milestone; follow the moving Focus immediately.
- Treating wave ten enemies as normal. Their item modifier can change attack speed, movement, or the timing you learned.
- Spending every movement skill on damage. Save one answer for Fog, a bad spawn, or the next Focus location.
- Assuming wave 50 ends the run. It is an unlock milestone, not the mode's cap.
- Using mods without checking the mode. The Risk of Rain 2 mods guide is a safer place to start than assuming every old mod supports current DLC and alternate modes.
Our take
We'd play Simulacrum as a crowd-control test, not a boss rush. Take area damage and movement from the early orbs, keep one mobility skill for every fifth-wave move, and stay with the Focus even when a chest is calling. Aim for wave 50 with a survivor you already steer well; if you only want Void Fiend, the Planetarium route in a normal run is the other way in.
How we checked this
- On 2026-10-15 we read the Risk of Rain 2 wiki (riskofrain2.wiki.gg) pages for Simulacrum, Void Potential, Dragged Below, Void Fiend and Karma as raw wikitext.
- We checked the Survivors of the Void release date on Steam.
- We watched Gearbox's Survivors of the Void launch trailer and took frames every three seconds.
- We didn't play a run for this guide; wave rules and reward odds are the wiki's.
Frequently Asked Questions
What is Simulacrum in Risk of Rain 2?
It is an infinitely scaling, wave-based mode where a moving Assessment Focus protects players from Void Fog and drops a Void Potential reward after each clear.
How do you unlock Simulacrum?
Enable Survivors of the Void. The mode is tied to that DLC and does not require reaching a normal-run hidden realm first.
What happens every fifth wave?
It becomes a boss wave. Clearing it awards the normal boss reward and moves the Assessment Focus to a new position in the current environment.
What happens every tenth wave?
Enemies gain an item from the mode's repeating rarity cycle. Clearing the wave opens a portal to another environment, where the team activates the Focus again.
What do you get for wave 50?
Wave 50 can complete Dragged Below and unlock Void Fiend. Simulacrum continues beyond that wave.
Does Simulacrum work in multiplayer?
Yes. Each participating player receives a Void Potential, dead players respawn when the wave ends, and the team must stay together as the Focus moves.
Related Reading
- Risk of Rain 2 Mithrix Guide: All 4 Phases and Escape: Risk of Rain 2 Mithrix guide: how to handle all 4 phases, item-stealing phase, Lunar
- Risk of Rain 2 Hallowed Concepts Reveals Acolyte, Enforcer: Risk of Rain 2 Hallowed Concepts adds two new Survivors, Acolyte and Enforcer, confirmed September
- Risk of Rain 2 Items and Artifacts: Tiers and All 20 Explained: item categories and build priorities.
- Risk of Rain 2 Stages Guide: Maps, Loops and Routes: environment recognition and route context.
- Risk of Rain 2 Interactables: Shrines, Printers, Scrappers: normal-run objects compared with mode-specific rules.
- Risk of Rain 2 Eclipse Guide: All 8 Modifiers Explained: a separate high-difficulty mode with cumulative restrictions.
- Risk of Rain 2 Achievements Guide: 205 Challenges Explained: unlock and completion planning.
References
- Risk of Rain 2 wiki: Simulacrum: mode loop, waves, environments, rewards, and tips.
- Risk of Rain 2 wiki: Alternate Game Modes: mode availability and DLC context.
- Risk of Rain 2 wiki: Void Potential: reward-object rules.
- Risk of Rain 2 on Steam: official game and DLC context.
- Risk of Rain 2 wiki: Dragged Below: the two ways to unlock Void Fiend.
- Risk of Rain 2: Survivors of the Void Launch Trailer: Gearbox's YouTube channel
Was this guide helpful?
About the author

GameBrief's byline for metroidvanias, RPGs, comparisons and design history. Places each game in its genre and argues both sides before picking one.
- Metroidvanias and RPGs
- Comparisons and design history
- Sources listed per article
Keep reading
Risk of Rain 2 Prismatic Trials Guide: Seed and Rewards
General · 9 min
Risk of Rain 2 Mithrix Guide: All 4 Phases and Escape
General · 15 min
Risk of Rain 2 Interactables: Shrines, Printers, Scrappers
General · 10 min

Risk of Rain 2 Acolyte and Enforcer: Every Skill and Unlock
General · 9 min
Risk of Rain 2 Eclipse Guide: All 8 Modifiers Explained
General · 10 min
Risk of Rain 2 Stages: Which Maps Appear at Stages 1 to 5
General · 16 min
Sponsored
More game deals
Disclaimer
This article is published for informational and entertainment purposes. It does not constitute professional financial, legal, or technical advice. Game performance, online services, patch schedules, and store listings change. Verify critical details (pricing, system requirements, regional availability) with publishers and storefronts before you buy. Affiliate links, where present, help support our editorial work and are labelled in our affiliate disclosure.