
GuideRisk of Rain 2
Risk of Rain 2 Item Tier List 2026: Best Items for Every Run
About the game
Risk of Rain 2
Hopoo Games
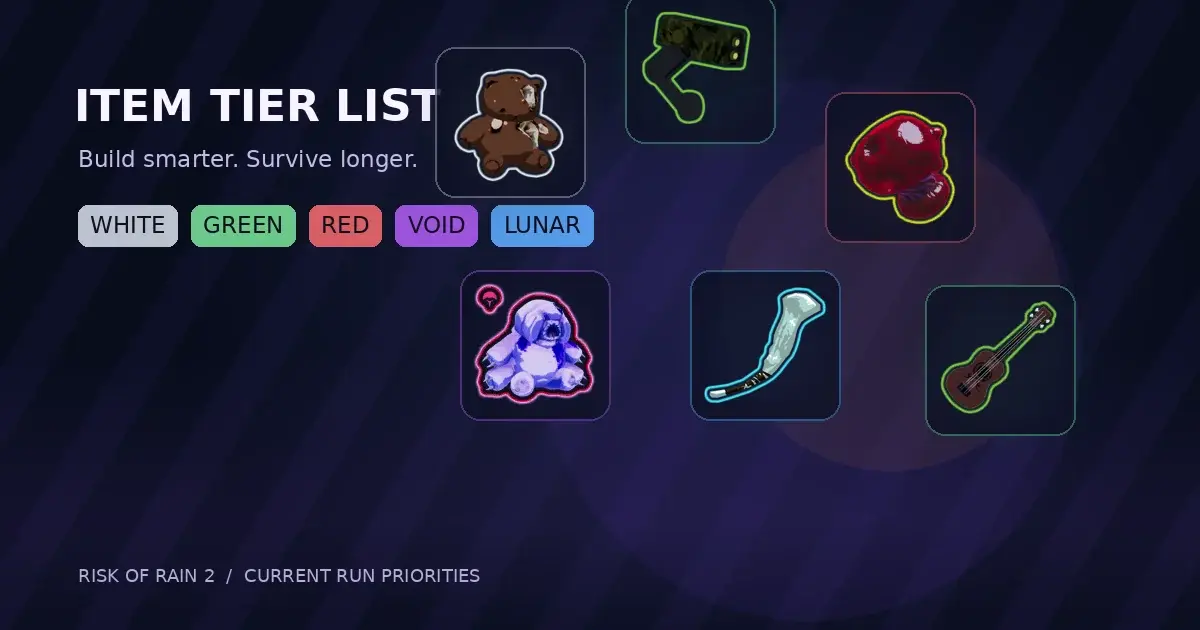
Risk of Rain 2 item tier list decisions are really decisions about time, survivability, and the next fight. This 2026 ranking separates reliable run-saving items from flashy but conditional picks, then adjusts the order for 3D Printers, Void corruption, Eclipse, co-op, and survivor builds.
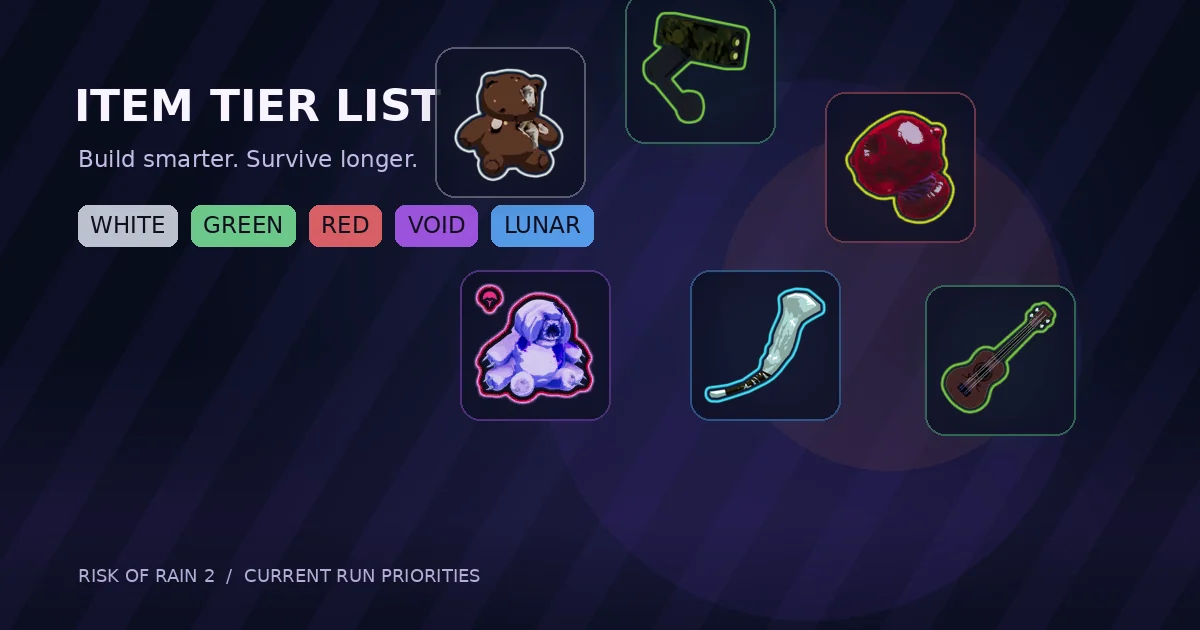 The same rarity can hide very different priorities. Tougher Times, AtG Missile Mk. 1, Safer Spaces, and other high-value picks earn their place by solving problems that appear in almost every run.
TL;DR: For a general Rainstorm or Monsoon run, prioritize Tougher Times, Lens-Maker's Glasses, AtG Missile Mk. 1, Ukulele, Hopoo Feather, and Safer Spaces when the run offers them. Treat this as a priority list, not a commandment: a printer, survivor kit, Eclipse modifier, or existing corruption pair can make a lower-ranked item the correct pickup. Void items are especially powerful when you understand which normal item they replace.
What is the Risk of Rain 2 item tier list? (quick answer)
The best general-purpose items are the ones that stay useful when the run does not cooperate. Tougher Times and Safer Spaces protect against mistakes, Lens-Maker's Glasses and AtG Missile Mk. 1 scale ordinary attacks into real damage, and Ukulele covers groups before they surround you. Movement from Paul's Goat Hoof or Hopoo Feather can be worth more than another damage proc when the problem is reaching a Teleporter or escaping a boss attack.
The ranking below assumes a normal run with the current item pool enabled, no Artifact of Command, and a player who wants a dependable clear rather than a highlight-reel build. DLC items are included and labeled by their behavior where that matters. If a run has no Survivors of the Void content, ignore its Void recommendations rather than trying to substitute them one for one.
Key Takeaways
- S-tier items fix a run-wide problem: staying alive, reaching targets, or dealing damage to both bosses and crowds.
- White items are not filler. Tougher Times, movement speed, crit, attack speed, and proc setup often carry the first four stages.
- A 3D Printer changes the decision. Item Scrap, White is a purpose-built printer input, while sacrificing a one-of-a-kind defensive item can make a good tier list choice terrible.
- Void items corrupt their paired normal items. Safer Spaces replaces Tougher Times, Plasma Shrimp replaces AtG Missile Mk. 1, Polylute replaces Ukulele, and Needletick replaces Tri-Tip Dagger.
- Lunar items are build tools with tradeoffs. Shaped Glass can end a run that would otherwise survive, while Gesture of the Drowned is much safer when the equipment effect is already useful on cooldown.
- Eclipse, Simulacrum, Prismatic Trials, and four-player co-op all reward a slightly different version of the list.
How this Risk of Rain 2 item tier list works
The tier labels measure first-pick priority, not the theoretical maximum of a perfect build. An item rises when it gives immediate value, stacks cleanly, and does not need a rare survivor interaction to matter. It falls when it is narrow, dangerous, or outclassed by a common item that solves the same problem more consistently.
The baseline is a solo run on Rainstorm or Monsoon with ordinary random drops. That matters because Artifact of Command can make a combo-focused item look universal, and multiplayer can make team utility look stronger than it feels in a solo run. The Risk of Rain 2 co-op guide covers the shared stage economy and personal item ownership that make that distinction important.
| Tier | What belongs here | How to use it |
|---|---|---|
| S | Broad survivability, mobility, or damage that is useful immediately | Take it early unless a printer or corruption plan says otherwise |
| A | Excellent items with a modest condition or a stronger alternative in the same role | Take freely, then stack when the build supports it |
| B | Good glue, scaling tools, or strong items with a real matchup limit | Use them to patch the run's current weakness |
| C | Niche, dangerous, or replaceable picks | Take them for a specific survivor, artifact, or combo |
This is also why a tier list should not pretend that every item has one permanent rank. The Risk of Rain 2 survivors guide lists the current roster, but Loader does not want exactly the same item mix as Commando, and Engineer does not value every proc in the same way as Railgunner.
S tier: Tougher Times, AtG Missile Mk. 1, Safer Spaces
Tougher Times (white) is the cleanest early defensive pickup. The official item reference gives it a 15% chance to block incoming damage, with another 15% per stack, and the chance is not affected by luck. It does not ask you to attack, stand near an enemy, or activate anything. That reliability is why it stays S tier even after the run finds more sophisticated defensive options.
AtG Missile Mk. 1 (green) adds a 10% chance to fire a missile for 300% total damage, with the listed damage increasing by another 300% per stack. It works on survivors who hit often and survivors who hit hard, so it is one of the best general green items for turning ordinary attacks into boss damage. It is also a useful comparison point for Plasma Shrimp: if you take the Void item, you are choosing a different trigger and corrupting every AtG Missile Mk. 1 you hold.
Safer Spaces (Void) blocks one incoming hit and recharges after 13.5 seconds, with its recharge improving per stack. That single protected hit is excellent against a fall, a stray elite attack, or a mistake during a Teleporter fight. The cost is real: Safer Spaces corrupts all Tougher Times in the inventory. Take it when the resettable block is more valuable than stacking the normal item, not simply because the Void rarity color looks better.
Tougher Times is an S-tier white because its defensive value starts at one stack and stays relevant when the run becomes chaotic.
A tier: Lens-Maker's Glasses, Ukulele, Brilliant Behemoth
Lens-Maker's Glasses (white) gives a 10% chance to critically strike for double damage, increasing by 10% per stack. Crit is a foundation rather than a complete build, but that is exactly the point: attack-speed survivors, slow heavy hitters, and proc characters all get a reason to keep the item. The item becomes less attractive only when a Void plan specifically calls for Lost Seer's Lenses and its instant-kill effect.
Ukulele (green) is the dependable crowd-damage choice. It gives attacks a chance to chain lightning through nearby enemies, so a survivor who would otherwise spend too long cleaning up wisps, beetles, or a packed Teleporter wave gets immediate breathing room. Polylute can be stronger for repeated single-target procs in the right run, but it corrupts Ukulele, which makes the choice a build decision rather than a free upgrade.
Brilliant Behemoth (red) turns attacks into explosions and remains one of the easiest Legendary picks to use well. It needs no unusual survivor skill, and it improves both ordinary clearing and crowded boss arenas. A red item is never a reason to stop looting the stage, though. The Risk of Rain 2 items and artifacts guide explains the full rarity structure, while this list is only answering the narrower question of what to prioritize once the chest has already offered you a choice.
Hopoo Feather (green) is close to S tier for survivors that convert air time into damage or safety. Extra jumps solve gaps, vertical routes, and attacks that are difficult to dodge on the ground. It is not mandatory on a survivor with reliable mobility, so it stays A rather than S.
B tier: Paul's Goat Hoof, Gasoline, Harvester's Scythe
Paul's Goat Hoof (white) is a strong run stabilizer. Movement speed helps with every stage route, Teleporter positioning, projectile dodge, and escape from a bad spawn. It does not make a screenshot look as dramatic as a red item, but the extra movement can prevent more damage than a small offensive proc.
Gasoline (white) is excellent when a run is fighting crowds and feels merely adequate against a single boss. A kill ignites nearby enemies, and its radius improves with stacks. That makes it a strong stage-clearing bridge into the midgame, especially for survivors that struggle to finish low-health groups. It drops when the run needs boss damage more than it needs another chain of small explosions.
Harvester's Scythe (green) supplies healing and critical-strike support, which is valuable in a run that has started finding crit but lacks a way to turn it into sustain. It ranks below universal defensive items because the healing depends on the survivor actually critting, and because a fast movement or damage pickup can prevent the damage the Scythe would have healed.
Runald's Band and Kjaro's Band (green) are usually B-tier individually and A-tier when the survivor can reliably trigger their high-damage hit threshold. They are also important in the Void decision: Singularity Band corrupts both Bands, so picking it up can close off a strong normal-band plan for the rest of the run.
Topaz Brooch and Focus Crystal (white) are good targeted pickups. Topaz Brooch gives temporary barrier after a kill, while Focus Crystal increases damage at close range. Put them higher when the survivor's kit is built around close combat or constant kills, and lower when the run is already struggling to reach enemies safely.
AtG Missile Mk. 1 is a strong green priority because it adds meaningful single-target damage without asking for a specific survivor.
C tier: Delicate Watch, Warbanner, Corpsebloom
Delicate Watch (white) can be very strong while the survivor stays above its health threshold, but it is a poor blind recommendation in a guide meant for consistent clears. A mistake that breaks the watch is more expensive when the rest of the build has been balanced around its damage. Take it when you control the run's damage intake, not just because the tooltip promises more output.
Warbanner (white) is useful when the team can keep fighting inside its zone or when a route naturally creates repeated engagements there. In a solo run with scattered objectives, its value is more conditional than a movement or attack-speed item. Co-op coordination can move it up, especially when teammates call out where the banner will matter before the Teleporter starts.
Corpsebloom (Lunar) is a deliberate sustain conversion rather than a default healing upgrade. Its benefit can look enormous on paper, but its healing rules change how quickly health returns and can make a familiar survival pattern feel wrong. Lunar items should be ranked by the run they create, not by their blue color. The same warning applies to Brittle Crown, Transcendence, and other powerful tradeoffs.
Benthic Bloom, Bison Steak, and other extreme build modifiers belong in the conditional bucket even when an experienced player can make them work. A tier list for random runs should not call an item universally bad when its actual role is to enable a particular artifact, survivor, or challenge. It should tell you that the item has a higher opportunity cost than a general-purpose defensive pickup.
White item tier list: the drops that carry early stages
White items are where a run gets its foundation. They are common enough to stack, cheap enough to put through a printer, and often more important than a single high-rarity item during the opening stages.
Start with Tougher Times when incoming damage is the problem, Lens-Maker's Glasses when the survivor can attack consistently, Paul's Goat Hoof when movement is limiting every encounter, and Soldier's Syringe when attack speed improves both damage and utility. Energy Drink fills the movement role when sprinting matters more than raw speed, while Tri-Tip Dagger gives a strong damage-over-time route to rapid-hit survivors.
Choose Gasoline for crowd clear, Topaz Brooch for kill-based barrier, and Focus Crystal for a close-range plan. Armor-Piercing Rounds rises for a run whose immediate concern is boss damage. Mocha is a flexible DLC white because it adds both attack speed and movement speed, though it is not as individually decisive as the best single-stat picks.
The printer rule is simple: do not spend a one-stack item that is solving the run's current problem unless the output solves a larger one. If the stage offers Item Scrap, White, it is the cleanest way to prepare for a white printer. The Risk of Rain 2 interactables guide covers how printers, Scrappers, Shrines, and other stage decisions fit together.
Green and red item tier list: damage with a job
Green items should normally add a new function to the build. AtG Missile Mk. 1 is the safe first choice for boss damage, Ukulele is the safe first choice for crowd damage, and Hopoo Feather is the safe first choice when vertical mobility is the bottleneck. Harvester's Scythe, Runald's Band, and Kjaro's Band are strong when crit, burst, or survivability already exists to support them.
Will-o'-the-wisp is a good alternative to Gasoline when the run can reliably secure kills but needs a larger detonation payoff. Wax Quail is a movement tool that becomes more valuable as the survivor spends more time jumping. Predatory Instincts rises for rapid attacks and falls for a survivor who cannot keep its bonuses active.
For reds, take Brilliant Behemoth for broad attack value, Ceremonial Dagger for chain kills after the first enemy dies, Alien Head for cooldown-heavy survivors, 57 Leaf Clover for a proc-heavy build, and N'kuhana's Opinion when the run has enough healing to turn that effect into damage. A Legendary item should patch the current run rather than override its identity.
Boss or yellow items sit outside normal chest rarity. Titanic Knurl, Genesis Loop, Halcyon Seed, Little Disciple, and Shatterspleen are tied to boss-related sources rather than the ordinary white, green, and red chest loop. Take them according to the effect you received, but do not route a run around the assumption that a specific yellow item will appear. The Risk of Rain 2 bosses guide covers the current boss and DLC context behind those drops.
Void and lunar item tier list: power with a cost
Void items are not simply purple upgrades. The official item rules say that picking up one corrupts all stacks of its paired normal item, and the normal and Void versions cannot coexist in the same inventory. Common examples are:
- Safer Spaces corrupts Tougher Times.
- Plasma Shrimp corrupts AtG Missile Mk. 1.
- Polylute corrupts Ukulele.
- Weeping Fungus corrupts Bustling Fungus.
- Needletick corrupts Tri-Tip Dagger.
- Lost Seer's Lenses corrupts Lens-Maker's Glasses.
- Singularity Band corrupts both Runald's Band and Kjaro's Band.
Safer Spaces is an excellent defensive pickup, but its Tougher Times corruption is part of the decision, not a footnote.
The correct question at a Void Cradle is not "is this item higher tier?" It is "which inventory am I choosing after the corruption?" Safer Spaces is often the cleanest defensive choice when one protected hit matters more than a chance to block every hit. Plasma Shrimp is attractive when the build can maintain a shield and wants automatic missiles. Polylute can be excellent in a rapid-hit build, but it trades away the normal Ukulele path. Weeping Fungus is a serious option for a sprinting survivor, while Needletick is a decision about collapse versus bleed.
Lunar items deserve the same caution. Shaped Glass raises damage at the cost of maximum health, Gesture of the Drowned cuts equipment cooldown while forcing the equipment to activate automatically, Transcendence converts health into shield, and Corpsebloom changes healing behavior. They are best when the player can name the problem the Lunar item solves and the drawback the rest of the build will absorb.
Printer, Scrapper, and co-op decisions
The item tier list changes as soon as the stage offers a 3D Printer. A high-ranked item is not automatically printer fuel. Before using one, ask three questions:
- Does the output solve a problem the current build actually has?
- Is the sacrificed item replaceable, or is it the only source of healing, mobility, crit, or fall safety?
- Will the next stage make the same choice more valuable, especially before a Teleporter or Mithrix encounter?
Item Scrap, White is the safest general printer input because it has no combat effect and is explicitly prioritized by 3D Printers. A printer that produces Tougher Times can therefore be much stronger than a random green chest, but a printer that consumes your only Hopoo Feather may quietly make the route impossible to navigate.
In co-op, call the output before someone activates the printer. Pickups belong to the player who collects them, while the stage and interactables are shared. A teammate who already has a strong damage engine may give the printer to the player who has no defensive item, and a team may prefer Ukulele or Will-o'-the-wisp for shared crowd control over a selfish single-target upgrade. The Risk of Rain 2 co-op guide explains the item ownership and pacing rules in more detail.
Best items by survivor and mode
The Risk of Rain 2 best survivors tier list is the right companion when you want a build starting from a character rather than a rarity. Use these quick adjustments:
- Commando, Huntress, Railgunner, and Captain: prioritize attack speed, crit, proc items, and movement. AtG Missile Mk. 1 and Lens-Maker's Glasses are dependable because their attacks can use them without a special setup.
- Loader and Mercenary: movement, close-range damage, and survivability rise. Focus Crystal can be excellent, but do not skip mobility because the damage number looks better.
- Engineer: area damage, cooldown help, and items that remain useful while turrets work can outrank attack-speed picks. Ukulele, Will-o'-the-wisp, and Hopoo Feather are often more practical than a narrow on-hit plan.
- Acrid and Void Fiend: value the item effects that complement their own damage and health patterns. Do not assume a generic healing item is always better when the survivor's kit already changes how health is managed.
- Operator and Drifter: include the current Alloyed Collective context when judging item and drone interactions. A DLC survivor can make a flexible utility item more valuable than a stale base-game ranking suggests.
For modes, build for the restriction rather than the name. Eclipse makes healing, fall protection, mobility, and consistent damage more important because its modifiers stack and artifacts are disabled. The Risk of Rain 2 Eclipse guide lists the eight modifiers. Simulacrum rewards reliable area clear and the ability to survive repeated waves, so the Simulacrum guide is more useful than copying a Mithrix-only damage build. Prismatic Trials is a seeded challenge, which makes a specific stage and item route more important than a permanent tier ranking; see the Prismatic Trials guide.
If the question is not about item strength but about how to unlock the surrounding systems, use the Risk of Rain 2 achievements guide. If the goal is a modified item pool, the Risk of Rain 2 mods guide is the safer place to check compatibility before changing a serious save.
Step-by-Step: build around Risk of Rain 2 items
1. Name the current problem: Before choosing a chest or printer output, decide whether the run lacks survivability, movement, crowd damage, boss damage, or cooldown help.
2. Take a foundation white: Start with Tougher Times, Lens-Maker's Glasses, Paul's Goat Hoof, Soldier's Syringe, or another white item that directly fixes that problem. Do not wait for a green item to make the run functional.
3. Add one damage engine: Use AtG Missile Mk. 1 for general single-target damage, Ukulele or Gasoline for crowds, or a crit and bleed route when the survivor attacks often enough to support it.
4. Check every corruption: At a Void Cradle, compare the item you will gain with the exact normal stacks it will replace. Write down the pair mentally before you pick it up; the conversion is not a reversible reroll.
5. Make printers intentional: Feed a printer Item Scrap when possible. Otherwise, spend an item only when the output improves the run's main problem and the sacrificed effect is not carrying a later stage.
6. Re-rank before the finale: Before the Mithrix fight, keep mobility, reliable damage, and a survivability answer. A flashy Lunar item or a greedy red-item trade is not worth losing the escape route after the final phase.
Frequently Asked Questions
What is the best item in Risk of Rain 2?
There is no universal best item, but Tougher Times, AtG Missile Mk. 1, Lens-Maker's Glasses, Ukulele, and Safer Spaces are safe high-priority picks because they solve common problems across many survivors.
Should I always take a red item over a white item?
No. Rarity does not know what the run needs. A Paul's Goat Hoof that lets you dodge a boss attack or a Tougher Times stack that prevents a death can be more valuable than a red item that does not fit the build.
Are Void items better than normal items?
Not automatically. They offer distinct effects and corrupt a paired normal item. Safer Spaces, Plasma Shrimp, Polylute, and Needletick can be excellent, but you should compare the new effect against Tougher Times, AtG Missile Mk. 1, Ukulele, or Tri-Tip Dagger that you are giving up.
What is the best printer item?
There is no single best printer output. A Tougher Times printer can stabilize defense, an AtG Missile printer can solve boss damage, and a Ukulele printer can solve crowds. Use the output that fixes the run and preserve irreplaceable movement or healing items.
Is Shaped Glass worth taking?
Sometimes. Shaped Glass is a high-risk Lunar choice that can shorten fights dramatically, but its health drawback makes mistakes less forgiving. Take it when you have a plan for avoiding damage and do not need a large health pool to survive the next route.
Do artifacts change this item tier list?
Yes. Artifact of Command makes targeted combos easier, while Artifact of Sacrifice changes the chest and enemy-drop rhythm. The Risk of Rain 2 achievements guide can help with unlock goals, but this ranking assumes ordinary random item drops unless a mode section says otherwise.
Related Reading
- Risk of Rain 2 Complete Guide: the hub for every Risk of Rain 2 guide on this site.
- Risk of Rain 2 Hallowed Concepts Reveals Acolyte, Enforcer: Risk of Rain 2 Hallowed Concepts adds two new Survivors, Acolyte and Enforcer, confirmed September
- Risk of Rain 2 Interactables Guide: printers, Scrappers, Shrines, and the choices that change item value.
- Risk of Rain 2 Best Survivors Tier List: survivor-by-survivor build priorities.
- Risk of Rain 2 Stages Guide: stage routes and environment context for planning item timing.
References
- Risk of Rain 2 on Steam: current game listing and DLC context.
- Risk of Rain 2 official wiki: Items: item names, categories, effects, stack behavior, and Void corruption pairs.
- Risk of Rain 2 official wiki: Tougher Times: block chance and luck interaction.
- Risk of Rain 2 official wiki: Safer Spaces: Void defensive effect and Tougher Times corruption.
- Risk of Rain 2 official wiki: Interactables: printers, Scrappers, and stage decision context.
- Alloyed Collective patch 1.4.1 announcement: current released expansion and patch baseline.
- Risk of Rain 2: Alloyed Collective Launch Trailer: official Gearbox visual reference for the current expansion.
Was this guide helpful?
About the author

Critical game theorist with a background in film criticism. Writing for print and digital outlets since 2015. Specialises in genre analysis and design heritage.
- Background in film criticism
- 10 years games coverage
- Genre theory and design history specialist
Keep reading
Risk of Rain 2 Achievements Guide: 171 Challenges Explained
General · 11 min
11 Best Risk of Rain 2 Mods: 2026 Thunderstore Picks
General · 20 min

Risk of Rain 2 Hallowed Concepts Reveals Acolyte, Enforcer
General · 3 min

Risk of Rain 2 Complete Guide: Survivors, Items, Bosses
General · 8 min

Risk of Rain 2 Bosses and the Alloyed Collective DLC
General · 10 min

Risk of Rain 2 Items and Artifacts Guide: All 20 Artifacts
General · 9 min
Game deals · affiliate links

Disclaimer
This article is published for informational and entertainment purposes. It does not constitute professional financial, legal, or technical advice. Game performance, online services, patch schedules, and store listings change. Verify critical details (pricing, system requirements, regional availability) with publishers and storefronts before you buy. Affiliate links, where present, help support our editorial work and are labelled in our affiliate disclosure.
Comments
Loading comments…