
GuideValheim
Valheim Fader Guide: 3 Bells, All Attacks, and Drops

About the game
Valheim
Valheim Fader is the Ashlands boss, and the fight is gated behind a three-Bell ritual rather than a simple altar offering. You must find the coliseum with a Vegvisir, collect 9 Bell Fragments, read a fight built around green ground hazards and fire, then bring the right damage type and food.
Updated 2026-10-07: Verified Fader's summon, attack timings, health, and rewards against current wiki data; updated the reward name to Kindled Ribs and added direct counters for every attack.
TL;DR: Find a Vegvisir in a Charred Fortress, collect 9 Bell Fragments, craft 3 Bells, and place them around Fader's coliseum. Use upgraded Slash or Blunt damage because Fader resists Pierce and ignores Fire and Spirit. Move out of green fissures, meteors, fire lines, and the rotating wall. Fader drops 5 Kindled Ribs, formerly called Fader Relics, and a guaranteed Trophy.
Valheim Fader guide: quick answer
Fader drops 5 Kindled Ribs (formerly called the Fader Relic) and one Fader Trophy; both are guaranteed rewards. Mount the Trophy at the Sacrificial Stones to claim Fader's Forsaken Power. It lasts 300 seconds, grants Fire resistance and +100% Adrenaline gain, and reduces stagger buildup by 50%. A zero-star Fader has 25,000 HP.
Key Takeaways
Fader is a preparation check disguised as a long boss fight. The arena route costs exploration time, the boss punishes staying inside ground effects, and its resistances make a familiar bow or fire build much worse than an upgraded physical weapon. Plan the return route before you place the final Bell.
- How many Bells: 3 Bells.
- How many fragments: 9 total, because each Bell needs 3 Bell Fragments.
- Where to find the arena: follow a Vegvisir from a Charred Fortress to the Ashlands coliseum.
- Best damage plan: upgraded Slash or Blunt damage. Frost, Lightning, and Poison are also listed as normal damage types.
- Avoid as your main plan: Pierce, Fire, and Spirit damage. Fader resists or ignores them.
- Main fight rule: leave green circles and lingering fire before looking for another hit.
- Current reward: 5 Kindled Ribs and 1 Fader Trophy; both are guaranteed.
- Kindled Ribs use: the wiki lists its usage as a placeholder. The Eternal Pyre is a Stonecutter structure for collecting embers, but its recipe is not documented.
Who Fader is and where the Ashlands boss fits
Fader is the Ashlands boss and the final boss before the Deep North route. The current creature data lists 25,000 health, Pierce resistance, Fire and Spirit immunity, and immunity to stagger. Blunt, Slash, Frost, Lightning, and Poison are listed as normal damage types. That resistance profile should decide your weapon before you enter the coliseum.
Fader is not a boss you can solve by standing in front of it and trading hits. Its melee attacks are short-range, but the fight also layers green flame, meteor impacts, a line of fire, summoned Charred enemies, and a moving fire wall. Those effects occupy the floor you need for dodging, so the practical goal is to preserve open ground and take safe damage windows rather than chase maximum swings.
The Ashlands gate matters because Fader is more than a trophy fight. The boss drops Kindled Ribs, and the trophy gives a Forsaken Power with fire resistance, faster Adrenaline gain, and reduced stagger. If you are still deciding whether to attempt the fight, the Valheim complete guide gives the wider biome and boss route around this page.
Fader resistances and damage choices
| Damage or effect | Current result | What that means |
|---|---|---|
| Pierce | Resistant | Do not make a bow, crossbow, or pierce weapon your main damage plan. |
| Fire | Immune | Fire weapons do not solve this fight. |
| Spirit | Immune | Spirit damage does not solve this fight. |
| Stagger | Immune | Do not build around a stagger loop. |
| Blunt | Normal | A strong blunt weapon is a valid primary choice. |
| Slash | Normal | A strong sword, axe, or other Slash weapon is a valid primary choice. |
| Frost | Normal | Frost damage can supplement a physical build if you already have it. |
| Lightning | Normal | Lightning is a valid damage type according to the current data. |
| Poison | Normal | Poison is not resisted, but it should support rather than replace your main weapon. |
How to summon Fader: 3 Bells and 9 Bell Fragments
The Fader summon has two separate requirements: finding the arena and collecting the offering. The answer to “how many Bells to summon Fader” is 3 Bells, and the answer to “how many fragments” is 9 Bell Fragments. Each Bell uses 3 fragments, and the fragments come from Charred Fortresses in the Ashlands.
1. Find a Charred Fortress
Explore the Ashlands until you find a Charred Fortress. These structures are the important search point because they contain Bell Fragments and can contain the Vegvisir that marks the boss arena. Clear enough of the fortress to reach its information point before you spend time searching the wider biome.
2. Find the Vegvisir
Search the central tower of the Charred Fortress for the Vegvisir. The current data lists the central tower as the normal location, with a very rare Charred Ruins location also possible. Interact with the Vegvisir to reveal the location of Fader's coliseum on your map.
Do not confuse the fortress with the arena. The fortress is your route to the marker and fragments; the coliseum is the separate boss location. Mark the fortress, arena, and your return point before you leave so a death does not turn the next attempt into another full search.
3. Collect 9 Bell Fragments
You need 9 fragments for the complete summon. The cleanest route is to keep opening fortress rooms and chests while you search for the Vegvisir instead of leaving after finding only the marker. Carry a portal or establish a safe staging base outside the combat route if your world and inventory allow it. If you still need earlier progression materials before committing to the southern route, the Valheim iron farming guide keeps that preparation separate from the boss run.
4. Craft and place the Bells
Craft 3 Bells from the 9 fragments, then place the Bells around the marked coliseum. The arena is the place where the ritual happens, so do not waste the items by trying to use them at the fortress Vegvisir. Once the offering is ready, make sure your food, mead, repair access, and escape route are in place before the last interaction.
The Valheim boss order guide is useful here because Fader is the Ashlands gate immediately before the Deep North. It also helps separate this three-Bell ritual from the earlier boss summons, which use different items and altar rules.
Fader arena and preparation checklist
Fader arena preparation is a safe loop outside the coliseum. Put a return point outside the boss's attack area, repair to full durability, carry a second food set, and leave spare equipment nearby if the trip through the Ashlands is costly. Recovery should not require another fortress run.
Armor and resistance
Bring your strongest current armor, with Flametal-tier armor as the sensible Ashlands target. Flametal's heat resistance helps with the biome's lava and boiling water, but it is not a substitute for Fire Resistance Barley Wine. Keep the mead active before you enter the arena because Fader's lingering fire and the biome's environmental damage can overlap.
Major Healing Mead is a practical second potion for a fight where a bad ground effect can remove a large part of your health. Keep stamina available for movement rather than spending the whole bar on a greedy attack string. If you are playing with a group, agree on a direction for moving around the arena so players do not run separate hazards through the same safe space.
Weapons
Use an upgraded Slash or Blunt weapon as your default. Fader's Pierce resistance makes a bow or crossbow a poor primary answer even though ranged weapons can still help with summoned enemies or a brief safe window. Fire and Spirit damage are worse choices because the boss is immune to both. Frost and Lightning are valid alternatives when your character already has a strong tool for them.
Do not swap to a weaker weapon just because its element looks appropriate on paper. A fully upgraded physical weapon that you can land reliably is more useful than a low-level elemental experiment. The Valheim weapons tier list can help compare the gear you already own before you spend rare upgrade materials.
Food
For a pre-Deep-North Fader attempt, use Piquant Pie, Mashed Meat, and Roasted Crust Pie. The current food table gives that trio 239 HP and 169 stamina: two health-heavy foods plus one stamina food. It is the practical Ashlands boss set because the arena asks you to survive mistakes without giving up the stamina needed to leave fire.
If Deep North food is already unlocked, Meat In Bread, Seal Meat Soup, and Pancakes give 259 HP and 189 stamina. That set is stronger, but it is a progression upgrade rather than a requirement for the Fader fight. The Valheim best food guide has the verified values and alternatives if you need a stamina-heavy or magic rotation.
For an Eitr build, do not fill every slot with a food that leaves you unable to survive a stray hit. Oven Pancake and Meatballs and Poteitr reach 105 Eitr, but Oven Pancake lasts 30 minutes and Meatballs and Poteitr lasts 25. A mixed health, stamina, and Eitr set is often easier to use while you learn the attack cues. The Valheim Mistlands guide explains the earlier point where Eitr becomes part of normal progression.
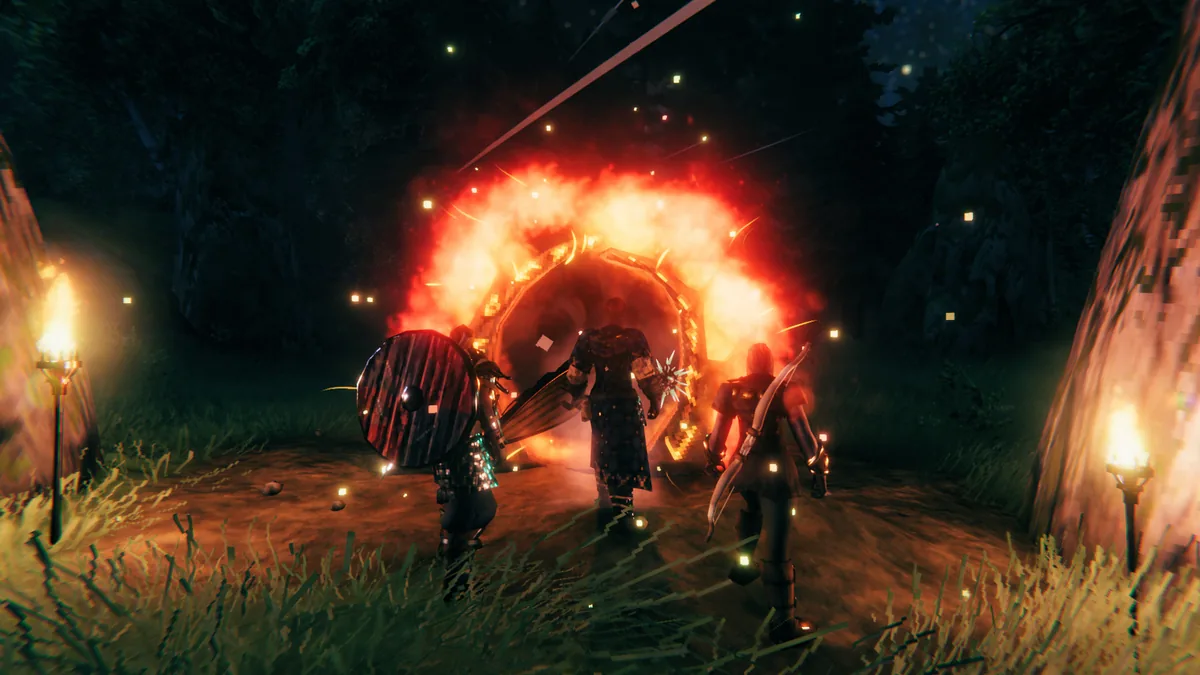 Set a safe return route before the summon. This portal scene is a useful reminder that recovery access matters as much as the weapon in your hotbar.
GODEEPER: Fader is the bridge into the current final biome. Read the Valheim Deep North biome guide before spending every rare material on a one-off arena setup.
Fader attacks and how to read them
Use Fader's attack table as a movement plan instead of a damage spreadsheet. The short-range bite, claws, and spin punish players who stay in front, while ranged attacks make the arena unsafe from a distance. Watch the ground and the boss's body cue first, then decide if you have time for one hit.
| Attack | Verified cue and timing | Counter |
|---|---|---|
| Bite | 210 Pierce damage in a frontal 10-meter, 40-degree arc; used within 9 meters about every 3 seconds | Step out of the frontal arc or move behind Fader before the next bite. |
| Left or right claw | 200 Pierce damage in a frontal 10-meter, 65-degree arc; each claw has its own 3-second cooldown and is used within 9 meters | Move behind the shoulder line. Watch which side winds up, since the two claws track separately. |
| Spin | 140 Pierce damage in an 8.5-meter radius; used within 8 meters about every 20 seconds | Leave the 8.5-meter radius as the spin begins, then return after it ends. |
| Fissure | 12 to 16 green flame circles appear 0.45 seconds apart; spikes form after 4 seconds and pools last 15 seconds. Repeats about every 30 seconds at 35% to 85% health, then every 20 seconds below 35%. | Leave the marked circles as soon as they appear and wait for the pools to clear before crossing that ground. |
| Flamebreath | Unblockable 17-meter line with ground fire in a 4-meter radius for 14 seconds; used every 25 seconds at 5% to 85% health and 2 to 20 meters away | Dodge across the line, then stay clear of the burning ground until its 14-second duration ends. |
| Meteors | 10 impacts, each with green fire in a 5-meter radius for 20 seconds. Repeats about every 25 seconds at 25% to 100% health, then every 18 seconds below 25%. | Keep moving through open ground and avoid lingering impact zones, including after the meteors stop falling. |
| Roar | 8 orbs summon one Charred Warrior or Marksman each; the type is 50/50 and the arena caps at 7 of each. Repeats about every 45 seconds at 35% to 55% health, then every 26 seconds below 35%. | Keep Fader and the adds in view. Clear an add only if it blocks your route, since Fader's attacks can also hit its summons. |
| Wall of Fire | 12 fire circles with 4-meter radius start 8 meters from the player, opposite Fader, and appear clockwise 0.25 seconds apart. They last 20 seconds and repeat about every 60 seconds at 15% to 90% health. | Keep moving with the open gap. The pattern is placed relative to you, so a continuous route preserves room to move. |
Fissure: leave the green circles immediately
Fissure is the attack that most often turns a normal attempt into a corpse run. The circles telegraph the locations before spikes appear, then the resulting pools occupy the ground for 15 seconds. The current timing data places the attack around every 30 seconds from 35% to 85% health and around every 20 seconds below 35%.
Leave the circles on their first telegraph. Walk or sprint out as soon as they form, then choose a new edge of the arena rather than returning through the pools. If you stop sprinting after the first safe gap, you keep stamina for the next cue. Community players also report that controlled walking can be easier than panic sprinting here, but treat that as a practice tip rather than a special mechanic.
Flamebreath: respect the line and its afterburn
Flamebreath is a 17-meter line with a lingering fire area. It cannot be blocked, so a shield only protects you from other attacks while the line is active. Move across the line rather than backing away along it, and do not return for damage until the 14-second fire window has cleared from your path.
This attack has a useful health-window clue: the data lists it between 5% and 85% of Fader's health. The first moments and the final 5% therefore remove one of the fight's major hazards. Do not waste that final window by healing in the fire; keep moving and finish with safe attacks.
Meteors and the wall of fire: keep the arena open
The meteor pattern throws 10 impact zones around the fight, with green flames that last 20 seconds. The wall of fire is a separate ring pattern that moves clockwise. Both attacks punish the same habit: staying still because the boss is close enough for another swing.
Move around the outer part of the arena without hugging the boundary. Let the boss follow you through open ground, and use the gaps between effects to attack. A group should rotate in the same direction; a solo player should avoid crossing the center unless the safe route demands it.
Roar: manage the adds without losing Fader
Roar summons Charred Warriors and Charred Marksmen through 8 orbs, with a maximum of 7 of each listed in the current data. The boss can damage its own summons, so do not automatically abandon Fader to chase every add. If the adds are spread out, keep Fader near them and let its fissure, fire, and meteor effects do part of the cleanup.
The roar cadence becomes more urgent as health drops: the current data lists roughly 45 seconds between roars from 35% to 55% health and 26 seconds below 35%. Save a stamina and healing buffer for the final phase rather than treating the first roar as the whole add problem.
Valheim Fader strategy: melee, ranged, and mage plans
The Fader strategy is a movement loop: bring the boss into open ground, wait for a hazard cue, step out of it, take a safe attack, and repeat. Melee players should circle the head and shoulders rather than stand in front. Ranged and mage players should keep the boss near summoned adds so its area attacks create space.
Melee strategy
Open with the boss in the center or on the clearest side of the coliseum. Use Slash or Blunt damage, attack after a bite, claw, or spin finishes, and leave immediately when green circles appear. Your best damage window is the space between hazards, not the few seconds after a blocked hit.
Keep the boss moving in one direction. A consistent route makes the clockwise fire wall easier to read and prevents you from scattering fire pools over every part of the arena. When Fader roars, check whether the adds are actually in your path before turning away from the boss. If they are not, continue the loop and let Fader damage them.
Ranged strategy
Ranged weapons are useful for pulling or finishing Charred adds, but Pierce resistance means they should not be your main Fader damage plan. If your strongest weapon is a bow or crossbow, bring it as a utility tool and use a better Slash, Blunt, Frost, or Lightning option for the boss itself.
The extra distance does not make the arena safe. Meteors, flame lines, wall patterns, and fissures all reach the area where a ranged player wants to stand. Keep moving between shots, maintain a clear retreat line, and do not stand still to finish a long draw while a green circle is under you.
Mage strategy
Fader's Fire and Spirit immunities matter even more for a mage. Do not build the attempt around fire or spirit damage. A staff or spell that deals Frost or Lightning damage is a better fit when available, and one physical weapon gives you an answer if your Eitr runs dry or an add reaches you.
Use one Eitr food with two survivability foods while learning the fight. Three Eitr foods can make the health pool too thin for a missed fissure, especially when the fire wall and summoned enemies overlap. Once you can read every hazard, replace one survivability slot if the extra casting pool shortens the encounter enough to matter.
Solo and group positioning
Solo players need to protect open ground because every hazard is aimed at the same person. Pull the boss toward a clean area, use the outer route, and never spend all stamina on a damage combo. Group players have more damage but also more ways to cover the arena in fire. Choose one rotation direction, keep the add handler from dragging Marksmen across the group, and call out fissure and wall patterns.
The Valheim base building guide is relevant to the preparation side of this fight. A compact portal and repair base outside the danger area saves more time than an ambitious arena structure that blocks your escape route. If you are still choosing a weapon from the current northern tier, the Valheim Nord weapons guide gives a separate gear comparison.
Fader drops: Kindled Ribs, Trophy, and Forsaken Power
Current item data calls the drop Kindled Ribs, the item formerly named Fader Relic. Fader drops 5 Kindled Ribs every time, and the Fader Trophy has a 100% drop rate. The older name remains in earlier guides and the original 1.0 notes, but the wiki says the item was renamed as part of the Deep North update.
Kindled Ribs (formerly Fader Relic)
The wiki lists Kindled Ribs usage as a placeholder, and the Eternal Pyre as a Stonecutter structure for collecting embers. Neither page documents a recipe, so this guide does not give one. Keep the drops safely stored until the usage is documented. The Winding Tunnels and Morkhalla guide follows the dungeon route that opens after this progression gate.
Fader Trophy and Forsaken Power
Mount the Fader Trophy at the Sacrificial Stones to claim the boss power. The current data lists a 300-second duration with fire resistance, 100% increased Adrenaline gain, and 50% reduced stagger. The power is useful in the Ashlands and the northern content that follows, so activate it before a dangerous route rather than saving it indefinitely.
The Valheim achievements guide is a useful next stop if the Fader kill is part of a full 1.0 completion run. The Valheim Crown of Valheim guide covers another Deep North progression reward once the relic chain is underway.
Weapons and food to bring to the arena
The simplest loadout is a maxed physical weapon, an emergency utility weapon, Fire Resistance Barley Wine, healing mead, and three foods that give both health and stamina. That package covers Fader's resistances and the movement demands without asking you to farm a completely separate build for one attempt.
| Slot | Recommended choice | Reason |
|---|---|---|
| Main weapon | Upgraded Slash or Blunt weapon | Both damage types are listed as normal against Fader. |
| Alternative | Frost or Lightning weapon you already use well | Both are listed as normal damage types. |
| Utility | Bow or crossbow for adds and pulls | Pierce resistance makes it a poor primary boss weapon. |
| Armor | Flametal-tier armor if available | Heat resistance helps in the Ashlands; it does not replace fire mead. |
| Mead | Fire Resistance Barley Wine and Major Healing Mead | Fire protection and recovery cover the two most common punishments. |
| Ashlands food | Piquant Pie, Mashed Meat, Roasted Crust Pie | 239 HP and 169 stamina from the current food table. |
| Deep North food | Meat In Bread, Seal Meat Soup, Pancakes | 259 HP and 189 stamina if these recipes are unlocked. |
Food values are full values before the timer decays. Eat the three foods before the summon and refresh them before the icons flash. The Valheim food guide explains the three-slot rule and why a fourth meal replaces the active food with the least time remaining.
Ashlands enemies: the secondary threats around Fader
The Ashlands enemy problem continues outside the coliseum. Charred Warriors and Charred Marksmen create melee and ranged pressure, Charred Twitchers add another interruption, Morgen can turn a route into an ambush, and Asksvin make open travel unpredictable. Keep this section as the short field guide; Fader remains the main search intent and the boss encounter needs the detailed strategy above.
Charred enemies
Charred Warriors are the close-range threat you should avoid fighting inside another enemy's fire. Charred Marksmen make open ground dangerous from a distance, which is why a retreat route and cover matter even when your target is Fader. Charred Twitchers are another reason not to let a fortress clear turn into a stationary melee pileup.
Fader's Roar can summon Charred Warriors and Marksmen into the arena. That overlap is different from a normal Ashlands patrol because the boss can damage its own adds. Keep them near the fight when it is safe, but clear any Marksman that forces you to stand in a hazard or blocks your only exit.
Morgen, Asksvin, and the route to the fortress
Morgen is the Ashlands ambush check. Pull it away from suspicious rubble and fight where you can see the approach rather than committing beside the place it can emerge. Asksvin make travel and recovery routes more dangerous when you are already carrying Bell Fragments, so mark a portal or staging point before your inventory is full.
The broader Valheim 1.0 release guide explains where Ashlands sits in the live progression. If you need a full enemy and material reference rather than the Fader-specific route, use the Valheim complete guide as the hub for the surrounding biome pages. The Valheim Ocean biome guide is useful for the sailing leg before your first Ashlands landing.
 Charred enemies combine fire pressure with physical attacks, so the Ashlands preparation rules apply before you even reach Fader's coliseum.
Step-by-Step: summon and beat Fader
Use this condensed route when you are ready for the actual attempt: collect the marker and fragments first, prepare a safe return loop second, and only then place the final Bell. That order keeps a bad pull from turning into a second expedition through the Ashlands.
1. Clear a Charred Fortress. Search the central tower for a Vegvisir and collect Bell Fragments from the fortress route.
2. Reach 9 fragments. You need 3 fragments for each of the 3 Bells.
3. Mark the coliseum. Follow the Vegvisir marker and identify the safest approach, portal location, and retreat direction.
4. Prepare the character. Repair Flametal-tier gear, equip Slash or Blunt damage, eat Piquant Pie, Mashed Meat, and Roasted Crust Pie, and activate Fire Resistance Barley Wine.
5. Place the Bells. Put all 3 Bells around the coliseum, then check that your escape route is clear before starting the encounter.
6. Start the movement loop. Keep Fader in open ground, circle instead of trading in front, and leave every green fissure immediately.
7. Read the phase cues. Expect fire breath between 5% and 85% health, faster fissures below 35%, faster roars below 35%, and a meteor cadence that tightens below 25%.
8. Finish without greed. The final 5% has no Flamebreath window in the current data, but meteors, fissures, adds, and the wall can still kill you. Take the safe hit, then keep moving until Fader falls.
9. Spend the reward. Collect the 5 Kindled Ribs and the Fader Trophy, then claim the Forsaken Power at the Sacrificial Stones.
Tips that make the Fader attempt less painful
Fader becomes manageable when each preparation choice removes one failure mode. Use a damage type the boss accepts, reserve stamina for hazards, keep the arena open, and treat the reward as the beginning of the next route rather than the end of the Ashlands.
- Do not bring a fire build just because the arena looks volcanic. Fader is Fire immune.
- Do not spend all stamina on a combo before checking the floor. Fissure and meteor cues need immediate movement.
- Do not let a portal or bed sit inside the coliseum approach. Recovery should begin from a safe location.
- Do not chase every Charred add if Fader can damage it with the next area attack.
- Do not rely on a Pierce weapon as your only damage. Bring a Slash or Blunt backup even if you prefer ranged combat.
- Keep a second food set and spare mead outside the arena. A failed attempt should cost time, not another full Ashlands expedition.
- If the arena becomes covered in lingering fire, pull Fader through open ground and wait for a clean route instead of forcing damage.
- If your ingredients are tight, use the Valheim food buff guide to keep a second Ashlands boss set ready before you spend the first one.
- A new world can make the sailing leg shorter or longer, so the Valheim best seeds guide is useful when you are planning a fresh 1.0 run.
Frequently Asked Questions
How many Bells do you need to summon Fader in Valheim? You need 3 Bells. Each Bell uses 3 Bell Fragments, so the full summon costs 9 fragments collected from Charred Fortresses.
Where is the Fader arena in Valheim? Find a Vegvisir in the central tower of a Charred Fortress. It reveals the location of Fader's coliseum. The current data also lists a very rare Charred Ruins location for the Vegvisir.
What does Fader drop in Valheim? Fader drops 5 Kindled Ribs, formerly called Fader Relics, every time and a guaranteed Fader Trophy. Mount the Trophy at the Sacrificial Stones to claim Fader's Forsaken Power.
What is Fader weak to in Valheim? Fader is resistant to Pierce and immune to Fire, Spirit, and stagger. Blunt, Slash, Frost, Lightning, and Poison are listed as normal damage types, so use an upgraded physical weapon.
Is Fader immune to fire damage? Yes. Fader is listed as immune to Fire and Spirit damage. Fire Resistance Barley Wine still helps you survive the biome and burning attacks, but fire weapons are a poor damage choice.
What food is best for the Fader fight? Before Deep North recipes, use Piquant Pie, Mashed Meat, and Roasted Crust Pie for 239 HP and 169 stamina. With northern recipes, Meat In Bread, Seal Meat Soup, and Pancakes give 259 HP and 189 stamina.
What does the former Fader Relic build? The current item is named Kindled Ribs. The wiki lists the Eternal Pyre, a Stonecutter structure for collecting embers, but does not document the Kindled Ribs recipe yet.
Is Fader the last boss in Valheim? No. Fader is the Ashlands boss, and the Deep North follows it as the current final biome. The Fader Trophy and Relics move your character into that northern endgame route.
Related Reading
- Valheim Food Buff Guide: Best Foods for Every Biome: choose the verified Ashlands or Deep North food rotation before the summon.
- Valheim Boss Order: All 8 Bosses and How to Summon Them: place Fader in the current boss progression.
- Valheim Deep North Biome Guide: Enemies and Gear 2026: plan the route that opens after Kindled Ribs.
- Valheim Kall Fimbulbringer Guide: Summon and Beat Him: prepare for the boss route after Ashlands.
- Valheim Base Building Guide: Comfort, Wards, Portals 2026: build the safe portal and repair setup around a dangerous arena.
References
- Valheim on Steam: current official game page and developer announcements.
- Valheim 1.0 Has Arrived: Iron Gate's official 1.0 release notes.
- Fader page on the Valheim Wiki: health, summon route, attack cues, attack timing, resistances, and trophy and power details.
- Eternal Pyre on the Valheim Wiki: base structure for collecting embers, built at a Stonecutter.
- Kindled Ribs on the Valheim Wiki: renamed item identity and former name.
- Valheim 1.0 patch note mirror: the official 1.0 announcement mirror, including the updated Fader Relic functionality note.
- Valheim weapons tier list: internal gear comparison for choosing a Slash or Blunt weapon.
- Valheim best food guide: internal current food values used for the boss loadout.
- Valheim iron farming guide: how to farm iron for the gear upgrades you take into the fight.
Was this guide helpful?
About the author

Senior Critic & Analyst
Former game data analyst turned critic with 11 years covering indie and mid-tier games. Based in Austin. Runs spreadsheets on games most people just play.
- 11 years games criticism
- Former game economy analyst
- Roguelike and strategy specialist
Keep reading
Valheim Iron Farming Guide: Crypts, Keys & Portals (2026)
General · 10 min

Valheim Mistlands Guide: Magic, Eitr, and The Queen
General · 10 min

Valheim Boss Order: All 8 Bosses & How to Summon Them
Guides · 13 min

Valheim Deep North Biome Guide: Enemies and Gear 2026
General · 10 min

Valheim Complete Guide: 8 Bosses, Biomes & Bases (2026)
General · 20 min

Valheim Best Weapons: Complete Tier List by Biome (2026)
General · 30 min
Game deals · affiliate links

Disclaimer
This article is published for informational and entertainment purposes. It does not constitute professional financial, legal, or technical advice. Game performance, online services, patch schedules, and store listings change. Verify critical details (pricing, system requirements, regional availability) with publishers and storefronts before you buy. Affiliate links, where present, help support our editorial work and are labelled in our affiliate disclosure.
Comments
Loading comments…