
GuideSecurity 51
Security 51 Tips Guide: Surviving Your First Shift
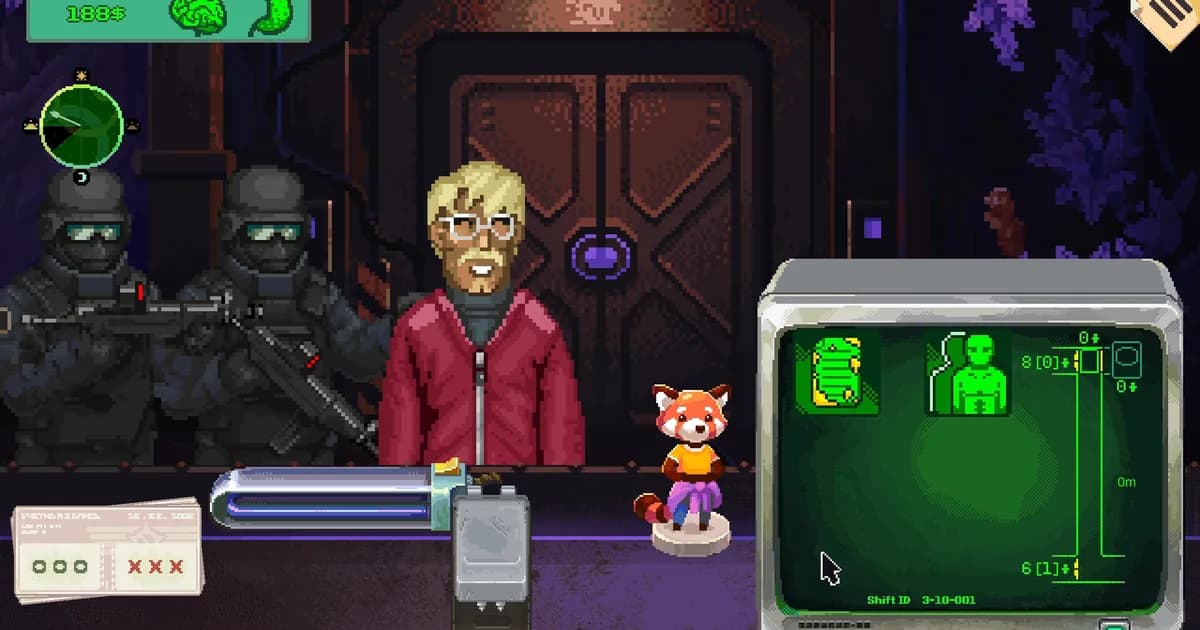
This Security 51 tips guide covers the checkpoint Manual, the isolation ward's real risks, and the sanity meter that quietly runs out on new players. Security 51 drops you at a desk with a UV light and a line of visitors who may not all be human, and the game genuinely does not slow down to explain any of it. Everything here traces back to Alawar's own Steam achievement descriptions and store page. Our Security 51 review covers whether the full game is worth buying in the first place, so treat that as the companion piece to this one.
Sponsored

About the game
Security 51
Alawar · Alawar
TL;DR: Follow the desk Manual literally: it lists exact conditions for calling security, letting someone through, or sending them to quarantine, and guessing instead of reading it is the fastest way to fail a shift. The isolation ward and blood test both carry their own follow-up risk (Steam's own achievement text confirms you can graze an anomaly while sampling blood), and a sanity meter runs in the background that sandwiches, pastries, and antidepressants can top back up. At least 3 floors exist, each gated behind its own achievement, so this isn't a one-location loop that just gets harder.
BESTPRICE: Want Security 51? Eneba sells a Steam key: Buy on Eneba →
How do you play Security 51? (quick answer)
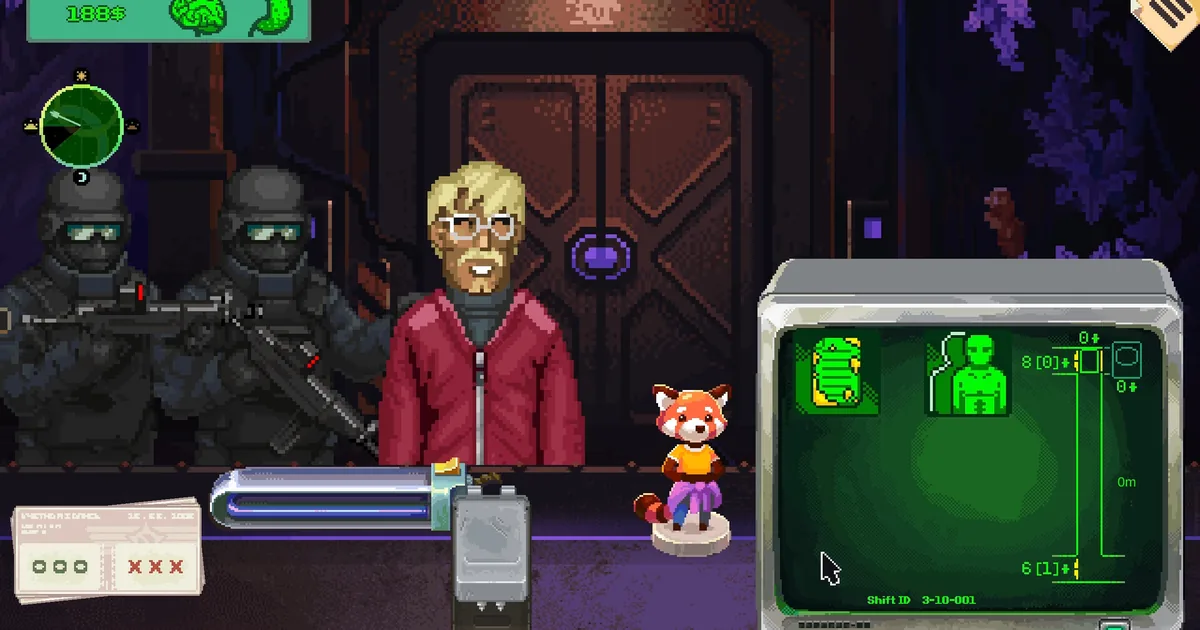
You're a checkpoint officer stationed inside Area 51, per Alawar's own description: inspecting visitors, cross-checking credentials, and making sure classified anomalies don't slip past the perimeter. Practically, that means checking each visitor's passport and pass against a Manual of written rules, using tools like a UV light and a fingerprint scanner to catch discrepancies, then deciding to let them through, call security, or send them to the isolation ward.
Sponsored

Key takeaways
- Security 51 launched August 12, 2026 from developer and publisher Alawar, priced $9.99 on Steam, currently Mostly Positive (449 reviews, 71% positive at audit time).
- The Manual posted at your desk lists exact, literal conditions for each decision. Read it every shift: the conditions can change.
- The isolation ward and blood test both have real follow-up risk, confirmed by Steam's own achievement descriptions (alarms, emergency situations, accidentally grazing an anomaly).
- A sanity meter runs in the background. Sandwiches, pastries, and antidepressants are all purchasable and all restore it.
- At least 3 floors exist: your starting checkpoint, a confirmed 2nd floor, and a confirmed 3rd floor.
- Most players clear one mistake-free shift (96.4% have Excellent Guard). Far fewer string five in a row (44.4% have Professional), so consistency, not any single hard decision, is what actually separates a good run from a great one.
- Steam achievement descriptions are a legitimate primary source for undocumented mechanics; this site used the same method for Denshattack's achievement guide.
The checkpoint Manual: read it, don't memorize it
This is the section worth getting right before anything else. Your desk has a physical Manual, and Alawar built it as an actual in-game reference document with numbered conditions, not flavor text. A typical example spells things out literally: mismatched details between a passport and pass (name, number, or photo) means call security, ignoring whatever else the visitor's paperwork shows. Separately, it lists specific override conditions, like a skull visible under UV light on the papers, that mean let the visitor through, ignoring every other instruction on the list.
The trap for new players is treating the Manual like a tutorial you read once. It isn't. The specific conditions attached to "call security" and "let through" change as you progress, and a rule that was correct on your first shift can be wrong, or replaced entirely, several shifts later. Re-check the Manual at the start of every shift rather than running on memory from the last one.
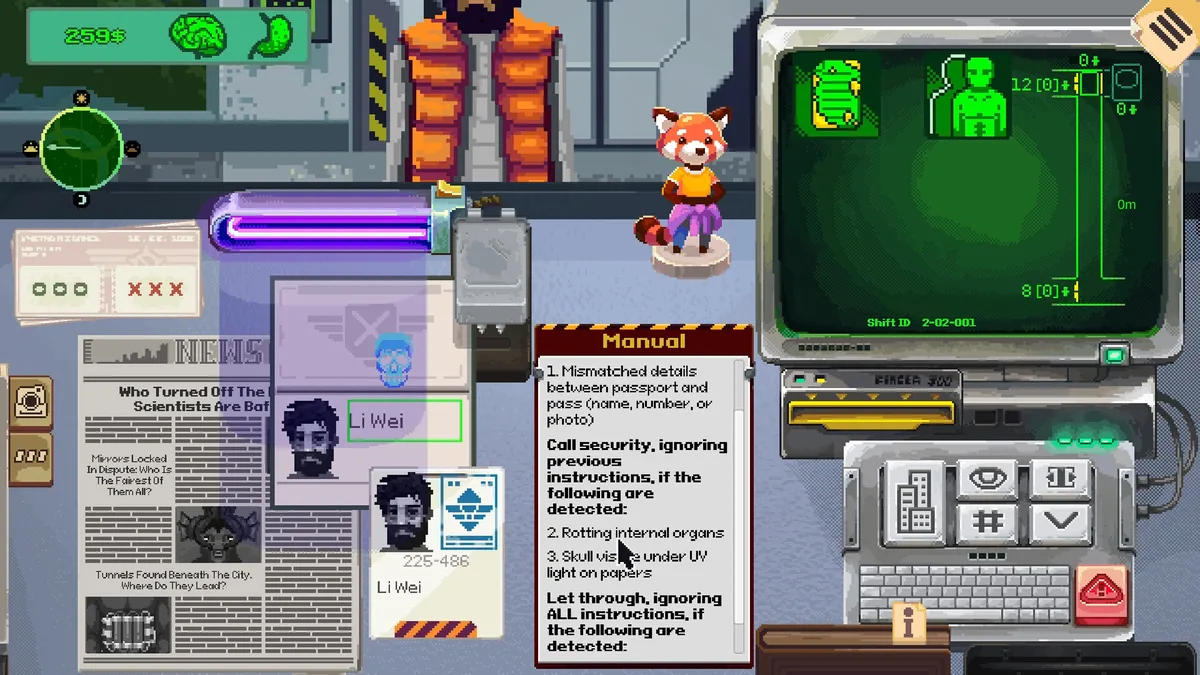 The Manual's exact wording matters. "Ignoring previous instructions" and "ignoring ALL instructions" are two different override strengths, and misreading which one applies is an easy way to wave through something you shouldn't.
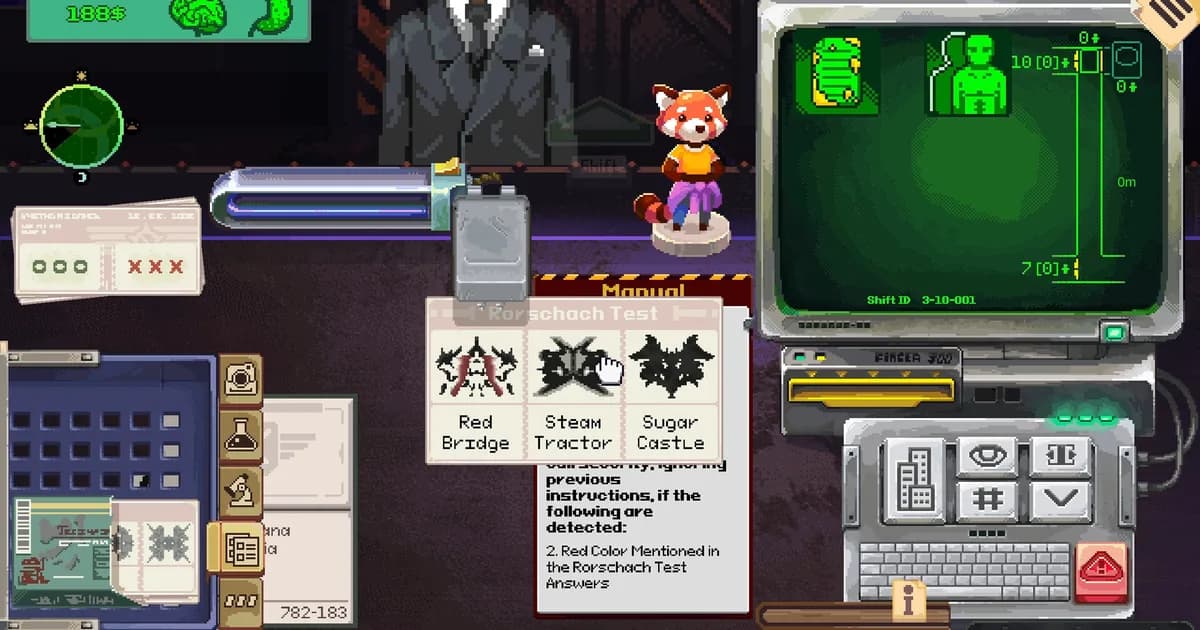
Your verification toolkit includes a UV light for hidden markings, a fingerprint scanner (labeled FINGER 300 on the desk hardware) for identity checks, and, per the achievement list, a Rorschach test that specifically tracks a visitor's answers. None of these tools work in isolation. The Manual tells you which combination of results actually triggers a decision, so pulling one tool and skipping the others is how borderline cases get missed, the same "read the actual rule, don't guess" discipline this site applies to roster and mechanic claims in every achievements guide it publishes.
GODEEPER: If you're deciding whether Security 51 is worth the desk-and-Manual loop in the first place, our full review breaks down how the verification system escalates from bureaucratic to genuinely unsettling over a full playthrough. Security 51 Review: Papers Please Meets Area 51 Horror →
The isolation ward: what happens after you quarantine someone
Sending a visitor to the isolation ward isn't a safe default when you're unsure. Steam's own achievement descriptions confirm it's a second gameplay loop with its own risks: Quarantine tracks sending people there, We Have a Disco Ball and Maître D' track higher volume milestones (50 and 100 respectively), and Weird Science specifically rewards conducting all experiments available in the ward. Separately, I Saw Some [Redacted] tracks facing 25 emergency situations inside it, which confirms the ward can go wrong on its own terms, not just at your desk.
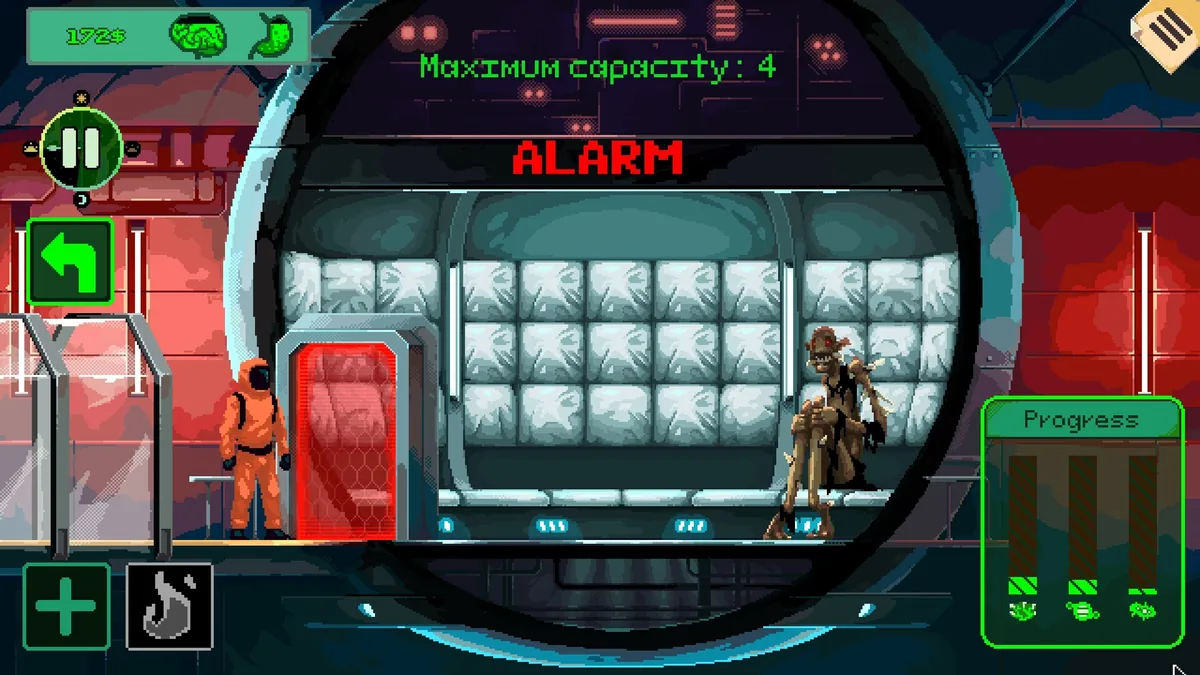 The isolation ward has its own capacity limit and its own alarm state, confirming it runs as a genuinely separate system rather than a simple holding cell.
Treat quarantine as a decision with consequences, not a way to pass a hard call to someone else. If the Manual's conditions genuinely don't resolve a visitor one way or the other, isolation is the correct move, but going in expecting it to always be the safe, no-cost option will catch you off guard the first time an alarm fires in there. It's the same discipline this site's Gamble With Your Friends achievements guide applies to rarer, riskier unlocks: verify against the source before committing, rather than guessing and hoping.
Blood testing and the anomaly risk
Blood sampling is one of the game's verification tools, and it's not risk-free to perform. The This Will Only Sting a Bit achievement, sitting at 30.4% of players, fires specifically for accidentally grazing an anomaly while taking a blood sample; a real, tracked failure state built into a routine-sounding action. That's a genuinely different design choice from a lot of inspection sims, where the paperwork check is the tense part and the physical tools are just confirmation steps.
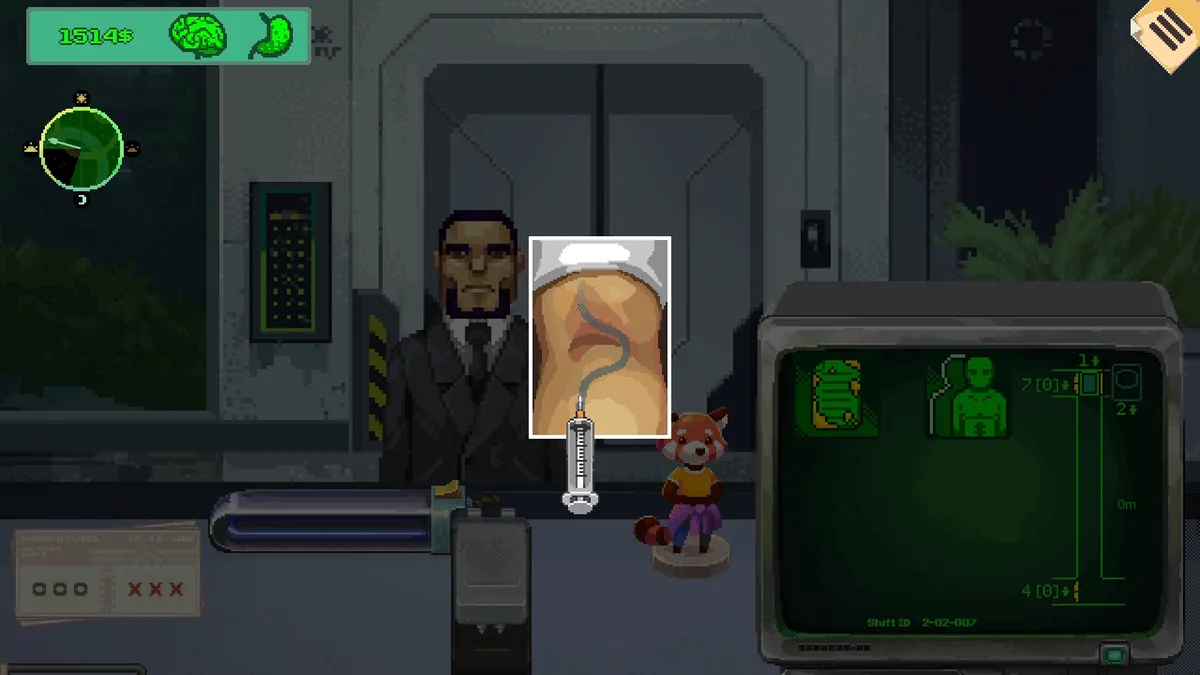 The blood sample tool looks like a routine confirmation step, but Steam's own achievement data confirms it can go wrong on a specific visitor type.
Practically: don't reach for the blood sample as a first-resort tool the way you might reach for the UV light. Use it when the Manual's other checks have already flagged something specific worth confirming, not as a blanket extra step on every visitor, since that's exactly the pattern that turns a routine sample into a grazed anomaly.
Managing your sanity meter
A sanity meter tracks your mental state across a shift, visible on the desk HUD alongside your cash total. Steam's own achievement text confirms it can bottom out entirely: Hard Day fires for ending a workday with exactly 1 point remaining, and No Overtime! tracks simply running out of time, which reads as a related, adjacent failure state. Three purchasable items counter it directly, per the achievement list: sandwiches (Full Belly, Happy Heart, 3 in one evening), a single pastry (A Little Treat!), and antidepressants (Bring Me Antidepressants, Santa!, 50 purchases).
Don't wait until the meter is nearly empty to buy something. The shop items are cheap relative to your cash total in the early game, and running the meter down to nothing appears to have real downstream effects on your shift, not just a cosmetic bar. Building a habit of buying a sandwich or pastry between visitors costs almost nothing and avoids finding out the hard way what a fully-drained meter actually does to your decision-making. It's a similar discipline to keeping a stress or hunger meter topped up in Abiotic Factor's beginner guide: small, cheap, frequent top-ups beat one big correction after the fact.
GODEEPER: Resource-management-under-pressure is a mechanic this site has covered from a very different angle in the Gamble With Your Friends bankroll guide, worth a look if you like seeing how other indies handle a ticking-down resource. Gamble With Your Friends Strategy Guide: All 4 Floors →
Floor progression: what changes as you move up
At least 3 distinct floors exist, each confirmed by its own Steam achievement: your starting checkpoint, a 2nd floor unlocked via the New Workplace achievement (46.8% of players), and a 3rd floor unlocked via Where the Hell Am I? (31.8%). The drop-off between those two numbers (roughly 15 percentage points) suggests the 2nd-to-3rd floor jump is a real difficulty step, not a formality.
Don't expect each floor to just reskin the same checkpoint loop. The achievement list gestures at genuinely new mechanics appearing later (Weird Science's isolation-ward experiments, the wide range of hidden pop-culture-reference achievements tied to specific rare anomaly encounters) rather than the same Manual-and-tools loop simply running longer. Budget extra time and caution for your first shift on a new floor rather than assuming your Floor 1 routine transfers directly.
Security 51 isn't the only recent indie horror release worth checking on this site if the Area 51 setting appeals to you. Our Halloween: The Game review covers a very different horror sim, but both share the same design bet: a familiar real-world setting used as the delivery mechanism for something that stops feeling routine partway through.
Step-by-Step: your first shift, start to finish
1. Read the Manual before your first visitor: don't skip straight to checking IDs. The numbered conditions at your desk are the actual rules for this specific shift, and they can differ from the last one you worked.
2. Run the full toolkit on anything borderline: UV light, fingerprint scanner, and Rorschach test each catch different discrepancies. A visitor who passes one check can still fail another.
3. Match what you find against the Manual literally: don't decide from instinct. If the posted conditions say call security for a specific mismatch, do that even if the visitor seems fine otherwise.
4. Use quarantine for genuine uncertainty, not convenience: the isolation ward has its own risks (alarms, emergency situations), so it's a real decision, not a free pass to skip a hard call.
5. Keep an eye on your sanity meter between visitors: buy a sandwich or pastry proactively rather than waiting until the meter is nearly empty.
6. Reserve the blood sample for confirmed flags: it carries a real risk of grazing an anomaly, so don't run it on every visitor as a routine extra step.
Frequently Asked Questions
How do you play Security 51? You check visitors' passports and passes against a posted Manual of rules, using a UV light, a fingerprint scanner, and a Rorschach test to catch fakes. Follow the Manual's checklist: call security if it lists a red flag, let through if it lists an override, quarantine anything you can't resolve.
What does the isolation ward do in Security 51? It's where you send visitors you can't clear at the checkpoint. Steam's own achievement list confirms it tracks alarms, running experiments, and handling emergency situations, so treat a quarantine call as the start of a second, riskier decision loop, not the end of one.
How does the sanity system work in Security 51? A meter tracks your mental state across a shift, and Steam's stats page confirms it can hit zero (the Hard Day achievement fires at exactly 1 point remaining). Sandwiches, pastries, and antidepressants are all purchasable in-game, and buying them is how you keep the meter from bottoming out.
How many floors are in Security 51? At least three are confirmed through Steam's achievement list: your starting checkpoint, a 2nd floor (New Workplace), and a 3rd floor (Where the Hell Am I?). Each floor move is tied to its own achievement, so progression is a real, trackable structure, not just a difficulty ramp.
Is Security 51 hard for beginners? It's forgiving on mistakes individually but unforgiving on streaks. The Excellent Guard achievement (96.4% of players have it) rewards a single mistake-free day, while Professional (44.4%) asks for five in a row, showing most players clear one clean shift easily but struggle to string several together.
Does Security 51 have a blood test mechanic? Yes. Blood sampling is one of the verification tools, and it carries real risk: the This Will Only Sting a Bit achievement (30.4% of players) fires specifically for accidentally grazing an anomaly while drawing a sample, confirming the test itself isn't always safe to perform.
Related Reading
- Security 51 Achievements Guide: All 68, Confirmed 2026: Security 51 achievements guide: all 68 confirmed via Steam, but 42 stay hidden by design.
- Gamble With Your Friends Strategy Guide: All 4 Floors: another indie's take on managing a ticking resource under pressure.
- Gamble With Your Friends Achievements Guide: a full achievement-list breakdown using the same Steam-sourced verification approach as this guide.
- Winter Burrow Achievements Guide: another indie where the achievement list itself became the primary source for undocumented mechanics.
- Black Jacket Guide: Blackjack Roguelite Tips: a different genre entirely, but a similar case of a simple-looking core loop hiding real decision-making depth.
References
- Security 51 on Steam: official store page, price, and review data.
- Security 51 Steam Community Achievements: the primary source for every mechanic detail (isolation ward, blood test risk, sanity meter, floor progression) referenced in this guide.
Was this guide helpful?
About the author

Action & Design Desk
GameBrief's byline for platformers, horror and action games. Dry, short paragraphs, strong opinions about tutorials and boss design.
- Action, platformers and horror
- Tutorials, onboarding, boss design
- Sources listed per article
Keep reading
Security 51 Achievements Guide: All 68, Confirmed 2026
General · 12 min

Security 51 Review: Papers Please Meets Area 51 Horror
General · 7 min

IRON NEST Review: The Heavy Turret Simulator Done Right
General · 10 min

Best Base-Building and Colony Sim Games in 2026: 8 Picks
Features · 11 min

Creature Kitchen Review: A Tiny, Overwhelmingly Positive Hit
General · 5 min

Timberborn Review: The Beaver City-Builder Nails 1.0
General · 7 min
Sponsored
More game deals · affiliate links
Disclaimer
This article is published for informational and entertainment purposes. It does not constitute professional financial, legal, or technical advice. Game performance, online services, patch schedules, and store listings change. Verify critical details (pricing, system requirements, regional availability) with publishers and storefronts before you buy. Affiliate links, where present, help support our editorial work and are labelled in our affiliate disclosure.
Comments
Loading comments…