
GuideSunderfolk
Sunderfolk Arcanist Guide: Teleport Builds and Tips 2026
The Sunderfolk Arcanist is the class that makes every other player's job easier without always getting credit for it. When the Berserker lands a clean kill chain, it might be because the Arcanist spent their previous turn pulling two enemies into adjacent hexes. When the Pyromancer hits four targets with an area attack, it is because someone clustered them first.
Sponsored

About the game
Sunderfolk
Secret Door · Dreamhaven
Updated 2026-10-05: Corrected Arcanist range, class-synergy, and progression claims against the current card references and official Update 2.0 notes.
That "someone" is the Arcanist, and doing it well requires reading the room constantly.
TL;DR: Arcanist is a control-damage mage built around teleport repositioning. A tier in groups of 3+ where teleport affects multiple players. Prioritize Pull and Teleport cards over damage cards. Don't compare your kill count to the Berserker's. You're playing a different game. Patch 2.0 added the Vanguard hero and Knockback mechanic and fixed two Arcanist bugs (a Bedazzle softlock, a Fate Card damage error); it didn't change teleport ranges. Not a beginner class.
BESTPRICE: Want Sunderfolk? These stores list it: Buy on Eneba → Buy on Humble Bundle → Buy on Loaded → Buy on Gameseal → Buy on Kinguin →
Sunderfolk Arcanist: quick answer
The Arcanist repositions units (enemies, allies, and itself) on the tactical grid through teleport abilities. Every Arcanist card that moves a unit is potentially worth more than a pure damage card, because the repositioned unit stays there for everyone else's turn.
The Arcanist doesn't have the Berserker's raw damage output or the Bard's passive team multipliers. What it has is a degree of board control unavailable to any other class: enemies go where the Arcanist puts them, and the team attacks whatever cluster results.
GODEEPER: How the Arcanist fits into party composition at each group size, and when Berserker or Vanguard is the stronger frontline choice. Sunderfolk Complete Guide: All 7 Classes →
Sponsored

Key takeaways
- Arcanist is A tier in groups of 3+, where repositioning scales with team size
- Core mechanic: teleport repositions enemies, allies, or self to a specific grid hex
- Update 2.0 added the Vanguard and Knockback mechanic; Arcanist Pull + Vanguard positioning is a strong combo
- Prioritize Pull and Teleport cards over damage cards in your hand
- Control-first build: your job is to make everyone else's turn better
- Not recommended for first-run players; pick Berserker or Ranger first
- Best party pairing: Berserker (benefits from clustered enemies), Pyromancer (area attacks), or Vanguard (Arcanist delivers enemies to the Vanguard's Grit range)
Step-by-Step: Playing the Arcanist Each Round
1. Check your Mana total before picking a card: You gain 2 Mana passively each round toward a cap that starts at 10 and rises to 12 and then 15 through Workshop upgrades, so know what you can afford before committing to a play.
2. Read enemy and ally positions first: Identify which enemies are clustered, which are threatening a fragile ally, and where your teammates need to end up before you choose a Pull or Teleport target. In online groups, coordinate those destinations using the co-op setup and party tips.
3. Play Thunderclap or hold when Mana is low: Thunderclap is the only zero-cost card in the base set, so use it to stay active in early rounds while banking Mana toward a bigger play.
4. Spend Stargate for cheap repositioning: At 2 Mana, teleport 4 for yourself, then teleport any character within Range 3 to a chosen hex. Use it to pull the Bard into formation or drag a dangerous enemy off an ally.
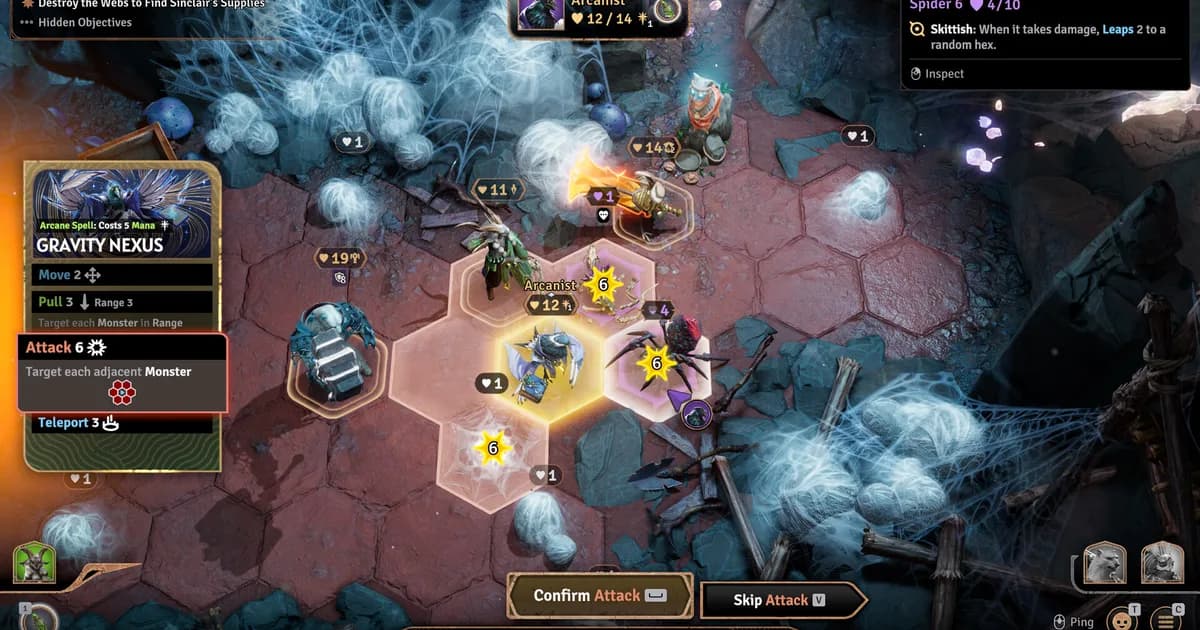
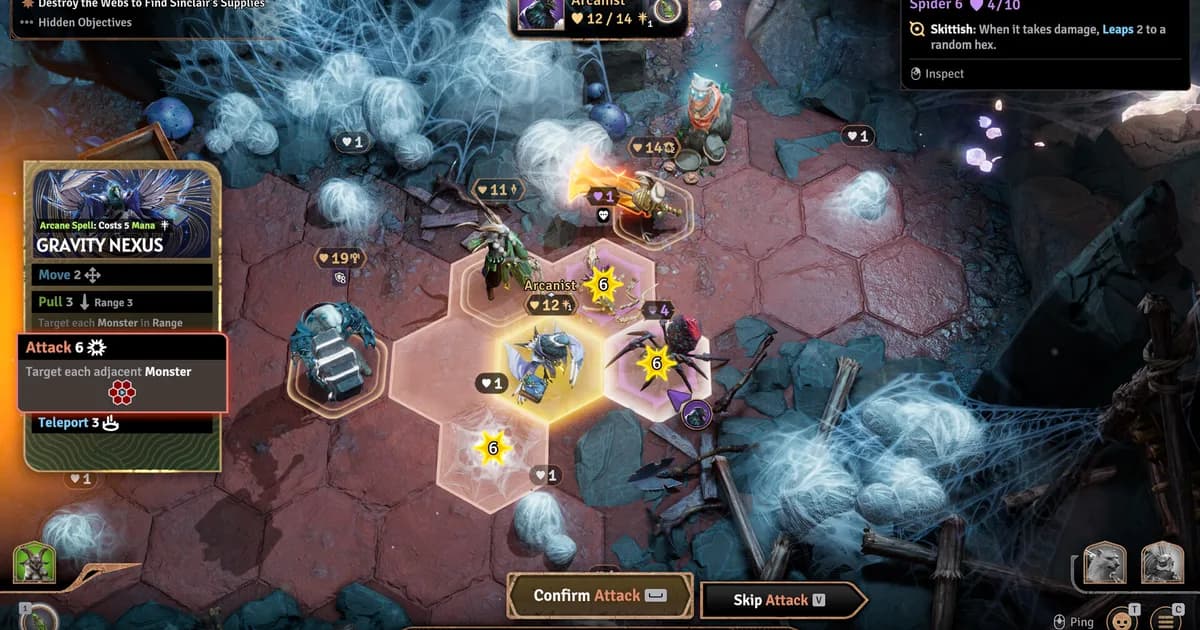
5. Fire Gravity Nexus when enemies are already close: At 5 Mana, Move 2, Pull 3 on all monsters in Range 3, Attack 6 to adjacent hexes, then Teleport 3 to safety. This is the signature card and the one to upgrade first.
6. Recover Mana with Mana Spring: It teleports you 3 hexes and restores Mana, plus 1 extra per adjacent character including enemies, so play it from mid-range where the adjacency bonus is highest.
7. Save Aetherize for a likely kill: At 8 Mana against a 10-Mana cap, it costs 80% of your pool, so only commit to it when the 3-Mana refund on a kill is likely.
How teleport and pull work
Arcanist abilities come in three categories: teleport (move a unit to a specific hex), pull (move a unit toward the Arcanist), and damage. The control abilities are the reason to pick the Arcanist. Damage cards in the Arcanist's set are secondary.
Teleport places a unit on a specific hex you choose. Against enemies, this means pulling a high-priority target away from your fragile allies, separating a cluster before it can converge, or positioning a slow enemy in a dead-end corner where it spends its turns approaching rather than attacking. Against allies, teleport moves the Bard into the middle of the formation so its next Two-Step swap can reach more allies, repositions the Ranger to a clear firing line, or repositions the Pyromancer to ignite a cluster before enemies scatter.
Pull drags a unit toward the Arcanist's current position. Pull range and pull distance vary by card. The GRAVITY NEXUS card (Pull 3, Range 3, adjacent-target attack) lets you collapse enemy spacing in ways that set up both Arcanist follow-up attacks and other players' area attacks. After a pull, the pulled enemy is within attack range of whoever is standing near the Arcanist.
The key mistake with pull is using it reactively: "this enemy is about to attack my ally, pull it away." That's better than nothing but it's not full-value Arcanist play. Full-value pull is looking three turns ahead: positioning enemies so the Pyromancer's line or area attack catches four of them at once, or clustering enemies adjacent to the Berserker before the Berserker's turn fires.
The Mana System: resource planning for every round
The Arcanist's most important resource isn't teleport range or pull distance. It's Mana.
Every round, the Arcanist passively gains 2 Mana. The Mana cap starts at 10 and increases to 12 and then 15 through Workshop upgrades. Most of the Arcanist's strongest cards cost Mana: Stargate costs 2, Storm Chain costs 1, Mirror Image costs 3, Flummox Flux costs 3, Mirror Shatter costs 4, Gravity Nexus costs 5, Chaos Beam costs 5, and Aetherize costs 8. Thunderclap is the only zero-cost card in the base set.
This means the Arcanist is always managing a budget. In early dungeon rounds, play Thunderclap (free) while banking Mana toward the high-cost payoff cards. The real decision is never "do I play a card" but "do I spend Mana now or hold it for Gravity Nexus next round."
Mana Spring is the always-available bonus card every Arcanist carries into every dungeon. It teleports you 3 hexes and restores Mana (1/2/3 depending on upgrade tier), plus 1 extra Mana per adjacent character, including enemies. In a room with 2-3 enemies nearby, a single Mana Spring play can return 3-5 Mana while simultaneously repositioning you to a safer hex. That adjacency bonus is the reason the Arcanist plays from mid-range rather than the backline: close enough for Mana Spring recovery, far enough to avoid priority targeting.
Practical planning: if your goal for the round is Gravity Nexus (5 Mana) followed by Mirror Image (3 Mana), you need 8 Mana available. At 2 passive gain per round, that requires 4 full rounds from empty. Mana Spring recoveries and Storm Chain (1 Mana, hits two targets) are what shorten that window. Keep Mana Spring upgraded ahead of everything except Gravity Nexus.
One ceiling note: with the 10-Mana cap, Aetherize costs 80% of your total pool. Fire it only when a kill refund is likely. Once Workshop upgrades raise the cap to 12, Aetherize becomes a more regular finisher rather than an emergency-only card.
Reading the room: the Arcanist's real skill requirement
Every class in Sunderfolk benefits from reading the room. The Arcanist requires it at a deeper level than any other class.
Before playing any card, the questions are:
- Where will each enemy move on its turn?
- Where does each ally need to be to maximize their cards?
- What's the two-turn setup? (Turn 1 repositions, Turn 2 commits)
The Rogue needs to read the room to set up stealth. The Arcanist needs to read the room to evaluate every single card choice, because teleport cards are useless if you move things somewhere wrong. A misplaced teleport doesn't just waste a card; it potentially puts an ally in a worse position or an enemy in a more dangerous one.
This is why the Arcanist is not a first-run class. You can't read the room on your first dungeon because you don't know yet how enemies move, which patterns the game uses, or where your allies will be on their turns. That knowledge is built up over multiple runs.
Build: control-first (recommended)
Card selection priority: Pull and Teleport effects first, then damage.
When building your hand at the start of a dungeon, evaluate cards by control impact. How many units does this card move? How far? Do the resulting positions benefit my team? A card that does 3 damage and pulls an adjacent enemy is potentially worth more than a card that does 10 damage to a single target, depending on what your party can do with the repositioned enemy.
The damage floor doesn't drop to zero. The Arcanist's damage cards interact with its control setup: after pulling enemies into cluster, an area attack that hits all of them is high-value damage. The damage cards you want are area-effect cards that punish the enemy positions you've been creating.
What to avoid: building for single-target damage output. The Arcanist isn't the Ranger. If you're trying to compete with damage dealers on kill count, you're spending cards in a way that does less total value for the group than a control-first approach.
The Arden hub labels the town facilities that support Workshop upgrades and party preparation between missions.
Sunderfolk Arcanist cards and Forge priority
Knowing every card in the Arcanist's set is the prerequisite for making good Forge decisions. Some cards that look strong in isolation compete directly with a higher-value option in the same Mana slot.
Core cards (upgrade first, never cull):
Gravity Nexus (5 Mana) is the signature card: Move 2, Pull 3 on all monsters in Range 3, Attack 6 to adjacent hexes, then Teleport 3 to safety. The combination of mass Pull, area damage, and self-repositioning in one card is unmatched in the set. Upgrade this first. Both the Pull range and Attack 6 scale with upgrades.
Stargate (2 Mana) is the most Mana-efficient control card in the set: Teleport 4 for yourself, then teleport any character in Range 3 to a chosen hex. At 2 Mana, it costs less than half what Gravity Nexus does while affecting both allies and enemies. Upgrade priority second.
Mana Spring (bonus card, always available) returns Mana while repositioning you. At tier 3, it restores 3 Mana plus the adjacency bonus. Upgrade this before Aetherize, because faster Mana recovery funds every other high-cost play.
Situational cards (keep if running a specific build):
Mirror Image (3 Mana) places two Decoys at Range 3. A Decoy is a 1-HP allied unit that draws enemy targeting, giving your fragile allies some breathing room. Mirror Shatter (4 Mana) destroys active Decoys for Attack 6 plus 1 per Decoy destroyed, then creates a new Decoy. With two Decoys in play, Mirror Shatter hits for 8 before Fate cards; with three, it hits 9. The combo sequences correctly across rounds: Mirror Image round 1, Gravity Nexus round 2 (different Mana ceiling, no conflict), Mirror Shatter round 3.
Important caveat on Decoys: not all enemies are fooled by them. Reaper-type enemies in the Fog Corridor missions have pull targeting that bypasses Decoys entirely and pulls heroes regardless. Read the encounter type at mission start before committing 3 Mana to Mirror Image in those fights.
Storm Chain (1 Mana) hits a primary target at Range 3 for 4 damage, then a random secondary target within Range 2. Low Mana cost for two attacks is efficient. The secondary target is random, which limits setup value, but in crowded rooms the probability of a useful secondary hit is high. Worth keeping in most builds.
Cards to consider culling:
Flummox Flux (3 Mana) teleports you and attacks random targets within 2 hexes, inflicting debuffs. The randomness on targeting conflicts with the Arcanist's setup-dependent playstyle. If your hand already has Stargate and Gravity Nexus as the control backbone, Flummox Flux often sits unused while occupying the same 3-Mana slot as Mirror Image. Cull it if the Forge offers a second Stargate or an upgraded Storm Chain.
Aetherize (8 Mana) is the finisher: Attack 15 at Range 3, plus 1 per Mana remaining after casting, and a 3-Mana refund on kill. At a 15-Mana cap (fully upgraded), Aetherize deals 22 damage before Fate cards and refunds 3 on a kill. It is the correct card against single high-HP targets when the Mana cap and encounter justify the cost. With the 10-Mana cap, consider removing it from the starting hand when the math is unfavorable; bring it back when Workshop upgrades raise the cap to 12 or 15.
Starfall (Ultimate, unlocked at level 6) gives Teleport 4, then attacks a small hexagon at Range 3 for 4/5/6 damage scaled by upgrade tier, Stuns the center target, Confuses all others hit, and refunds Mana per target. Pairing Starfall with a prior Gravity Nexus pull maximizes the hexagon's target count and the Mana refund.
Party synergies
Arcanist + Berserker: The Berserker wants enemies adjacent. The Arcanist delivers enemies adjacent. Protector's Fury grants Rage for one round when the Berserker takes damage; while Rage is active, the Berserker deals more damage and takes less. Pulling enemies into reach helps the Berserker stay in the frontline where that documented trigger can occur. This is the most naturally synergistic pairing in the game.
Arcanist + Pyromancer: The Pyromancer's line and area attacks benefit from clustered enemies, while Firepower comes from moving onto Fire rather than from a spread chain. Arcanist's Pull and Teleport create useful target shapes. In a four-player group with both, the Arcanist sets up the cluster and the Pyromancer spends Firepower on the best area attack. The Pyromancer needs to be in range after the Arcanist's setup, so do not pull everything toward the wrong side of the board.
Arcanist + Bard: Music notes come from the Bard's own Two-Step swap or from specific Bard cards and trinkets, not from being moved by an outside effect, so Arcanist teleport doesn't generate a note by itself. What it does instead: Stargate or a straight Teleport can pull the Bard out of a bad tile or drop it into the middle of the formation before the Bard's own turn, so when the Bard uses Two-Step, the swap partner is already close and the resulting note lands somewhere three or four allies can reach. The planning question shifts from "where does teleport put the Bard" to "where does the Bard need to stand so its own Two-Step pays off." In a four-player group with Bard, Berserker, Arcanist, and Pyromancer, the Arcanist is simultaneously managing enemy clusters, Bard pre-positioning for a strong Two-Step, and Pyromancer range. It's the most complex coordination in the game, and also one of the highest-output configurations at endgame difficulty.
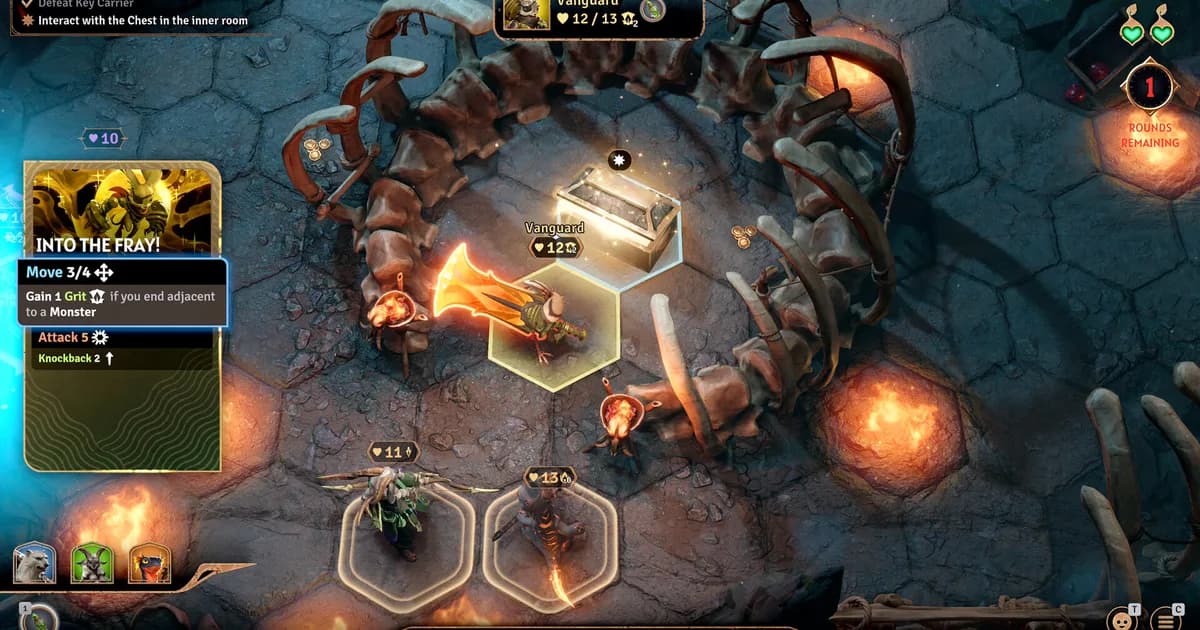
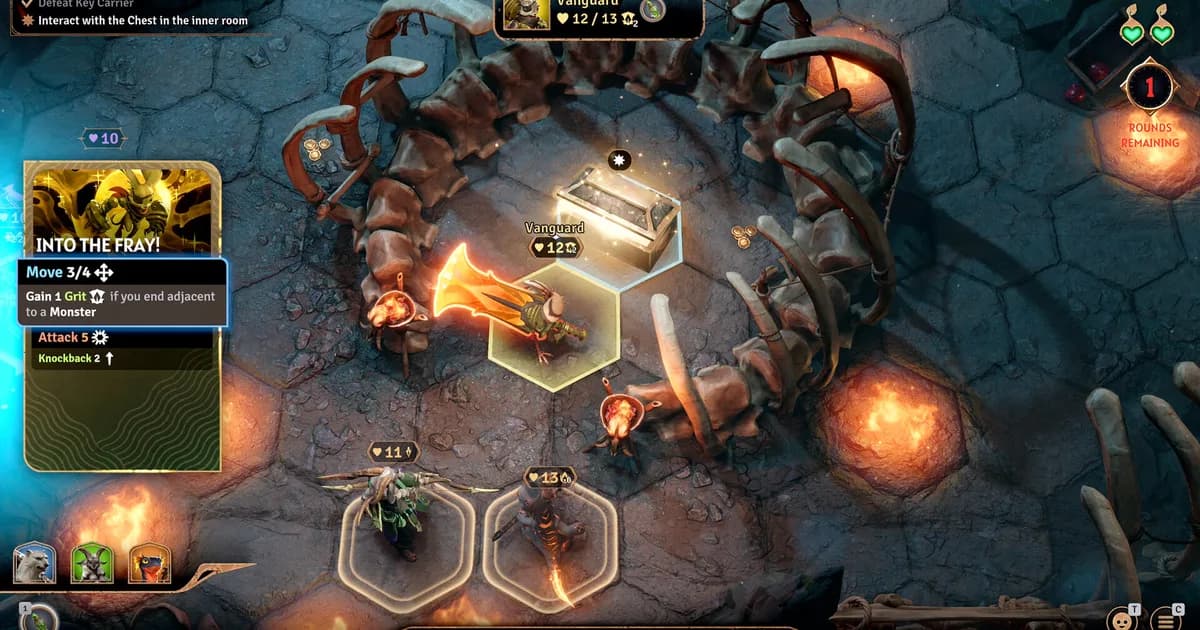
Arcanist + Vanguard: The Vanguard (added in Update 2.0) builds Grit through certain Skill Cards. Grit increases its damage and reduces incoming damage, and an enemy hit while Grit is active can trigger retaliation while removing a stack. Arcanist Pull abilities bring enemies toward the Arcanist's position, making it easier for the Vanguard to stand in the frontline and use its documented Grit loop. Conversely, the Vanguard's Knockback abilities, such as Into the Fray, can scatter enemies that the Arcanist can then Pull back into a tighter cluster. In practice, the Arcanist creates useful positions while the Vanguard uses its own cards to build and spend Grit. In solo mode, Arcanist plus Vanguard is a functional pairing because the Arcanist supplies control and the Vanguard supplies a durable frontline.
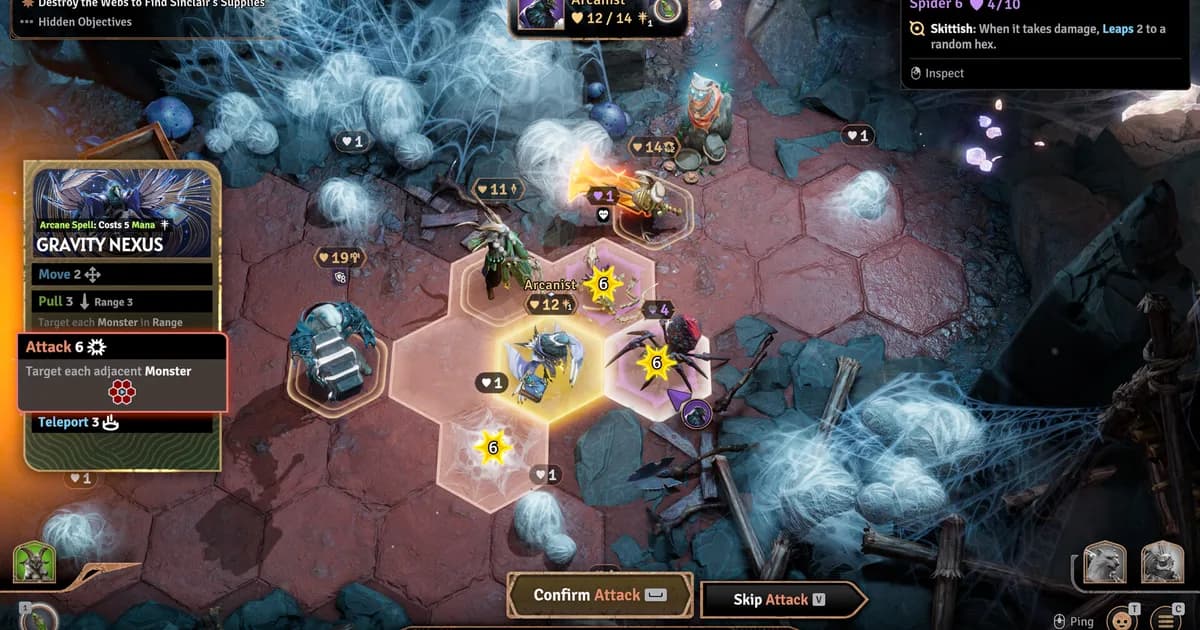
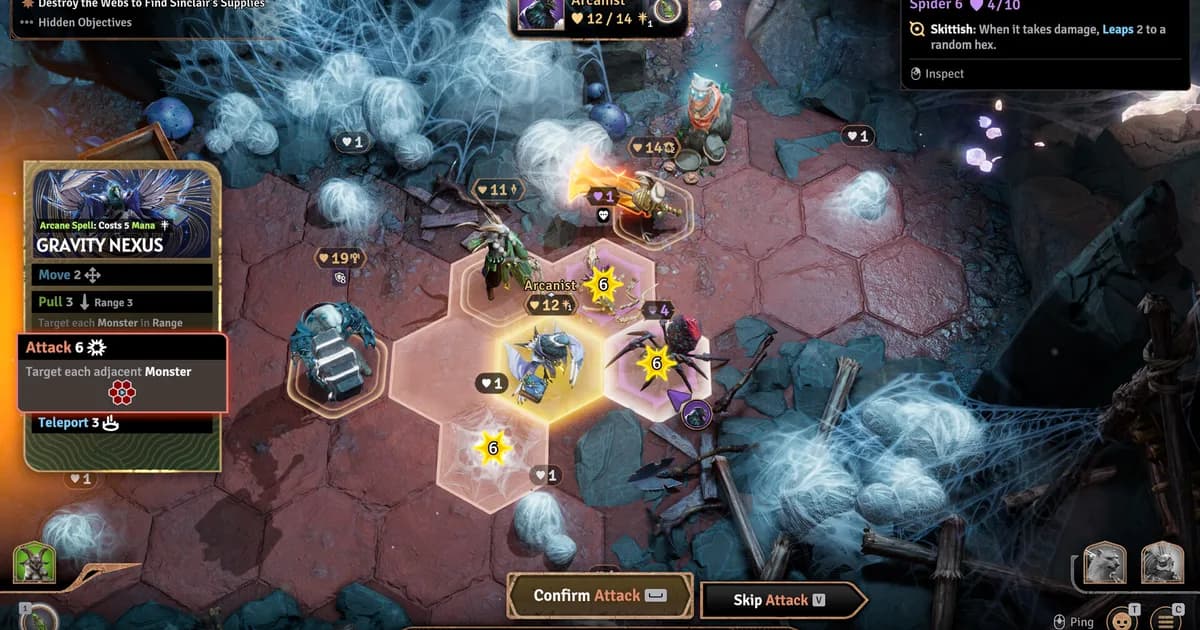
Gravity Nexus shows Move 2, Pull 3, Attack 6, and Teleport 3 on the Arcanist's combat screen.
GODEEPER: Why Bard notes come from Two-Step and specific cards instead of movement, and how Arcanist positioning sets up stronger Two-Step swaps for team-wide buffs. Sunderfolk Bard Guide: Music Note System and Best Builds →
Difficulty and progression: confirmed Arcanist scaling
The current campaign reference documents a prologue and three acts, with difficulty settings changing enemy spawn counts, elite monsters, Frenzy, round limits, and available life seeds. Those system-level changes can make control and positioning more valuable, but the authoritative sources do not document a separate Cycle 1, Cycle 2, or Cycle 3 Arcanist balance model.
The official Arcanist spotlight confirms that abilities unlock as you level and that Starfall is the Level 6 ultimate. The current card reference documents the Mana cap progression from 10 to 12 to 15 and the complete Arcanist card set. Use those confirmed unlocks and your chosen difficulty when planning upgrades; treat cycle-specific enemy scaling or spawn claims as undocumented rather than fixed Arcanist mechanics.
Arcanist in solo play
Sunderfolk solo uses a two-hero control system where you play two classes simultaneously. The Arcanist works in solo, but its control value scales with how many players benefit from repositioning. When you're the only player other than the Arcanist's partner, the setup payoff is more contained.
Arcanist + Berserker is the strongest solo pairing: the Berserker benefits directly from every enemy you pull into adjacency range. Arcanist + Ranger also works if you want to play at range, using pull to keep enemies in the Ranger's firing positions.
The solo caveat: the Arcanist's turns that don't deal damage feel more expensive when you're managing two heroes than when you're part of a four-player group where other players are hitting things while you reposition. In solo, every Arcanist control turn is a turn your partner isn't also contributing. Factor that into your hand evaluation.
Related Reading
- Sunderfolk Complete Guide: All 7 Classes 2026: party composition at every group size, tier list, and where the Arcanist fits against the Vanguard in the control slot.
- Sunderfolk Berserker Guide: Protector's Fury and Best Builds: how the Berserker's adjacency-based mechanics make it the natural partner class for Arcanist repositioning.
- Sunderfolk Bard Guide: Music Note System and Best Builds: how Two-Step and specific cards generate music notes, and why Arcanist positioning sets up stronger Two-Step swaps for the whole team.
- Sunderfolk Class Tier List: All 7 Heroes Ranked 2026: where Arcanist sits in the overall ranking and how its active repositioning compares with the Vanguard's Grit and Knockback tools.
- Sunderfolk Vanguard Guide: Grit, Retaliation, Best Builds: the other A-tier group control option, how Vanguard's passive approach differs from Arcanist's active repositioning.
- Sunderfolk Pyromancer Guide: Fire Builds and AoE Tips 2026: Sunderfolk Pyromancer guide: Firepower fuels area damage, but the class dies fast. Correct positioning, frontline requirements, and....
- Sunderfolk Ranger Guide: Range Builds and Party Tips 2026: Sunderfolk Ranger guide: A tier ranged damage and traps.
- Sunderfolk Rogue Guide: Stealth Builds and Tips 2026: Sunderfolk Rogue guide: C tier for most players, technically powerful for experienced ones.
- Sunderfolk Online Co-op Guide: Setup, Fixes, and Party Tips: Sunderfolk online co-op supports 1-4 players on Steam and Epic.
References
- Sunderfolk on Steam: official store page and current game status
- Meet Your Heroes: The Arcanist: official class overview, unlocks, and card descriptions
- Sunderfolk Update 2.0 announcements: official patch notes for the Arcanist fixes and Vanguard release
- Sunderfolk campaign setup: documented acts, party size, and difficulty effects
- r/Sunderfolk: community Arcanist build discussions, teleport range threads, and patch 2.0 reaction posts
- Arcanist on Sunderfolk Wiki: card values, Mana system details, and ability descriptions for the full card set
Frequently Asked Questions
Is the Arcanist good in Sunderfolk? A tier in groups of 3 or more. The teleport repositioning scales with team size: in a four-player group, one good pull benefits up to three other players simultaneously. In solo, the control value is more contained but still functional when paired correctly. Fully mastered, the Arcanist is the highest-impact class in a coordinated four-player group.
How does teleport work? Teleport places a unit (enemy, ally, or the Arcanist) on a specific hex you choose. Range and targeting vary by card. For example, Stargate teleports the Arcanist 4 and a character in Range 3, while Gravity Nexus teleports the Arcanist 3. The official Update 2.0 notes document Arcanist bug fixes, not a general teleport-range rework. The point of teleport is setting up positions that benefit your whole team's next turn.
What's the best Arcanist build? Control-first. Prioritize Pull and Teleport cards over damage cards. Your job is to make enemies attack from bad angles and die to your teammates' cards, not to compete on kill count. Damage cards that hit clustered enemies are worth keeping; single-target damage cards are lower priority than any control card.
How does Arcanist compare to Berserker? Berserker deals more direct damage and has clearer feedback on what it's doing right. Arcanist does more team-enabling work that's harder to see directly but changes what's possible for everyone. They're the strongest pairing in the game when the Arcanist commits to creating adjacency for the Berserker.
Is Arcanist beginner-friendly? No. Start with Berserker or Ranger. The Arcanist requires reading enemy movement patterns, knowing ally card ranges, and planning two turns ahead. That knowledge comes from playing the game, not from reading a guide. Come back to Arcanist after your first few runs.
What did patch 2.0 change? Patch 2.0's direct Arcanist changes were two bug fixes: the Bedazzle Fate Card could softlock the game, and a separate Fate Card was subtracting damage instead of adding it when Mana dropped under 10. Both are fixed now. Teleport ranges weren't touched. The bigger 2.0 change for Arcanist was indirect: the new Vanguard hero's Knockback ability gives Arcanist a second class to set up pulls with.
Was this guide helpful?
About the author

Indie & JRPG Desk
GameBrief's byline for indie, JRPG, visual novel and cozy games. Warm, direct, and willing to say which one to buy.
- Indie, JRPG and visual novels
- Early access and survival
- Sources listed per article
Keep reading
Sunderfolk Pyromancer Guide: Fire Builds and AoE Tips 2026
General · 16 min
Sunderfolk Ranger Guide: Range Builds and Party Tips 2026
General · 7 min
Sunderfolk Rogue Guide: Stealth Builds and Tips 2026
General · 16 min
Sunderfolk Vanguard Guide: Grit, Retaliation, Best Builds
Guides · 7 min
Sunderfolk Bard Guide: Music Note System and Best Builds
General · 7 min
Sunderfolk Berserker Guide: Protector's Fury and Best Builds
General · 8 min
Sponsored
Disclaimer
This article is published for informational and entertainment purposes. It does not constitute professional financial, legal, or technical advice. Game performance, online services, patch schedules, and store listings change. Verify critical details (pricing, system requirements, regional availability) with publishers and storefronts before you buy. Affiliate links, where present, help support our editorial work and are labelled in our affiliate disclosure.
Comments
Loading comments…