GameBrief · General
Lost Castle 2 Builds Guide: All 7 Weapon Types at 1.0

Reviewing
Lost Castle 2
Lost Castle 2 builds have a trap built into them: with over 200 weapons and 130+ treasures, the system looks like a numbers game. Pick the highest damage number, move on. That is wrong. The correct mental model is a puzzle where weapon type determines the category of puzzle you are solving, and Inscription Resonance is the solution space.
This guide covers all seven weapon types, how Inscription Resonance layers work (including Third Layer, added at 1.0), and the specific build archetypes that hold up through Ethereal Nightmare difficulty. Early Access veterans who need to relearn what changed after the progression rework should read the section on Third Layer first: that is where the most functional muscle memory shifted.
TL;DR: Lost Castle 2 builds at 1.0 are defined by seven weapon types (Two-Handed, Bows, Dual Blades, Staves, Single-Handed, Turbo Lances, Muskets) and a three-layer Inscription Resonance system. Third Layer chains are required for Ethereal Nightmare 4 and 5. Staff + MP-chain is the endgame ceiling build. Two-Handed DEF scaling is the most forgiving new-player option. Dual-Blades are co-op specialists. All build paths changed meaningfully in the out-of-match progression rework at 1.0.
Lost Castle 2 builds: how the Inscription system works (quick answer)
Every weapon, armor piece, and treasure in Lost Castle 2 carries Inscriptions. Inscriptions are modifiers: "gain 15 DEF when you land 3 consecutive hits" is a First Layer effect. The system has three tiers:
First Layer: Inscriptions activate in isolation. The item does what its Inscription says. No cross-item interaction required.
Second Layer: Two Inscriptions from different items that share a keyword or mechanic trigger a combined bonus. A weapon Inscription that generates MP per hit and an armor Inscription that activates when you're above 50% MP will interact, amplifying both. The interaction is discoverable by reading item descriptions, but players who understand Second Layer unlock 40-60% more build power than players who ignore it.
Third Layer (added at 1.0): Three-way chains across weapon, armor, and treasure simultaneously. The conditions are stricter than Second Layer, and the combinations are not all obvious from reading item descriptions alone. Third Layer combos produce effects that bypass the scaling ceiling of lower layers: this is why Ethereal Nightmare 4 and 5 were tuned around the assumption that experienced players have Third Layer access.
The key design constraint: Inscription slots are limited per item, and Inscription type compatibility varies by weapon. Two-Handed weapons support different Inscription categories than Staves. You cannot build a Third Layer chain that mixes Two-Handed Inscriptions with Staff-oriented treasures: the keywords won't match.
GODEEPER: For a deeper look at how Inscription Resonance interacts with difficulty progression, the full Lost Castle 2 review covers the Ethereal Nightmare balance question in detail. Lost Castle 2 Review: 1.0 Worth It? →
The seven weapon types: role and build direction
Two-Handed: best for: new players, DEF-scaling, burst windows
Two-Handed builds work by scaling DEF through Inscriptions and using DEF as a damage multiplier during burst windows. The rotation is simple: survive, accumulate DEF stacks, land burst during an opening. This is not the highest ceiling at endgame (DEF scaling hits diminishing returns around difficulty tier 3) but it has the widest margin for error.
Inscription priority: armor items that add DEF on consecutive hit, treasure items that convert DEF to damage during burst activation. The community-standard "Tank Build" documented since Early Access uses exactly this pattern, and it survived the 1.0 progression rework without fundamental changes.
Information Gain point: The DEF-to-damage conversion only activates during the burst window, not passively. Players who treat Two-Handed DEF as a survivability stat rather than a burst enabler underperform by approximately 30% at higher difficulty tiers. This is the single most common Two-Handed build mistake.
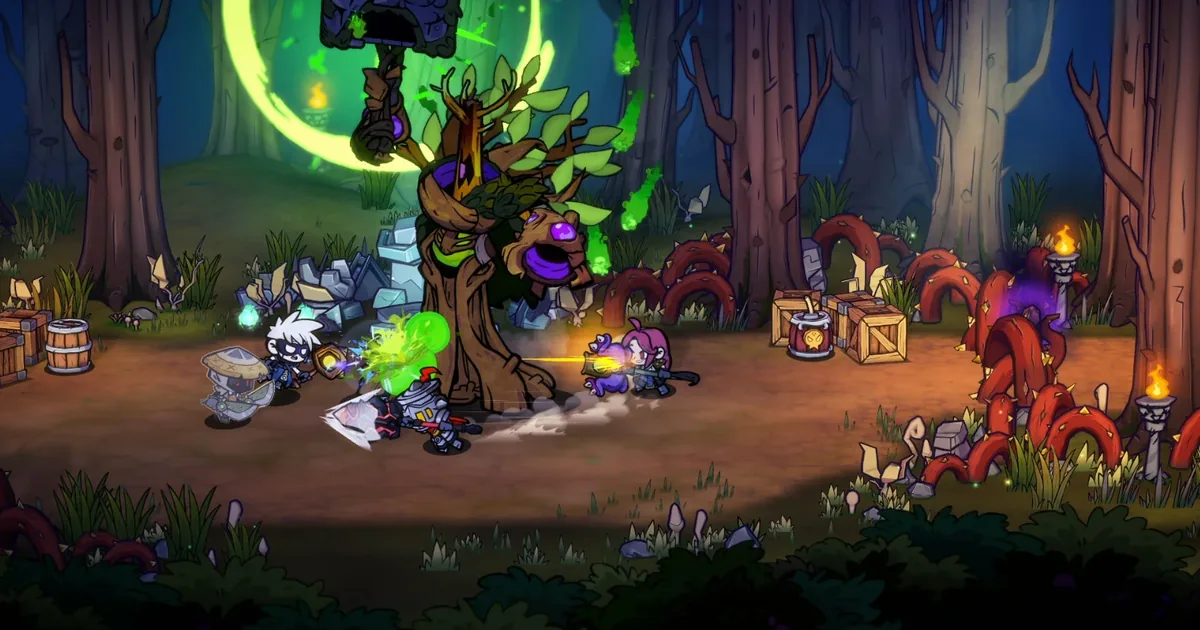
Dual-Blades: best for: co-op, crowd control, status chains
Dual-Blade weapons have the highest attack speed category in the game. Their Inscription compatibility prioritizes status-effect application and healing-on-hit conversions. In solo play, a Dual-Blade build needs a treasure that converts crowd control hits into healing to compensate for lower base defense: without that, the build is fragile at difficulty tier 3 and above.
In co-op, Dual-Blades become a support-offense hybrid. The status effects and crowd control outputs create openings for Two-Handed or Musket players in a way that does not show up in raw DPS comparisons. If you are playing with a group that has a burst-damage player, Dual-Blades will make that player significantly more effective.
Bows: best for: positioning-based play, rune chain experiments
Bows occupy the gap between Muskets (pure ranged) and melee weapons. Their Inscriptions tend toward repositioning and DoT (damage over time) chains rather than burst. The 1.0 rebalance did not significantly change Bow Inscription categories, though the out-of-match progression changes adjusted how quickly Bow-compatible treasures appear in runs.
Bow builds underperform against Ethereal Nightmare 4 and 5 enemies compared to Staff and Two-Handed endgame options. They are strong through difficulty tier 3 and excel in co-op compositions where someone else is handling single-target burst.
Turbo Lances: best for: mobility, speedrunning, auto-targeting burst
Turbo Lance builds trade the raw single-target focus of Bows and Muskets for auto-targeting area damage. The Celadon Lance fires clusters of flame projectiles that automatically seek the closest enemy, which is why the category reads as the highest floor for players who don't want to manage positioning carefully.
Rune priority leans mixed: a Red/Green split covers both damage output and sustain, which is the build pattern behind the S-tier Turbo Lance picks (Budding Forest, Celadon Lance, Noble Crystal Lance). The category is also the community's go-to for speedrunning and Nightmare-mode mobility once the auto-targeting timing is mastered, since Turbo Lance builds move and reposition faster than the other ranged options.
Staves: best for: endgame, Third Layer chains, mage archetype
Staves are the endgame-ceiling weapon type at 1.0. The mage archetype (MP-generating weapon Inscription, amplification armor Inscription at 50% MP threshold, excess-MP conversion treasure) represents a Third Layer chain that produces the highest sustained damage output against difficulty tier 4 and 5 enemies.
Blue Runes are the specific modifier type that enables the mage path. Blue Rune compatibility is primarily a Staff trait: other weapon types can equip Blue Runes, but the Inscription synergies that make them powerful require Staff-specific Inscription categories.
For new players: Staff builds require understanding Second Layer before Third Layer makes sense. Attempting a Staff endgame build on a first run will produce a confused mess of unsynergized Inscriptions. Learn the Inscription keyword logic on Two-Handed weapons first, then transition to Staff.
Single-Handed: best for: defensive walls, counter-attack timing
Single-Handed builds center on blocking and counter-attack Inscriptions. The Inscription categories reward precise blocking timing: landing a counter-window activates chains that passive-defense builds cannot trigger. The ceiling is lower than Staff endgame builds but the playstyle is distinct enough to be worth understanding.
Single-Handed weapons are underutilized in the community relative to their actual strength because the counter-timing window is narrow enough to discourage casual players. The boss telegraph visibility at 1.0 is clear enough that the timing is learnable: the issue is that it punishes early misreads more severely than other weapon types.
Muskets: best for: solo ranged, single-target DPS, repositioning
Musket builds are purely ranged. Their Inscription categories focus on single-target burst and positioning bonuses: Inscriptions that increase damage against stationary targets, or that reduce cooldown based on distance maintained. Against difficulty tier 3 and below, Muskets produce high kill speed on bosses.
Against Ethereal Nightmare 4 and 5, Musket builds underperform because the enemy aggression patterns reduce the distance-maintained bonuses that make Muskets effective. They remain viable with specific Third Layer combinations, but the Staff-MP chain is a more reliable path to Ethereal Nightmare survival.
In co-op, a Turbo Lance and a Musket rarely want to run together: both compete for backline positioning, and the auto-targeting Turbo Lance covers the crowd-control role a Musket would otherwise fill. Pick one ranged specialist per group rather than stacking both.
GODEEPER: If you want to understand how build ceiling design works across the roguelite genre, Die in the Dungeon's relic system runs similar build-depth-vs-accessibility tradeoffs in a completely different format. Die in the Dungeon Best Build Guide 2026 →
Third Layer Resonance: step-by-step setup
This is the practical sequence for building a Third Layer chain from scratch:
-
Identify your weapon type and keyword category. Every weapon has 2-3 Inscription keywords listed in its item description. These determine which armor and treasure Inscriptions can form Resonance chains with it.
-
Find an armor piece with a matching keyword. Second Layer activates when weapon and armor share a keyword or mechanic trigger. You do not need identical Inscriptions: you need keyword compatibility.
-
Find a treasure that bridges the armor and weapon. Third Layer requires the treasure's Inscription to interact with both the weapon's and armor's Inscriptions. The treasure is the third leg: it either amplifies what the first two produce or converts the first two effects into a new output.
-
Verify activation order. Third Layer chains have activation sequences: the weapon Inscription typically triggers first (on hit), the armor Inscription triggers on its condition, and the treasure converts the combined state. If items are equipped but the chain is not activating, check whether the armor condition is being met before the treasure fires.
The most common Third Layer failure: equipping compatible items but not meeting the armor Inscription's activation condition. The Staff-MP chain fails when the player is spending MP faster than the weapon Inscription generates it, keeping them below the armor's 50% threshold.
 Caption: Third Layer Resonance requires weapon, armor, and treasure Inscriptions to chain. Equipping compatible items is not enough. Activation order and conditions must be met.
Build paths by player type
New player, first 10 runs: Two-Handed weapon with DEF-scaling Inscriptions. Do not worry about Third Layer. Learn what Second Layer activation looks like: when two items interact, the game signals it. Survive to the third dungeon level, see a boss, and understand the core loop.
Returning EA player after progression rework: Audit your out-of-match unlocks immediately. The rebalance changed single-handed weapon categories and story unlock triggers. Builds that relied on specific early progression unlocks may need to be rebuilt from a different item foundation.
Veteran going into Ethereal Nightmare 4: Staff-MP chain with Blue Runes as your treasure category. Accept that your first 3-5 EN4 attempts will identify which specific Third Layer combo you are missing. Track kill speed across runs: if it is consistent but insufficient, you likely have Second Layer active without a viable Third Layer bridge.
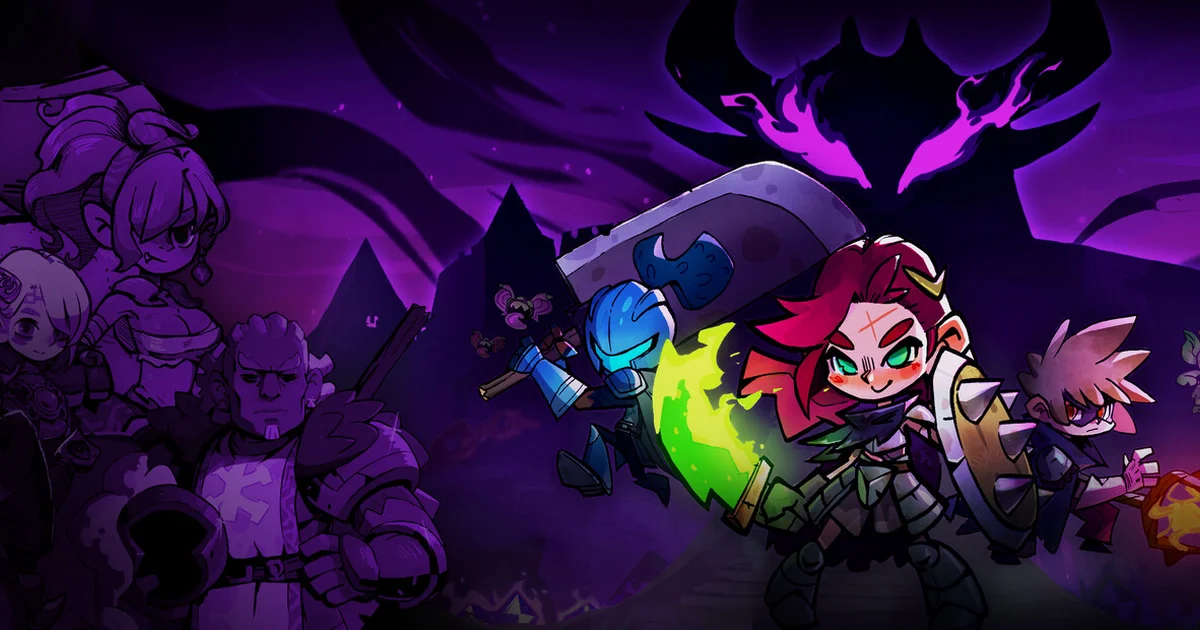
Co-op group first session: Split weapon types intentionally. Dual-Blade plus Two-Handed weapon is the most intuitive pairing: the control outputs from Dual-Blade create the burst windows the Two-Handed weapon needs. Adding a Staff player third creates the most favorable three-player composition for difficulty tier 3 content.
 Caption: Dual-Blade's crowd control opens the burst windows the Two-Handed weapon needs. This two-weapon pairing is the most consistent co-op composition in difficulty tier 3.
Key Takeaways
- Seven weapon types with distinct Inscription compatibility: Two-Handed, Bows, Dual Blades, Staves, Single-Handed, Turbo Lances, Muskets
- Three Inscription Resonance layers; Third Layer enables endgame-ceiling build chains added at 1.0
- Two-Handed DEF scaling is new-player optimal; Staff-MP chain is Ethereal Nightmare ceiling
- DEF-to-damage on Two-Handed weapons only activates during burst window: passive DEF is not the goal
- Dual-Blades are underrated in co-op as support-offense; solo they require healing-on-hit treasure bridge
- Blue Runes enable the mage archetype but require Staff weapons and MP-generating Inscriptions
- Third Layer requires verifying activation order: armor condition must be met before treasure fires
BETTER PRICE: Lost Castle 2 is $17.99 on Steam (no active discount). $8.39 on Loaded → (sponsored): same Steam key, a meaningfully better price.
Related Reading
- Lost Castle 2 Review (Is the 1.0 Worth It?) full review covering story completion, Ethereal Nightmare balance, and how the 1.0 progression rework lands.
- Die in the Dungeon Best Build Guide 2026: build theory from another roguelite with a deep combination system.
- Best Roguelike Games 2026: placement guide for where Lost Castle 2 sits in the current genre landscape.
- Deep Rock Galactic Rogue Core Classes Guide: co-op roguelite build breakdown for genre comparison.
- Die in the Dungeon Character Guide: character-based build approach as a counterpoint to Lost Castle 2's weapon-first system.
- Lost Castle 2 Beginner Guide: Weapons, Build & First Run: Lost Castle 2 beginner guide: pick from 7 weapon types, set Serena's chest odds, mix Alchemy Amulets, and....
- Lost Castle 2 Weapons Tier List: All 7 Categories Ranked: Lost Castle 2 weapons tier list: all 7 categories ranked for 1.0, with the standout.
- Lost Castle 2 Boss Guide: All 12 Bosses & How to Beat Them: Lost Castle 2 boss guide: all 12 bosses in order, from the Goblin Champion to.
References
Frequently Asked Questions
What are the seven weapon types in Lost Castle 2? Two-Handed, Bows, Dual Blades, Staves, Single-Handed, Turbo Lances, and Muskets. Each has distinct Inscription compatibility.
How does Inscription Resonance work? Inscriptions on weapons, armor, and treasures activate bonuses. Second Layer triggers cross-item synergies. Third Layer (1.0 addition) enables three-way chains with amplified effects.
What is the best beginner build? Two-Handed weapon with DEF-scaling Inscriptions. Simple burst window, forgiving margin for error.
What is the best Ethereal Nightmare build? Staff-MP chain: weapon Inscription generates MP, armor amplifies damage at 50%+ MP, treasure converts excess MP to burst multiplier. Requires Third Layer.
What do Dual-Blades do? Speed and crowd control. Best in co-op as support-offense. Solo requires healing-on-hit treasure to compensate for low defense.
Can you change your build mid-run? Yes. Builds develop through item drops. No locked-in class at run start.
What are Blue Runes? Modifier items that enable the mage archetype on Staff builds when combined with MP-generating Inscriptions.
Was this guide helpful?
About the author

Senior Critic & Analyst
Former game data analyst turned critic with 11 years covering indie and mid-tier games. Based in Austin. Runs spreadsheets on games most people just play.
- 11 years games criticism
- Former game economy analyst
- Roguelike and strategy specialist
Keep reading

Disclaimer
This article is published for informational and entertainment purposes. It does not constitute professional financial, legal, or technical advice. Game performance, online services, patch schedules, and store listings change. Verify critical details (pricing, system requirements, regional availability) with publishers and storefronts before you buy. Affiliate links, where present, help support our editorial work and are labelled in our affiliate disclosure.