GameBrief · General
Lost Castle 2 Beginner Guide: Weapons, Build & First Run

Reviewing
Lost Castle 2
This Lost Castle 2 beginner guide cuts through a chaotic first hour: over 200 weapons, more than 130 treasures, eight weapon categories, and a hub full of merchants who never explain themselves. It covers the three things that actually decide your early runs: which weapon to commit to, how to bend chest drops in your favor, and the survivability build that keeps a first-timer alive.
TL;DR: Talk to Serena to set weapon preferences and toggle only three weapon categories to concentrate your chest drops. For solo play, run a Tank build with average attack: a single-handed weapon, its Soul Inscription unlocked, and defensive Soul Stones socketed once it is. Mix up to three Amulets at the Alchemist's Hut for a combined buff. Survivability beats raw damage until you learn the boss patterns across the Black Forest, Crystal Mountain, and Black Castle.
How do you start in Lost Castle 2? (quick answer)
Start by setting your weapon preferences with Serena (the merchant by the weapon slots) and limiting yourself to three weapon categories so chests drop what you want. Then build a survivable solo Tank: a single-handed weapon, its Soul Inscription unlocked, and defensive Soul Stones socketed once it is. Lost Castle 2 is a 2D beat-'em-up roguelite where items are randomized each run, so the goal early is consistency, not a perfect build.
Key Takeaways
- Set weapon preferences at Serena and enable only three weapon categories to improve chest odds
- The eight weapon categories are Single-Handed (pairs with a Shield), Two-Handed, Dual Blades, Turbo Lance, Staff, Musket, Katana, and Phantom Lantern
- Best solo start: a Tank build with average attack, single-handed weapon, Soul Inscription unlocked plus defensive Soul Stones
- Mix up to three Amulets at the Alchemist's Hut for one combined buff potion
- Items are randomized per run, so adaptability beats a rigid plan
- Over 10 bosses across the Black Forest, Abandoned Village, Crystal Mountain, and Black Castle
Step-by-Step: your first run
Follow this order the first few times you play. It removes most of the early frustration.
- Visit Serena first. Before anything else, talk to Serena near the weapon slots and set your weapon preferences. Toggle on only three weapon categories. This is the single highest-impact decision you make, because it concentrates the random chest pool around weapons you can actually build with.
- Grab a single-handed weapon and a shield if offered. Mobility and blocking carry beginners further than raw damage. You can pivot later once you read enemy patterns.
- Stop at the Alchemist's Hut. Interact with the pot and mix up to three Amulets into one buff. Lean toward survivability effects for your first runs.
- Unlock your weapon's Soul Inscription and socket defensive Soul Stones. Look for Soul Flowers to unlock the Inscription, then prioritize survival-focused Soul Stones as they drop. Do not chase a perfect set; take what keeps you alive.
- Push into the Black Forest and learn one boss at a time. Dying is the teacher here. Each run feeds your knowledge even when it ends early.
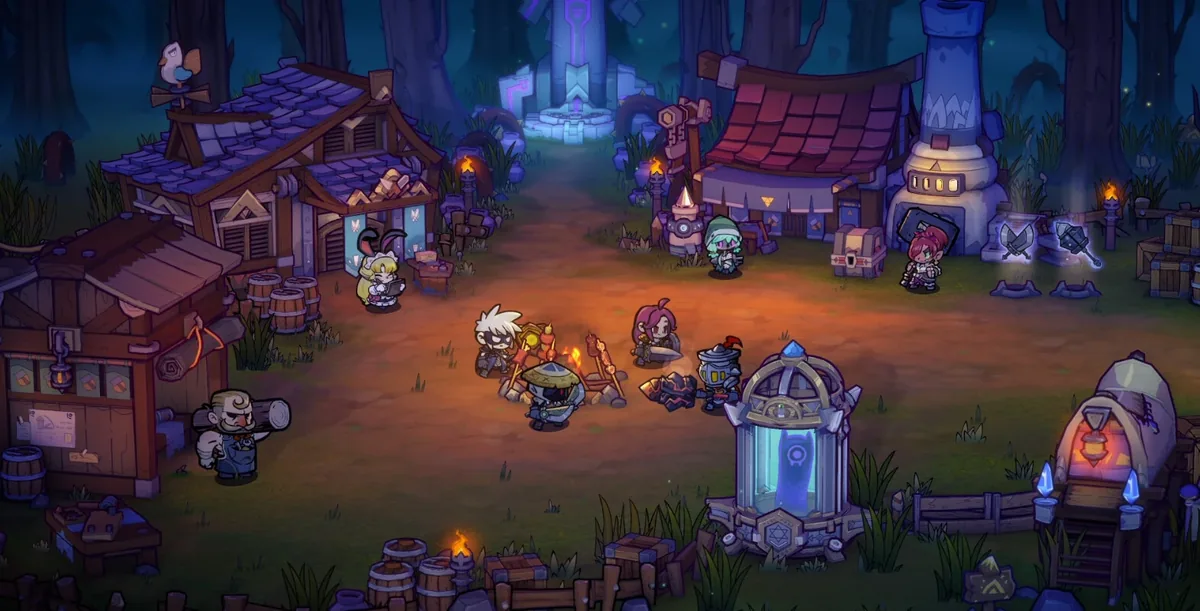 The hub is where runs are won. Serena sets your weapon odds and the Alchemist's pot mixes your Amulets before you ever swing a sword.
The eight weapon categories and what to pick first
Lost Castle 2 sorts its 200-plus weapons into eight categories, and each plays distinctly. Shields are not a category of their own; they pair with Single-Handed weapons for blocking.
- Single-Handed: close-range and pairs with a Shield to block. The most forgiving start for a new player.
- Dual Blades: fast combo attacks and a rapid dash, great for learning dodge timing. A strong first pick.
- Two-Handed: slow and clunky but high damage. This is where greatswords live, powerful yet punishing before you know the bosses.
- Turbo Lance: ranged weapons that fire projectiles from the end rather than striking. Good safety, but you manage spacing constantly.
- Staff: magic weapons that cast spells, best once you understand the Soul Inscription system.
- Musket: ranged weapons that build a Heat Gauge and cash it in for burst damage. Not the pick for a first run since managing Heat while learning enemy patterns is a lot at once, but strong once you're comfortable.
- Katana: a precision, skill-timed melee category confirmed in Hunter Studio's own patch notes. Not a beginner priority yet since there's little public build guidance for it.
- Phantom Lantern: a summon-and-ride category that mounts an Arcane Mech companion. Interesting for a second or third run, not your first.
The trap beginners fall into is trying every category. Pick two you enjoy, set those plus one wildcard at Serena, and let the run specialize you.
GODEEPER: Ready to optimize past the basics? Lost Castle 2 Builds Guide →
Serena and the chest-odds trick
This is the mechanic most new players miss. Serena lets you set weapon preferences, and that selection directly changes what weapons appear in your chests during a run. If you leave all eight categories on, the pool is diluted and you rarely find a coherent kit. Toggle on only three categories and the same chests start handing you usable weapons far more often.
Treat it as deck-thinning. Fewer options in the pool means each drop is more likely to advance your build. It is the closest thing Lost Castle 2 has to choosing a class, and it costs nothing but a conversation before you descend.
Alchemy Amulets explained
Amulets are your buff layer, and the Alchemist's Hut is where they get interesting. Interact with the pot and you can select up to three Amulets to mix into a single combined buff potion. Rather than equipping one Amulet and hoping, you blend three effects into one slot.
Early on, weight your mixes toward survival: health, defense, or healing effects. As you get comfortable, you can build aggressive mixes that amplify your weapon type. The system rewards experimentation, so do not hoard Amulets; combine them and see what sticks.
Best beginner build: the solo Tank
For solo play, the most reliable build is a Tank with average attack. The recipe is simple: a single-handed weapon for mobility, unlock its Soul Inscription with a Soul Flower as soon as you can, then socket survival-leaning Soul Stones as they drop. That combination keeps you alive long enough to clear rooms without forcing you to dodge perfectly, which is exactly what a new player needs.
The instinct to maximize damage is the most common early mistake. A glass-cannon run that dies in the Abandoned Village earns you nothing. A tankier run that reaches Crystal Mountain teaches you the bosses and banks progress. Damage comes later, once your reactions catch up.
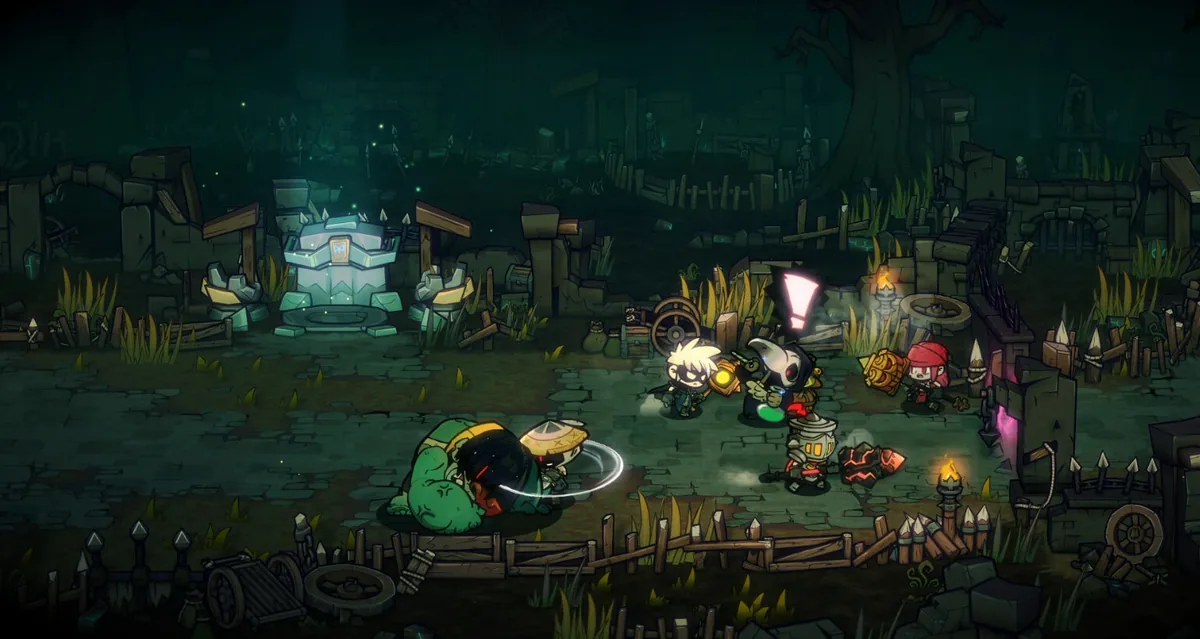 Lost Castle 2 supports up to four-player co-op. Survivability builds shine here, since staying up to revive teammates wins fights.
Level progression: what to expect
Lost Castle 2 runs you through a sequence of distinct level scenes, each with its own enemies, hazards, and bosses. Knowing the order helps you plan how aggressively to gear up.
- Black Forest: the opening area and your training ground. Enemies are readable and the bosses telegraph clearly. This is where you learn dodge timing and test whichever weapon Serena's preferences handed you.
- Abandoned Village: the first real difficulty step. Enemy density rises and you start meeting packs that punish greedy attacks. If you reach here consistently, your weapon-preference setup is working.
- Crystal Mountain: the mid-run wall for most beginners. Damage spikes, and a fragile build dies fast. This is the area that proves why the Tank approach matters early.
- Black Castle Bridge and Black Castle: the deep run. These demand a coherent build, a stocked Amulet mix, and real knowledge of the boss roster. Reaching the Black Castle is the goal that turns scattered runs into a sense of progress.
With over ten unique bosses spread across these scenes, the early game is about pattern recognition. You will lose to a boss several times before it clicks, and that is the intended loop. Each death teaches the tell that beats it next time. Do not rush the deeper areas before your reactions are ready; a clean Crystal Mountain clear teaches more than a panicked sprint into the Black Castle.
Tips: common beginner mistakes
- Enabling all eight weapon categories. Dilutes your drops. Pick three.
- Going full damage too early. You will die before you learn anything. Survive first.
- Ignoring the Alchemist's pot. Mixing three Amulets is free power most beginners skip.
- Treating runs as wins or losses. Every death teaches a boss pattern. That is the progress.
- Soloing when you could co-op. Up to four players makes learning the early areas far smoother.
For the full picture before you commit, our Lost Castle 2 review covers whether the 1.0 build is worth your time right now.
GODEEPER: Every death teaches a boss pattern, so knowing what's coming helps. Lost Castle 2 Boss Guide: All 12 Bosses & How to Beat Them →
Related Reading
- Lost Castle 2 Builds Guide: Soul Inscription theory and advanced weapon builds once the basics click.
- Lost Castle 2 Review: is the 1.0 build worth buying right now.
- Best Indie Roguelites for the Steam Summer Sale: more roguelites worth your time in the genre.
- Lost Castle 2 Weapons Tier List: 8 Categories Ranked: Lost Castle 2 weapons tier list: all 8 confirmed categories for 1.0, with the standout weapon in each,....
- Witchspire Beginner Guide: All 6 Covens Explained 2026: Witchspire beginner guide: all 6 Covens ranked for solo and co-op, how the familiar recruiting system works, and....
- Lost Castle 2 Boss Guide: All 12 Bosses & How to Beat Them: Lost Castle 2 boss guide: all 12 bosses in order, from the Goblin Champion to.
Frequently Asked Questions
What is the best weapon to start with? A Single-Handed weapon plus a Shield for mobility and blocking. Single-Handed and Dual Blades are the most forgiving categories.
How do you choose your weapon? Set preferences at Serena and toggle only three weapon categories to concentrate chest drops.
What is the best beginner build? A solo Tank with average attack: single-handed weapon, Soul Inscription unlocked, defensive Soul Stones socketed.
How do Alchemy Amulets work? Mix up to three Amulets at the Alchemist's pot to create one combined buff potion.
Is it co-op? Yes, up to four players online, LAN, or split-screen.
References
Was this guide helpful?
About the author

Senior Critic & Analyst
Former game data analyst turned critic with 11 years covering indie and mid-tier games. Based in Austin. Runs spreadsheets on games most people just play.
- 11 years games criticism
- Former game economy analyst
- Roguelike and strategy specialist
Keep reading

Disclaimer
This article is published for informational and entertainment purposes. It does not constitute professional financial, legal, or technical advice. Game performance, online services, patch schedules, and store listings change. Verify critical details (pricing, system requirements, regional availability) with publishers and storefronts before you buy. Affiliate links, where present, help support our editorial work and are labelled in our affiliate disclosure.