
GameBrief · General
Mortal Shell II Complete Guide: 8 Shells, Seals, and Gates
Mortal Shell II complete guide: all 8 Shells, four Seals, 8 primary weapons, Corrupted Gate routes, boss context, achievements, and current patch notes.
Reviewing
Mortal Shell II
Cold Symmetry · Playstack
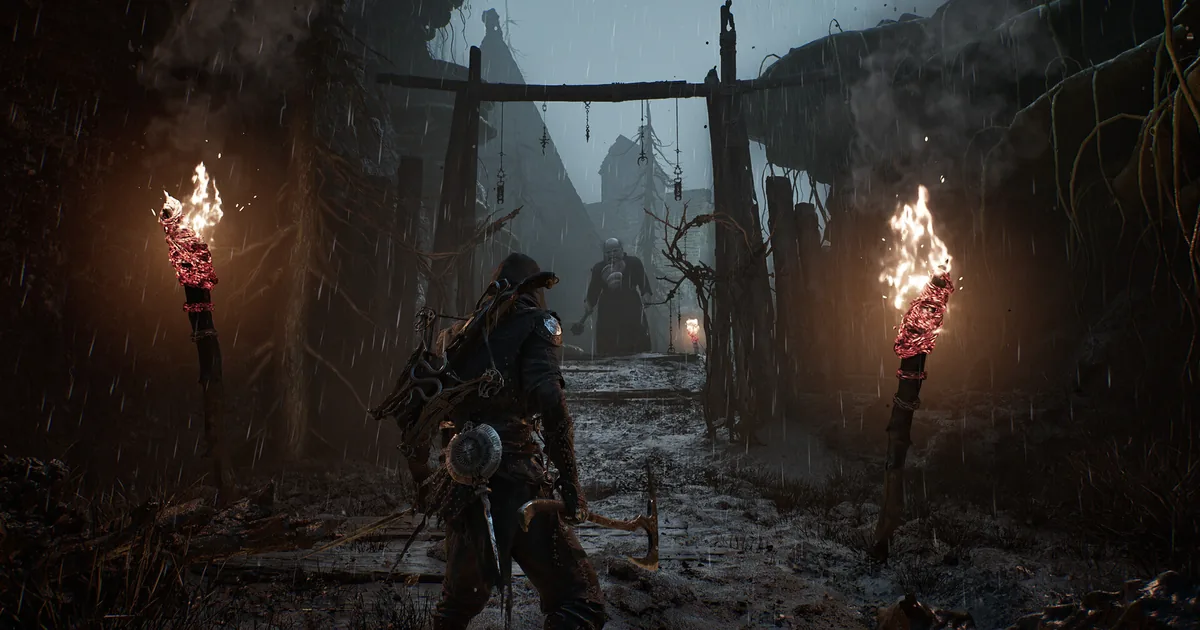
This Mortal Shell II complete guide is the hub for the sequel's combat, Shells, weapons, exploration route, boss context, and completion path. Cold Symmetry's standalone action RPG keeps the original game's possession fantasy but expands it into a compact open world with eight lost warriors, multiple defensive Seals, extensive weapon upgrades, and no stamina bar. The result is a game that rewards understanding your loadout before it rewards raw aggression.
The six leaf guides below each answer a narrower question. The parry guide explains why the defense system is not one universal button. The weapon tier list compares the eight primary weapons and their infusions. The walkthrough maps both overworld regions and all six Corrupted Gates. The boss guide gives a practical route while preserving the community's counting caveat. The achievements guide handles the 53-item completion list. The review supplies the broader verdict on the game's excellent opening and uneven back half.
Key takeaways
- Mortal Shell II is a single-player standalone sequel from Cold Symmetry and Playstack, released August 20, 2026 at $49.99 in the US Steam store.
- The official store describes eight lost warrior Shells, a compact interconnected open world, posture breaks, melee and ranged weapons, and combat without stamina.
- Four Seals control the defense layer: Untarnished, Infinite, Vatras, and Slayer. They change blocking, parrying, animation cancellation, healing, and achievement eligibility.
- The primary weapon roster has eight named choices. Axatana and Axe & Dagger remain the clearest high-performance starting points in the existing tier breakdown, but the Week 1 patch changed heavy-weapon context.
- Fainweald and Mammon each contain three Corrupted Gates. Clear all six to open the Unfound Path and its final confrontation with Zmey the Unbidden.
- The practical boss route has 10 post-prologue major fights plus Tar Golem as a scripted tutorial encounter. The broader community still disputes how reused elite encounters should be counted.
- Steam currently shows 82% positive from 9,034 English reviews. Recent reviews are 78% positive from 16,534 reviews, so the current reception is better read alongside the September fixes than the launch week alone.
Current status: September 2026
The live US Steam listing currently shows Mortal Shell II at $49.99. Its English review view is Very Positive at 82% from 9,034 reviews, while the recent review view is Mostly Positive at 78% from 16,534 reviews. These are moving store snapshots, not permanent scores. Check the Mortal Shell II Steam page before buying because price, discounts, and counts can change.
The current build is not the same game described by a launch-day review. Cold Symmetry's official September 14 hotfix fixed Proxima getting stuck in the Biosampler animation, Lazlo's infinite Temperament glitch, several stone and item issues, boss and enemy problems, traversal and collision faults, and stability problems. It also fixed a number of situations that could trap a player in a dungeon or leave an encounter in a broken state. Those fixes matter more than a generic “patched” label because several affect progression or whether an attack can be read correctly.
The official September 5 update added Adaptive Difficulty as an optional setting. It is off by default and responds to how the player is performing by changing enemy damage, health, and break resistance. Players who are winning can face stronger enemies, while players who are struggling can receive softer values. The adjustment relaxes over time, and the setting can be changed from the game settings menu. If you compare two videos and their damage numbers do not line up, check whether Adaptive Difficulty was enabled before assuming one source is wrong.
The earlier Week 1 update also changed the progression economy. Fragile Tarstones, Glimpse Stone, and Egon's Stone added new ways to manage resources and recover from a death. Glimpses and Tarcores became renewable rather than permanently finite, and Mether's Severance introduced Shell respec support through the Shell keeper. New beacons and exploration rewards changed the recovery loop across Fainweald and Mammon. The same update improved heavy-weapon balance, changed the Obsidian Hammer, strengthened Great Martyr's Blade, and adjusted several weapon abilities.
For the larger buying question, read the Mortal Shell II review as a current-build assessment rather than a launch-only warning. Its 6.5 score still identifies the campaign's uneven back half, but it also accounts for the September hotfix, the new difficulty option, renewable progression resources, and the respec item.
What is Mortal Shell II? (quick answer)
Mortal Shell II is a single-player action RPG and standalone sequel built around possessing the bodies of lost warriors. The official store describes eight Shells scattered through a ravaged world, and each Shell contributes a different set of attributes, passives, and active abilities. Finding a Shell is therefore both exploration progress and a build decision. You can change the way a fight feels without changing the entire game by changing the body you inhabit.
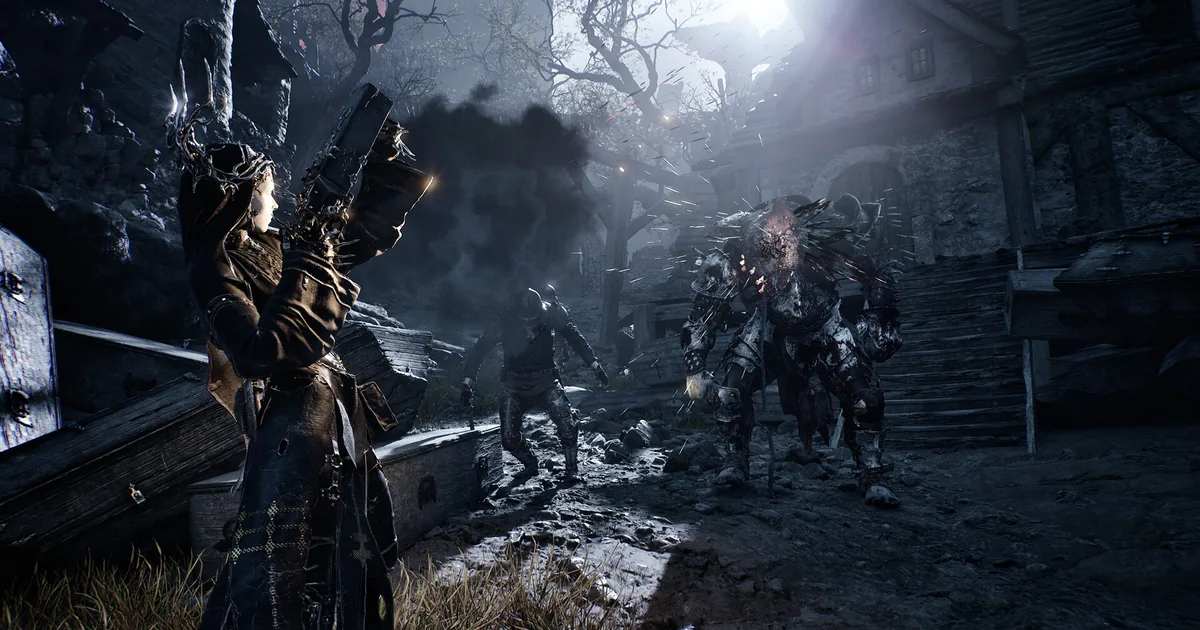
The sequel's combat has two important differences from a conventional stamina-based souls-like. Melee attacks are not governed by a stamina bar, and enemy posture is a central target. You are deciding when to spend Resolve, when to break posture, and which Seal's defensive rule fits the incoming attack. The game also supports ranged weapons and sidearms, so a “melee build” is not the only way to solve a difficult encounter.
For the defensive layer first, start with the Mortal Shell II parry guide before committing to a Seal.
The world is compact and interconnected rather than a set of isolated levels. Fainweald is the opening overworld region, Mammon is the later and more punishing region, and the six Corrupted Gates sit inside that broader route. The Unfound Path becomes the endgame area after the six gates are cleared. This structure gives the game a clear first-run spine while leaving room to return for Shells, Tarstones, memories, weapons, and other completion goals.
The most useful way to approach Mortal Shell II is as a chain of decisions:
- Choose a Shell whose recovery pattern you understand.
- Choose a Seal whose risk matches the enemy group in front of you.
- Use Resolve for the sidearm or Shell ability that actually solves the encounter.
- Pick a weapon and infusion whose attack speed supports the effect you want.
- Enter a gate with a route back to safety, not only a plan for the boss room.
That chain explains why this hub separates defense, weapons, exploration, and completion. A strong weapon does not compensate for a Seal you do not understand, and a clean boss plan does not replace knowing where to find the next Beacon.
Shells, Seals, and the no-stamina combat loop
The Shell roster contains Tiel, Proxima, Eredrim, Gragu, Smert, Sariel, Lazlo, and the Cursed Child. These are not traditional character classes that lock you into one campaign route. They are bodies with different abilities and progression incentives. You can try multiple Shells, and the best choice depends on whether you need damage, survivability, control, utility, or a better answer to a particular enemy pattern.
The Mortal Shell II Parry Guide: All 4 Combat Seals Explained is the essential companion because the word “parry” hides four different systems. Untarnished is the starting hold-to-guard Seal. It can support a perfect guard and repeated taps against a multi-hit string, but it does not let you cancel your own attack into defense. If you raise it too late against a difficult enemy, the result can look inconsistent until you learn that the safe window begins earlier than the hit appears to land.
Infinite is the high-risk true parry. It can cancel out of your own attack and rewards a correctly timed response, but a miss gives you less fallback than a safer block. The September 5 update widened the wind-up window for consecutive Infinite parries, which is a current-build reason not to rely on old launch footage when judging the Seal.
Vatras is the returning Harden ability under a new name. The practical attraction is forgiveness: a successful use can stagger an enemy even when the timing is not the perfect version, so it gives a new player a larger margin while learning an arena. It still asks you to understand when to hold, when to release, and when a multi-enemy room makes a single defensive answer unsafe.
Slayer is the unusual option. It is not another normal defense Seal. It enables healing through executions and turns off achievements when equipped. That makes it a legitimate accessibility choice for a player who wants help during combat, but it is not compatible with a completion run. Do not put it on while testing the build you intend to use for achievement hunting.
Above the health bar, Resolve fuels sidearm ammunition and special Shell abilities. Landing hits, kills, and successful blocks or parries refill it. That creates a useful loop: defense is not only about avoiding damage, it can also fund the next offensive tool. When a fight feels like it has no safe opening, ask whether your Seal, movement, and Resolve spending are working toward the same plan instead of treating each attack as an isolated reaction.
The answer to “what is the parry timing” is deliberately less precise than many search results would like. No official source or patch note publishes a universal frame count or millisecond window for the Seals. Use the named behavior and the visual wind-up as the reliable information. A specific number from an unverified video is not a stronger fact just because it sounds exact.
GODEEPER: The four Seals, their confirmed behaviors, Resolve interaction, and the limits of current timing evidence are covered in the Mortal Shell II Parry Guide: All 4 Combat Seals Explained →
Weapons, infusions, and build choices
The main weapon breakdown covers Axatana, Axe & Dagger, Black Needle, Veteran's Battle Axe, Great Martyr's Blade, Clockwork Scythe, Iconoclast, and Obsidian Hammer. This is the eight-weapon primary roster used by the existing tier list. Mortal Shell II also has a separate group of ranged sidearms, so “eight weapons” should not be read as “eight total tools in the game.” The achievement guide confirms additional named weapon and sidearm unlocks beyond the eight primary choices.
The existing Mortal Shell II Weapons Tier List: All 8 Ranked (2026) puts Axatana and Axe & Dagger in their own S+ tier. The reason is not just a vague feeling that they are fast. They are the two weapons that can equip the Duality Tarstone, whose consecutive-hit effect rewards maintaining a clean string. Axatana also gives strong reach and a useful Stasis pairing, while Axe & Dagger works naturally with Tiel and benefits heavily from Bloodcurse.
The next group is more about fit than a universal ranking. Black Needle is a fast choice associated with Genessa and Phantom. Veteran's Battle Axe supplies the strongest heavy-weapon identity in the older comparison and pairs with fire effects. Great Martyr's Blade is slow but benefits from Frost and Eredrim's strengths. Clockwork Scythe applies Bloodcurse quickly, making it a strong general option when a Shell has no signature weapon requirement. Iconoclast is the balanced choice and fits Sariel's Curse-focused kit.
Obsidian Hammer was the original list's clear B-tier outlier because of its slow attack speed and weak infusion synergy. The official Week 1 patch changed that context: Cold Symmetry gave it a full balance pass, increased Great Martyr's Blade damage, and adjusted heavy weapons generally. That does not automatically invalidate every part of the leaf article, but it does mean you should not repeat “never use Obsidian Hammer” as a current developer-confirmed fact. Treat the tier list as a tested framework, then read it against the latest official balance notes.
Infusion choice should follow the weapon's actual behavior. Bloodcurse rewards hit frequency and remains the broad recommendation for fast weapons. Stasis is the strongest anti-boss utility in the existing comparison because it slows enemies and creates a longer counter window. Frost is especially important for Great Martyr's Blade and Triarch Repeater. Phantom makes more sense on Black Needle with Genessa, Lightning belongs to Proxima's identity, and Curse is tied to Sariel. Fire, Poison, and Trauma are more conditional, so do not choose them only because their name sounds aggressive.
The simple build rule is to match effect and recovery time. A fast weapon gives Bloodcurse more opportunities to trigger. A slow weapon needs an effect or Shell ability that justifies the time spent in recovery. A boss counter plan needs Stasis or a defensive Seal that keeps the next opening readable. The best build is therefore not a tier-list label by itself. It is a weapon, Shell, Seal, and Resolve plan that can be executed without guessing.
GODEEPER: The eight primary weapons, tier bands, Tarstone pairings, infusion choices, and current balance caveats are in the Mortal Shell II Weapons Tier List: All 8 Ranked (2026) →
Fainweald, Mammon, and the Corrupted Gate route
Mortal Shell II has two overworld regions and six Corrupted Gate dungeons. Fainweald contains Glutted Mire, Sanguine Caverns, and Prisoner's Domain. Mammon contains Conqueror's Temple, Withered Shoals, and Faded Citadel. After the six gates are cleared, the Unfound Path opens as the final area and leads to Zmey the Unbidden.
The gates are not presented as one rigid mandatory sequence. A new player can wander into a harder route early, return to Fainweald after entering Mammon, or take a different order based on which Shell, weapon, and Tarstones have already been collected. The practical route in the Mortal Shell II Walkthrough: All 6 Corrupted Gates (2026) is a recommendation for keeping the difficulty curve readable, not a hidden quest requirement.
For a first run, use the opening stretch to reach the first Beacon and understand your equipped Seal before rushing toward the first dungeon. Glutted Mire is a sensible opening gate because its ranged enemies and ambushes teach you to manage vertical threats and sightlines. Sanguine Caverns tightens the corridors and rewards a faster weapon that can clear pressure without a long recovery. Prisoner's Domain uses scaffolding, drops, and captive-themed placement to punish careless movement, so saving it for the end of Fainweald gives you more room to learn first.
Mammon is the more demanding region. Conqueror's Temple is the gentler entry point relative to the other two Mammon gates. Withered Shoals asks for sustained pressure management rather than one dramatic duel. Faded Citadel is best left for last because it is consistently treated by current walkthrough sources as the hardest of the three. The goal is not to prove that the route is mandatory. The goal is to reach the final gate with a Shell and weapon you already know instead of using the hardest zone as a build test.
Use Beacons and return trips as part of the route. Fainweald contains side pockets with Shells and Tarstones that are easy to miss, and Mammon's pressure makes it tempting to ignore exploration until after the story. That is a false economy if you keep dying with a build that has not been upgraded. Explore when the region is still survivable, then return after a Shell or Seal change makes an old detour easier.
Once the six gates are down, the Unfound Path is a capstone rather than another open region. It leads to Zmey, a final fight built around mobility and Cosmic Flame pressure. Keep one defensive option for the transition into the endgame, and do not spend every resource on the last gate simply because the map is almost complete.
GODEEPER: The recommended gate order, region details, named dungeons, Unfound Path route, and exploration tips are in the Mortal Shell II Walkthrough: All 6 Corrupted Gates (2026) →
Bosses, patches, and how to read a fight
Boss-count questions need a scope label. The current boss guide counts 10 post-prologue major fights and adds Tar Golem as a scripted tutorial encounter, producing 11 when the tutorial is included. The achievement and walkthrough coverage is more cautious because community sources disagree about the order and boundaries of the main list, especially when the game reuses tough regular enemies as boss-like encounters. There is no value in turning that disagreement into a falsely precise all-enemies roster.
The practical route begins with Tar Golem, whose intended result is a scripted loss. After that, the guide's progression list runs through Magdalena, the Lost Child, the Nameless Captive, Droeg, Hexapod, Sir Isaac, Orrem, the Monolith, Malborn Offspring, and Zmey. Use that sequence as a learning path, not as proof that every player must enter every arena in the same order. The six-gate walkthrough is the right source when the problem is finding a dungeon rather than surviving the fight inside it.
Read each boss in three layers. First, identify the attack that controls space, such as a ram, breath, beam, projectile, or grab. Second, watch the final beat of the sequence instead of attacking during the first apparent opening. Third, choose one short punish and repeat it until the arena feels stable. Mortal Shell II's combat becomes much more manageable when “damage window” means a repeatable recovery animation rather than a hopeful opening you saw once.
The patch history makes this discipline more important. The Week 1 update changed or refined several boss timings, hitboxes, and arena behaviors, including the Monolith, Zmey, the Lost Child, Droeg, Sir Isaac, Hexapod, Orrem, and Malborn Offspring. The September 14 hotfix fixed additional boss and enemy issues, including frozen enemies, Hexapod's diving attack after death, and a Malborn transition problem. Adaptive Difficulty can also change enemy damage, health, and break resistance based on performance. Keep attack shapes and positioning as your durable notes, and recheck the official update feed before copying damage numbers from an old video.
Tar Golem deserves special treatment. It teaches the combat language and is not a normal victory check. Reaching zero health during the scripted fight connects to the “No, You Still Can't Win” achievement, so play it once for the lesson and the completion record instead of wasting rare resources trying to force a conventional clear. After that, use a familiar Shell, a weapon with a recovery animation you understand, and a safe route back to the arena for learning attempts.
GODEEPER: The scoped 10-fight route, Tar Golem explanation, attack tells, phase habits, and patch-aware boss notes are in the Mortal Shell II Boss Guide: 10 Major Fights + Tar Golem →
Achievements and completion planning
Steam lists 53 achievements for Mortal Shell II. The Mortal Shell II Achievements Guide: All 53 Confirmed verifies the list from Steam's public Community stats page rather than guessing hidden conditions. Eighteen entries show no description until they are unlocked, so a name that hints at a mechanic is not enough evidence to publish a confident solution.
The eight Shell achievements are the cleanest first target: Tiel, Proxima, Eredrim, Gragu, Smert, Sariel, Lazlo, and the Cursed Child. The collection achievement for all eight is rarer than most individual unlocks because the least obvious Shells require deliberate exploration. Treat the Shell route as part of the main game rather than a post-game checklist, especially because a new body can make a difficult gate or boss much easier to read.
Weapons form the next completion layer. The achievement data names at least 15 weapons and sidearms individually, while the primary weapon tier list focuses on eight. “At least” is the important wording because the list separates primary weapons from ranged tools and does not collapse every unlock into one simplified roster. Chase the weapon achievement that matches your build first, then use the full-collection goals as a reason to return to side paths.
Exploration achievements cover Marrowkeep, the Festival, Shell Memories, Map Fragments, Ova, Lute Tracks, Beacons, and Tarstones. Watch Shell Memories when you find them rather than trusting a late cleanup sweep. The guide records Seeking the Past at 5.6% for watching all Shell Memories, while No Lifer sits at 4.3% for unlocking every achievement. Peter's Perfect Parry is 7.2%, making it a useful signal that the combat-specific completion layer is demanding even for players who finish the story.
A sensible order is to finish a normal route with one Shell and weapon, then return for missed Shells and exploration items. Keep a note of Shell Memories and Tarstones as you move through Fainweald and Mammon. Max out a weapon after you know which moveset you will keep. Leave No Lifer for a second pass unless the first playthrough naturally delivers almost everything. The current hotfix and renewable resources reduce friction, but they do not turn every hidden achievement into a safe first-run objective.
Slayer requires a separate warning. Its execution-healing behavior can make combat more accessible, but equipping it disables achievements. Use it for a practice or accessibility save if it helps, then switch to a normal eligible Seal before beginning a completion attempt. That is a save-planning choice, not a judgment about how anyone should play.
GODEEPER: The Steam-sourced 53-achievement list, eight Shells, named weapons, hidden entries, rarity rates, and completion order are in the Mortal Shell II Achievements Guide: All 53 Confirmed →
All Mortal Shell II guides on this site
- Mortal Shell II Parry Guide: All 4 Combat Seals Explained: the four defensive Seals, Resolve loop, timing evidence, and achievement caveat.
- Mortal Shell II Weapons Tier List: All 8 Ranked (2026): primary weapon tiers, infusions, Tarstones, and Shell pairings.
- Mortal Shell II Walkthrough: All 6 Corrupted Gates (2026): Fainweald, Mammon, named gates, and the Unfound Path route.
- Mortal Shell II Review: Great Combat, Rough Second Half: the current-build verdict on combat, patches, pacing, and value.
- Mortal Shell II Boss Guide: 10 Major Fights + Tar Golem: a scoped boss route with attack tells and patch-aware warnings.
- Mortal Shell II Achievements Guide: All 53 Confirmed: Shells, weapons, exploration goals, hidden entries, and completion planning.
Frequently Asked Questions
What is Mortal Shell II? It is Cold Symmetry's standalone sequel action RPG, published by Playstack. You possess eight lost warrior Shells, explore a compact interconnected world, break enemy posture, and build melee and ranged weapons without a stamina bar.
How many Shells are in Mortal Shell II? There are eight named Shells: Tiel, Proxima, Eredrim, Gragu, Smert, Sariel, Lazlo, and the Cursed Child. Steam's store description confirms eight lost warriors, and each Shell has a public achievement.
How do Seals work in Mortal Shell II? Four Seals change your defense. Untarnished is the starting hold-block, Infinite is a high-risk true parry, Vatras is the returning Harden ability, and Slayer heals through executions while disabling achievements.
What are the best weapons in Mortal Shell II? The existing weapon breakdown places Axatana and Axe & Dagger at the top because they can use Duality Tarstone. The official Week 1 balance pass improved heavy weapons and Obsidian Hammer, so read the ranking with current patch context.
How many Corrupted Gates are in Mortal Shell II? There are six, split between Fainweald and Mammon. Each region has three gates. Clearing all six opens the Unfound Path and the route to Zmey the Unbidden.
How many bosses are in Mortal Shell II? The current route counts 10 post-prologue major fights plus the Tar Golem tutorial. Community sources still disagree about broader boss labels and order, so that is a useful progression scope rather than an official all-enemy roster.
How many achievements are in Mortal Shell II? Steam lists 53 achievements, including eight Shell unlocks, named weapon and sidearm goals, exploration tasks, and 18 hidden entries. No Lifer is the rarest confirmed achievement in the current guide at 4.3%.
Is Mortal Shell II worth buying at $49.99? The September hotfix and Adaptive Difficulty update make the current build easier to recommend than the launch snapshot. The combat remains the main reason to play, while the uneven later campaign makes a sale sensible for cautious buyers.
Related Reading
- Mortal Shell II Review: Great Combat, Rough Second Half: a current-build verdict on combat quality, patches, pacing, and full-price value.
- Kristala Review: another souls-like comparison with ambitious combat and visible rough edges.
- Cursemark Review: a smaller action RPG comparison for players weighing unfinished edges.
- Tainted Grail Best Gear Guide: a systems-first gear reference for another dark fantasy RPG.
- Windrose Combat Guide: a contrasting approach to defense, stamina, and enemy pressure.
References
- Mortal Shell II on Steam: official price, review snapshot, release date, features, Shell count, and game description.
- Mortal Shell II Steam news hub: official Week 1, Adaptive Difficulty, September hotfix, and balance notes.
- Mortal Shell II Steam achievements: primary source for the 53 achievement count and public unlock rates.
- Cold Symmetry: official developer site and studio context.
- Mortal Shell II official trailer: official Playstack visual reference for the game.
About the author

Senior Critic & Analyst
Former game data analyst turned critic with 11 years covering indie and mid-tier games. Based in Austin. Runs spreadsheets on games most people just play.
- 11 years games criticism
- Former game economy analyst
- Roguelike and strategy specialist
Keep reading

Disclaimer
This article is published for informational and entertainment purposes. It does not constitute professional financial, legal, or technical advice. Game performance, online services, patch schedules, and store listings change. Verify critical details (pricing, system requirements, regional availability) with publishers and storefronts before you buy. Affiliate links, where present, help support our editorial work and are labelled in our affiliate disclosure.
Comments
Loading comments…