GameBrief · General
Windrose Combat Guide: Fighting Tips, Builds & Gear 2026

Reviewing
Windrose
This Windrose combat guide covers what actually wins fights: the right weapon for the situation, gear tier matched to your biome, and the consumable stack you run before every dangerous encounter. Combat itself gives no XP, so the goal is to win efficiently and move on.
TL;DR: Match gear tier to biome (Copper → Iron → Steel) and weapon to situation: sword for general content, Steel mace or halberd for bonus damage against the High Priestess. Learn the deflect system to break enemy poise and open punish windows. Stack all four buffs before the Cursed Swamps (Rested + food + Elixir of Pain Relief + Healing Potions), and bring anti-plague to every Swamp camp, not just boss fights.
Key takeaways
- Windrose combat guide focus: weapon choice by situation, gear tier by biome, consumable prep before every Swamps session
- Steel mace and halberd deal bonus damage vs the High Priestess: sword is best for general content
- All four buffs stack simultaneously: Rested + food + Elixir of Pain Relief + Healing Potions
- Anti-plague before every Cursed Swamps camp, not just boss fights
- The deflect system refills mana and opens counter windows: learning it reduces consumable burn significantly
Windrose combat is straightforward until it isn't. The Foothills and Coastal Islands are forgiving: enemies are spaced out, Iron gear holds up, and you can brute-force most encounters with enough potions. The Cursed Swamps change that. Plague Thrall adds, stacking DoT, and camps dense enough that a bad pull can chain into three fights before you can recover.
This windrose combat guide covers weapon selection, gear build priorities, and the consumable prep that separates clean Swamps runs from wipe-and-respawn loops. Keep it bookmarked: the Swamps punish gaps in preparation more than any other biome.
Windrose combat guide: gear tiers by biome
Windrose combat gear scales through three tiers: Copper, Iron, and Steel. Each tier has five armor pieces (helmet, chest, arms, legs, boots) plus a primary weapon and firearm slot: seven gear slots total.
The rule is simple: your gear tier should match your current biome. Running Iron gear into the Cursed Swamps is the most common reason players get two-shot by standard camp enemies.
Copper covers the Coastal Islands (levels 1-5). You craft it from the first island. It holds up fine there but don't bring it into the Foothills: it's not a gradual difficulty curve, it's a wall.
Iron takes you through the Foothills and mid-Coastal Islands (levels 5-12). The Iron Smithing bench unlocks after your first Foothills exploration; fill all five armor slots before pushing into the Swamps. Most players skip this step and wonder why they're getting two-shot.
Steel starts at the Cursed Swamps (levels 12+). Steel components drop from Swamps camps, and the bench requires materials from those same camps, so it's self-funding: you get the materials from doing the content you need them for.
The real goal in endgame Windrose combat is full Steel across all seven slots: five armor pieces, primary weapon, and firearm. Most players hit level 15 with at least one slot still in Iron. That gap matters in late Swamps content.
GODEEPER: Steel gear farming loops and Cursed Swamps camp routes for max-level play. Windrose Endgame Guide: What to Do After Max Level →
 The Iron Smithing bench unlocks after your first Foothills exploration: fill all five armor slots here before entering the Cursed Swamps.
Weapon selection: what to use and when
The windrose combat guide weapon tier list isn't fixed: it depends on what you're fighting.
The sword is the default. No enemy-type bonus, but no penalty either: it's the right choice for 80% of content where enemy composition varies by camp. Most players use a sword until they reach the High Priestess.
At that point, swap to a mace or halberd. Both deal a flat damage bonus against the Priestess that's noticeable immediately on your first kill. It's not a marginal difference. Personal preference between the two: mace is slightly faster, halberd has more reach on the swing arc. Keep a Steel sword for camps, a Steel mace or halberd for the Priestess fight.
Spear edges out the sword against single large Swamps targets when you're not getting interrupted. In mixed camps it falls behind because the range advantage disappears in close-quarters pulls.
The firearm handles the ranged slot. Good for opening pulls and for enemies that punish close range by design. Ammo management matters at Swamps difficulty: run out mid-camp and you're committed to melee for the rest of the pull.
The practical windrose combat build for the Swamps is: Steel mace (or halberd) + Steel firearm, with a Steel sword available if you're doing mixed camp circuits that include Foothills or Coastal Island enemy types. This windrose combat guide recommends keeping both in your loadout rather than swapping mid-run.
Consumable prep: the four-buff stack
The single biggest windrose combat improvement most players can make is pre-buffing properly before a Swamps session.
Four buffs can run simultaneously. The Rested buff requires comfort level 5 at a bonfire and lasts a full session if the bonfire is properly built. A food buff from any cooked meal stacks on top: different recipes give different bonuses and all of them stack with everything else. The Elixir of Pain Relief is the third, activated before entering a camp or the Priestess fight. The fourth is Great-tier Healing Potions, which aren't pre-activated but matter more than standard potions when multiple fights drain your health.
The Elixir is the one people skip. If you find yourself running dry on healing potions mid-circuit, that's almost always the cause: each fight is costing more health than it should because the Elixir wasn't up. Two minutes of pre-buffing at the bonfire changes the math on a full Swamps session.
GODEEPER: Full cooking system breakdown and which food buffs stack with combat elixirs. Windrose Cooking & Food Buffs Guide →
Anti-plague is separate from the four-buff stack but equally important. Stock 4+ anti-plague consumables per player before any Cursed Swamps session. Plague Thrall adds spawn throughout regular camp clears, not just the Priestess fight: they apply the same stacking DoT. A full group wipe in the middle of a camp circuit is almost always traceable to empty anti-plague slots after the group stopped expecting the mechanic.
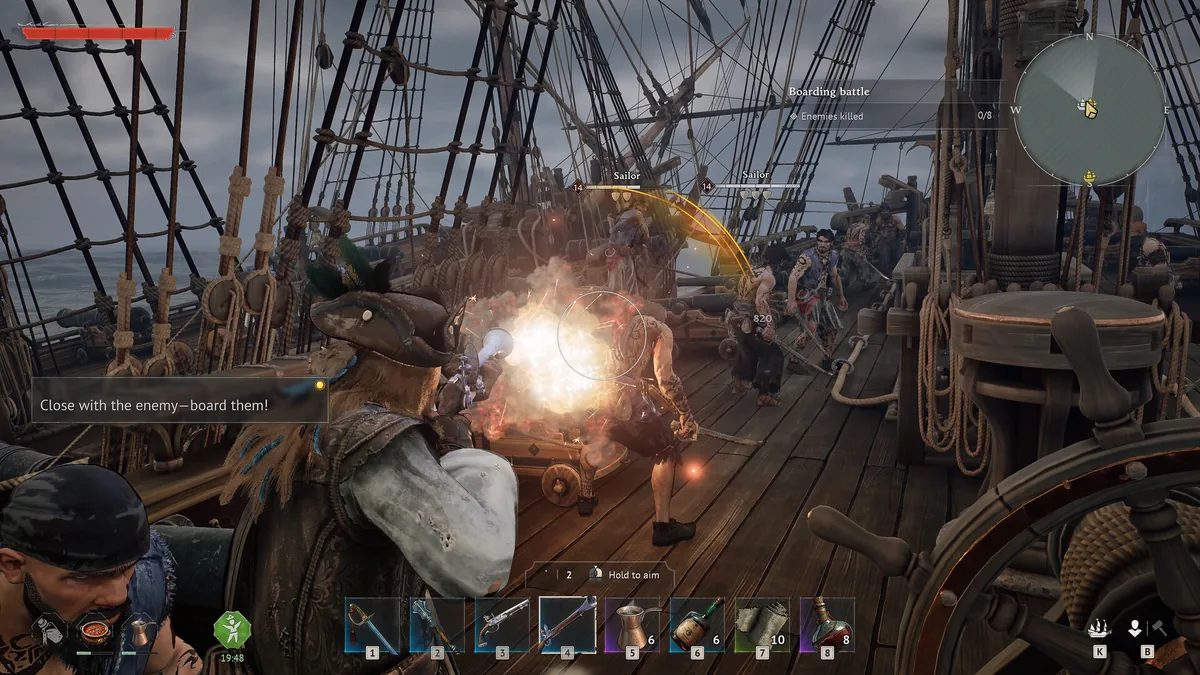
The deflect system
Windrose uses a deflect system rather than a standard block: correct timing on an incoming attack staggers the enemy, refills your mana, and opens a counter-attack window. The timing window is tight but consistent.
Deflect is the most important skill to develop in any windrose combat guide at the Cursed Swamps tier because it directly addresses your mana economy. Without reliable deflects, you burn through Elixirs replenishing mana for specials. With consistent deflects, you can sustain mana across a full camp circuit without touching your Elixir stock.
The deflect timing is identical across all weapon types: it's not harder with the mace or halberd than the sword. This matters because players who switch to mace for the High Priestess sometimes feel like their timing is off; it's usually adaptation to the mace's different attack animation, not a mechanical difference in the deflect window.
Against regular Swamps enemies, practice deflecting the most common attack patterns first: the single heavy and the quick-step stab cover 70% of what you'll face in camps. The Priestess fight has its own deflect opportunities during the pustule phase.
Biome-by-biome fighting tips
Coastal Islands: enemy density is low, encounters are isolated. You're learning the attack patterns. Use this time to internalize the deflect timing on common enemy types. Don't skip the early camp clears; Site Clear bonuses here still count toward faction reputation even if XP is minimal.
Foothills: enemies start combining melee and ranged in the same camp pull. Prioritize the ranged units first. Iron gear should be complete before extending into the deeper Foothills POIs, which have multi-floor structures and tighter pull spacing.
Cursed Swamps: the density and DoT mechanics change the rules. Key habits for the Swamps:
- Never run in without anti-plague consumables stocked from scratch, not leftovers from a previous session
- Prioritize Plague Thrall adds before focusing the main enemy: they apply DoT stacks that compound over time
- Pre-buff at the bonfire before your first camp, not after
- Don't push a second POI if your anti-plague is depleted from the first: the camp reset timing makes doubling back worth it
The multi-floor POIs in the Swamps have higher chest density than Foothills equivalents. Full clears (every chest opened) trigger Site Clear bonuses of 400-600 XP per player. Partial clears don't count.
 A successful deflect staggers the enemy, refills your mana bar, and opens a counter-attack window: the most efficient mana recovery in the Swamps.
Windrose combat guide: solo vs co-op differences
In solo play, the windrose combat pacing changes because you don't have backup for bad pulls. Slower camp approaches (checking angles before pulling) matter more than in groups. The Rested + food + Elixir stack is even more important in solo because healing is your only recovery.
In co-op, role distribution helps: one player focuses pulls and deflects while others handle Plague Thrall cleanup. Site Clear bonuses scale by player count, which makes full-group clears the most efficient use of a Swamps session.
The High Priestess in co-op adds Plague Thrall spawns during the fight itself, not just as separate camp enemies. If your group is spreading to deal with the adds, the mace/halberd player handling the pustule phase gets isolated: communicate before the fight who's on adds and who's on cycle management.
Related Reading
- Windrose Endgame Guide: What to Do After the Story
- Windrose Multiplayer Tips: Co-op Guide for 2026
- Windrose Ship Combat Guide: Bar Shots, Raking & Sea Tips: Windrose ship combat guide: bar shots demast enemies, the Rake crits stern hits, Keelhold makes repairs easy. 9....
References
- Windrose on Steam: official store page, patch notes, developer updates
- r/crosswind: community meta, camp circuit strategies, build discussions
- Windrose Complete Guide 2026: full hub for all Windrose content
- Windrose Boss Guide: All Bosses & Weak Spots: High Priestess strategy, consumable list
- Windrose Pirate Camps XP Farming Guide: camp circuit routes and Site Clear strategy
Was this guide helpful?
About the author

Senior Critic & Analyst
Former game data analyst turned critic with 11 years covering indie and mid-tier games. Based in Austin. Runs spreadsheets on games most people just play.
- 11 years games criticism
- Former game economy analyst
- Roguelike and strategy specialist


Disclaimer
This article is published for informational and entertainment purposes. It does not constitute professional financial, legal, or technical advice. Game performance, online services, patch schedules, and store listings change. Verify critical details (pricing, system requirements, regional availability) with publishers and storefronts before you buy. Affiliate links, where present, help support our editorial work and are labelled in our affiliate disclosure.