
GuideWindrose
Windrose Ship Combat Guide: Bar Shots, Raking & Sea Tips
About the game
Windrose
Kraken Express
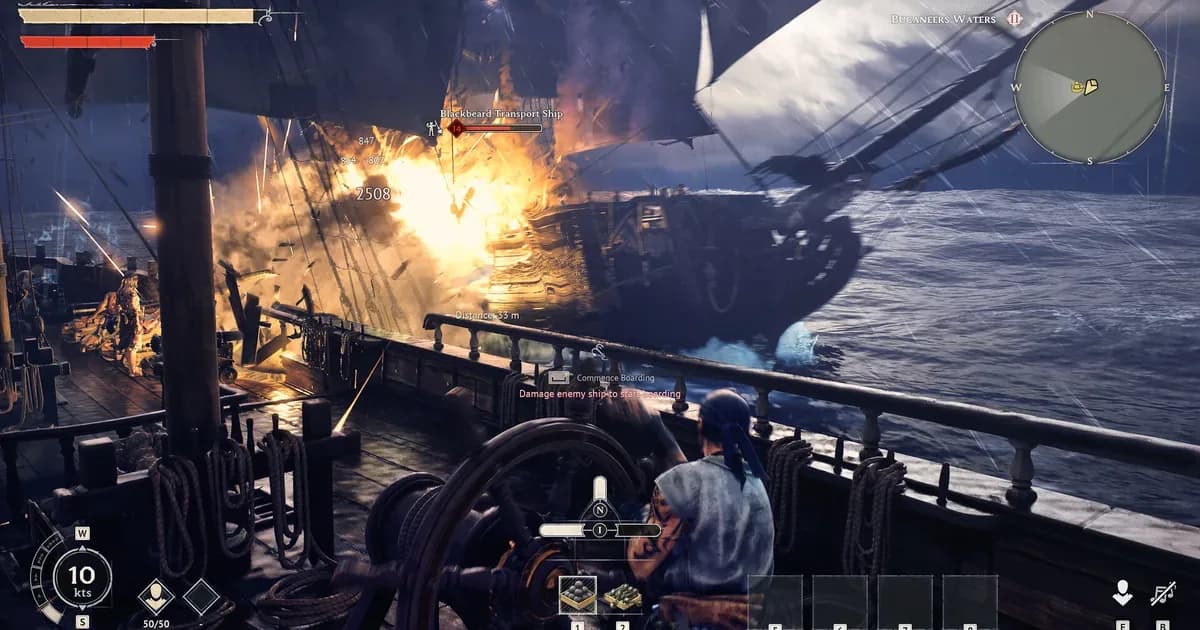
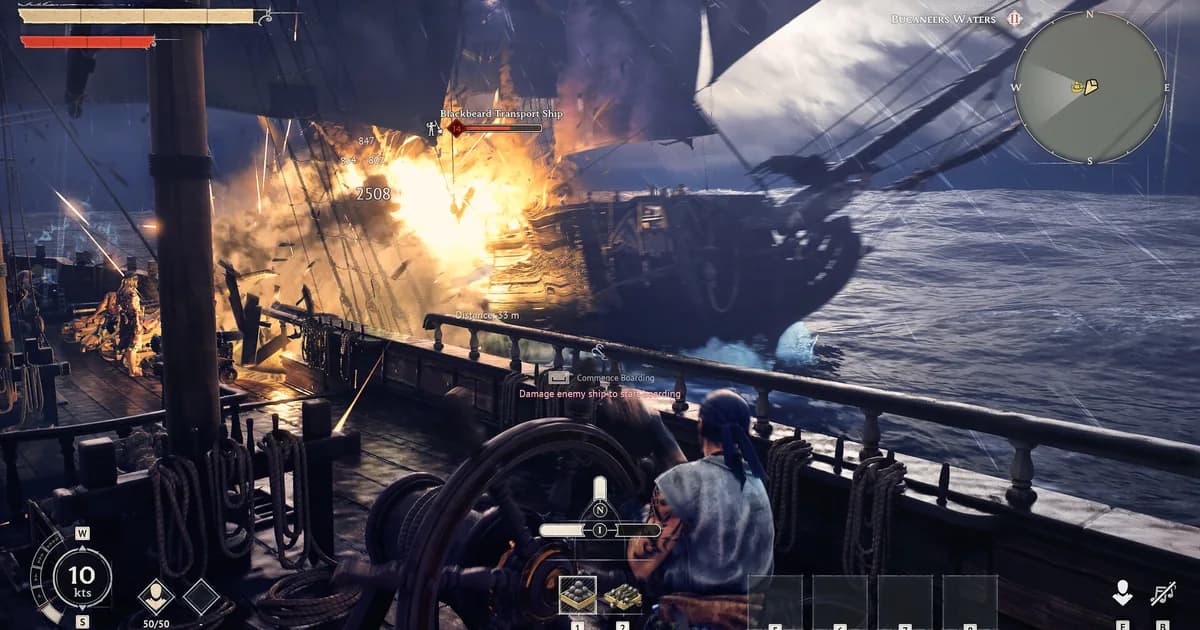
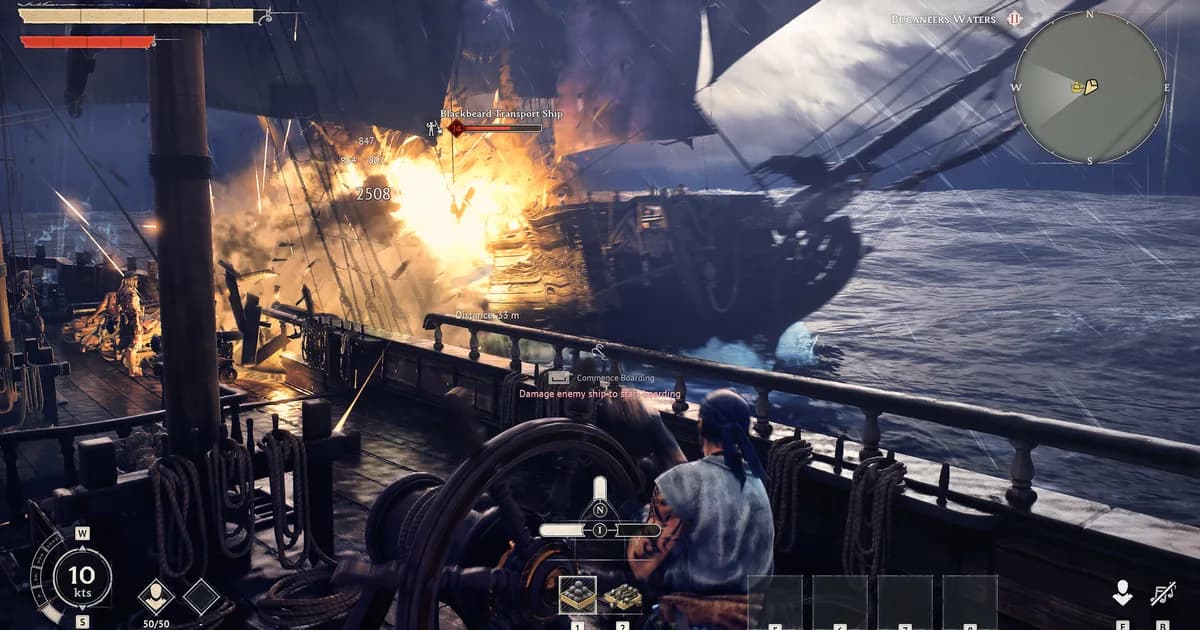
Windrose ship combat runs on two mechanics most players never read in any tutorial: Bar Shots and the Rake. Miss those two, and you're fighting at half capacity every sea battle.
TL;DR: Right-click at the helm to fire without leaving the wheel. Switch to Bar Shots to demast enemies (no reload penalty). Shoot the stern for critical Rake hits. Half-speed during turns for tighter geometry. Keelhold hull bracing lets you heal mid-damage. When outnumbered: disable first, kill second. Crew boards before captain does.
Windrose ship combat: quick answer
Three things determine whether a sea fight goes your way: gear level matching the opponent, positioning that gets you Rake angles, and Bar Shots to neutralize ships you can't fight yet.
Ship gear scales with damage the same way character gear does. A level-10 enemy ship with a level-6 cannon loadout will shred you. The rule is: never be more than two levels below your target's gear when picking a fight. Upgrade ship cannons, hull, naval tactics, and boarding gear at the Shipwright's Workshop in the same progression rhythm as your character armor.
The short version: check gear first. Fight outnumbered only when you know your gear is close. Then use the positioning and ammo tips below.
How cannons work in Windrose
Three firing positions on every ship: left broadside, right broadside, and bow. Each has an independent reload cooldown. Firing all three at once burns your reload windows simultaneously. Community consensus on the setup called "Perfectly Ordered Cannons" is to fire in rotation: left → right → bow → repeat. One position is always reloaded.
The mechanic most players miss: you don't have to run to each cannon. Right-click at the helm while steering to aim and fire without leaving the wheel. It took many players 15+ hours to discover this, according to multiple Reddit threads. Naval combat becomes significantly smoother the moment you know it.
Cannon tier progression from Rogue Buccaneers faction:
- 12-Pounder Cannons: Rogue Buccaneers Level 2 (the first tier that actually changes how fights go)
- 24-Pounder Cannons: mid-game, Brigantine-era combat standard
- 36-Pounder Cannons: late-game, Frigate-era, the heaviest tier in early access
The Blackbeard ship variant supports the widest cannon options per class. The Blackbeard Frigate with 36-Pounders is the highest-damage naval setup in the current EA build.
GODEEPER: Ketch, Brig, Frigate materials, all three variants, and the Wharf vs Workshop confusion explained. Windrose Ship Building Guide →
Bar Shots: the mechanic that changes outnumbered fights
Bar Shots are the most underused Windrose ship combat tool. They target sails instead of hull, and a solid broadside of Bar Shots demasts an enemy ship, making it nearly immobile.
A demasted ship can't maneuver. It can still fire, but it can't close distance or disengage. That turns a 4v1 into a sequence of 1v1 fights: demast three ships, engage the fourth, then come back for the rest.
The key rule: switching to Bar Shots does not reset or interrupt your reload. The ammo converts inside the already-loaded cannons. You can swap mid-fight, fire, swap back to standard rounds, all without penalty.
Targeting logic in multi-ship fights: demast everything except the one ship currently chasing you. Keep one enemy mobile so it pulls away from the immobilized fleet. Fight it in open ocean where the pack can't converge. Once it's gone, return and finish each disabled ship individually.
When to stay on standard rounds: in 1v1 situations where you're winning, or when the enemy is already slowed and you want to end the fight. Bar Shots deal significantly less hull damage than standard rounds. Use them as a control tool, not a primary damage source.
The Rake: critical hits are always available
The Rake is any cannon shot that hits the stern (rear section) of an enemy ship. The angle doesn't matter: broadside, bow, stern chase, any round that lands on the back of the ship triggers a critical hit.
Named after the historical naval tactic where broadsides were fired down the length of an enemy vessel, passing through the full interior and maximizing casualties. In Windrose the mechanic is simplified: stern = crit, every time, from any direction.
In practice, getting Rake angles means getting around or behind enemy ships. Two ways to do it:
- Cut behind on a turn: enemy turns to bring their broadside to bear, you turn tighter to get their stern exposed
- Chase a fleeing ship: damaged enemies sometimes try to run; a stern chase gives free Rake shots
Combat Sails (below) is the positioning tool that makes Rake angles achievable against faster or larger ships.
Combat Sails: the half-speed advantage
Half-speed sailing during combat, called Combat Sails in the community, is the foundation of Windrose ship combat positioning. Slower speed produces less momentum in turns, which means tighter turn geometry and easier broadside alignment.
The rotation: turn left → fire left broadside → turn right → fire right broadside → repeat. At full speed, that rotation is hard to execute cleanly because momentum carries you through the turn before your broadside lines up. At half-speed, you stop the turn where you want it.
One community trick worth picking up: go full speed normally, then drop to half-speed when you start a turn. The speed change while turning creates a drift-like effect (tighter turn than full-speed, faster exit than half-speed only). Worth practicing in 1v1 fights where precise angles matter.
One important application of half-speed: keeping your stern away from enemies approaching from behind. If a ship is sneaking up behind you, a half-speed turn lets you pivot and bring a broadside to bear before they get a Rake angle on you.
Using the map during combat helps execution. The map shows all ship positions and let you plan where to maneuver and which direction to drag the fight. More relevant in multi-ship fights where you need to avoid sailing into reinforcements.
Combat Sails at half-speed: easier broadside alignment, tighter turns, and better stern protection against rear attackers.
Ship gear: what to build at the Shipwright's Workshop
The Workshop has four gear slots per ship. Each matters differently depending on your current fight type.
| Slot | Late-game Pick | Why |
|---|---|---|
| Cannons | Tier-appropriate (24lb/36lb) | Damage is the first gate; gear level must match opponent |
| Hull Bracing | Keelhold | Repairs while taking damage (see below) |
| Naval Tactics | Stretch The Supply | Pairs with Keelhold across long fights |
| Boarding Party | Tier-appropriate | Melee boarding when boarding is faster than sinking |
Faction unlock order for combat builds:
- Rogue Buccaneers Level 2 → 12-Pounder Cannons
- Smugglers of Port Royal Level 2 → Hull Bracing (Keelhold tier unlocks later)
- Brethren of the Coast Level 2 → Brigantine blueprint (after Richards)
Smugglers quests focus on ship combat objectives: boarding actions, pursuit objectives. They're the faction that rewards players who take naval fights. Running their quests is how you build reputation while also getting combat practice.
Damage control: repairs are half the fight
The single most game-changing Windrose ship combat upgrade is Keelhold hull bracing. A community member summed it up: "just makes it easymode. Being able to heal while getting damaged is huge."
Keelhold works because it lets you double up on repairs. A regular Repair Kit and the Combat Repair Kit have separate cooldowns. Keelhold lets you use one while the other is active, then swap. In extended fights, especially multi-ship engagements, this keeps hull HP stable without needing to disengage.
Repair kit priority:
- Regular Repair Kit: use constantly in combat, no CD except the action time
- Combat Repair Kit: shorter CD, use freely
- Master Repair Kit: shares CD with the Combat Repair Kit, save for genuine emergencies (hull at 15-20%)
Gunroom Grog gives reload speed, which is the other mid-combat consumable worth carrying. Reload speed matters in fights where you're getting Rake windows and want to maximize damage output before the enemy repositions.
The combination of Keelhold + Repair Kits turns most 1v1 fights into attrition wins. You outlast ships that would otherwise win in raw damage exchanges.
GODEEPER: Faction level order, Insignia sources, and which factions unlock ship-specific upgrades at each tier. Windrose Faction Guide →
Windrose ship combat outnumbered: 3v1 and 4v1 strategy
The mistake in multi-ship Windrose ship combat is treating every fight like a race to maximum damage output. That approach runs out of hull before the enemy fleet does.
The correct framework:
- Bar Shots first: demast 2-3 ships before they converge
- Keep one ship mobile: leave the closest pursuer active, let the rest sit immobilized
- Fight in open ocean: drag the mobile ship away from the immobilized fleet before engaging
- Repair constantly: Keelhold + Kits between engagements
- Return for the rest: each disabled ship is a 1v1 you get to fight on your own terms
A ship that shows Sword icons is ready to board and will stop firing. Don't sink it. Shift all targeting to the next active ship. Once the whole fleet is at boarding state, clear them in sequence.
One counter-intuitive rule: don't kill ships that are almost at boarding state. They stop fighting on their own. Wasting cannon time to fully sink a pacified ship while another ship is actively shooting at you is a mistake that loses otherwise winnable fights.
Bar Shots to demast enemy fleet: once their sails are gone, fight them in sequence rather than simultaneously.
Boarding: let crew go first
When boarding is the right call, the captain goes in second, not first.
Jumping in immediately puts the captain 1v6 against the enemy crew while friendly sailors are still crossing. Letting crew board first spreads the fight across multiple targets. Then the captain enters and picks off isolated enemies that crew has separated from the main group.
The "Dutch-sailor" alternative: stay on the ship and shoot enemies boarding-side while your crew fights on deck. Works when the captain has a strong firearm and there are fewer enemies boarding than expected.
Random enemy spawns during boarding are a known Windrose ship combat quirk: new enemies can appear mid-fight on the boarded ship. Don't commit everything to clearing a section if you haven't secured the deck yet.
The Blackbeard advantage in combat
After testing all 9 ships across 100+ hours, the community consensus is clear: Blackbeard variants are the best for combat. They have the highest speed and the most cannon capacity of the three variants, trading hull HP and cargo.
The hull HP reduction sounds punishing until you're running Keelhold. The heal-while-damaged mechanic offsets the Blackbeard's lower base HP, and the speed advantage is what actually determines whether you get Rake angles and can disengage from bad fights.
One specific note: the Blackbeard Ketch holds up fine in combat until around level 15 multi-ship encounters. At that point, upgrading to the Blackbeard Brigantine is the priority. The Ketch remains useful for exploration and single-ship fights even after the Brig is built.
The Brethren variant (200,000 hull HP on the Frigate) has a specific use case: extended boss fights or multi-phase encounters where raw survivability matters more than speed. For most naval combat, Blackbeard.
Related Reading
- Windrose Ship Building Guide: Wharf vs Workshop, every material for Ketch through Frigate, and which variant to build.
- Windrose Faction Guide: Which factions to level first, Insignia sources, and how Buccaneers and Smugglers unlock ship combat upgrades.
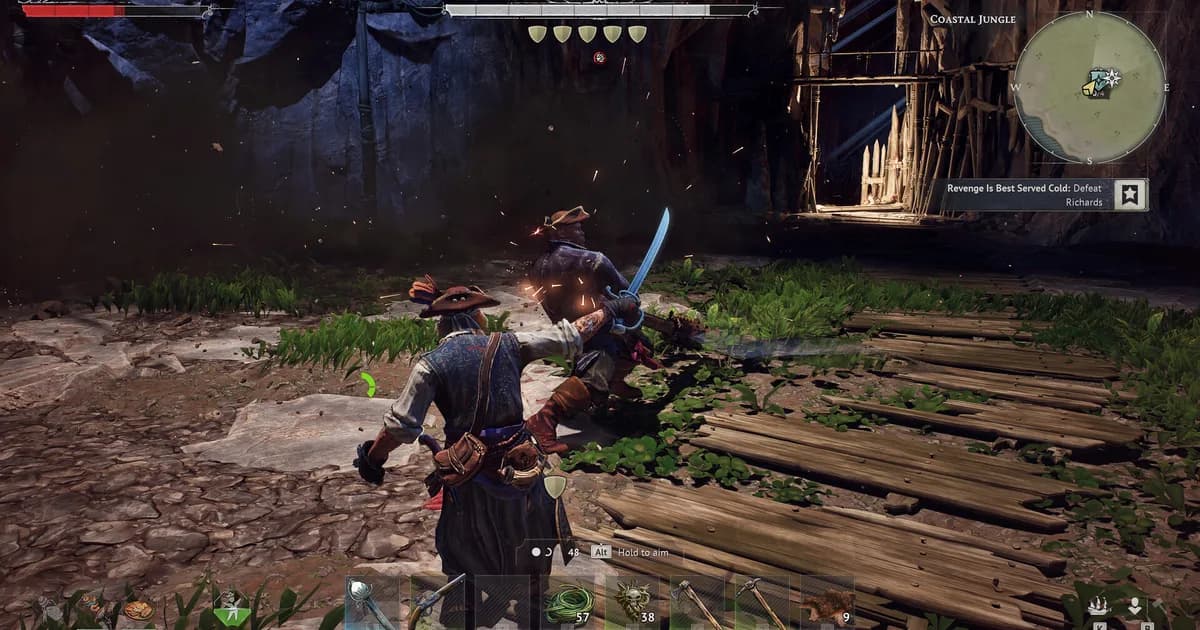
- Windrose Boss Guide: The Richards fight and every boss through the Cursed Swamps, with weak spots and gear checks.
- Windrose Complete Guide 2026: The full hub for all Windrose content.
- Windrose Combat Guide: Fighting Tips, Builds & Gear 2026: Windrose combat guide covering weapon choices, gear builds, consumable prep, and fighting tips for every biome tier in....
References
- Windrose on Steam: store page, early access details, patch notes
- r/crosswind: "I see a lot of people are struggling with Sea-Battles": community-sourced tips including Bar Shots, Rake, Combat Sails
- r/crosswind: "Thoughts after making all 9 ships": Blackbeard variant testing, combat effectiveness assessment
- r/crosswind: "It took me 15 hours to realize something important": right-click to fire from helm discovery
Frequently Asked Questions
How do you fire cannons in Windrose? Right-click at the helm to aim and fire while still steering. Three positions (left broadside, right broadside, bow) each with independent cooldowns. Fire in rotation rather than all at once.
What are Bar Shots in Windrose? An alternate ammo type that targets sails instead of hull. Switching ammo doesn't reset reload. Bar Shots demast enemies, making them nearly immobile. Use them to neutralize ships you can't fight yet, then return for each one individually.
What is raking in Windrose ship combat? Any cannon shot hitting the stern (rear) of a ship is a critical hit. The angle doesn't matter: broadside, bow, or stern chase, hitting the back end of the ship triggers the Rake. It's the biggest available damage multiplier in sea fights.
What is the best hull bracing in Windrose? Keelhold. It heals the ship while still taking damage, letting you use regular and combat repair kits on separate cooldowns. Veteran players call it easymode for extended fights and multi-ship engagements.
What is Combat Sails in Windrose? Sailing at half-speed during combat. Half-speed means less momentum in turns, which means tighter geometry and easier broadside alignment. Standard rotation: turn left, fire left broadside, turn right, fire right broadside.
How do you win outnumbered sea battles in Windrose? Bar Shots to demast the fleet, keep one ship mobile, fight each ship 1v1 in open ocean, repair with Keelhold continuously, and stop firing at ships showing Sword icons (they've stopped fighting). Disable first, kill second.
Should you board or sink enemies in Windrose? Boarding gives better loot when feasible. Let crew go first. When outnumbered, focus on sinking or demasting active ships before boarding anything. A ship at boarding state stops fighting on its own, so shift attention to the remaining threats.
What ship is best for combat in Windrose? Blackbeard variant of whatever class you can currently build. Fastest speed plus maximum cannon capacity, compensating for reduced hull HP with Keelhold bracing. Community consensus after testing all 9 ships is Blackbeard across the board for combat.
Was this guide helpful?
About the author

Senior Critic & Analyst
Former game data analyst turned critic with 11 years covering indie and mid-tier games. Based in Austin. Runs spreadsheets on games most people just play.
- 11 years games criticism
- Former game economy analyst
- Roguelike and strategy specialist
Keep reading
Windrose Multiplayer Tips: Full Co-op Guide for 2026
Guides · 15 min
Windrose Max Level 15: Fastest XP Paths in Early Access
General · 9 min
Windrose Faction Guide: All Factions and How to Progress
Guides · 12 min
Windrose Crafting Guide: All 5 Stations & Best Recipes
General · 15 min
Windrose Thomas Richards Boss Guide: How to Beat Richards
Guides · 7 min
Windrose Best Ship Build Tier List: Brig and Frigate 2026
General · 9 min
Game deals · affiliate links

Disclaimer
This article is published for informational and entertainment purposes. It does not constitute professional financial, legal, or technical advice. Game performance, online services, patch schedules, and store listings change. Verify critical details (pricing, system requirements, regional availability) with publishers and storefronts before you buy. Affiliate links, where present, help support our editorial work and are labelled in our affiliate disclosure.
Comments
Loading comments…