GameBrief · General
Windrose Talent Tree Guide: Best Talents and Builds 2026

Reviewing
Windrose
Kraken Express
The Windrose talent tree gives you 14 skill points total. That sounds like a lot until you see three branches with far more options than you can fill. The math is simple: enough to fully invest one branch or split across two, with the third left mostly empty. The question most players get wrong isn't which talent to take. It's when to commit.
The talent tree sits dormant for the first few levels while you figure out the game. By the time you're in the Foothills, you've probably spent five or six points without much thought. Then you hit level 10, the third tier opens, and suddenly the spec you've been drifting toward has locked you into something you're not sure about for the rest of the cap.
This guide covers what each branch does, how to approach the level 10 commitment, and which spec wins for each playstyle in the current Early Access build.
TL;DR: Windrose talent tree has 14 points across combat, survival, and crafting branches. Commit at level 10 when tier 3 opens. Combat spec wins for Swamps efficiency and damage output. Survival is the better pick for new players and solo runs. Don't spread across all three branches. Respec exists but it's not free.
Windrose talent tree: quick answer
The current talent tree has three branches. You reach the level cap at 15 with 14 total skill points. That's enough to fully invest one branch or build a partial hybrid across two. The third branch will be mostly empty.
The branch breakdown:
- Combat: damage passives, deflect bonuses, and healing mechanics tied to kills and successful parries
- Survival: defensive passives, stamina economy, and resistance against biome hazards
- Crafting: resource yield improvements and crafting speed bonuses
The level 10 mark is when tier 3 unlocks and the real build choices appear. Most experienced players hold at least four to five points at level 10 specifically to spend there, rather than filling lower-tier nodes they'll grow out of.
GODEEPER: If you're still working toward level 10, the fastest route is through Journal quests and Site Clears. Windrose Max Level Cap: Hit 15 Faster With These Routes →
Key takeaways
- 14 skill points at level cap (15), one per level starting at level 2
- Three branches: combat, survival, crafting
- Tier 3 opens at level 10, the real commitment point
- Enough points to fully invest one branch or split across two; three-way splits are too thin to be effective
- Respec is not free in the current build
- Combat build wins for Swamps damage efficiency; survival wins for survivability and solo comfort
- Crafting branch serves dedicated crafters in co-op, adds little to solo gameplay
The three branches and what they enable
Combat branch builds around damage output, deflect timing, and recovery mechanics that activate in fights. The branch includes healing tied to successful deflects and kills, which creates a self-sustaining loop in long camp circuits. A committed combat spec in the Swamps recovers health through the fight rather than burning bandages between each encounter.
The combat branch also supports the perfect block build, where consecutive successful deflects generate compounding damage or effect bonuses. This is the higher-skill path: it rewards players who've internalized the deflect timing and punishes those who haven't. If you're still fumbling the timing, don't expect the combat branch to carry you. Get the deflect down first.
Survival branch takes the opposite philosophy. Defensive passives here improve your damage floor and stamina regeneration, making the game more forgiving rather than more efficient. Players who struggle with the Cursed Swamps because they're taking too much damage in each encounter, not because their damage output is low, tend to get more value from survival than combat.
Survival also covers stamina economy, which affects how many sprints, dodges, and special actions you can take per fight. That matters in the Swamps, where fights chain together faster than in earlier biomes.
Crafting branch covers resource yield from gathering nodes and crafting speed at the workbench. The return on these passives is meaningful for a dedicated crafter in a co-op group: if your role is base maintenance and supply while others handle camps, the crafting branch makes you significantly more efficient at that job.
Solo players should think twice before investing here. Crafting passives don't help you survive the High Priestess, clear camps faster, or recover health mid-fight. Every point in crafting is a point not in combat or survival.
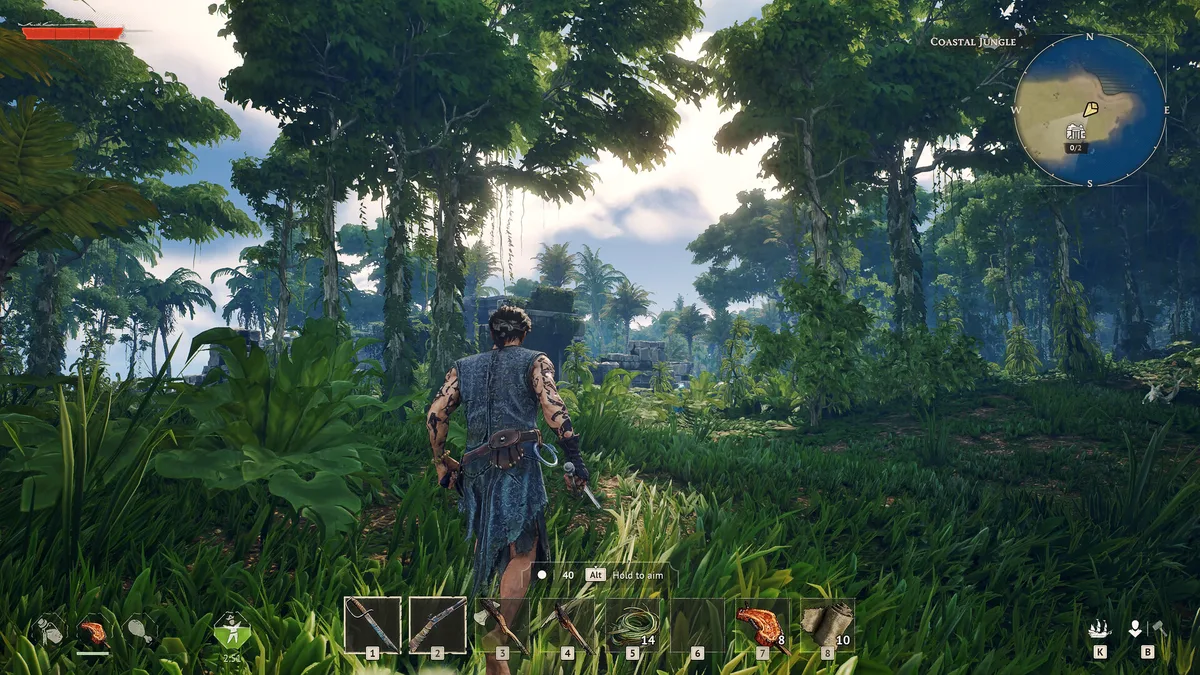 The Coastal Islands biome is where you build the deflect habits that determine how well your talent tree investment pays off in the Swamps. Get the timing right here.
The level 10 decision: where to commit
Level 10 is the checkpoint the talent tree is designed around. The first two tiers have passives that improve what you're already doing. Tier 3 is where the high-payoff nodes live, and it opens at 10.
Hold four to five skill points at level 9, then spend them all once tier 3 unlocks. Players who fill lower-tier nodes as fast as possible sometimes find themselves at level 10 with no flexibility left for the build they actually want.
At 10, ask yourself two questions. First: have you been relying on potions to survive, or are you comfortable taking hits and recovering through deflects? Potion-dependent players need survival passives more urgently. Deflect-comfortable players get more return from combat. Second: are you playing solo or in a group? Solo puts more pressure on self-sustain, which survival handles better.
There's no wrong answer, but there's a wrong time to commit: before level 10. Spreading points thin across all three branches before tier 3 is available means you're investing in lower-efficiency nodes when the high-value ones were one level away.
GODEEPER: How the deflect system works, which weapon types pair with which playstyle, and the consumable stack that matters at the level 15 ceiling. Windrose Combat Guide: Fighting Tips, Builds and Gear →
Combat branch: the efficient choice for experienced players
The combat build pays off most at levels 11 through 15 in the Cursed Swamps. The combination of healing on kills and deflect-tied recovery means a combat-spec player who's landing consistent deflects runs through camp circuits with far fewer interruptions.
The practical difference shows up in consumable use. A combat-spec player doing Swamps circuits burns through fewer Great Healing Potions per run compared to an unspecced character because each fight generates some recovery. It's not enough to replace the four-buff stack, but it noticeably changes the math.
Combat spec pairs best with:
- Steel Halberd for single-target Swamps enemies (three swings vs. six with Iron-tier weapons)
- Steel Sword for mixed-camp circuits where swing arc covers multiple enemies
- Full four-buff stack: Rested at the bonfire, food buff, Elixir of Pain Relief, Great Healing Potions
- Deflect timing that's consistent enough to reliably trigger combat branch recovery nodes
The weak point: the combat branch assumes you can reliably deflect. Against enemies you haven't learned yet, or during the early Swamps adjustment period, you'll sometimes miss deflects and burn health faster than the branch compensates for. Keep the four-buff stack running regardless of spec. The combat branch improves your efficiency, it doesn't replace preparation.
Survival branch: the solo and newcomer pick
Survival branch is easier to justify when you know you're going to take hits you didn't plan for. It doesn't reward perfect play the way combat does: it rewards playing through imperfect encounters without getting two-shotted.
The defensive passives here reduce incoming damage in a way that compounds over a full Swamps session. The difference isn't dramatic in individual fights, but across 10 to 15 camp encounters in a session, the reduced damage floor means you consume fewer bandages and potions and spend less time waiting between fights.
For solo players specifically: you don't have a teammate covering stray hits while you handle the main threat. Survival branch provides a margin for error that combat branch doesn't. In a four-player group where one person is handling deflects and pulls, the combat branch produces more useful output. Solo, the extra survivability changes what you can clear without backing out.
Survival spec pairs best with:
- Any Steel-tier weapon, since the survivability gain lets you focus on offense without needing perfect play
- The same four-buff stack (Rested, food, Elixir, Great Healing Potions): survival build still needs pre-buffing, it just uses each buff more efficiently
- Players who prioritize clearing camps reliably over clearing them fast
Crafting branch: when it makes sense
In a four-player co-op group with defined roles, the crafting branch is genuinely useful for the player who handles base maintenance, supplies, and gear crafting. The crafting branch's resource yield passives mean the supply player keeps the team in Elixirs, cooked food, and repair materials without spending the whole session farming nodes.
In solo, the math doesn't work out. Every point in crafting is a point not in combat or survival, and the resource efficiency gain doesn't offset the combat performance gap when you're clearing Swamps camps alone.
If you're in a dedicated group and want to spec into crafting, keep at least six to seven points in combat or survival for the core self-sustain passives. A pure crafting spec with no combat or survival investment is a support role that only works if the rest of the team is covering the actual fighting.
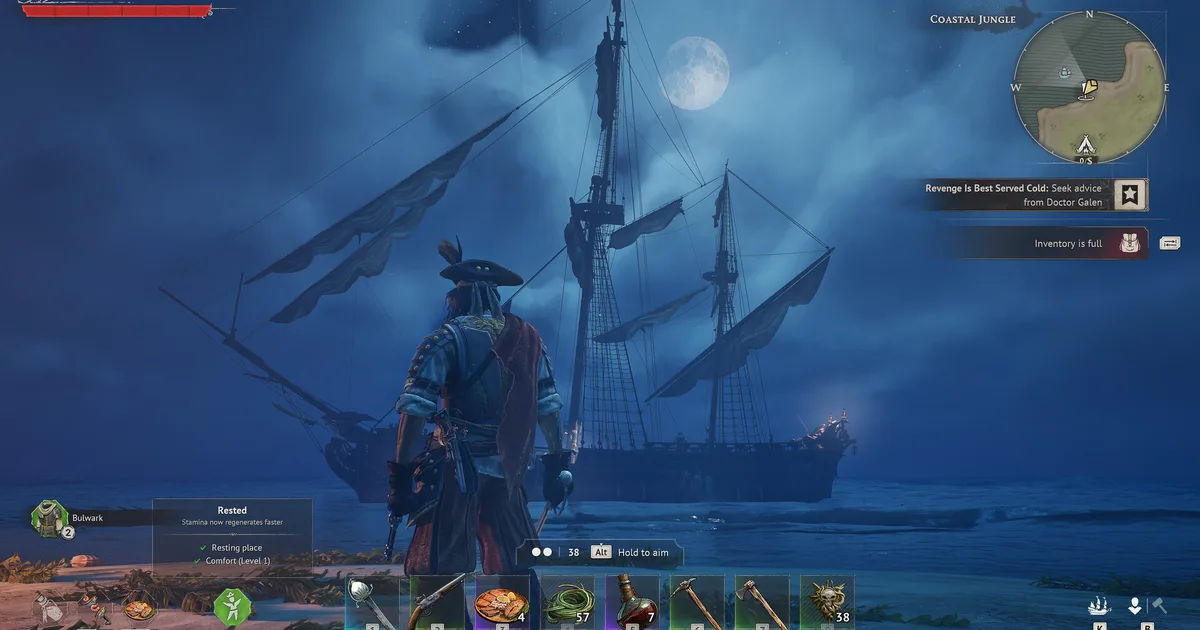
 The open sea between islands is where most player-vs-environment combat happens: scan for hostile ships before committing to a direct route.
Respec cost and when to use it
Respeccing the talent tree in Windrose is not free in the current Early Access build. There's a cost associated with resetting your points. It's worth knowing this before you commit at level 10, not after.
The respec exists to let you correct a spec that genuinely isn't working for you, not as a way to swap builds between sessions. If you're at level 15 and the combat branch isn't producing the results you expected because your deflect timing is inconsistent, a respec to survival isn't free. Budget for it if you plan to experiment.
When respec makes sense:
- You committed combat at level 10 and you're still struggling with Swamps deflect timing at level 14-15
- You're shifting from solo to consistent co-op play and want to move from survival to combat
- You tried crafting branch and found it underperformed for solo content
When it doesn't:
- You're just curious what the other branches feel like
- You want to "try" combat then go back to survival
How your talent spec connects to gear priorities
Talent tree choice affects which gear upgrades you should prioritize first.
Combat spec: Get the Steel Halberd before filling out armor. The weapon is where the combat branch's damage nodes pay off. A combat-spec player with a Steel Halberd in mixed Iron armor clears faster than a combat-spec player in full Iron armor using an Iron weapon.
Survival spec: Armor slots first. The survival branch's defensive passives amplify your armor's damage reduction. Getting all five armor slots to Steel-tier before focusing on weapon upgrades makes the survival spec's benefit feel larger. The Steel Sword is the right weapon here since you're optimizing for camp efficiency over single-target burst.
Both specs: Run the four-buff stack. Rested at a comfort-level bonfire, a food buff from any cooked meal, Elixir of Pain Relief before entering a camp, and Great Healing Potions as your healing consumable. All four stack simultaneously. Talent spec doesn't change this. Pre-buffing before every Swamps session is the single highest-return habit regardless of how you've built your character.
Related Reading
- Windrose Combat Guide: Fighting Tips, Builds and Gear 2026: how the deflect system works, weapon tier list by biome, and the consumable prep that separates clean Swamps runs from wipe loops.
- Windrose Endgame Builds Guide 2026: Steel Halberd vs Sword at the level 15 ceiling, Naval Tactic selection, and the four-buff stack math.
- Windrose Max Level Cap: Hit 15 Faster With These Routes: why enemies give zero XP, the two sources that actually work, and the co-op shortcut to level 15 in 4-6 hours.
- Windrose Best Weapons and Gear Tier List 2026: full tier list for weapons and armor, Steel Halberd ranking, and when to prioritize weapon vs. armor upgrades.
- Windrose Combat Guide: Gear, Builds and Fighting Tips: how to turn your talent picks into a complete build with the right gear and fighting style.
- Windrose Complete Guide 2026: full progression path from the starting Ketch to the Cursed Swamps, with all major milestones mapped by biome.
- Windrose Ashlands: Everything Confirmed So Far (2026): Windrose Ashlands release date: Kraken Express said 'at least 6 months' on April 29, so.
- Windrose Crafting Guide: All 5 Stations & Best Recipes: Windrose crafting guide: station outputs, best material-to-output ratios, and what to craft first at each.
- Windrose Updates Tracker: Every Patch Since Launch 2026: Windrose updates tracker: every patch and hotfix since the April 14 launch, what each one.
- Windrose Bosses: Loot Tables, Weak Spots & Named Attacks: Windrose bosses full breakdown: Richards, Israel Hands, High Priestess, Ghost Captain.
References
- Windrose on Steam: official store page, patch notes, and developer updates from Kraken Express
- r/Windrose: community build discussion, skill tree debate threads, and Swamps survivability tips
Frequently Asked Questions
How many skill points do you get in Windrose? 14 total. One point per level from 2 through 15. That's enough to fully invest one branch or build a partial hybrid across two. The third branch stays mostly empty at 14 points.
What are the three branches in the Windrose talent tree? Combat, survival, and crafting. Combat focuses on damage output, deflect bonuses, and healing mechanics. Survival covers defensive passives and stamina economy. Crafting improves resource yield and crafting speed.
When should I commit my skill points? Level 10. That's when the third tier unlocks and the high-value nodes become available. Hold four to five points at level 9, then spend them at 10 when you can see the full build. Committing earlier locks you into lower-tier nodes when better options were a level away.
Is combat or survival better? Combat for experienced players comfortable with deflect timing. The healing and recovery nodes create a self-sustaining loop in Swamps camp circuits. Survival for new players and solo runs where you need a margin for error.
Can you respec in Windrose? Yes, but it's not free in the current Early Access build. Plan for the cost. Respec when your spec genuinely doesn't fit your playstyle, not to experiment casually.
Is the crafting branch worth it? In solo play, no. Every crafting point is a point not in combat or survival, and the resource efficiency gain doesn't offset the combat gap. In a co-op group with a dedicated supply role, crafting is genuinely useful.
What build works for the High Priestess? Combat spec with Steel Halberd and the full four-buff stack. The Priestess fight has deflect opportunities during the pustule phase. A combat-spec player landing consistent deflects can sustain through the whole fight without burning their full consumable stock.
Was this guide helpful?
About the author

Indie & JRPG Critic
Indie game evangelist and lifelong JRPG fan covering small studios since 2017. Mumbai-born, London-based. Writes the way she talks.
- 7 years indie games coverage
- JRPG and visual novel specialist
- Narrative design focus
Keep reading


Disclaimer
This article is published for informational and entertainment purposes. It does not constitute professional financial, legal, or technical advice. Game performance, online services, patch schedules, and store listings change. Verify critical details (pricing, system requirements, regional availability) with publishers and storefronts before you buy. Affiliate links, where present, help support our editorial work and are labelled in our affiliate disclosure.