GameBrief · General
Windrose Naval Tactics Guide: All 5 Tactics Ranked 2026

Reviewing
Windrose
Kraken Express
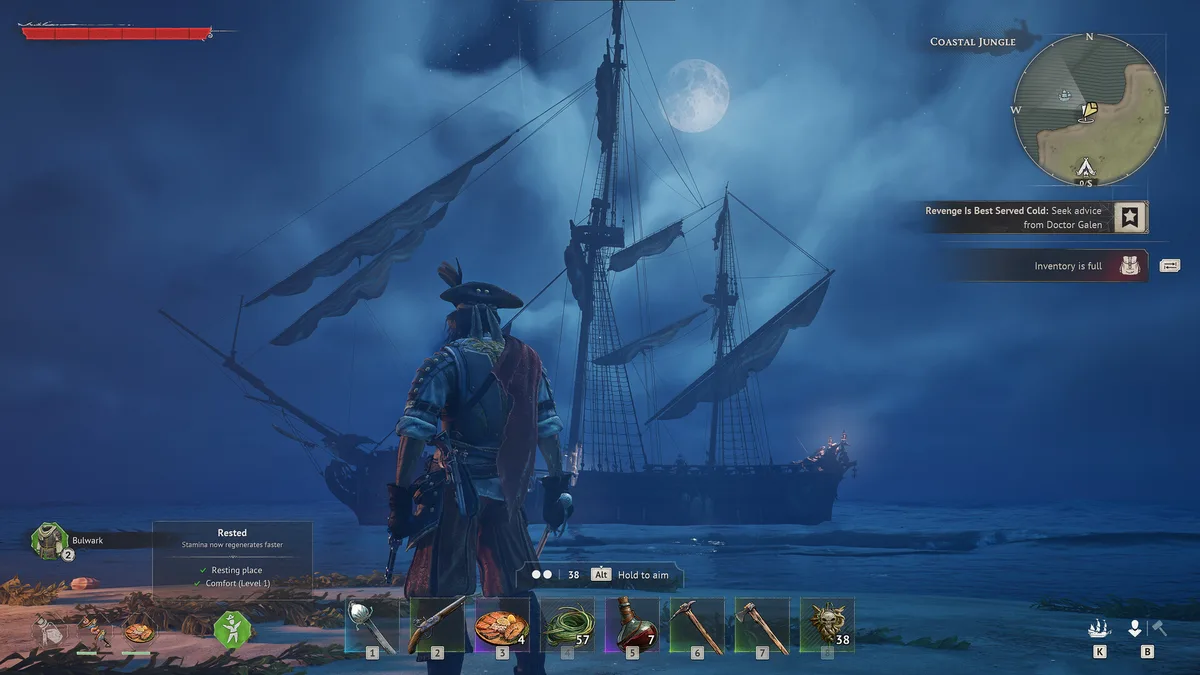
Windrose naval tactics don't just tweak numbers. They change how you engage, when you engage, and what the shape of a session looks like. Most players stick with whatever tactic they unlocked first because the system isn't explained anywhere in-game. The result is a Broadside player trying to navigate Cursed Swamps in zero visibility, or a Storm Rider player leaving damage on the table in open-water fleet fights where raw fire wins.
This guide covers all five naval tactics, the cannon rotation technique that pairs with them, and the fleet engagement strategies that differ by biome.
TL;DR: Broadside is S-tier for open-water fleet encounters. Storm Rider is S-tier for Cursed Swamps. Unlock both, swap between them by biome. The cannon rotation technique (left broadside → right broadside → bow in sequence) doubles your effective damage output regardless of which tactic you're running. Ambush works for burst-focused players. Iron Resolve is the boss fight tactic. No Quarter is boarding-specific. All five come from Smugglers of Port Royal Level 3.
Windrose naval tactics: quick answer
Naval tactics are equippable upgrades from the Shipwright's Workshop, unlocked through Smugglers of Port Royal Level 3. You equip one at a time. The five options are:
| Tactic | Effect | Best for |
|---|---|---|
| Broadside | Increases cannon damage in broadside exchanges | Open-water fleet encounters |
| Storm Rider | Improves mobility and repositioning in low visibility | Cursed Swamps |
| Ambush | Increases opening volley damage | Burst-first engagement style |
| Iron Resolve | Increases hull durability in sustained combat | Boss fights, Brethren builds |
| No Quarter | Improves boarding effectiveness | Boarding-first playstyle |
Level 3 Smugglers reputation unlocks access to all five. You can swap tactics between sessions at the Shipwright's Workshop.
GODEEPER: Full breakdown of the Smugglers of Port Royal faction, how to reach Level 3 efficiently, and what each level unlocks beyond naval tactics. Windrose Faction Tier List 2026: Best Order to Level →
Key takeaways
- Broadside and Storm Rider are the two S-tier picks; everything else is situational
- Swap by biome: Broadside for Foothills open water, Storm Rider for Cursed Swamps
- The cannon rotation technique is tactic-agnostic: it works with any tactic equipped
- Iron Resolve is the correct pick specifically for the High Priestess boss fight
- Ambush rewards players who master approach positioning and opening-volley timing
- No Quarter only makes sense if boarding is your primary engagement method
- All tactics require Smugglers Level 3; reach it before the Cursed Swamps or you're playing without the system
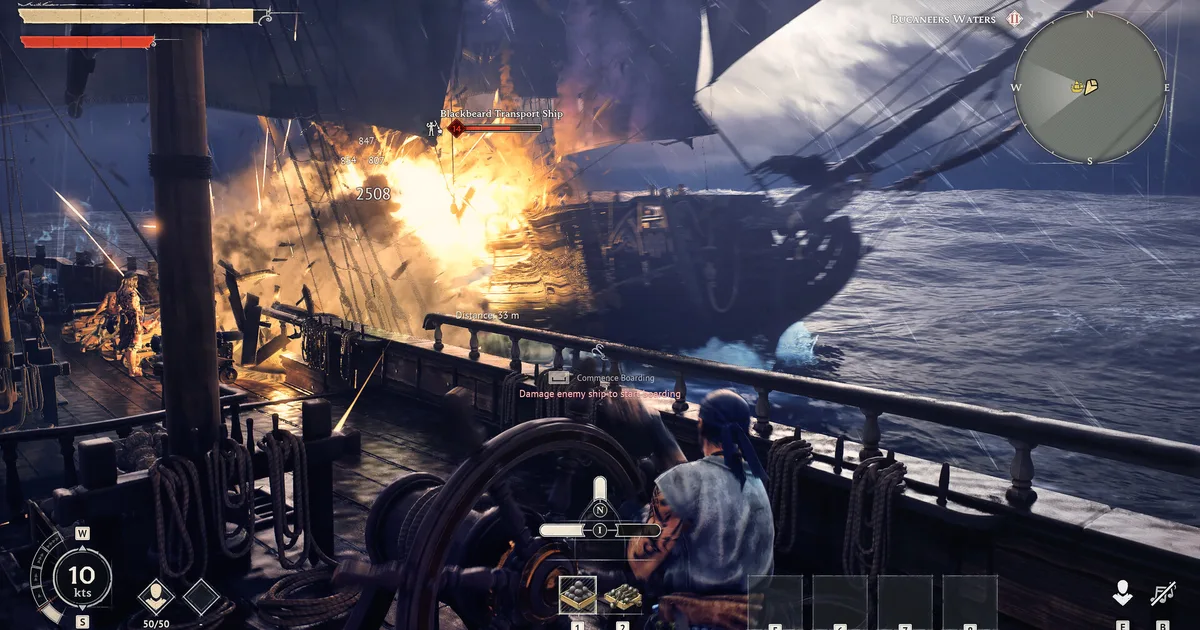
The cannon rotation technique
Before tackling individual tactics, this is the foundational technique that affects every ship combat encounter regardless of which tactic you're running.
Your ship has three independent cannon positions: left broadside, right broadside, and bow. Each has its own reload timer. The mistake most players make is firing all three simultaneously in a volley, then waiting through a full combined reload while enemies keep shooting.
The rotation: fire the left broadside, maneuver to bring the right broadside to bear, fire, bring the bow around, fire. You're using the travel time between positions to cover the reload on the positions you've already fired. The result is near-continuous damage output instead of burst fire followed by dry reloads.
The community nickname for this is "Perfectly Ordered Cannons," because the rotation is only possible if you're positioning the ship intentionally between each fire rather than sitting static and waiting. It rewards aggressive maneuvering. Passive players who hold position and volley get maybe 40% of the damage output that the rotation achieves over a 90-second fight.
Broadside amplifies every position in the rotation. Storm Rider amplifies your ability to maintain the rotation under conditions that would normally break it.
All five naval tactics ranked
Broadside (S tier)
Broadside increases the damage you deal during broadside cannon exchanges. In open-water fights where you're rotating the ship to bring each cannon position to bear sequentially, Broadside multiplies the output of every exchange.
The Blackbeard Frigate at 20 kn speed can dictate engagement distance, which means you're consistently getting clean broadside angles. Broadside rewards that playstyle directly: you're already maneuvering aggressively for the rotation technique, and Broadside turns those maneuvering windows into higher-value exchanges.
This is the default pick for Foothills and post-Foothills open-water sessions. Most of what you're doing is rotating broadsides at pirate fleet ships in open water. Broadside is built for exactly that.
Where it drops off: Cursed Swamps. The reduced visibility and terrain obstacles mean you can't always get clean broadside angles. You spend more time repositioning than exchanging. Broadside's multiplier on exchanges it applies to stays strong, but Storm Rider's mobility advantage in that context produces better session outcomes for most players.
Storm Rider (S tier)
Storm Rider improves ship mobility and repositioning in low-visibility conditions: fog, storm weather, and the terrain choke points that define Cursed Swamps sailing.
The Cursed Swamps regularly put you in situations where an enemy fleet is between you and your objective, visibility is 50 meters, and a static broadside exchange would mean taking damage from ships you can't see on your flanks. Storm Rider lets you disengage cleanly from those situations, circle to a better angle, and re-engage on terms you chose rather than the ones the terrain imposed.
The counterargument is that Storm Rider does less raw damage than Broadside. That's true. The reason it's still S tier in the Swamps is that the fights you win with positioning in the Swamps are fights you would have lost at half health trying to broadside exchange through fog.
For players who spend the majority of their time in the Foothills, Storm Rider is A tier at best. The biome distinction matters. Buy both when you unlock Smugglers Level 3 and swap on the way to your session location.
Iron Resolve (A tier)
Iron Resolve boosts hull durability under sustained combat. Against enemies that deal continuous damage over many rounds, the extended hull HP means your ship survives the contact to return fire.
The targeted use case is boss fights. The High Priestess in the Cursed Swamps has a sustained damage phase that punishes Blackbeard hull HP directly. A Blackbeard Frigate at 110,000 hull HP is taking meaningful damage per second during that phase. Iron Resolve extends the window. The Brethren Frigate at 200,000 hull HP with Iron Resolve is the maximum survivability configuration in the current build.
For standard fleet encounters, Iron Resolve underperforms Broadside because fleet encounters don't last long enough for the durability multiplier to outpace Broadside's damage gains. You want fights to end faster, not be survivable longer, in standard content. Boss fights invert that calculation.
Ambush (B tier)
Ambush adds bonus damage to your opening cannon volley when you initiate combat. The first exchange in a new encounter deals more than it would with any other tactic.
Two conditions make Ambush work: you need to consistently win the approach (be in position to open at optimal range before the enemy can react) and your sessions need to have a lot of short fights rather than extended engagements. Pirate camp sailing circuits in the Foothills fit both conditions. Each camp has 2-3 ships, encounters resolve quickly, and a Blackbeard ship at 22 kn speed can approach from angle before most enemies adjust.
Where it falls apart: anything that takes longer than 3-4 exchanges. In those fights, the Ambush opener becomes a small fraction of total output, and Broadside's consistent multiplier over many exchanges pulls ahead.
Ambush is a legitimate pick for experienced players who have mastered approach positioning. It's not a beginner tactic.
No Quarter (B tier, boarding-specific)
No Quarter improves boarding effectiveness: the damage your crew deals during boarding actions and the speed at which boarding encounters resolve.
The niche is real. A Blackbeard Brigantine captain who leads boarding parties instead of rotating broadsides will see better results with No Quarter than without it. Boarding gives better loot per encounter when it works because you're collecting from the ship rather than just sinking it.
The problem is that No Quarter only makes sense if boarding is your consistent strategy. Broadside and Storm Rider both improve the approach phase of a fight, which happens in every encounter. No Quarter only applies after you've already won the approach and brought a ship to boarding range. Choosing No Quarter means committing to boarding as your primary damage source, which requires positioning skills and timing that casual players often don't have.
For players who want to build boarding-focused runs: No Quarter is your tactic. For everyone else, it's C tier.
 Pre-session ship checks matter. Having the right tactic equipped before you sail determines what options you have once contact happens.
Fleet engagement strategy by biome
The tactics only solve half the problem. The other half is how you approach fleet composition and engagement order.
Coastal Islands: Encounters are 1v1 and 2v1 at most. Cannon rotation covers everything. Broadside if you have it, whatever tactic is available if you don't.
Foothills: Ship circuits in the Foothills regularly produce 3v1 situations. The correct approach: demast one ship with Bar Shots to remove it from the engagement temporarily, then run the rotation technique on the ship that can still maneuver. Don't fight three mobile ships simultaneously if you can take one out of the chase first. Broadside handles the 1v1 and 2v1 portions of that sequence efficiently.
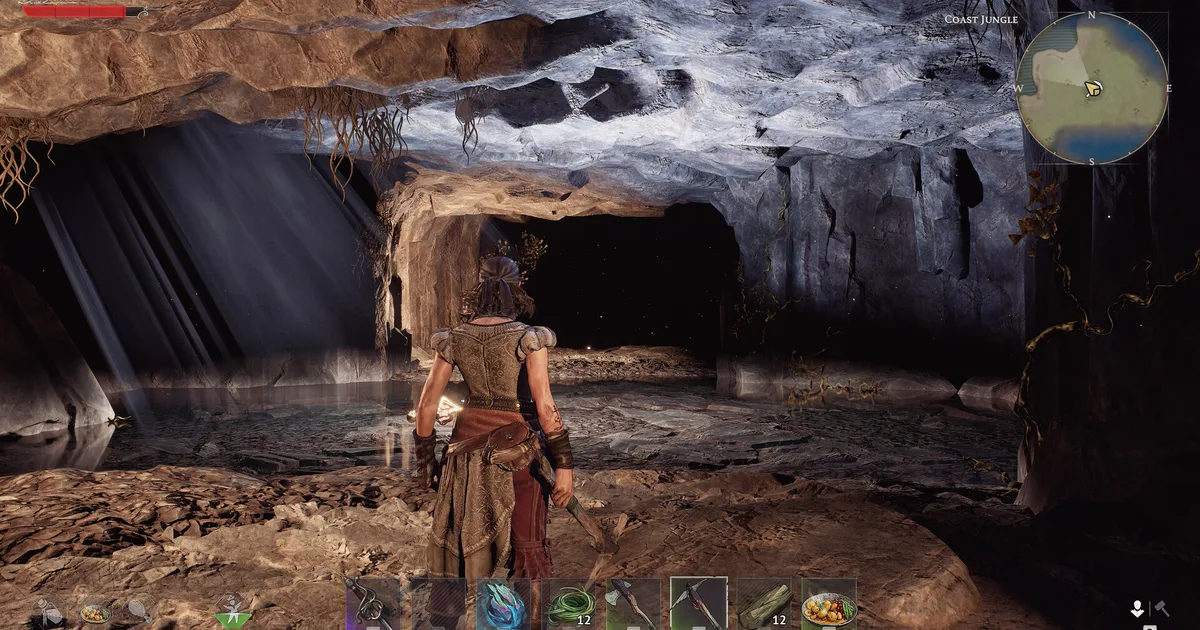
Cursed Swamps: Naval encounters here frequently happen in partially blocked terrain with 3-4 ship fleets that include higher-tier enemies. Storm Rider's repositioning advantage lets you break contact when the engagement angle goes wrong. Never commit to a static broadside fight in the Swamps if terrain is pinching you. The goal is always to create a clean 1v1 situation against the nearest threat; Storm Rider gives you the mobility to manufacture that situation.
 The world map tracks faction control, discovered ports, and cleared dungeon locations, useful for planning efficient multi-island routes.
GODEEPER: How to combine camp circuits and sailing routes in the Foothills to maximize Old Salt Insignia drops, which feed both faction reputation and Piastre income. Windrose Pirate Camps Farming Guide: XP Loop and Respawn →
Piastre economics of ship combat
Ship combat generates Piastre through loot from sinking and boarding. Fully upgraded 36lb cannons cost 2,500 Piastre each. Understanding how session design affects Piastre return shapes how you plan runs.
Boarding generates more Piastre per encounter than sinking. A sunk ship drops a fraction of its cargo. A boarded ship lets you loot the hold directly. If your session is going well and a target reaches boarding state (the Sword icons appear above the ship), it's worth the boarding commitment for the loot multiplier.
The caveat: boarding takes longer and leaves you stationary. Against a 3-ship fleet, boarding one while two others are still mobile is a good way to take sustained fire during the boarding action. Only board when you can either neutralize the remaining ships first with Bar Shots or handle the engagement solo.
Old Salt Insignias drop from defeated ships in the Foothills and Cursed Swamps and are worth +80 faction reputation each. Running ship combat isn't just Piastre income. It's the fastest reputation source in the game, which accelerates every faction upgrade including the next Shipwright's Workshop tier.
Related Reading
- Windrose Ship Combat Guide: Bar Shots, Raking and Sea Tips: the foundational ship combat guide covering bar shots, critical hits, and how to handle outnumbered encounters.
- Windrose Best Ship Build Tier List 2026: Blackbeard vs Brethren variant debate, the full cannon and hull bracing priority order, and why Keelhold changes ship survivability math.
- Windrose Faction Reputation Guide: Level Factions Fast 2026: how to farm Old Salt Insignias efficiently, why ship combat is the fastest reputation source, and which faction to prioritize for Smugglers Level 3.
- Windrose Faction Tier List 2026: Best Order to Level: what Smugglers Level 3 unlocks, the full vendor comparison, and the faction order that gets you naval tactics before the Cursed Swamps.
- Windrose Complete Guide 2026: the full progression path, where ship combat fits in the overall loop, and the biome unlock order.
- Windrose Israel Hands Boss Guide: Foothills Fight & Loot: Windrose Israel Hands boss guide: how to beat the Foothills boss, parry his combo, dodge the Poison Dash....
- Windrose Ashlands: Everything Confirmed So Far (2026): Windrose Ashlands release date: Kraken Express said 'at least 6 months' on April 29, so.
- Windrose Endgame Guide: What to Do After the Story: Windrose endgame guide: faction Level 3 priority order, Frigate build-out, Steel gear farming loops, and.
- Windrose Best Weapons Tier List 2026: All Tiers Ranked: Windrose best weapons tier list 2026: Steel Halberd S-tier, Copper Sword B, Stone tools F.
- Windrose Max Level 15: Fastest XP Paths in Early Access: Windrose max level is 15 in Early Access.
References
- Windrose on Steam: official store page, patch notes, and ship combat system details from Kraken Express
- r/Windrose: community tactics discussion, cannon rotation threads, and Naval Tactic tier debates
Frequently Asked Questions
What are the best naval tactics in Windrose? Broadside for open-water fleet encounters, Storm Rider for Cursed Swamps. Both are S tier for their respective contexts. If you can only unlock one immediately: Broadside handles more of the game's standard content. If you're entering the Cursed Swamps without Storm Rider, reach Smugglers Level 3 before descending.
How do you unlock naval tactics? Through Smugglers of Port Royal faction reputation at Level 3. All five tactics become available simultaneously. Equip one at a time from the Shipwright's Workshop between sessions. The fastest path to Level 3 is consistent ship combat in the Foothills and Cursed Swamps: Old Salt Insignias from those naval encounters give +80 reputation each.
What is the cannon rotation technique? Fire your three cannon positions (left broadside, right broadside, bow) in sequence rather than all at once. Each position has an independent reload cooldown. Using travel time between firing angles to cover the reload of previously fired positions produces near-continuous damage output. Volleying all three simultaneously wastes two-thirds of your potential fire rate.
What does Broadside do? Increases cannon damage during broadside exchanges. In fights where you're rotating the ship to bring each position to bear, Broadside multiplies the damage of every exchange in that rotation. It's the tactic built for the standard fleet combat style: aggressive maneuvering, rotation technique, close to medium range engagement.
What does Storm Rider do? Improves ship mobility and repositioning in low-visibility conditions. In the Cursed Swamps where fog and terrain restrict sight lines, Storm Rider lets you disengage from bad angles and re-engage where you choose. It doesn't increase raw damage, but it wins fights in the Swamps that Broadside loses because the engagement geometry can't support clean broadside exchanges.
When should I use Iron Resolve? Boss fights, specifically the High Priestess in the Cursed Swamps. Also for Brethren Frigate builds that are designed around high hull HP survivability. In standard fleet encounters, Broadside generates better outcomes than Iron Resolve.
What is the Ambush tactic for? Opening volley burst damage. Works best for players who master approach positioning and run sessions with many short fights rather than extended engagements. In Foothills pirate fleet circuits, Ambush combined with the speed advantage of a Blackbeard ship produces strong early damage. In longer encounters, Broadside's consistent multiplier outpaces Ambush's front-loaded bonus.
Was this guide helpful?
About the author

Senior Critic & Analyst
Former game data analyst turned critic with 11 years covering indie and mid-tier games. Based in Austin. Runs spreadsheets on games most people just play.
- 11 years games criticism
- Former game economy analyst
- Roguelike and strategy specialist
Keep reading

Disclaimer
This article is published for informational and entertainment purposes. It does not constitute professional financial, legal, or technical advice. Game performance, online services, patch schedules, and store listings change. Verify critical details (pricing, system requirements, regional availability) with publishers and storefronts before you buy. Affiliate links, where present, help support our editorial work and are labelled in our affiliate disclosure.