GameBrief · General
Windrose Best Ship Build Tier List: Brig and Frigate 2026

Reviewing
Windrose
Kraken Express
The Windrose best ship build question usually comes down to one choice: Blackbeard variant for combat, Brethren variant for trading. But variant selection is only the beginning. The four gear slots at the Shipwright's Workshop (cannons, hull bracing, naval tactics, boarding party) are where the actual build happens. Two players running the same Blackbeard Frigate with different Naval Tactics are playing different games.
This tier list ranks every build combination available in the current Early Access meta, with specific numbers for each option and the community-debated call on Broadside vs. Storm Rider.
TL;DR: Blackbeard Frigate with Keelhold, 36-Pounder cannons, and Broadside is S tier for open-water combat. Swap to Storm Rider for Cursed Swamps runs. Blackbeard Brigantine is A tier mid-game, good enough to carry you through the second biome until you unlock the Frigate. Brethren variants are B tier: useful for boss fights and trading, not the combat default. Stock variants are C tier with no meaningful advantage over Blackbeard.
Windrose best ship build: quick answer
Blackbeard Frigate, fully geared with Keelhold hull bracing and 36-Pounder cannons. The 20 kn speed lets you dictate engagement range; the 36-Pounders delete opposing hulls before the hull HP gap matters. The gap from reduced hull HP is real (110,000 vs 160,000 for Stock Frigate), but Keelhold from Smugglers of Port Royal essentially closes it for any fight you don't let drag out.
Mid-game answer: Blackbeard Brigantine. The 22 kn speed is the fastest ship option in the first biome, and 12lb/24lb mixed cannon support gives you upgrade headroom as you level Buccaneers.
Ship build tier list
| Tier | Build | Best For |
|---|---|---|
| S | Blackbeard Frigate + Keelhold + 36lb + Broadside | Open-water fleet combat |
| S | Blackbeard Frigate + Keelhold + 36lb + Storm Rider | Cursed Swamps navigation |
| A | Blackbeard Brigantine + 24lb + Keelhold | Mid-game (pre-Frigate) |
| B | Brethren Frigate + Keelhold + 36lb + Iron Resolve | Boss fights, attrition |
| B | Brethren Frigate + Keelhold + 36lb + Broadside | Trading + combat hybrid |
| C | Stock Frigate / Stock Brigantine | No clear advantage |
| D | Brethren Brigantine | Trading only (18 kn is limiting) |
| F | Ketch (any) | Replace immediately |
GODEEPER: Full Brigantine crafting material list, Frigate unlock requirements, and which Wharf vs Workshop mistake trips up most players. Windrose Ship Building Guide: Ketch, Brig and Frigate →
S tier: the Blackbeard Frigate build
Variant: Blackbeard Frigate Stats: 110,000 hull HP, 20 kn, 12 × 24lb/36lb + 6 × 12lb/24lb cannons, 28 cargo Gear: Keelhold (hull bracing), 36-Pounder cannons, Broadside or Storm Rider (naval tactic)
The Blackbeard Frigate's 20 kn speed combined with 36-Pounder cannons gives you the widest engagement windows in the game. You close the distance when you want, fire at optimal range, and disengage if the fight turns bad, all before slower ships can respond.
The hull HP trade-off is real. 110,000 vs 160,000 on the Stock Frigate means you take more punishment in long fights. Keelhold from Smugglers of Port Royal Level 2 offsets enough of this to make the Blackbeard viable in every fight type. The build breaks down only if you let enemies get sustained broadside fire without maneuvering. Blackbeard ships reward aggressive engagement and punish passive hull tanking.
Cannon setup: Perfectly Ordered Cannons rotation
The Frigate has three cannon positions: left broadside, right broadside, and bow. Each has an independent reload cooldown. The community calls the standard rotation "Perfectly Ordered Cannons": fire left broadside, maneuver to bring right broadside to bear, fire, bring bow around, fire. Rotating through all three maintains continuous damage output. Volleying all three positions at once wastes two-thirds of your reload time.
The 36-Pounders require Rogue Buccaneers Reputation Level 3 and cost 2,500 Piastre per cannon. Get Piastre stockpiled before hitting Level 3. The upgrade is available the moment you rank up, and you want to purchase immediately.
Hull Bracing: Keelhold
Keelhold is currently the top hull bracing tier available and comes from Smugglers of Port Royal Level 2. If you completed the Smugglers questline during normal progression, it carries over when you switch to the Frigate. If you skipped Smugglers in the first biome, prioritize it as the second unlock after cannons.
The Broadside vs Storm Rider debate
This is the only genuine gear choice with active community debate. Both are Naval Tactics from Smugglers of Port Royal Level 3.
Broadside: Maximizes cannon output in side exchanges. In open-water fleet encounters where you're rotating broadsides at range, Broadside increases the damage dealt in each exchange. This is the default pick for players running first-biome pirate camp circuits and open-sea encounters.
Storm Rider: Mobility and positioning boost in low-visibility conditions. The Cursed Swamps environment drops visibility significantly. Storm Rider's positioning advantage prevents situations where you get caught between patrol groups mid-sail, which happens regularly in the swamps without it.
The practical answer: use Broadside until you're running the Cursed Swamps consistently, then test Storm Rider across a few sessions. Changing Naval Tactics requires a vendor visit (not swappable mid-session), so experimentation has a cost. Players who spend most of their time in the first biome will not feel Storm Rider's advantage enough to justify the switch.
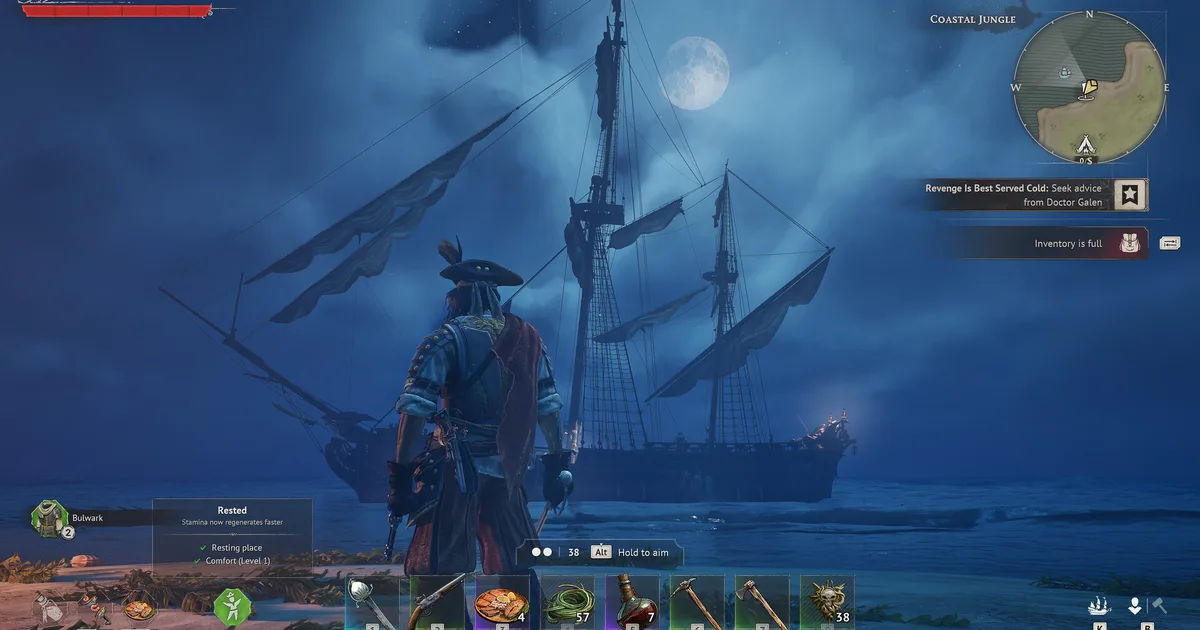
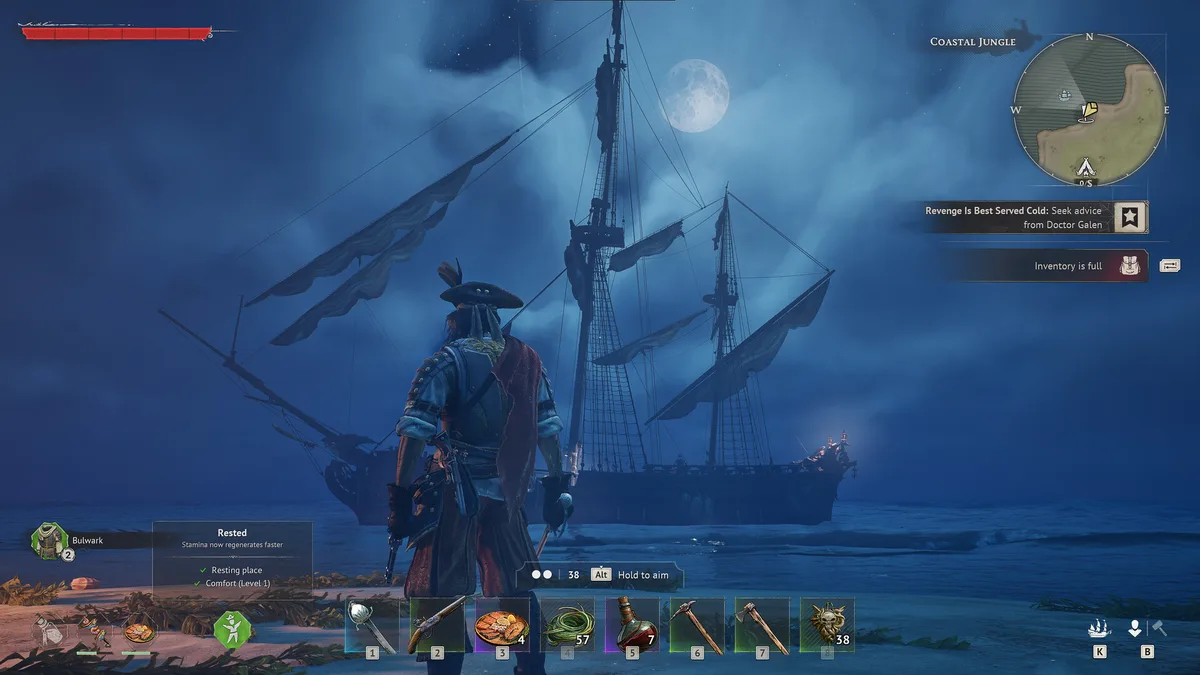 A Windrose ship in the Coastal Jungle at night. The Brigantine is your transport and fighting platform through the first biome until Frigate materials are available.
A tier: Blackbeard Brigantine build
Variant: Blackbeard Brigantine Stats: 50,000 hull HP, 22 kn, 6 × 12lb/24lb cannons, 24 cargo Gear: Keelhold (when available), 24lb cannons
22 kn makes the Blackbeard Brigantine the fastest ship in the first biome, and the 12lb/24lb cannon support gives it combat upgrade headroom that the Brethren and Stock variants don't have. By the time you're mid-Foothills, a Blackbeard Brigantine with 24lb cannons and Keelhold hull bracing will clear pirate camp circuits that turn other players around.
The hull HP is the genuine weakness: 50,000 at a tier where enemies hit harder late in the biome. The correct response is to use that speed. At 22 kn you're faster than every ship you'll fight in the first biome. You don't have to absorb hits if you're dictating distance.
The Brigantine sits in A tier rather than S because it's time-limited. Once you reach the second biome and Brethren Level 4, the Frigate upgrade is mandatory. A tier means the right choice for where you are. This is the build that carries the first 60% of the game.
GODEEPER: How the deflect system works at the Cursed Swamps difficulty, Frigate naval tactic selection, and the endgame gear priority order. Windrose Endgame Builds Guide →
B tier: Brethren builds (when to use them)
Brethren Frigate for boss fights. 200,000 hull HP and 52 cargo is the survivability maximum in the current build. Against bosses with sustained damage phases (the High Priestess specifically), Iron Resolve naval tactic and the Brethren hull create an attrition setup that out-survives Blackbeard builds in extended fights.
The cost is 16 kn speed, which is the slowest endgame option. What this means practically: you won't choose when fights start. Enemies close to you on their timeline, not yours.
Brethren Brigantine for pure trading. 32 cargo and 90,000 hull HP with 18 kn. The cargo advantage is real for dedicated traders who want to move maximum goods per run. But 18 kn means you'll lose chases and can't disengage from fights that go badly. Know what you're signing up for.
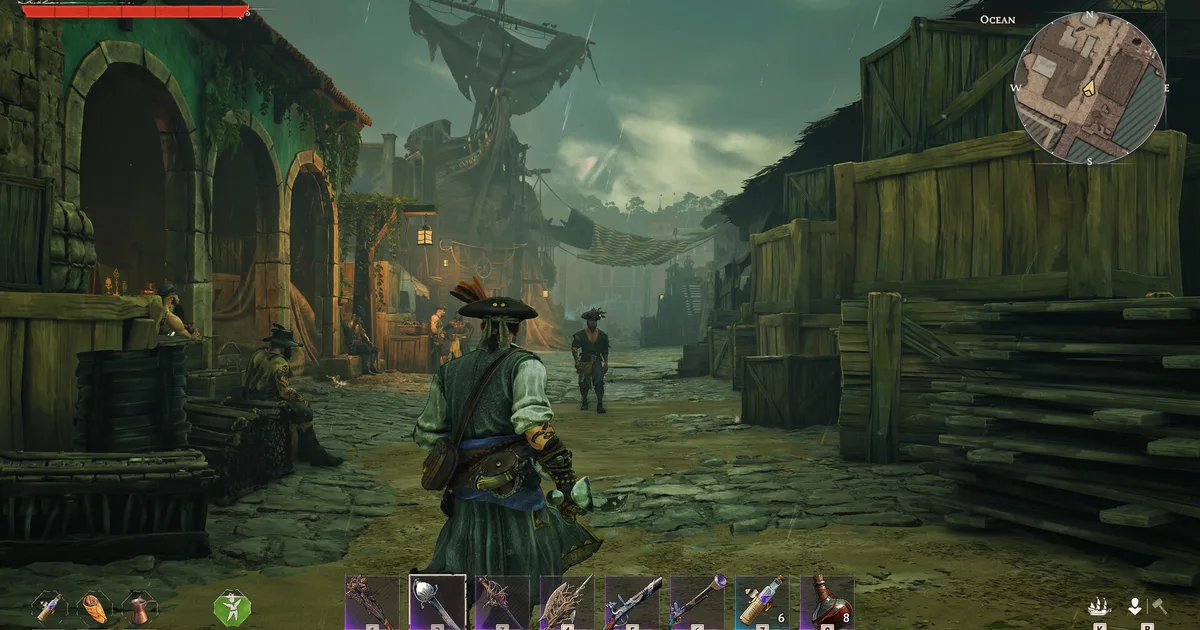
 Ship combat rewards positioning over firepower: flanking an enemy removes their broadside advantage and exposes the hull to concentrated fire.
C and D tier: why Stock and slow ships underperform
Stock variants sit at C tier not because they're bad but because they offer nothing specific. Stock Brigantine at 20 kn and 28 cargo is in between the Blackbeard and Brethren on every stat: slower than Blackbeard, less cargo than Brethren, less HP than Brethren. "Middle of all stats" without a specialization advantage is a non-build.
Brethren Brigantine at D tier is the trading option in the first biome, but 18 kn means retreating from bad fights is harder than it should be. Unless you're exclusively running trade routes and avoiding combat entirely, the cargo advantage doesn't compensate for the speed disadvantage.
How to build toward S tier
The unlock order for the Blackbeard Frigate S-tier build:
- Complete Richards boss fight: prerequisite for Brigantine blueprint purchase
- Reach Brethren of the Coast Level 2: Brigantine blueprint available (1,000 Piastre)
- Switch to Blackbeard Brigantine: speed advantage starts immediately
- Level Smugglers of Port Royal to Level 2: unlocks Keelhold hull bracing
- Level Rogue Buccaneers to Level 3: unlocks 36-Pounder cannons; stockpile 2,500 Piastre per cannon in advance
- Reach second biome, Brethren Level 4: Frigate blueprint (3,000 Piastre)
- Build Blackbeard Frigate: requires Tarred materials from swamp biome
- Level Smugglers to Level 3: unlocks Naval Tactics (Broadside or Storm Rider)
The Keelhold + 36lb cannons combination is the functional build completion point. Naval Tactic selection is the final optimization, not a prerequisite for the build being viable.
Related Reading
- Windrose Ship Building Guide: Ketch, Brig and Frigate: complete material lists for each ship tier, variant stats table, and the Wharf vs Workshop mistake that blocks most players.
- Windrose Ship Combat Guide: Bar Shots, Raking and Sea Tips: how bar shots demast enemies, the Rake maneuver, and the Keelhold timing that makes hull bracing worth the investment.
- Windrose Endgame Builds Guide: Frigate gear slot priorities, Naval Tactic comparison across biomes, and the personal weapon builds that pair with each ship configuration.
- Windrose Faction Tier List 2026: faction priority order for ship unlocks, Smugglers and Buccaneers first, in that order, for the S-tier build.
- Windrose Complete Guide 2026: full progression path from starting Ketch to Frigate, with ship upgrade milestones mapped to biome progress.
- Windrose Talent Tree Guide: Best Talents and Builds 2026: Windrose talent tree: 14 skill points, 3 branches, one commitment at level 10. Combat wins for Swamps, survival....
- Windrose Ashlands: Everything Confirmed So Far (2026): Windrose Ashlands release date: Kraken Express said 'at least 6 months' on April 29, so.
- Windrose Best Weapons Tier List 2026: All Tiers Ranked: Windrose best weapons tier list 2026: Steel Halberd S-tier, Copper Sword B, Stone tools F.
- Windrose Max Level 15: Fastest XP Paths in Early Access: Windrose max level is 15 in Early Access.
- Windrose Crafting Guide: All 5 Stations & Best Recipes: Windrose crafting guide: station outputs, best material-to-output ratios, and what to craft first at each.
References
- Windrose on Steam: official store page, patch notes, developer updates from Kraken Express
- r/Windrose: community meta discussion, build sharing, Naval Tactic debate threads
- Windrose is $29.99 on Steam right now (no active discount). Loaded (sponsored) often lists the same key for less than the Steam storefront price.
Frequently Asked Questions
What is the best ship build in Windrose? Blackbeard Frigate with Keelhold hull bracing, 36-Pounder cannons, and Broadside naval tactic for open-water combat. The 20 kn speed and 36lb damage output handles the combat difficulty that every other build struggles with. For Cursed Swamps: swap Broadside for Storm Rider.
Should I use Blackbeard or Brethren variant? Blackbeard for combat. The speed advantage on both ships lets you choose engagement terms. Brethren for dedicated trading routes or boss survivability. Most players default to Blackbeard.
When should I upgrade from Brigantine to Frigate? When you reach the second biome and have Brethren Level 4. The Frigate requires Tarred materials from the swamp biome. There's no workaround. Plan it as a second-biome project, not a first-biome goal.
What is the best Naval Tactic in Windrose? Broadside for open-water fleet fights. Storm Rider for Cursed Swamps navigation. Both come from Smugglers Level 3. Test both before committing since swapping requires a vendor visit.
How do I get 36-Pounder cannons? Reach Rogue Buccaneers Reputation Level 3. Cost: 2,500 Piastre per cannon. Stockpile Piastre before hitting Level 3 so you can buy immediately on unlock.
What is the Perfectly Ordered Cannons setup? Fire left broadside, right broadside, and bow in rotation rather than volleying all three at once. Each position has an independent reload, so rotation maintains continuous output. Volleying wastes two-thirds of your cooldown.
Is the Ketch worth upgrading? No. Replace it with the Brigantine after defeating Richards and reaching Brethren Level 2. Ketch upgrades don't carry over to the Brigantine. Treat the Ketch as a transport while you gather Brigantine materials.
Was this guide helpful?
About the author

Senior Critic & Analyst
Former game data analyst turned critic with 11 years covering indie and mid-tier games. Based in Austin. Runs spreadsheets on games most people just play.
- 11 years games criticism
- Former game economy analyst
- Roguelike and strategy specialist
Keep reading

Disclaimer
This article is published for informational and entertainment purposes. It does not constitute professional financial, legal, or technical advice. Game performance, online services, patch schedules, and store listings change. Verify critical details (pricing, system requirements, regional availability) with publishers and storefronts before you buy. Affiliate links, where present, help support our editorial work and are labelled in our affiliate disclosure.