GameBrief · General
Windrose Armor Guide: All Sets, Stats, Upgrade Order 2026

Reviewing
Windrose
Kraken Express
This Windrose armor guide covers everything that actually matters: all 6 named armor sets, their 2-piece and 4-piece bonuses, and where to buy each one. The rule most guides get wrong is treating armor as a simple material ladder. It isn't. Windrose armor identity comes from which named set you're wearing, not just what it's made of, and the faction vendors who sell them.
TL;DR: Windrose has 6 named armor sets, not a plain material tier system: Conquistador and Pikeman (Smugglers of Port Royal), Flibustier and Tracker (Rogue Buccaneers), Privateer and Marksman (People of Tortuga). Each unlocks at Level 2 faction reputation for 200 Piastre per piece, and each grants a 2-piece bonus plus a stronger 4-piece bonus. Five armor slots per character. Mixing 2 pieces from two different sets to combine their 2-piece bonuses is a common, viable build.
Windrose armor guide: quick answer
Windrose armor is organized around 6 named sets, each with its own 2-piece and 4-piece bonus: Conquistador (damage mitigation and Bulwark), Pikeman (health and two-handed damage), Flibustier (stamina efficiency and one-handed damage), Tracker (healing and damage resistance), Privateer (crit chance and scaling crit damage), and Marksman (mobility stamina and ranged damage). Which one you want depends on your build, not just your current biome.
Five slots per character: helmet, chest, arms, legs, boots. Seven gear slots total when you include the primary weapon and firearm (weapons follow their own separate Uncommon/Rare/Epic rarity ladder, not the armor set system).
The 6 Windrose armor sets:
| Set | Faction vendor | 2-piece bonus | 4-piece bonus |
|---|---|---|---|
| Conquistador | Smugglers of Port Royal | +15% damage resistance | Bulwark (early hits don't interrupt actions) |
| Pikeman | Smugglers of Port Royal | +160 max health | +15% two-handed weapon damage |
| Flibustier | Rogue Buccaneers | Attacks cost 20% less stamina | +15% one-handed weapon damage |
| Tracker | Rogue Buccaneers | +35% healing effectiveness | +15% damage resistance |
| Privateer | People of Tortuga | +10% critical hit chance | +10% crit damage per nearby enemy, up to 30% |
| Marksman | People of Tortuga | -30% sprint/jump/dash stamina cost | +15% ranged damage |
Each set unlocks at Level 2 reputation with its faction, priced at 200 Piastre per piece. Pieces also drop from Coastal Jungle and Foothills points of interest.
GODEEPER: The five armor slots pair with a primary weapon and firearm for seven total gear slots. Here's how weapon choice affects which armor set actually fits your build. Windrose Best Weapons Tier List: All Tiers Ranked →
Key takeaways
- 6 named armor sets, each with a 2-piece and a 4-piece bonus: Conquistador, Pikeman, Flibustier, Tracker, Privateer, Marksman
- Five armor slots: helmet, chest, arms, legs, boots (seven total with weapon and firearm)
- Every set unlocks at Level 2 faction reputation, 200 Piastre per piece from that faction's vendor
- Conquistador and Pikeman come from Smugglers of Port Royal; Flibustier and Tracker from Rogue Buccaneers; Privateer and Marksman from People of Tortuga
- Upgrade materials differ by set type: Ingots (Copper/Iron/Steel) for Conquistador and Pikeman, Leather for Flibustier and Tracker, Cloth and Linen for Privateer and Marksman
- Mixing 2 pieces from two sets to stack two different 2-piece bonuses is a common, viable hybrid build
- Set pieces also drop from Coastal Jungle and Foothills points of interest, not just vendors
Conquistador and Pikeman: Smugglers of Port Royal (tank sets)
Conquistador and Pikeman are the two metal-and-plate sets, sold by the Smugglers of Port Royal once you hit Level 2 reputation with that faction, at 200 Piastre per piece. Both upgrade with Ingots, the same Copper, Iron, and Steel smelting chain the crafting guide covers for tools: Copper Ore and Iron Ore smelt at 3-to-1, Steel Ore at 4-to-1, all requiring Charcoal.
Conquistador is the pure defense set. Its 2-piece bonus grants +15% damage resistance, and the 4-piece bonus is Bulwark, which stops the first few hits you take from interrupting whatever action you're mid-swing on. That's a genuinely different kind of survivability than a flat damage reduction number: it keeps your own attacks and heals from getting cancelled in a crowd.
Pikeman trades pure mitigation for a bigger health pool and offense. Its 2-piece bonus is +160 max health, and the 4-piece bonus adds 15% two-handed weapon damage. If you're running a Halberd or similar two-handed weapon, Pikeman's 4-piece turns your armor into a damage stat, not just a defense stat.
Common hybrid build: 2 pieces of Conquistador plus 2 pieces of Pikeman gives you both 2-piece bonuses (damage resistance and bonus health) without committing to either 4-piece effect. This is the most frequently recommended tank setup in community discussion for players who haven't settled on a single damage type yet.
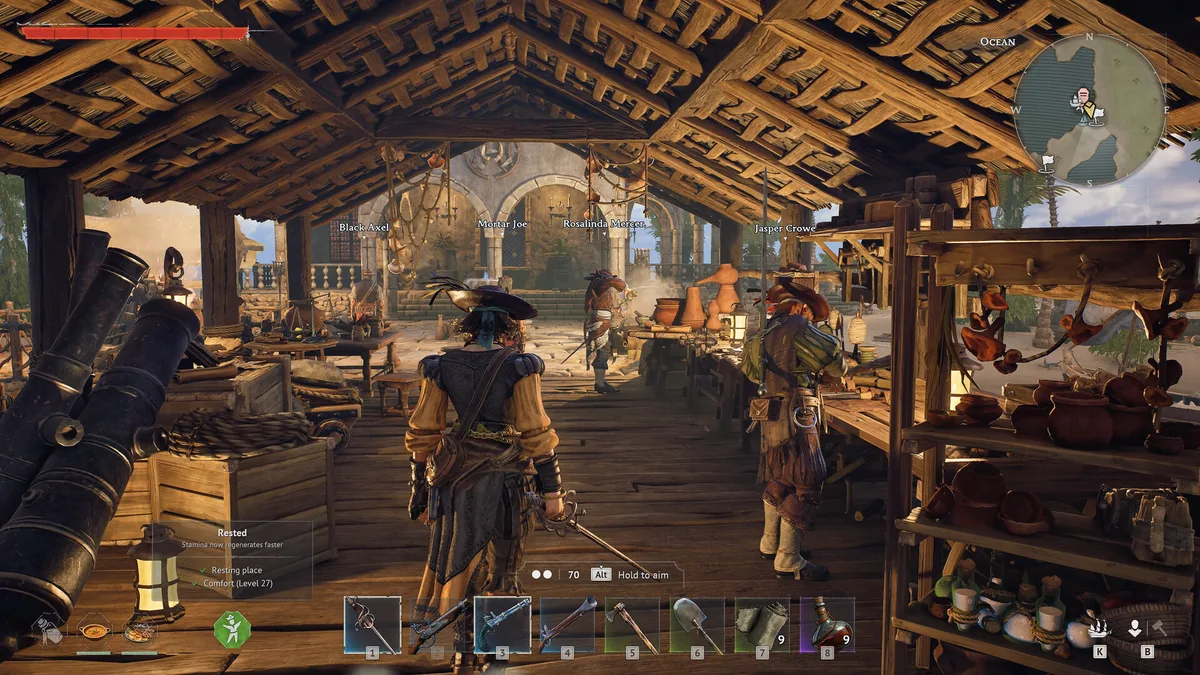 Faction vendors sell armor sets once you reach Level 2 reputation. Conquistador and Pikeman come from the Smugglers of Port Royal.
Flibustier and Tracker: Rogue Buccaneers (melee and sustain sets)
The Rogue Buccaneers sell Flibustier and Tracker at the same Level 2 reputation, 200 Piastre gate. Both upgrade with Leather from the Tanning Rig rather than smelted Ingots.
Flibustier is built for one-handed melee builds that want to stay mobile. Its 2-piece bonus cuts attack stamina cost by 20%, and the 4-piece bonus adds 15% one-handed weapon damage. This is the set for a Rapier or Cutlass build that leans on attack frequency over single big hits.
Tracker is the sustain option. Its 2-piece bonus increases all healing effectiveness by 35%, which applies to potions, Elixirs, and any other healing source, and the 4-piece bonus adds 15% damage resistance on top. Tracker doesn't deal damage itself, but it stretches your healing supply further across a long session.
Privateer and Marksman: People of Tortuga (crit and ranged sets)
People of Tortuga sell Privateer and Marksman, both upgraded with Cloth and Linen instead of Ingots or Leather.
Privateer is a crit-scaling set. Its 2-piece bonus adds 10% critical hit chance, and the 4-piece bonus adds 10% critical damage for every nearby enemy, up to 30%. That scaling makes Privateer's 4-piece strongest in crowded fights, not one-on-one encounters, since the bonus depends on how many enemies are near you when you land the hit.
Marksman is the mobility and ranged set. Its 2-piece bonus cuts sprint, jump, and dash stamina cost by 30%, and the 4-piece bonus adds 15% ranged damage. For a Musket or Pistol build that needs to reposition constantly to keep range, Marksman's 2-piece alone is worth running even before you complete the full 4 pieces.
GODEEPER: How talent tree branch choice (combat vs survival) interacts with armor set bonuses and consumable math. Windrose Talent Tree Guide: Best Talents and Builds 2026 →
Choosing and completing a set: the priority framework
With 6 named sets and only 5 armor slots, the real decision isn't slot order, it's which sets to combine:
1. Decide your build first. Tank (Conquistador/Pikeman), melee sustain (Flibustier/Tracker), or crit/ranged (Privateer/Marksman). The 4-piece bonus only triggers with 4 matching pieces, so a full-commitment build needs 4 of one set plus 1 flex slot, or 2+2 for two 2-piece bonuses with no 4-piece payoff.
2. Full 4-piece vs. 2+2 hybrid. A full Pikeman set (4 pieces) gets the two-handed damage bonus; 2 Pikeman plus 2 Conquistador gets bonus health and damage resistance but neither 4-piece effect. Which is better depends on whether the specific 4-piece bonus (Bulwark, extra weapon damage, scaling crit) matters more to your build than a second 2-piece bonus.
3. Buy the whole set from one vendor when you can afford it. Since each set is tied to a single faction vendor at 200 Piastre per piece (1,000 Piastre for all 5), reaching Level 2 reputation with that faction and buying in bulk is faster than waiting on POI drops for specific pieces.
One exception: if you're still short on Piastre, prioritize the pieces that matter most for your damage type first (chest and the weapon-relevant slot), and fill in cheaper pieces as reputation and gold allow.
 Port areas serve as the primary resource exchange hub: sell salvage, restock consumables, and repair ship hull between expeditions.
How armor sets interact with the four-buff stack
The pre-session buff stack (Rested at the bonfire, food buff, Elixir of Pain Relief, Great Healing Potions) applies regardless of which armor set you're wearing, but which set you have on changes how much value each buff adds.
Tracker's 2-piece healing bonus stacks directly with the Elixir and food buffs, so a Tracker-geared character gets more out of every healing item than a Conquistador or Marksman character does. Conquistador's Bulwark 4-piece reduces how often a fight interrupts your healing in the first place, which is a different kind of efficiency than raw healing power.
Matching your consumable choices to your armor set, rather than treating both as separate systems, is where the buff stack actually pays off. A Privateer crit build burning healing items meant for a Tracker build is wasting the set bonus you paid Piastre for.
Related Reading
- Windrose Best Weapons Tier List 2026: All Tiers Ranked: the other half of the gear system: all 8 real weapon types ranked, rarity ascension, and when to upgrade weapon vs armor slots.
- Windrose Talent Tree Guide: Best Talents and Builds 2026: how combat vs survival spec changes your armor upgrade order and the consumable math behind each build.
- Windrose Crafting Guide: All 5 Stations and Recipes: the full crafting station build order, smelting chain ratios, and buy vs. craft decisions for each biome tier.
- Windrose Endgame Builds Guide 2026: what full Steel unlocks for endgame builds, Naval Tactics, and the four-buff stack math at the level 15 ceiling.
- Windrose Combat Guide: Fighting Tips, Builds and Gear 2026: biome-by-biome gear requirements, how armor tier affects consumable use, and the deflect system that matters most at Swamps difficulty.
- Windrose Foothills Guide: Camps, Iron Gear, Israel Hands: Windrose Foothills guide: levels 6-10, Iron crafting chain, Veteran Corsair camp circuits, Israel Hands strategy, and which faction....
- Windrose Guide 2026: All Biomes, XP, Factions & Ships: Windrose guide hub for 2026: biomes, XP system, factions, ships, combat, co-op, and the road.
- Windrose Ashlands: Everything Confirmed So Far (2026): Windrose Ashlands release date: Kraken Express said 'at least 6 months' on April 29, so.
- Windrose Max Level 15: Fastest XP Paths in Early Access: Windrose max level is 15 in Early Access.
- Windrose Best Ship Build Tier List: Brig and Frigate 2026: Windrose best ship build in 2026: Blackbeard Frigate is S tier for combat.
References
- Windrose on Steam: official store page, patch notes, and crafting system details from Kraken Express
- r/Windrose: armor set discussion, hybrid build reports, faction vendor pricing threads
- Windrose Steam Community discussions: player breakdowns of Conquistador, Pikeman, Flibustier, Tracker, Privateer, and Marksman set bonuses
Frequently Asked Questions
What armor should I use in Windrose? It depends on your build, not your biome. Windrose has 6 named armor sets (Conquistador, Pikeman, Flibustier, Tracker, Privateer, Marksman), each with its own 2-piece and 4-piece bonus, rather than one simple material tier to chase.
How many armor slots are there? Five: helmet, chest, arms, legs, boots. Seven total gear slots with the primary weapon and firearm included.
Does Windrose have armor set bonuses? Yes. Each of the 6 named sets grants a 2-piece bonus and a stronger 4-piece bonus. Pikeman's 2-piece adds 160 max health, for example, and its 4-piece adds 15% two-handed weapon damage.
Where do I get armor sets? From faction vendors at Level 2 reputation, 200 Piastre per piece: Smugglers of Port Royal sell Conquistador and Pikeman, Rogue Buccaneers sell Flibustier and Tracker, and People of Tortuga sell Privateer and Marksman. Pieces also drop from Coastal Jungle and Foothills points of interest.
What materials do I need to upgrade armor? It depends on the set. Conquistador and Pikeman use Ingots from the Copper/Iron/Steel Foundry chain. Flibustier and Tracker use Leather from the Tanning Rig. Privateer and Marksman use Cloth and Linen.
Can I mix pieces from different sets? Yes, and it's a common build choice. Running 2 pieces from one set and 2 from another gives you both 2-piece bonuses, though you give up either 4-piece effect. Full 4-piece commitment is better when that specific bonus (Bulwark, extra weapon damage, scaling crit) matters more to your build.
Was this guide helpful?
About the author

News Reporter
Games journalist and news hound with 7 years covering industry moves, studio announcements, and patch notes. Chilean. Writes tight, edits tighter.
- 7 years games journalism
- Industry and esports specialist
- Early access coverage
Keep reading


Disclaimer
This article is published for informational and entertainment purposes. It does not constitute professional financial, legal, or technical advice. Game performance, online services, patch schedules, and store listings change. Verify critical details (pricing, system requirements, regional availability) with publishers and storefronts before you buy. Affiliate links, where present, help support our editorial work and are labelled in our affiliate disclosure.