
GuideGraveyard Keeper 2
Graveyard Keeper 2 battles: all 23, waves and rewards
About the game
Graveyard Keeper 2
Lazy Bear Games · tinyBuild
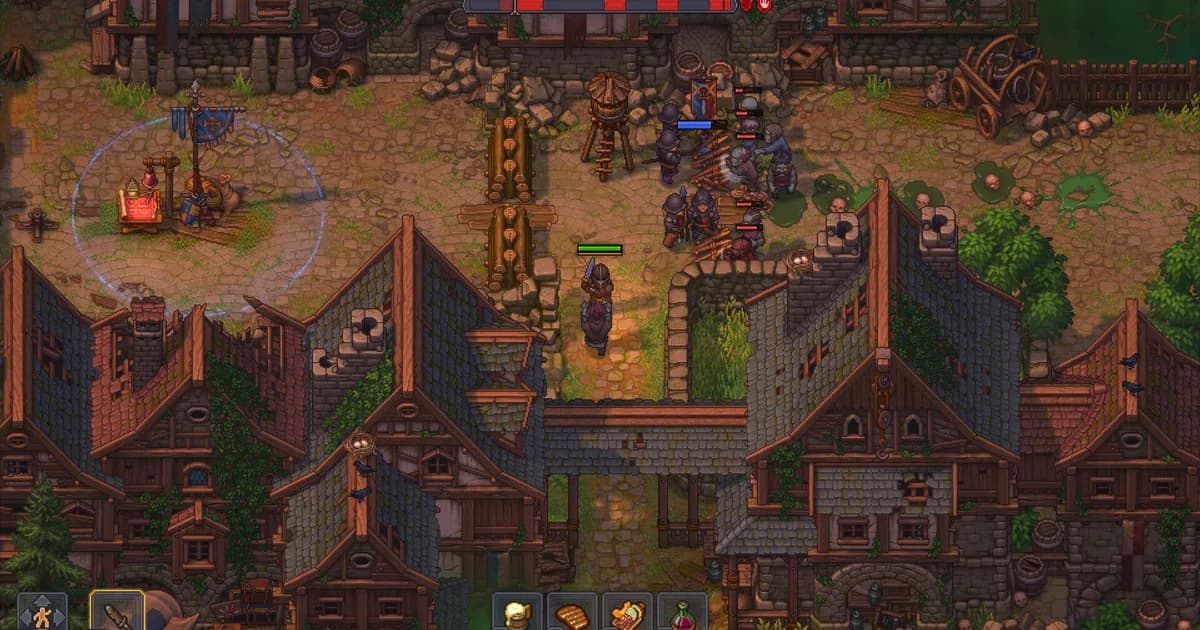
Graveyard Keeper 2 battles are fixed encounters, not random waves. This list puts all 23 fights in order, records unlocks, shows every front's timed waves, and separates fixed rewards from six descriptive zombie labels.
TL;DR: There are 16 story and sewer entries plus seven Sewerena rounds. Most town battles use Sloth, while the Port, sewer brawls, Sewerena, and Bathhouse fight are listed as any-day exceptions. Hold your base until the final front timer ends. The reward table keeps the GK2DB and Wikily Town Gratitude values side by side because they disagree after the 1.008 balance change.
Graveyard Keeper 2 battles: quick answer
The list has 23 encounters: the Port opener, town and sewer fights, floodgates, endgame fights, and seven optional Sewerena rounds. The story fans out, so use the quest name in the unlock column. For squads, weapons, barricades, and Victory Banners, use the Zombie Army Battle Guide.
The official combat post describes town fights as weekday activities and sewer fights as open six days out of six. The references identify Sloth as the regular town window; exceptions are below. The calendar guide covers the week.
How to read the battle list
The wave database gives each route a front and timed blocks. F1 (5) means five blocks on Front 1; 0:12-0:35 is that block's arrival window. Gaps are pauses. W means Wild Zombie, K Buckethead, D Door Zombie, T Stinker, R Barrel Zombie, and P Spitter. Enemy totals are not kill quotas.
Both references describe holding your base until the timeline ends. Some fights also use enemy flags or control points. The official post illustrates Town Square's all-direction attacks and central streets' multiple fronts.
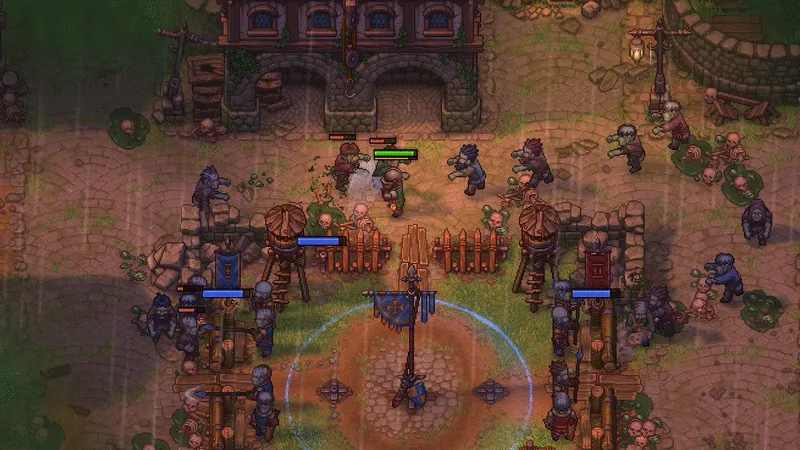 Steam combat preview with several enemy approaches and a defended base.
Step-by-Step: use this Graveyard Keeper 2 battles list
1. Match the quest pointer: Find the active quest named in the unlock column. Middle story branches can be active side by side.
2. Check the day rule: Treat Sloth as the normal town-battle appointment. The table marks the any-day exceptions; the workshop-hours guide covers other timed systems.
3. Read the longest front: Compare each front's last time block and its enemy mix. A lower total can still be awkward if fronts overlap late.
4. Claim the fixed reward: The reward is paid when the battle ends. Enemy kills have no separate drop table; red tech points for participating zombie fighters are a separate win reward.
Every Graveyard Keeper 2 battle in story order
The table uses the exact battle names in the two community databases. The fixed item rewards below follow the current GK2DB extract. TG means Town Gratitude. Where Wikily reports a different TG value, it appears after the slash. This is deliberate: official 1.008 confirms that winning-battle Town Gratitude was increased, but it does not publish a complete replacement table. Bathhouse defense power also differs, so this list does not present that disputed threshold as settled fact.
| # | Battle and unlock pointer | Starts | Front wave timeline | Enemies sent | Fixed end reward |
|---|---|---|---|---|---|
| 1 | Break Through to the Port. First... Sludge? and the Port camp. | Any day | F1 (5): 0:00-0:07, 0:07-0:12, 0:12-0:35, 1:55-2:00, 2:00-2:25. F2 (8): 0:20-0:30, 0:30-0:55, 1:35-1:45, 1:45-1:55, 2:25-2:35, 2:35-2:45, 3:15-3:27, 3:27-3:35. | 93 W | Defender's Emblem x1, Zombie goo x6, TG 4 / 8. |
| 2 | Eastern Districts: Active Scouting. Herbert opens Hope It Doesn't go South after the Port fight. | Sloth | F1 (10): 0:00-0:10, 0:10-0:40, 1:02-1:07, 1:29-1:51, 1:51-1:59, 2:11-2:15, 2:27-2:37, 2:37-2:57, 3:09-3:13, 3:25-3:40. | 133 W | Defender's Emblem x1, Goo x6, TG 4 / 8. |
| 3 | Eastern Districts Purge. The second Hope It Doesn't go South fight, after Active Scouting. | Sloth | F1 (6): 0:00-0:03, 0:03-0:15, 0:15-0:45, 0:45-1:00, 1:30-2:00, 3:00-3:30. F2 (2): 2:20-3:10, 3:30-4:20. F3 (7): 0:00-0:05, 0:05-0:20, 0:20-0:50, 0:50-1:05, 1:05-1:35, 1:35-2:00, 3:00-3:30. | 214 W, 33 K | Victory Banner x1, Goo x6, TG 4 / 8. |
| 4 | Market Square Purge. Plaza Battle after Jack's workshop order. | Sloth | F1 (6): 0:00-0:15, 0:15-1:05, 1:25-1:55, 1:55-2:20, 2:40-2:55, 2:55-3:35. | 176 W, 14 D | Goo x6, TG 4 / 8. |
| 5 | Central Districts Purge: Part I. Street Battles after Market Square. | Sloth | F1 (10): 0:00-0:35, 0:35-0:55, 0:55-1:10, 1:35-1:50, 1:50-2:30, 2:30-2:45, 3:25-3:45, 3:45-4:05, 4:35-4:50, 4:50-5:05. F2 (10): 0:00-0:20, 0:20-0:40, 0:40-0:55, 1:50-2:00, 2:00-2:35, 2:35-2:45, 3:45-4:05, 4:05-4:25, 4:55-5:10, 5:10-5:25. | 180 W, 74 K, 16 D | Defender's Emblem x1, Goo x6, TG 4 / 8. |
| 6 | Central Districts Purge: Part II. Immediately after Part I in Street Battles. | Sloth | F1 (13): 0:00-0:30, 0:30-0:35, 0:35-0:50, 0:50-1:10, 1:10-1:15, 1:15-1:30, 2:00-2:20, 2:20-2:40, 2:40-2:45, 2:45-3:00, 4:30-4:50, 4:50-5:10, 5:10-5:30. F2 (13): 0:00-0:30, 0:30-0:35, 0:35-0:50, 0:50-1:10, 1:10-1:15, 1:15-1:30, 3:00-3:20, 3:20-3:40, 3:40-3:45, 3:45-4:00, 4:30-4:50, 4:50-5:10, 5:10-5:30. | 136 W, 48 T, 40 K | Victory Banner x1, Goo x6, TG 4 / 8. |
| 7 | Sewer Brawl I. Davy's Wharf Rats request and Battles in the Sewers. | Any day | F1 (5): 0:00-0:03, 0:03-0:20, 0:30-1:05, 1:25-1:35, 1:35-1:55. | 64 W | Keys for Looters x3, Goo x4, TG 3 / 6. |
| 8 | Sewer Brawl II. The second Davy sewer fight, after Brawl I. | Any day | F1 (7): 0:00-0:15, 0:15-0:45, 0:45-1:00, 2:00-2:30, 3:00-3:15, 3:15-3:45, 4:15-4:45. F2 (7): 0:00-0:15, 0:15-0:45, 1:30-1:45, 1:45-2:15, 2:15-2:30, 3:15-3:45, 4:15-4:45. | 190 W, 32 K | Keys x3, Goo x4, TG 3 / 6. |
| 9 | Sewerena, bout 1. Optional Davy arena after the two brawls. | Any day | F1 (8): 0:00-0:05, 0:05-0:30, 0:30-0:35, 1:25-1:30, 1:30-1:50, 1:55-2:20, 2:35-3:05, 3:15-3:25. F2 (8): 0:35-0:50, 0:50-0:55, 0:55-1:10, 1:25-1:50, 1:55-2:00, 2:00-2:20, 2:45-2:55, 3:05-3:35. | 193 W, 63 K | Keys x4, Goo x5, TG 4 / 8. |
| 10 | Sewerena, bout 2. The next sequential arena fight. | Any day | F1 (9): 0:00-0:05, 0:05-0:20, 0:25-0:30, 0:30-0:45, 1:00-1:05, 1:05-1:45, 2:00-2:05, 2:05-2:40, 2:40-3:00. F2 (9): 0:00-0:05, 0:05-0:45, 1:00-1:05, 1:05-1:20, 1:25-1:30, 1:30-1:45, 3:00-3:05, 3:05-3:40, 3:40-4:00. | 156 W, 112 K | Keys x4, Goo x5, TG 4 / 8. |
| 11 | Sewerena, bout 3. After bout 2. | Any day | F1 (8): 0:00-0:20, 0:20-0:50, 0:50-1:00, 2:30-2:50, 2:50-3:20, 3:20-3:30, 5:30-5:50, 5:50-6:30. F2 (7): 0:00-0:15, 0:15-0:30, 0:30-0:45, 0:45-1:30, 1:30-2:00, 2:30-4:30, 5:00-7:00. | 316 W, 196 K, 4 D | Keys x5, Goo x4, TG 4 / 8. |
| 12 | Sewerena, bout 4. After bout 3. | Any day | F1 (10): 0:00-0:05, 0:05-1:00, 1:40-2:00, 2:00-2:10, 2:10-2:30, 2:30-3:10, 3:25-3:30, 3:30-4:00, 4:00-4:10, 4:42-4:58. F2 (10): 0:00-0:05, 0:05-0:45, 0:45-0:50, 0:50-1:30, 3:25-3:30, 3:30-4:00, 4:00-4:10, 4:20-4:35, 4:35-5:10, 5:10-5:20. F3 (10): 0:30-0:35, 0:35-1:30, 1:40-2:00, 2:00-2:10, 2:10-2:30, 2:30-3:10, 3:25-3:30, 3:30-4:00, 4:00-4:10, 4:42-4:58. | 255 W, 127 K, 44 T | Keys x5, Goo x5, TG 4 / 8. |
| 13 | Sewerena, bout 5. After bout 4. | Any day | F1 (11): 0:00-0:10, 0:10-0:35, 0:35-0:50, 1:50-2:05, 2:05-2:15, 2:15-2:30, 2:30-2:40, 3:05-3:40, 3:40-3:55, 5:15-5:35, 5:35-5:45. F2 (10): 1:00-1:15, 1:15-1:55, 1:55-2:30, 2:30-2:40, 3:05-3:35, 3:35-3:55, 4:05-4:35, 4:35-4:55, 5:05-5:35, 5:35-5:55. F3 (11): 0:00-0:10, 0:10-0:35, 0:35-0:50, 1:50-2:05, 2:05-2:15, 2:15-2:30, 2:30-2:40, 4:05-4:40, 4:40-4:55, 5:15-5:35, 5:35-5:45. | 320 W, 166 K, 28 T, 10 R | Keys x7, Goo x8, TG 4 / 8. |
| 14 | Sewerena, bout 6. After bout 5. | Any day | F1 (14): 0:00-0:10, 0:10-0:30, 0:30-1:00, 1:00-1:20, 1:20-1:50, 1:50-2:00, 3:00-3:20, 3:20-3:30, 3:30-4:00, 4:30-4:50, 4:50-5:00, 5:00-5:30, 5:30-5:40, 5:40-6:10. F2 (12): 0:00-0:05, 0:05-0:20, 0:20-0:30, 1:30-2:00, 2:00-2:20, 2:20-2:40, 2:40-3:00, 3:00-3:10, 3:10-3:30, 4:30-4:50, 5:10-5:30, 5:50-6:10. | 347 W, 215 K, 34 P, 17 R, 15 T | Keys x7, Goo x7, TG 7 / 14. |
| 15 | Sewerena, bout 7. Final sequential arena round after bout 6. | Any day | F1 (4): 0:00-0:40, 1:30-2:10, 2:10-2:50, 3:40-4:30. F2 (6): 0:00-0:40, 0:40-1:05, 1:05-1:20, 2:50-3:30, 4:00-4:40, 4:40-5:20. F3 (4): 0:00-0:40, 1:30-2:10, 2:10-2:50, 3:40-4:30. | 101 W, 205 K, 70 T, 61 R | Keys x10, Goo x10, TG 8 / 16. |
| 16 | Closing the Western Floodgate. Water Locked after the southern district branch. | Sloth | F1 (3): 0:00-1:00, 1:00-2:00, 4:00-5:45. F2 (9): 1:00-1:30, 1:30-2:00, 2:00-2:45, 2:45-3:05, 3:05-3:30, 4:00-4:15, 4:15-4:30, 4:30-4:45, 5:45-6:45. F3 (7): 0:00-0:30, 0:30-1:00, 2:30-2:50, 2:50-3:30, 4:45-5:05, 5:05-5:25, 5:25-5:45. | 156 W, 117 K, 32 D, 27 T | Goo x10, TG 8 / 16. |
| 17 | Closing the Eastern Floodgate: Part I. Steamy Royal branch, after its floodgate objective opens. | Sloth | F1 (11): 0:00-0:05, 0:05-1:00, 1:00-1:05, 1:05-1:30, 1:30-2:00, 3:15-3:20, 3:20-3:55, 3:55-4:15, 5:15-5:40, 5:40-5:55, 5:55-6:15. F2 (9): 0:00-0:05, 0:05-0:20, 0:20-0:25, 0:25-0:40, 0:40-1:40, 1:40-1:45, 1:45-2:00, 4:30-4:35, 4:35-5:00. | 91 W, 126 K, 14 T, 8 R, 16 P | Goo x10, TG 8 / 16. |
| 18 | Closing the Eastern Floodgate: Part II. Starts straight after Part I. | Sloth | F1 (6): 0:00-0:10, 0:10-0:30, 0:30-0:45, 0:45-1:00, 2:00-2:30, 3:35-4:00. F2 (10): 0:00-0:05, 0:05-0:35, 0:35-1:00, 1:15-1:20, 1:20-2:00, 2:50-3:10, 3:25-3:30, 3:30-3:45, 3:45-3:50, 3:50-4:10. | 71 W, 95 K, 16 T, 15 R, 12 P | Goo x10, TG 8 / 16. |
| 19 | Battle at the Lake. Still Standing on Stilts branch. | Sloth | F1 (8): 0:00-0:05, 0:05-0:50, 0:50-1:30, 1:30-1:55, 3:00-3:20, 3:20-3:40, 4:15-4:35, 5:10-6:00. F2 (7): 0:00-0:05, 0:05-0:50, 1:05-1:55, 2:10-2:15, 2:15-2:35, 2:35-2:40, 2:40-3:00. | 85 W, 102 K, 49 T | Goo x10, TG 8 / 16. |
| 20 | Operation POTATO: Part I. Dirt Rights branch. | Sloth | F1 (10): 0:00-0:05, 0:05-0:30, 0:30-0:40, 0:40-1:00, 1:10-1:15, 1:15-1:25, 1:25-2:00, 2:00-2:40, 3:15-4:35, 5:20-6:20. | 87 W, 40 K, 31 T, 25 R | Goo x10, TG 8 / 16. |
| 21 | Operation POTATO: Part II. Starts straight after Part I. | Sloth | F1 (11): 0:00-0:08, 0:08-0:30, 0:30-0:38, 0:38-1:00, 1:30-2:00, 2:00-2:15, 2:15-2:30, 3:00-3:20, 3:20-3:25, 3:25-3:30, 3:30-4:00. | 104 K, 36 T, 19 R | Goo x10, TG 8 / 16. |
| 22 | Break Through to the Bathhouse Basement. The late Steamy Royal objective. | Any day | F1 (9): 0:00-0:05, 0:05-0:30, 0:30-0:50, 0:50-1:00, 1:20-1:25, 1:25-2:10, 2:10-2:20, 3:55-4:25, 5:50-6:10. F2 (10): 0:00-0:10, 1:20-1:25, 1:25-2:05, 2:05-2:30, 2:30-3:10, 3:10-3:25, 3:25-3:40, 4:40-4:45, 4:45-5:30, 6:30-7:20. F3 (7): 0:00-0:05, 0:05-0:30, 0:30-0:35, 0:35-1:00, 2:40-2:45, 2:45-3:10, 5:50-6:10. | 175 K, 125 W, 24 R, 24 T, 16 D | Keys x3, Victory Banner x1, Goo x4, Defender's Emblem x1. |
| 23 | Final Battle. The Last Battle after the palace briefing and endgame quest setup. | Sloth | F1 (16): 0:00-0:10, 0:10-0:40, 0:40-1:00, 2:20-2:25, 2:25-2:50, 2:50-2:55, 2:55-3:20, 3:40-3:55, 4:10-4:25, 4:40-4:55, 5:25-5:30, 5:30-5:35, 5:35-6:15, 6:15-6:20, 6:20-6:25, 6:25-6:55. F2 (13): 1:00-1:10, 1:10-1:50, 1:50-2:00, 2:20-2:25, 2:25-2:50, 2:50-2:55, 2:55-3:20, 3:55-4:10, 4:25-4:40, 4:55-5:10, 5:40-5:50, 6:05-6:15, 6:30-6:40. | 443 W, 107 K, 48 T, 39 D, 38 P, 21 R | Keys x3, Goo x4, TG 3 / 16. |
The final row exposes the conflict: GK2DB lists Keys x3, Goo x4, TG 3; Wikily lists Goo x10 and TG 16. Official 1.008 confirms TG increased, not a complete replacement table. Track the town side of the payout with the reputation guide.
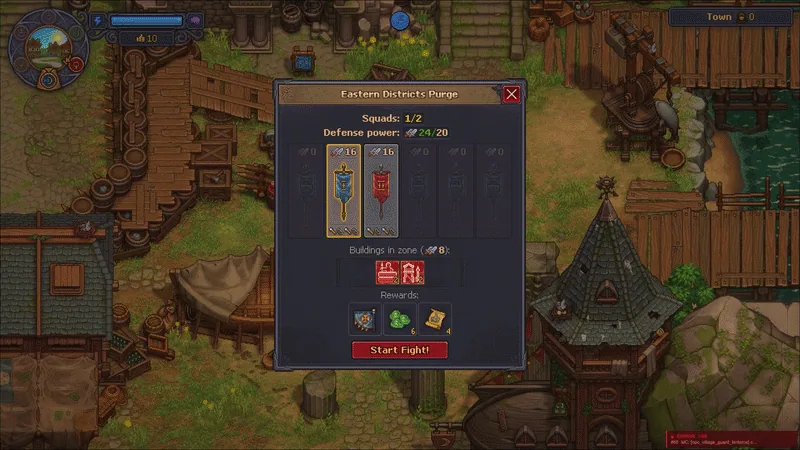 Steam preview of the fight name, defense check, and reward icons.
The six Graveyard Keeper 2 zombie enemy types
The game does not name these six looks on screen. GK2DB explicitly says its labels describe appearance, so this article uses those descriptive labels and gives Wikily's label in parentheses where it differs. They are not official enemy names. Both references agree that every battle zombie has no armor and the same movement speed, so normal weapon damage is not reduced by armor. Compare the zombie-limit guide when enemy caps affect your wider plan.
| Descriptive label used here | Wikily label | Verified profile | First listed appearance |
|---|---|---|---|
| Wild Zombie | Wild Zombie | 15 health, 4 damage. The basic melee enemy and the only type present in the Port opener. | Break Through to the Port |
| Buckethead | Bucket Zombie | 35 health, 6 damage. A tougher basic melee body that joins the Eastern purge and then appears throughout the later list. | Eastern Districts Purge |
| Door Zombie | Door Zombie | 30 health, 10 damage. Carries a door that blocks hits and targets barricades before other objectives. | Market Square Purge |
| Stinker | Bloated Zombie | 48 health, 7 damage. Bursts for 10 on death according to both combat references, so the final hit has a positional cost. | Central Districts Purge: Part II |
| Barrel Zombie | Barrel Zombie | 100 health, 10 damage. The toughest melee profile in the six-type table. Its first-appearance fields disagree, so treat the data page's Sewerena bout 5 entry as a reference label, not a guaranteed first encounter. | Disputed by the references |
| Spitter | Spitter Zombie | 32 health, 7 damage, 4.5 range, and a 1.5 second attack pause. It is the ranged profile and first appears in the Sewerena bout 6 data. | Sewerena, bout 6 |
The no-drop rule needs one careful distinction. GK2DB says an individual enemy kill gives no experience, tech points, or drop. Wikily says every zombie that fought in a winning Keeper squad receives red tech points, and the official 1.007 changelog says zombies earn red tech points for winning fights. That win payout is not an enemy-kill drop.
Battle tips that follow from the wave data
Use the last time block, not only the total count, when choosing a preparation point. Central Districts Part II shifts its mirrored late waves, while the final fight continues past six minutes.
For Sewerena, the sequence is the point. Davy's page says the seven fights run in order and pay increasing key bundles. Each round changes its fronts, enemy mix, and payout, so an early round does not predict the last one. The automation guide covers preparation.
Do not read a high enemy total as a demand to clear every body. If a front's timer ends while enemies remain queued, the timeline has finished. For a general battle-start checklist, return to the zombie army battle guide, and use the factory layout guide for the wider build space.
Treat the reward table as a live-build snapshot. Update 1.008 changed Town Gratitude, and the references have not converged on one complete table. Watch the Graveyard Keeper 2 patch notes tracker for later changes.
Frequently Asked Questions
How many Graveyard Keeper 2 battles are there?
The two battle references expose 23 encounters: 16 story and sewer entries plus seven sequential Sewerena rounds.
Are Wild Zombie and Buckethead official names?
No. Wild Zombie is used by the data reference, but the six names are descriptive labels because the game does not name the enemy looks on screen.
What is the longest battle?
The references list Final Battle at 6:55 and 696 enemies across two fronts. Those totals are a timeline ceiling, not a kill quota.
Can you start Sewerena on any day?
Yes. GK2DB and Wikily mark all seven Sewerena rounds as any-day fights. Most town battles use the Sloth window.
What does a battle pay?
The payout depends on the row: Zombie goo, Town Gratitude, Keys for Looters, a Defender's Emblem, or a Victory Banner. The sources disagree on several Town Gratitude values after 1.008.
Related Reading
- Graveyard Keeper 2 Complete Guide Hub
- Graveyard Keeper 2 Release Date, Price, and Platforms: Graveyard Keeper 2 release date is September 22, 2026 on Steam, priced at $24.99. See
- Graveyard Keeper 2 PR Machine Guide: Unlock and Use It: Graveyard Keeper 2 PR machine guide explains Gunter's quest, charged hypno devices, weekly runs, upgrades,
- Graveyard Keeper 2 Review: A Bigger, Stranger Keeper: Graveyard Keeper 2 review: the sequel adds a restored town, zombie combat, and conveyor-belt automation,
- Graveyard Keeper 2 orders: traders, money, and crates: Graveyard Keeper 2 orders turn crafted crates into cash and Likes. Learn Merchant Day, trader
- Graveyard Keeper 2 vs Graveyard Keeper: Key Differences: Graveyard Keeper 2 vs Graveyard Keeper: verified differences in town scope, combat, automation, presentation, and
- Graveyard Keeper 2 Multiplayer: Is There Co-op in 2026?: Graveyard Keeper 2 multiplayer is not in the official game. Steam lists single-player only; this
- Factory Layout Guide
- Zombie Power and Factory Power Guide
- Beginner Guide and Tips
- Achievements Guide
References
Was this guide helpful?
About the author

Senior Critic & Analyst
Former game data analyst turned critic with 11 years covering indie and mid-tier games. Based in Austin. Runs spreadsheets on games most people just play.
- 11 years games criticism
- Former game economy analyst
- Roguelike and strategy specialist
Keep reading
Graveyard Keeper 2 Zombie Limit Guide: Cap Explained
General · 14 min
Graveyard Keeper 2 zombie power: factory power guide
General · 13 min

Graveyard Keeper 2 vs Graveyard Keeper: Key Differences
Features · 12 min

Graveyard Keeper 2 Complete Guide: Town, Factory, Battles
General · 18 min
Graveyard Keeper 2 Guide: First Hours in Order (2026)
General · 14 min

Graveyard Keeper 2 Patch Notes: Update 1.008 and More
General · 14 min
Game deals · affiliate links

Disclaimer
This article is published for informational and entertainment purposes. It does not constitute professional financial, legal, or technical advice. Game performance, online services, patch schedules, and store listings change. Verify critical details (pricing, system requirements, regional availability) with publishers and storefronts before you buy. Affiliate links, where present, help support our editorial work and are labelled in our affiliate disclosure.
Comments
Loading comments…