ARC Raiders · Guides
ARC Raiders Beginner Guide: Survival, Loot & Extraction
ARC Raiders beginner guide: how to survive your first raids, manage loot, use the skill tree, and extract safely in Embark Studios' extraction shooter.

This ARC Raiders beginner guide covers the core extraction loop, loot zone system, skill tree, and the five vendors in Speranza so you stop losing gear to mistakes that aren't actually that hard to avoid.
TL;DR: ARC Raiders is a $39.99 third-person PvPvE extraction shooter (not free-to-play, despite the early announcement). Raids run up to 30 minutes and dying loses everything outside your Safe Pocket, so run the free Standard loadouts for your first 20 hours and bank gear across the five Speranza vendors instead of dumping it all into weapons. Six maps, three skill branches (Survival, Mobility, Conditioning), and squads of up to three.
Key Takeaways
- ARC Raiders is a third-person PvPvE extraction shooter from Embark Studios, available at $39.99 on Steam, Epic, PS5, and Xbox Series X/S: not free-to-play despite the original announcement
- Raids last up to 30 minutes; dying before extraction loses your full loadout except Safe Pocket items
- Six maps at launch: Dam Battlegrounds, Acerra Spaceport, Buried City, Blue Gate, Stella Montis, Riven Tides
- Skill tree splits into three branches: Survival, Mobility, Conditioning
- Five vendors in Speranza handle gear categories separately: don't dump everything into weapons early
- Run Standard loadouts for your first 20 hours; save crafted kits for runs where you know the map
What Is ARC Raiders
ARC Raiders launched October 30, 2025, developed by Embark Studios: the team behind The Finals. The game released at $39.99, a notable shift from the free-to-play model announced during development. A Deluxe Edition costs $59.99 and includes cosmetic bonuses.
The setting: hostile machines called ARC drove humanity underground into a city called Speranza. You play as a Raider: a scavenger who ventures topside to gather components, complete quests, and survive long enough to extract. The surface is set across Italy-inspired post-apocalyptic environments, and the machines that roam them don't negotiate.
It's a third-person PvPvE extraction game. Squads support up to three players; solo play is fully available. Cross-platform matchmaking connects PC, PS5, and Xbox Series X/S players in the same lobbies. The ARC Raiders Steam page lists the full system requirements and edition details.
On PC, the same Steam key is consistently cheaper through Green Man Gaming (sponsored): $27.51 there versus $29.99 on Steam at the time of writing, and GMG's rewards pricing brings it down further to $26.87. Worth checking before you buy directly on Steam.
The Core Game Loop
Each session runs the same four-phase structure:
Prep. In Speranza, visit vendors, level workbenches, accept contracts from vendor boards, and configure a loadout. Loadouts are consumable: they disappear when you die.
Drop. Select one of six maps. Raids have a 30-minute maximum timer, though most end before it expires.
Survive. Move through three color-coded loot zones (White (low threat, low reward), Orange (moderate), Red (hardest, best loot)) while managing ARC robot encounters and potential player squads in the same map.
Extract. Reach an extraction point and trigger it before dying. Items in your inventory carry back to Speranza. Items you didn't extract are gone.
This loop is unforgiving in ways that linear action games aren't: there's no gear respawn, no tutorial section, and no way to preview what the map sounds like when you trigger an elevator exit for the first time. The ARC Raiders maps guide covers all six zones and which ones to run first.
Step-by-Step: Surviving Your First Raid
1. Equip a Standard loadout: Before your first real map, use the Standard loadout option. These use borrowed gear with no resource cost on death. Run them for 10-20 hours. The inventory is smaller, but the zero-cost respawn cycle lets you study maps without the financial bleed that kills early progress.
2. Start with the Practice Range: The Practice Range is a live map that skips the countdown timer and active ARC threat. Use it to learn weapon handling, understand movement noise, and locate extraction points before a 30-minute clock is ticking.
3. Stay in White zones initially: White zones have minimal ARC density and predictable patrol routes. Orange zones require specific enemy knowledge to navigate efficiently: that knowledge takes several runs to accumulate. Go Orange only after you've learned how at least one enemy type moves and attacks.
4. Fill your Safe Pocket before extracting: Your inventory includes a Safe Pocket: one or two slots (expandable through progression) that survive death. Before heading to any extraction point, transfer your highest-value item into that slot. Quest items, rare blueprints, and high-tier crafting materials always go here first.
5. Use Raider Hatches over Elevators when you have items worth protecting: Cargo Elevators and Airshafts generate loud activation noise that draws ARC and reveals your position to every player in the map. Raider Hatches extract silently but require a single-use key from vendor Shani. Buy or craft Hatch Keys when you're carrying anything you'd rather not lose.
6. Holster your weapon while moving: ARC robots react to sound. Moving with a weapon drawn produces more noise. In Orange zones, this difference is measurable: unholstered movement alerts patrols two or three rooms ahead. Holster by default and draw only when contact is confirmed.
7. Extract when your Safe Pocket is full, not when the map is empty: Greed in Red zones is the primary cause of death for new players. Set a rule for early sessions: once your Safe Pocket slot is full and you have reasonable loot beyond it, head to extraction. The timer and the map's robot density both work against extended stays.
Understanding Loot Zones
Three tiers cover every map, with boundaries that shift depending on patrol density rather than fixed map markers:
| Zone | Threat | Reward |
|---|---|---|
| White | Light ARC patrols, basic robot types | Common materials, standard weapon parts |
| Orange | Mixed ARC types, occasional elite units | Uncommon components, blueprint fragments |
| Red | Dense patrols, boss encounters possible | Rare materials, exotic blueprints, top-tier gear |
Zone edges aren't labeled in-world. You identify them by how many patrol routes are crossing the same area, how many distinct enemy audio signatures you can hear simultaneously, and whether the loot containers you're finding are locked or unlocked. Three simultaneous patrol routes in a corridor is a Red zone regardless of which map quadrant you're in.
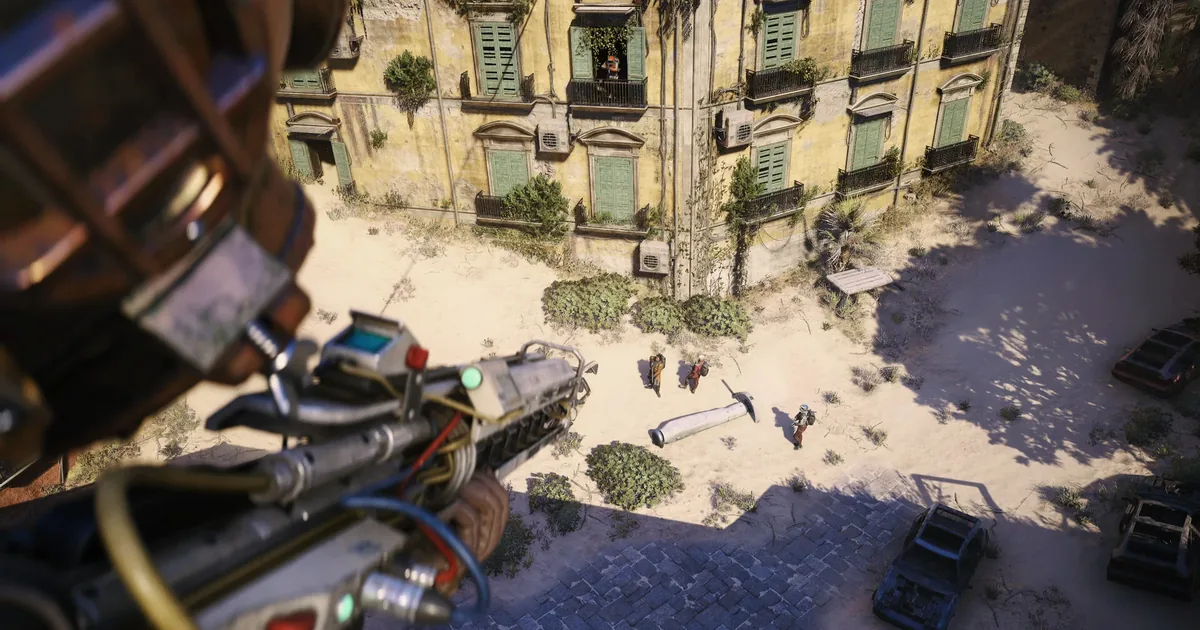 Scouting from elevation before committing to a courtyard entry. Multiple ARC units visible = Red zone density, regardless of map quadrant.
GODEEPER: The enemies in White and Orange zones each have distinct audio cues and specific counters worth knowing before your first run. ARC Raiders enemy types guide →
Extraction Methods Explained
Standard extractions (Cargo Elevators and Airshafts) are free to use and require no key. The activation sequence takes 15-30 seconds and generates audio that broadcasts your location. Use these in White or low-threat Orange areas where player squads aren't likely to be nearby.
Raider Hatch extractions are instant and silent once activated. Each use requires one Hatch Key. Keys come from vendor Shani in Speranza, Orange/Red zone containers, and player corpses. They cost resources upfront; they pay back every time another squad is in your sector of the map.
Matchmaking factors aggregate aggression into lobby composition: players who consistently hunt other Raiders get matched with similarly aggressive squads over time. This isn't a guarantee of quiet lobbies, but players focused on PvE tend to encounter fewer hostile players on average.
GODEEPER: All four extraction types (timers, alarm radii, and how not to burn a Raider Hatch Key) ARC Raiders extraction guide →
Your Five Vendors in Speranza
Each vendor handles a distinct category. Spreading resources across all five tracks the actual progression bottlenecks better than front-loading everything into weapons.
- Celeste: raw materials, base crafting components, farming supplies
- Shani: extraction keys, Raider Hatch keys, binoculars and reconnaissance tools
- Tian Wen: weapons and weapon parts; upgrade your primary loadout weapon here before branching elsewhere
- Apollo: gadgets, traps, deployables; ziplines, proximity traps, and grenades come from this vendor
- Lance: armor and medical supplies; survivability gear and healing that raise how much damage you can take
Vendor relationships level up through purchases and quest completion. Higher levels unlock better stock tiers and crafting recipes. Tian Wen and Lance typically provide the most visible early impact; Shani becomes critical once you're regularly running with crafted gear. For which weapons are worth building toward, the ARC Raiders weapons tier list covers the Ferro, Dolabra, and every other weapon ranked by playstyle. How credits flow between the five vendor tracks, what generates the most relationship XP and when to spend versus save, is in the ARC Raiders currency and progression guide. For the full workbench system, which recipes unlock at which vendor level, how to get the Ferro on day one, and which materials to keep versus sell, the ARC Raiders crafting guide covers all five vendor workbenches from scratch.
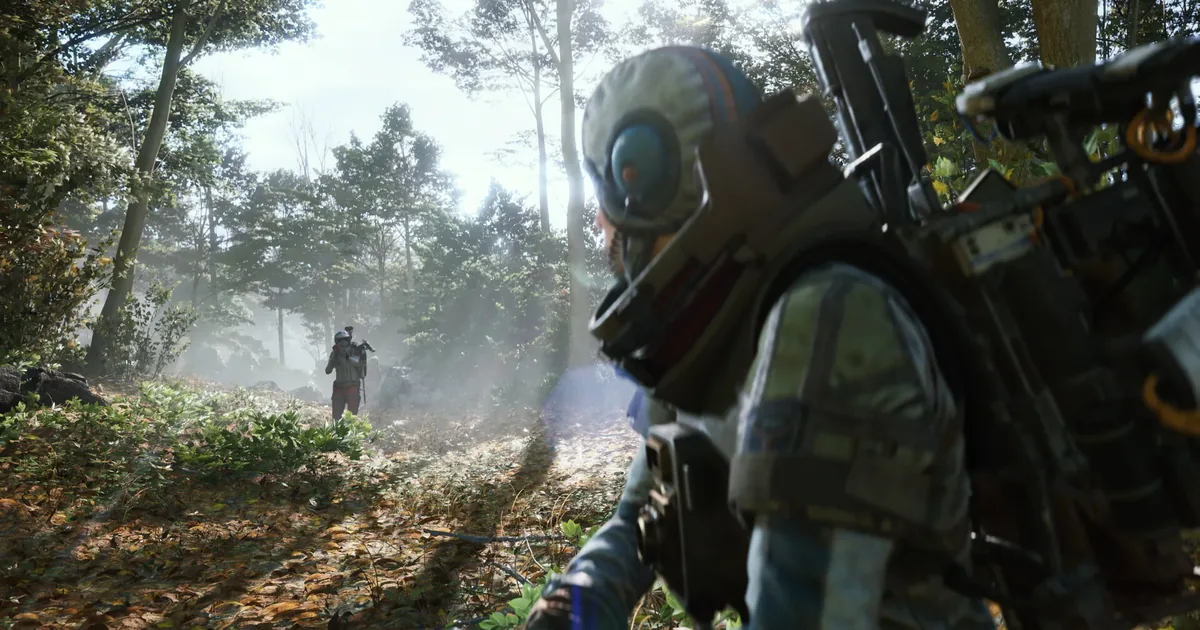 Movement between zones: moving through open terrain exposes you to both ARC patrols and other player squads approaching from the sightline ahead.
The Skill Tree: Three Paths
The skill tree branches into Survival, Mobility, and Conditioning. Early progression can't max all three simultaneously.
Survival covers looting speed, movement noise reduction, and ARC detection radius. The most impactful path for solo players relying on stealth over combat. The detection radius reduction alone changes how freely you can move through Orange zones.
Mobility handles sprint speed, climbing efficiency, zipline velocity, and stamina pool. Relevant for players who rotate between loot zones aggressively or depend on fast extraction timing.
Conditioning increases carry weight, health pool, stamina recovery, and status effect resistance. The primary branch for a squad member assigned to hauling high volumes of materials.
Put the first five or six skill points into Survival before branching. The ARC detection reduction pays off immediately. The ARC Raiders skill tree tier list covers every upgrade across all three branches ranked by practical impact.
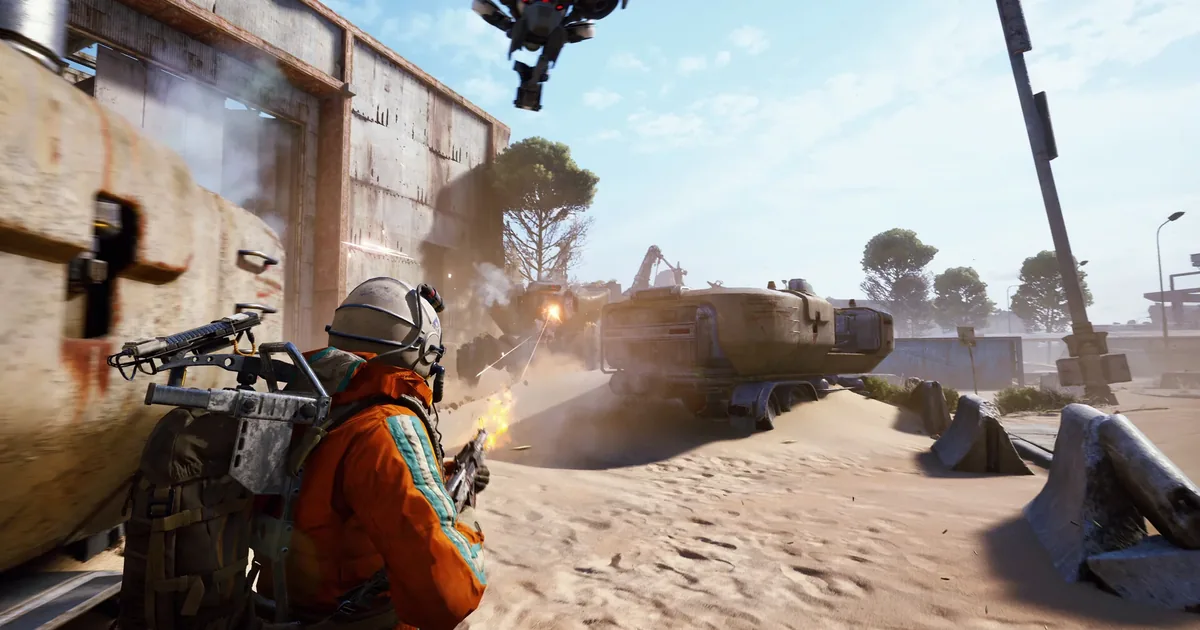 Direct ARC engagement in an Orange zone. This is what you're avoiding for the first 10 hours: learn movement and patrol routes before taking fights.
Beginner Tips to Survive Longer
Listen at doors before opening them. ARC Wasps and Hornets have distinct engine audio you can identify through geometry. Two seconds of listening at a door before entry changes survival rates in Orange zones by a substantial margin.
Don't run a loadout you can't afford to lose. Losing a well-crafted kit to a bad decision in the first few hours creates a resource hole that takes several Standard loadout runs to recover from. Treat expensive personal loadouts as something you earn access to through map knowledge, not something to bring in on day one.
Buy binoculars from Shani. Binoculars let you scan buildings and patrol routes before committing to an entry. In Red zones with multiple Sentinels, pre-scanning saves more time than the purchase costs. Most new players skip this purchase for three to four hours and consistently lose time to preventable contact.
Squads can split extraction. One player can take the group's most valuable items through a Raider Hatch while others continue looting. Coordinate who carries what before the extraction timer forces the decision under pressure. For a full breakdown of which materials to keep vs. sell vs. scrap after your runs, see the ARC Raiders loot guide.
ARC Raiders has 14 distinct enemy types at launch. Learning two or three per session is more useful than trying to absorb all of them before your first run. Wasps, Hornets, and Ticks are the highest-frequency encounters in White and Orange zones: start with those.
Frequently Asked Questions
Is ARC Raiders free to play? No. Embark Studios originally announced ARC Raiders as free-to-play but changed the model before launch. It released October 30, 2025 at $39.99 on Steam, Epic Games Store, PS5, and Xbox Series X/S. A Deluxe Edition with cosmetics costs $59.99.
What happens when you die in ARC Raiders? You lose all items in your inventory that aren't in your Safe Pocket. Your equipped loadout is consumed. Your character doesn't progress backward (no permanent death) but you return to Speranza without the gear you brought in.
How many players are in each map? Squads support up to three players. Multiple squads occupy the same map simultaneously. The exact lobby count per instance hasn't been publicly disclosed by Embark.
What is the best map for beginners? Dam Battlegrounds is the most-cited starting map due to open sightlines that give more warning before ARC encounters escalate. Stella Montis and Blue Gate have tighter corridors that are harder to navigate without knowing enemy behavior patterns.
Can you play ARC Raiders solo? Yes. Solo play is fully supported. The aggression matchmaking system applies separately to solo players running PvE, which tends to produce lobbies with fewer hostile squads: though this isn't guaranteed.
Do I need to buy gear before every run? No. Standard loadouts use borrowed equipment at zero cost. You can run unlimited Standard loadouts without spending resources. Personal crafted loadouts are optional and used when you want larger inventory space or specific weapon configurations.
Related Reading
- ARC Raiders 1.27.0: Riven Tides Map and All Changes: ARC Raiders 1.27 dropped May 5: Turbine visibility fixes, grenade exploit patched, audio overhaul, and Embark's direct response....
- ARC Raiders Dam Guide: Loot, Patrols & Extractions: ARC Raiders Dam guide: Alcantara Power Plant loot, patrol routes, close-quarters tips, and which extractions to use in....
- ARC Raiders Armor Guide: Tiers, Noise & Zone Choices: ARC Raiders armor guide: all three armor tiers compared by noise penalty, protection, and zone fit. Includes head....
- ARC Raiders Spaceport Guide: Towers, Loot & Vaporizers: ARC Raiders Spaceport guide: Acerra Spaceport POIs, where Vaporizers spawn on the towers, open-terrain extractions, and loadouts that....
- ARC Raiders Blue Gate Guide: Loot, Augments, Tips 2026: ARC Raiders Blue Gate guide: the reinforced reception augment spot, underground headhouse section, and what this starter map....
- ARC Raiders Riven Tides Guide: Shockwave, Loot, and Secrets: ARC Raiders Riven Tides guide: Shockwave clears the coastal mist, the Panorama Azzurro hotel loot is deceptively light,....
References
- ARC Raiders on Steam: store page with system requirements, editions, and patch history
- ARC Raiders Official Site: Embark Studios' official game page with lore, faction details, and announcements
- ARC Raiders on Green Man Gaming (sponsored): same Steam key, currently $27.51-$26.87 versus $29.99 on Steam
- ARC Raiders on Loaded (sponsored): CD key reseller, worth a price check before buying on Steam directly
Was this guide helpful?
Keep reading


Disclaimer
This article is published for informational and entertainment purposes. It does not constitute professional financial, legal, or technical advice. Game performance, online services, patch schedules, and store listings change. Verify critical details (pricing, system requirements, regional availability) with publishers and storefronts before you buy. Affiliate links, where present, help support our editorial work and are labelled in our affiliate disclosure.
About the author

Senior Critic & Analyst
Former game data analyst turned critic with 11 years covering indie and mid-tier games. Based in Austin. Runs spreadsheets on games most people just play.
- 11 years games criticism
- Former game economy analyst
- Roguelike and strategy specialist