
ARC Raiders · Guides
ARC Raiders Spaceport Guide: Towers, Loot & Vaporizers
ARC Raiders Spaceport guide: Acerra Spaceport POIs, where Vaporizers spawn on the towers, open-terrain extractions, and loadouts that survive sightlines.
About the game
ARC Raiders
This ARC Raiders Spaceport guide is built around the four things that catch most players off guard at Acerra Spaceport: what makes the terrain mechanically different from every other mid-tier zone, where Vaporizers actually spawn, which extraction points are worth the broadcast risk, and the loadout pattern that survives the open-ground sightlines.
TL;DR: Acerra Spaceport is a mid-tier zone built around open terrain and the iconic launch towers. Vaporizers spawn on top of the towers during Close Scrutiny mode. Best loadouts use mid-to-long range weapons, a Light or Medium shield, and audio-discipline movement. Raider Hatches are the safest extraction option when available. Cargo elevators give your position away across the entire map.
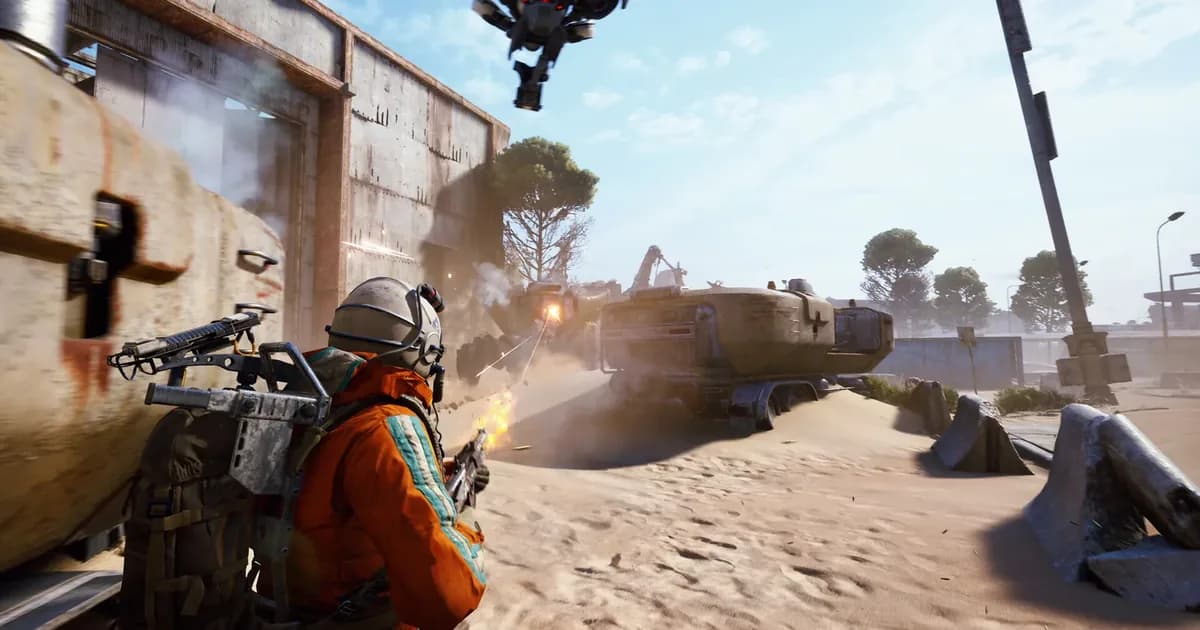
After Blue Gate's mountain pass and the Dam's interior catwalks, the Spaceport is a posture reset. The clearings between hangars are long enough that an ARC unit can lock onto you from cover you can't see. The launch tower silhouette on the skyline hides at least one enemy type that does not announce itself.
Key Takeaways
- Difficulty: Mid-tier (Level 10-20 comfortable; below Level 10 the sightlines will punish you)
- Defining terrain: Open ground between hangars, control buildings, and launch infrastructure. Most engagements happen at 30m+
- Notable POI: Spaceport Towers (launch tower structures). Vaporizers spawn on top during Close Scrutiny mode
- Best weapon archetype: Mid-range rifles or DMRs; shotguns and SMGs are dead weight outside hangar interiors
- Best extraction: Raider Hatches when available: silent, 15-second window, no map-wide broadcast
- Movement priority: Smoke grenades and audio distractions matter more here than on any other mid-tier zone
How big is the Acerra Spaceport map and what level should you run it? (quick answer)
Acerra Spaceport is a mid-sized zone, larger than Blue Gate and smaller than Buried City's full district network. It's designed for Level 10-20 Raiders. The terrain is the actual gate, not the level requirement: the open clearings between hangar complexes and launch infrastructure expose you in ways the Dam interiors never do. A Level 8 Raider with Dam experience will still get punished by a Level 15 Raider with Spaceport map knowledge.
The zone wraps around Exodus shuttle infrastructure: launch pads, the iconic Spaceport Towers, hangar buildings used for shuttle staging, and control buildings spread across the perimeter. Loot quality steps up here compared to entry-level zones, which is the first point in the progression where risk-to-reward starts to mean something.
Step-by-Step: how to clear the Spaceport POIs
These are the major points of interest in the order most ARC Raiders Spaceport guide veterans recommend approaching them on a fresh run. Movement between them is where most kits die. Assume any clearing has at least one angle you can't see.
A clean run on Acerra Spaceport follows roughly this sequence:
- Drop in on the perimeter, not the center. The further your insertion is from the towers, the more time you have to read the map before anyone reads you. Use the first 90 seconds to listen.
- Glass the launch tower silhouette before approaching. If you can see human-shaped shadows on the upper platforms or hear weapon fire echoing from above, the tower is already contested. Reroute to hangars.
- Push one hangar interior next. This is where SMG/shotgun engagements happen and where the second-best loot tier sits. Plan an exit route before you enter.
- Move via control buildings, not open ground. Treat them as cover nodes between major POIs. Crossing a 50m clearing in the open is the single most common cause of a one-shot kill on this map.
- Decide on the tower commit while you still have a kit worth losing. If you arrive at the tower with full ammo and stims, climb. If you've already burned half your kit on hangar fights, extract instead and bank what you have.
- Route to a Raider Hatch first, airshaft second, cargo elevator last. Use the silent option whenever the run allows. The extraction broadcast on Spaceport is the danger the new player guides underestimate.
The Spaceport Towers (Launch Towers)
The towers are the dominant landmark and the most contested POI on the map. The launch tower silhouette is visible from across the zone, which means anyone climbing the towers is broadcasting that intent to other Raiders the moment they start the approach.
The upper platforms hold the highest-density loot on the map, but climbing comes with a cost. There are three ways up:
- Standard ladder route: slow, predictable, exposed to anyone with line of sight to the tower base
- Snaphook to a fixed anchor: faster, requires you to have a Snaphook in your kit
- The Peanut zipline grab: leaping off a zipline trajectory to grab an upper platform without a Snaphook; mechanically demanding and assumes you've practiced the timing windows
The zipline grab became a community-celebrated movement tech because it shortcuts a long climb and puts you on a platform faster than anyone tracking your approach can react. You don't need it. But if you can land it consistently, it changes how the tower fights play out.
Hangar complexes
The hangars cluster in the central-southern section of the map. They're the highest-value loot location outside the towers, and the only part of Acerra Spaceport where close-range weapons earn their slot in your kit. Inside a hangar, an SMG or shotgun is genuinely useful. Outside, it isn't.
Hangar interiors are also where ARC ground units patrol in higher concentrations, so the loot-to-time-spent ratio is good only if you can clear or avoid the patrols efficiently. Pushing two hangars per run is realistic; trying to clear three usually means burning your medical supplies on the third.
Control buildings
Smaller structures scattered around the perimeter and along the routes between hangars. Lower individual loot value than the towers or hangars, but they offer cover positions for crossing the open ground between major POIs. A Raider who treats control buildings as movement nodes rather than loot stops will survive more runs than one who tries to fully clear them.
Outer perimeter and approach roads
The outer edges of the map are the lowest loot density but the safest movement routes. New Raiders should pattern their first three or four runs along the perimeter. Learn which control buildings break sightlines toward the towers, and which clearings have no cover at all. That map literacy is the real prerequisite for ever pushing the towers.
Pre-scanning open ground from elevated cover before committing. On Spaceport, holding a sightline from any rooftop or upper structure is the difference between a kit-saving fight and an expensive one.
GODEEPER: Read the full breakdown of how each extraction type works: what alarm radius each one has, what happens if you miss a Raider Hatch window, and how Electromagnetic Storms change the rules. ARC Raiders Extractions Guide →
Where Vaporizers spawn and how to handle them
Vaporizers are one of the more dangerous ARC enemy types, and the Spaceport is where you're most likely to meet them in a position you didn't pick. They spawn on top of the Spaceport Towers during the Close Scrutiny game mode. Not every run; only when that mode is active on the rotation.
When Close Scrutiny is live, expect two Vaporizers patrolling the upper tower platforms. The community clip that put this on most players' radar showed a Raider clearing both Vaporizers from the tower top, which confirms the pattern: two units, upper platform, predictable patrol routes once you've watched them for a cycle.
Tactical reads:
- Do not climb the towers blind during Close Scrutiny. Glass the upper silhouette from cover at the tower base before committing
- Bring DMR-range damage. Vaporizers tank close-range weapons in ways that turn into a fight you don't want to be in at point-blank on a narrow tower platform
- Use the platform geometry. The upper tower has elevation changes that you can use to break line of sight while reloading or repositioning
For the full enemy type breakdown (Leapers, Bastions, Ticks, Surveyors, Husks, and the rest), the ARC Raiders enemy types guide covers what each one does and how to fight it efficiently.
Direct engagement with an ARC unit in an open zone. Vaporizers spawned on tower tops are a worse version of this scenario because elevation removes most of your usable cover.
Extraction points and the open-terrain problem
Acerra Spaceport's extraction layout is the most position-sensitive on the map because the open terrain makes the cargo elevator broadcast more dangerous than it is in close-quarters zones. Three extraction types exist here in normal rotations:
- Cargo elevators: the loudest option, ~90-second timer, broadcasts your location across the zone the moment you start the call
- Airshafts: quieter than elevators, ~60-70 second timer, still audible
- Raider Hatches: silent, 15-second window, requires a single-use Raider Hatch Key, disabled during Electromagnetic Storms
The Hatch is the highest-priority extraction on this map, and the reason is geometry. On the Dam, you can shoot it out with anyone who comes for you at the elevator because the corridors compress engagements. On the Spaceport, anyone with a DMR and a clear sightline to the elevator platform has a free shot at you while you wait the full 90 seconds. The math is brutal: a 30-second elevator timer feels survivable on most maps. A 90-second one on Spaceport is a gamble.
If you don't have a Hatch Key, route to an airshaft first and only use a cargo elevator if both other options are unavailable or contested.
Recommended loadouts for the Spaceport sightlines
Every ARC Raiders Spaceport guide eventually comes back to this question, because the map's terrain logic dictates loadout choices more strictly here than anywhere else mid-tier:
Primary: Mid-range rifle or DMR. The Osprey, the Ferro, and any DMR-class weapon all earn their slot. SMGs and shotguns belong in your kit only if you specifically plan to push hangar interiors.
Secondary: A close-range option for hangar pushes: a Canto SMG or shotgun is fine. If you're skipping hangars entirely, drop the secondary for more ammo or a Snaphook.
Shield: Light or Medium. Heavy shields slow you down enough that crossing clearings becomes more dangerous, not safer. Mobility is the trade-off that matters on this map.
Utility:
- At least one smoke grenade: non-negotiable for crossing clearings safely
- A Snaphook if you intend to engage with the towers at all
- A Raider Hatch Key if you can afford one: it pays for itself in saved kits
GODEEPER: A full breakdown of weapon performance, including which rifles outperform DMRs at specific Spaceport ranges and which ones have been nerfed in recent patches. ARC Raiders Weapons Tier List →
Tips
- First three runs: perimeter only. Learn the cover network before you touch the towers
- Time your tower climb to a distraction event. If you hear another fight happening across the map, the noise is also masking your tower approach
- Watch the skybox from Buried City. The launch towers are visible across zones: useful as a directional reference if you're disoriented after a long fight
- Don't fight at extraction. On this map, the audio range of an extraction call is roughly the size of the map. Move to extraction with a clean approach, not a fight you're winning
- The hangar tradeoff is real. Two hangars cleared = sustainable run. Three hangars = burning supplies you'll need at extraction
- Audio cues matter more here. Footsteps carry farther across launch pads than through interior corridors. Walk-crouch in contested zones, even if it slows you down
Related Reading
- ARC Raiders Maps Guide: overview of all six zones, how they sequence by difficulty, and which one to run for which loot category
- ARC Raiders Beginner Guide: the pillar guide covering insertion, extraction, loot priority, and the first 10 hours of progression
- ARC Raiders Dam Guide: sister mid-tier zone with the opposite terrain logic; the contrast clarifies what each map asks of you
- ARC Raiders Best Solo Loadouts: kit recommendations specifically tuned for solo play on open-terrain maps
- ARC Raiders Skill Tree Tier List: which upgrades pay off for mid-tier zone difficulty
- ARC Raiders 1.27.0: Riven Tides Map and All Changes: ARC Raiders 1.27 dropped May 5: Turbine visibility fixes, grenade exploit patched, audio overhaul, and Embark's direct response....
References
- ARC Raiders on Steam: official store page with system requirements, edition details, and the most recent patch notes
- r/ArcRaiders community: community discussion, movement tech clips (including the Peanut zipline grab on Spaceport Towers), and current meta consensus
- Embark Studios: developer site with studio background and game-specific announcements
Frequently Asked Questions
Was this guide helpful?
Keep reading

Game deals · affiliate links

Disclaimer
This article is published for informational and entertainment purposes. It does not constitute professional financial, legal, or technical advice. Game performance, online services, patch schedules, and store listings change. Verify critical details (pricing, system requirements, regional availability) with publishers and storefronts before you buy. Affiliate links, where present, help support our editorial work and are labelled in our affiliate disclosure.
About the author

Critical game theorist with a background in film criticism. Writing for print and digital outlets since 2015. Specialises in genre analysis and design heritage.
- Background in film criticism
- 10 years games coverage
- Genre theory and design history specialist