ARC Raiders · Guides
ARC Raiders Machine Types: How to Kill Every ARC Unit (2026)
ARC Raiders machine types guide: Hornet, Wasp, Tick, Firefly, Rocketeer kill strategies with exact weak points, ammo picks, and detection patterns.

Reviewing
ARC Raiders
Embark Studios
ARC Raiders machine types don't scale linearly. A Wasp and a Hornet look similar in the air, but fighting one the same way you fight the other wastes ammo and invites a stun. A Tick on flat ground and a Tick in a corridor are two different threat levels. This guide breaks down every major ARC machine type by kill mechanics: the exact weak points, the movement patterns to exploit, and the weapon choices that keep you from burning your loadout on a fight you could have ended in two shots.
TL;DR: ARC Raiders machine types fall into four categories: aerial (Wasp, Hornet, Firefly), ground (Tick, Pop), support (Sentinel, Snitch, Shredder), and heavy (Rocketeer, Bastion, Leaper). All weak points are matte bright yellow. Wasps drop after 2 thrusters; Hornets need you to flank for the unarmored rear; Ticks die to one melee hit in stealth; the Snitch calls exactly 2 Wasps plus 1 Hornet. Kill the Snitch first, every time.
ARC Raiders machine types: quick-kill reference
The table below gives the one-sentence version for each unit. Every section after this goes deeper on tactics, encounter patterns, and what other units these types tend to appear alongside.
| Machine | Threat | Weak Point | Fastest Kill |
|---|---|---|---|
| Wasp | Low | Thrusters | 2 thruster hits: it crashes |
| Hornet | Medium | Rear rotors (unarmored) | Flank; medium ammo to rear |
| Tick | Medium | General body | One melee hit (silent) |
| Firefly | High | Yellow underside canister | Lure Grenade to reposition, shoot underside |
| Snitch | Situational | General body | Kill before it calls |
| Sentinel | High | Fixed position: shoot during reload | Heavy ammo in the 4-beam wind-up window |
| Shredder | High | Thrusters | Destroy thrusters to destabilize |
| Rocketeer | High | Thrusters, scanner, back canister | 2x Wolfpack grenades from cover |
| Bastion | High | Leg joints, rear canister | Stun, then grenades to legs |
| Leaper | High | Leg joints, face | Funnel into doorway choke points |
One rule covers every unit: matte bright yellow surfaces are weak points that deal direct damage and bypass armor. Shiny dark gray is armored plating. When you're unsure where to shoot, look for yellow.
ARC Raiders machine types: scanner states and detection
Every ARC machine runs on three scanner states you can read at a glance before you move in.
Blue is the passive patrol state. The machine follows a set route. You can move through its patrol path without triggering combat if you stay outside its detection cone and keep your noise down.
Yellow is the alerted state. The machine has detected possible activity and will investigate. Movement noise matters most at this stage.
Red is full combat mode. The machine has a confirmed target. Nearby units on the same patrol route often cascade to red when one unit enters combat, which is why engaging one machine in a group without accounting for the rest tends to go badly.
Aerial units (Wasp, Hornet, Firefly) all run a roughly 45-degree forward detection cone. Moving perpendicular to their flight line is safer than moving in front of or behind them. Weapon holstering cuts noise substantially. The ARC Raiders beginner guide covers the holster-first movement habit as the first thing to build before any of the tactics below matter.
Aerial machines: Wasp, Hornet, and Firefly
These are the three ARC machine types you face most often across nearly every zone. Riven Tides encounters routinely group four Wasps, two Hornets, and two Fireflies in a single patrol cluster, sometimes with a Rocketeer added above crane structures. Knowing how each one works individually makes the difference between a clean route and a full scramble.
Wasp
The Wasp is the baseline aerial unit. Unarmored, narrow detection cone, crashes after two thrusters are destroyed. Light ammo handles it fine. Wasps aren't scary alone. The danger is what happens when you shoot one loudly while others are nearby: the whole group cascades to alert state.
Drops: light ammo, Powercell, ARC Alloy.
Hornet
The Hornet fires stun rounds that temporarily disable movement and weapon use. Getting stunned in the open while other machines are nearby is a fast way to end a run.
The rotor configuration is what matters: two armored front rotors and two unarmored rear rotors. Engaging front-on burns ammo on plating. Flanking or baiting a turn exposes the rear. Medium ammo to the rear rotors is the standard approach. The Ferro battle rifle strips Hornet armor in 2-3 shots at the rear, compared to 5 or more from other rifle options.
Drops: medium ammo, Powercell, ARC Alloy.
Firefly
The Firefly is more aggressive than either Wasp or Hornet. Where those units fly set patrol routes and respond to detection, the Firefly actively pursues Raiders into corners and uses flame attacks from above. Running gives it time to close distance. It's built for the chase.
The weak point is the yellow gas canister on its underside. Use a Lure Grenade to pull it away from your position, then shoot the underside while it investigates the lure. In open areas without usable cover, Photoelectric Cloak creates enough distance to reposition. The Lure Grenade approach works consistently enough that it's worth carrying at least one when operating in zones where Fireflies are common.
Drops: medium ammo, Powercell, ARC Alloy.
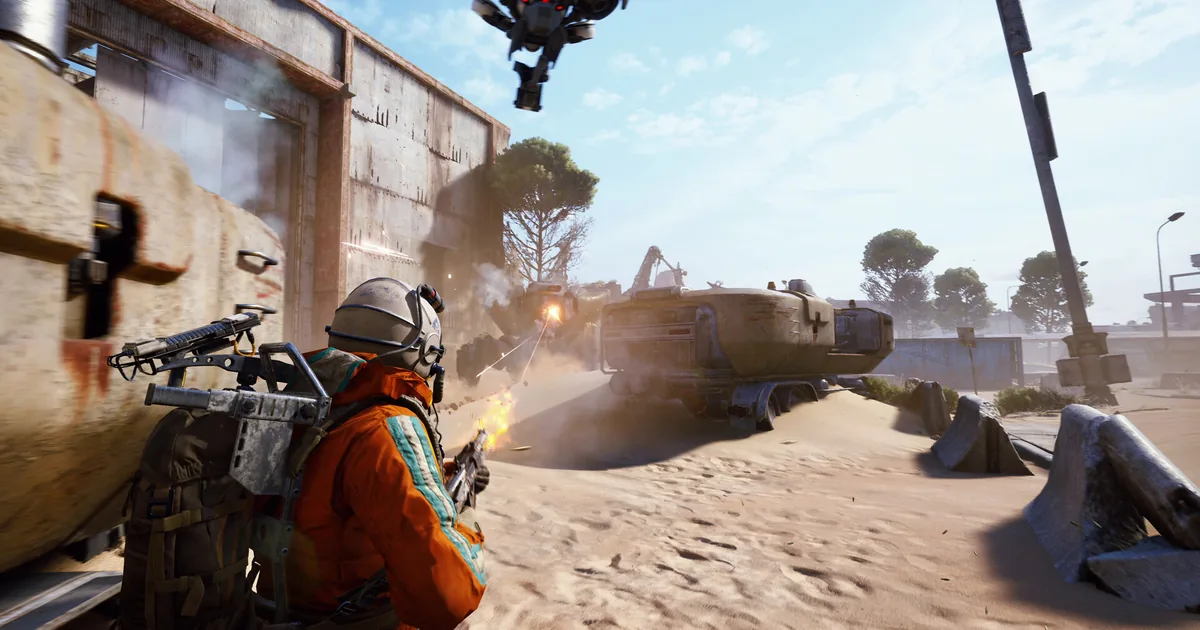
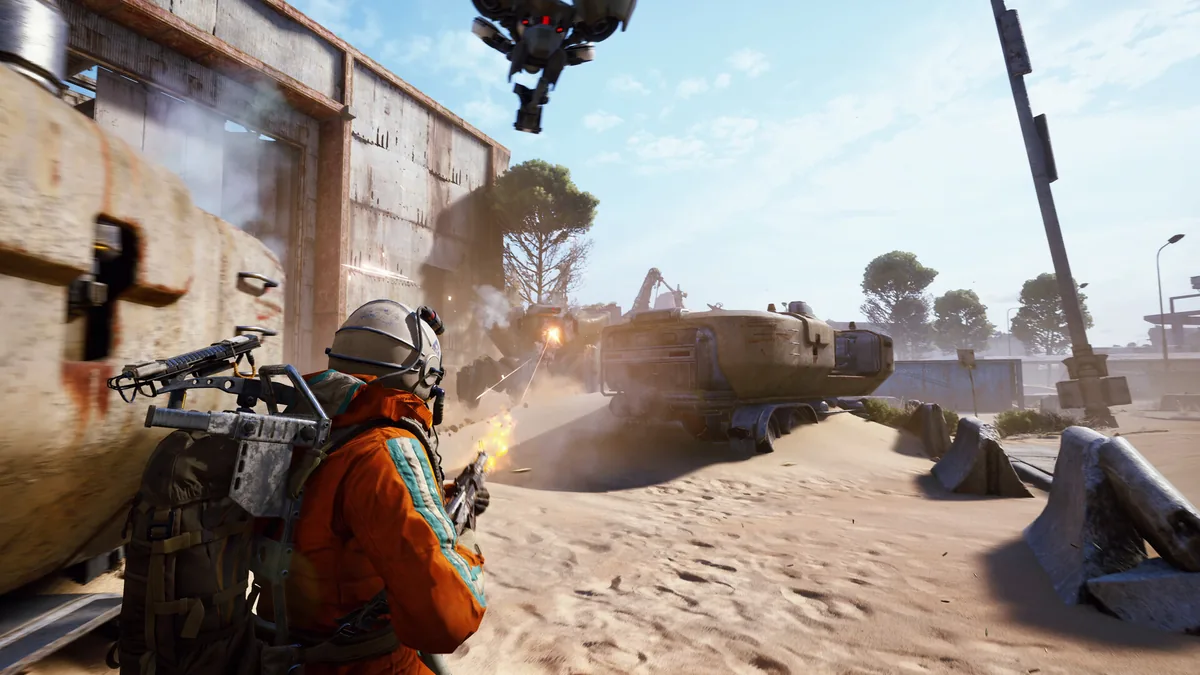 Caption: An aerial ARC unit patrols overhead while a raider engages a ground unit from cover. Aerial and ground ARC machine types frequently operate in the same patrol cluster.
GODEEPER: The weapon you bring determines how fast aerial units die. ARC Raiders Weapons Tier List: Top Guns Ranked 2026 →
Ground units: Tick and Pop
Ground ARC machine types deal with Raiders moving through their level rather than above it. They're common inside buildings where aerial units can't enter.
Tick
The Tick lunges, latches, and deals continuous damage if it connects. The lunge is readable: it charges up, pauses, then commits. That pause is your dodge window.
The specific angle most players miss: melee kills the Tick in one hit. If you hear the rapid mechanical clicking that signals a nearby Tick, pulling a melee weapon and waiting for the lunge is quieter than shooting and guarantees a one-shot clear. In corridors with multiple Ticks, the melee-one-at-a-time approach keeps noise low and prevents a cascade.
If there's no time to set up a melee, back up and shoot from range before it closes. Any weapon works once you've stopped the latch from happening.
Detection: Ticks have high visual detection inside buildings. The audio signal, rapid clicking that accelerates as they approach, is more reliable for spotting them than trying to see them first.
Pop
The Pop is a rolling ground unit with a taser contact attack. Keep distance, engage before it reaches melee range, move laterally to avoid its rolling approach. Any weapon at range handles it quickly. Low individual threat, but common in indoor areas alongside Ticks.
Support and patrol machines: Sentinel, Snitch, and Shredder
These ARC machine types don't fight you directly. They make everything else harder. Dealing with them before the main engagement changes the cost of the whole zone.
Snitch
The Snitch has enhanced audio detection: it picks up gunfire from further away than any standard unit. When it detects activity, it calls exactly two Wasps and one Hornet. That's the confirmed reinforcement composition.
Kill it on sight. Silent approaches (holstered weapon, no nearby gunfire) prevent detection. If it starts calling before you engage, clear the incoming wave before looting the area. Three fresh units arriving while you're checking containers ends extractions early.
Sentinel
The Sentinel is a fixed-position long-range sniper. Four converging yellow beams appear before it fires, giving you about one second to break line-of-sight. Patience works. Let it fire, break cover during its reload window, fire heavy ammo into its body, get back behind cover. Repeat. Flanking outside its fixed arc eliminates the sightline problem entirely when terrain allows.
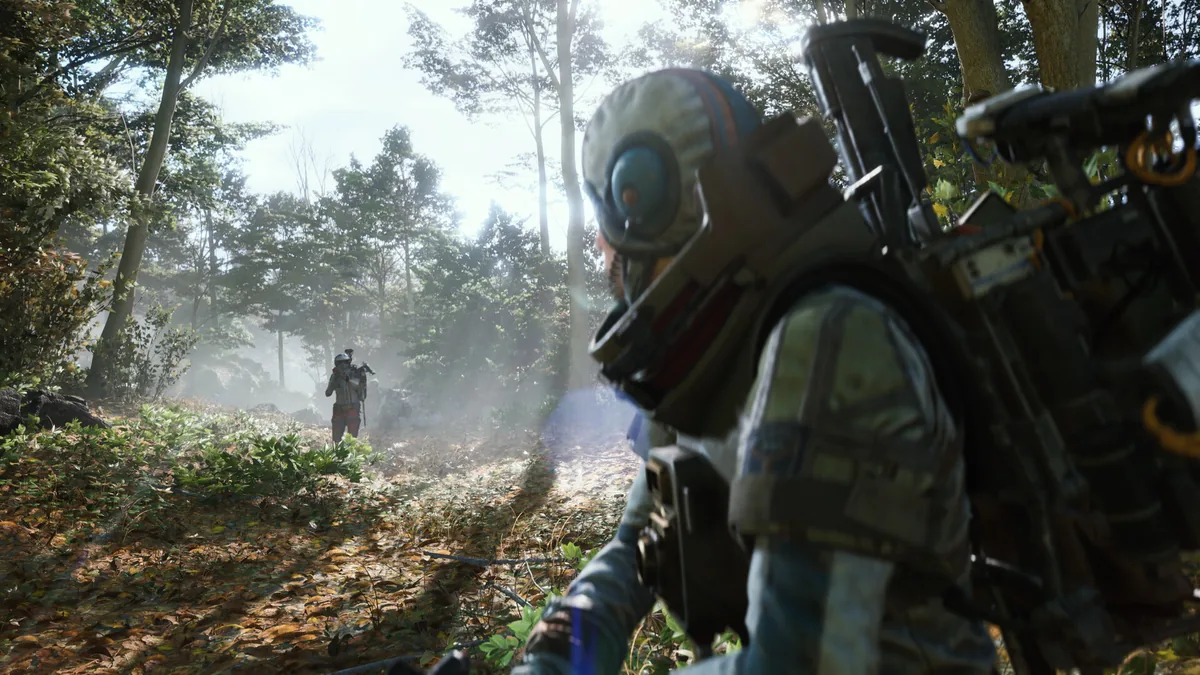 Caption: Zone movement in ARC Raiders requires identifying Snitch and Sentinel positions before committing. Both units change the cost of every encounter in their patrol area.
Shredder
The Shredder is an aerial unit with a wide shotgun blast on its rush attack. Stay behind solid cover when it signals: the blast radius makes partial cover unreliable. Targeting the thrusters destabilizes it the same way as a Wasp. Wolfpack grenades or heavy ammo to the thrusters converts a mobile threat into a stationary one.
GODEEPER: Skill tree investments that reduce your detection radius make Snitch encounters far less punishing. ARC Raiders Skill Tree Tier List: Best Upgrades Ranked →
Heavy machines: Rocketeer, Bastion, and Leaper
These ARC machine types cost real resources. When the extraction route has a path around them, take it. When you do fight them, the yellow weak point system still applies; you just need grenades or heavy ammo to make meaningful progress.
Rocketeer
The Rocketeer fires rocket barrages then reloads. The reload window is when you damage it. Between barrages, stay mobile and use cover: the rockets track partially, so standing still while they're incoming is a mistake.
Weak points are the thrusters, the scanner area, and the silver canister on the back. Two Wolfpack grenades to the thrusters from cover will destabilize it the same way a thruster shot destabilizes a Wasp. Once destabilized, heavy ammo to the remaining weak points finishes the fight.
Bastion
The Bastion is a slow heavy walker with devastating close-range attacks and a quick-turning gun. Weak points are yellow leg joints and the rear canister. Its key vulnerability: stun items (Showstoppers, Hornet Drivers) make it completely helpless for several seconds. Wolfpack grenades to the legs during a stun window take a big chunk out of its health. In squad play, one player draws attention while others cycle stun items and grenade the legs.
Leaper
The Leaper jumps, shockwaves on landing, and usually patrols with escort units. Weak points are the leg joints and face. The building is your counter. It can't fit through most doorways, so retreating inside removes its movement advantage and turns the fight into sustained fire on its legs through the frame. Outdoors, keep moving after jumps to avoid the shockwave landing.
Related Reading
- ARC Raiders Enemy Types Guide: ARC Units Ranked by Threat: Audio signatures, detection behaviors, and full threat ranking for all 18+ unit classes.
- ARC Raiders Weapons Tier List: Top Guns Ranked 2026: Which weapons perform best against specific machine categories.
- ARC Raiders Augments Guide: Best Frames Ranked 2026: Augment picks that reduce the cost of specific ARC encounters.
- ARC Raiders Best Solo Loadouts: Weapons, Gear and Tips: Builds optimized for handling ARC machine types without squad backup.
- ARC Raiders Beginner Guide: Survival, Loot and Extraction: Core movement and noise habits that apply to every machine encounter.
- ARC Raiders 1.27.0: Riven Tides Map and All Changes: ARC Raiders 1.27 dropped May 5: Turbine visibility fixes, grenade exploit patched, audio overhaul, and Embark's direct response....
Frequently Asked Questions
What are the main ARC machine types in ARC Raiders? ARC Raiders fields over 18 named machine types across aerial, ground, support, and heavy categories. The most commonly encountered are: Wasp (low-threat aerial), Hornet (medium-threat aerial with stun rounds), Tick (ground spider with latch attack), Firefly (aggressive aerial with flame attacks), Snitch (alert caller), Sentinel (long-range sniper), Rocketeer (aerial bombardier), Bastion (heavy walker), and Leaper (heavy jumper).
What color are ARC weak points? ARC weak points are always matte bright yellow. Hitting a yellow component deals direct damage and bypasses armor. Shiny dark gray is armored plating requiring moderate-or-higher armor penetration. Matte white is unarmored but not a direct-damage target.
How do you kill a Hornet in ARC Raiders? Target the two unarmored rear rotors rather than the two armored front rotors. Flanking forces the Hornet to turn and briefly expose its rear. Medium ammo works well at range. The Ferro battle rifle strips Hornet armor in 2-3 shots at the rear versus 5 or more for other rifles.
What does the Snitch do and why is it a priority kill? The Snitch has enhanced audio detection and calls exactly 2 Wasps plus 1 Hornet when it detects Raider activity. Killing it silently before it calls prevents that specific reinforcement wave. If it starts calling, deal with the incoming wave first before looting the area.
How do you escape a Tick in ARC Raiders? Back away and shoot from range before it closes distance. Its lunge is predictable: it charges up, pauses briefly, then commits. That pause is the dodge window. If it latches, dodge-roll immediately. Melee kills it in one hit for silent patrol clearing.
What is the Firefly weak point in ARC Raiders? The yellow gas canister on its underside. Running from the Firefly is ineffective because it actively chases Raiders into corners. Use a Lure Grenade to pull it off your position, then shoot the underside while it reorients.
How do you kill a Bastion in ARC Raiders? The Bastion becomes helpless when stunned. Use Showstoppers or Hornet Drivers, then cycle Wolfpack grenades into the yellow leg joints and rear canister during the stun window. Stay at range to avoid its melee and ground slam outside of stun windows.
References
Was this guide helpful?
Keep reading


Disclaimer
This article is published for informational and entertainment purposes. It does not constitute professional financial, legal, or technical advice. Game performance, online services, patch schedules, and store listings change. Verify critical details (pricing, system requirements, regional availability) with publishers and storefronts before you buy. Affiliate links, where present, help support our editorial work and are labelled in our affiliate disclosure.
About the author

Senior Critic & Analyst
Former game data analyst turned critic with 11 years covering indie and mid-tier games. Based in Austin. Runs spreadsheets on games most people just play.
- 11 years games criticism
- Former game economy analyst
- Roguelike and strategy specialist