ARC Raiders · Guides
ARC Raiders Stella Montis Guide: Loot, Blueprints, PvP
ARC Raiders Stella Montis guide: endgame zone, night-exclusive Tempest and Wolfpack blueprints, free loadout strategy, and why it's the highest-PvP map.

Reviewing
ARC Raiders
Embark Studios
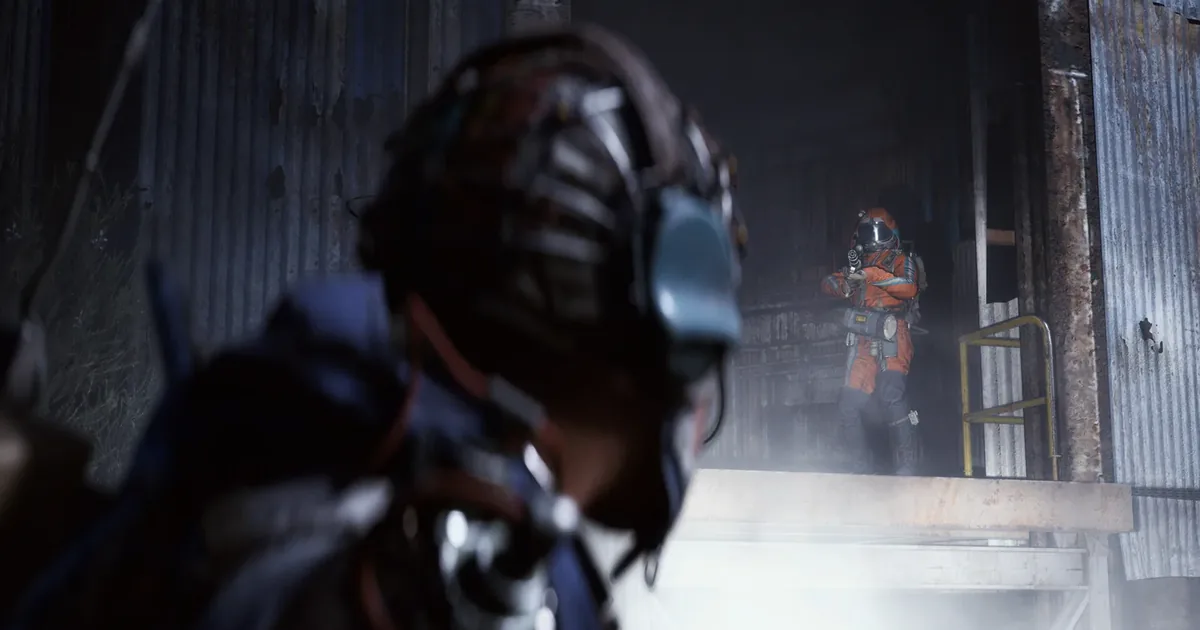
Stella Montis from elevation: compact mountain compound with concentrated loot zones and constant ARC patrol routes between buildings.
ARC Raiders Stella Montis is the endgame zone: smallest map in the game by footprint, highest loot value per location, most PvP-active area in the rotation. It's also the only zone with a level recommendation (25+) that Embark Studios stated publicly. If you're running it below that, the loadout costs outrun what you extract.
The blueprint farming loop here is what most guides miss: two specific blueprints only drop in night raids. The PvP meta is what most PvE players underestimate before their first session. Both topics below.
TL;DR: Stella Montis is the Level 25+ endgame zone with 692 discoverable markers (smallest map, highest loot density). Night raids drop Tempest and Wolfpack blueprints exclusively. Aphelion blueprint moved here in patch 1.7.0. High PvP zone; free loadout runs are the meta for players who don't want to gamble a full kit. Spawn distance was patched in 1.7.0 to reduce close-spawn encounters.
ARC Raiders Stella Montis: quick answer
Stella Montis is the hardest zone in ARC Raiders. It's a compact snowy mountain complex where the high loot density and small map footprint create constant player proximity. Night raids here drop Tempest and Wolfpack blueprints that don't appear anywhere else. The zone was added as a major content update after the game's original launch, not available from day one.
Zone overview: what makes Stella Montis different
The Dam teaches methodical interior clearance. Spaceport teaches open-terrain positioning. Stella Montis assumes you already know both.
The zone is set in a mountain environment with a compact layout that eliminates the "spread out and avoid contact" approach that works in larger maps. There are 692 discoverable markers total, the lowest of any zone in ARC Raiders. What that number means in practice: the loot you're after is geographically concentrated, which is both the zone's appeal (high density per run) and its problem (so is everyone else looking for it).
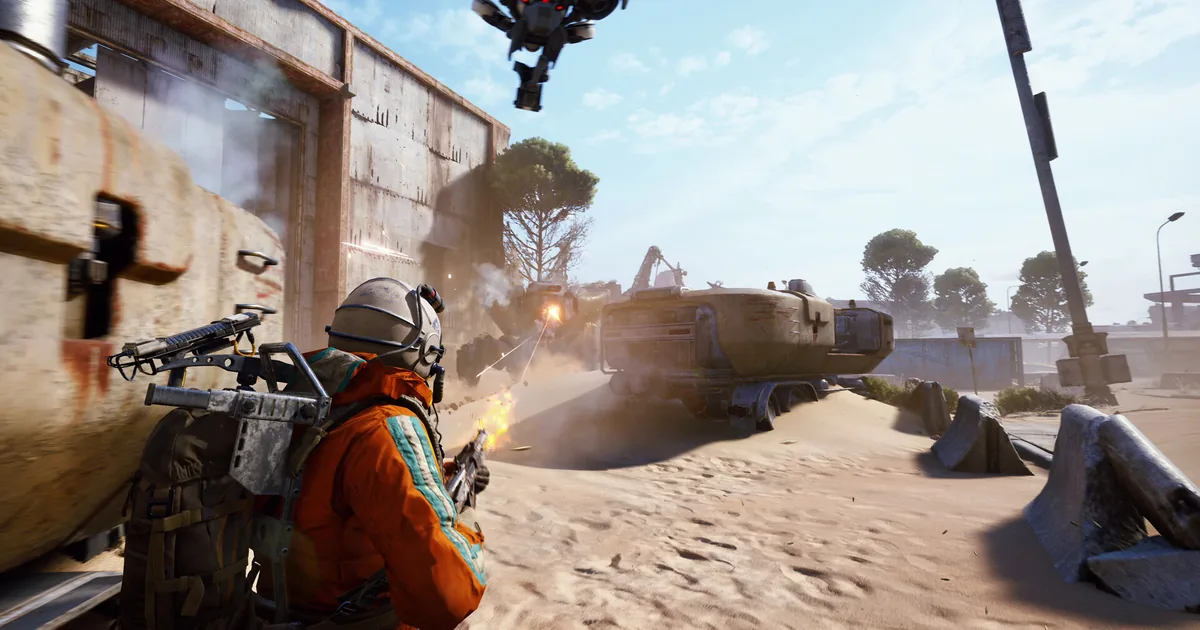
The ARC units here are the most dangerous in the game. The difficulty gap between Spaceport or Buried City and Stella Montis is real. Patrol routes are aggressive, and the compact terrain means you hit multiple units within short windows. Players used to breathing room between engagements at mid-tier zones get punished fast here.
PvP is essentially constant. The community has documented players killing each other in Stella Montis even when one or both parties are running free loadouts (zero kit investment, nothing to lose). Whether that's territorial behavior or just what the zone has become doesn't matter practically; assume contact.
At the right level, the loot covers it. Level 25+ players with solid kit consistently net better value from Stella Montis than any other zone. The material quality and blueprint drop rates are the highest in the game. The question isn't whether it's worth running, it's whether your current loadout and skill level make the risk calculation reasonable.
GODEEPER: If you're still working toward Level 25, the zone progression sequence and what prepares you for Stella Montis. ARC Raiders maps guide: all zones and difficulty ratings →
Blueprint farming: day vs night raids
Two blueprints only drop in the night raid variant of Stella Montis: the Tempest augment blueprint and the Wolfpack blueprint. Running day raids for these wastes runs. If you're specifically farming Tempest or Wolfpack, wait for night conditions.
The Aphelion blueprint was moved to Stella Montis in patch 1.7.0 (the Cold Snap update). Previously, it only dropped from the Matriarch boss encounter. The patch change gave players a farmable alternative: Stella Montis day and night raids both include it in the loot table. If you've been waiting on the Matriarch for this blueprint, Stella Montis is now the faster path.
For general augment farming: Augments drop in both day and night Stella Montis runs at higher rates than other zones. Players who need to build out an augment loadout should be running Stella Montis regularly regardless of which specific augment they're after.
The practical farming approach the community uses: run night raids for Tempest and Wolfpack specifically. Run day raids if you're after Aphelion or general augments, or if the lobby feels cleaner than the typical night session.
GODEEPER: Once you've extracted the blueprints, what to do with materials and which components to keep vs. sell. ARC Raiders loot guide: what to keep, sell, or scrap →
PvP meta: why Stella Montis is a rat zone and how to play it
Posts about Stella Montis PvP behavior reach 3,000 to 4,000 upvotes regularly. The consistent community frustration: players kill each other there even when one or both parties are running free loadouts. No kit to take. No obvious material incentive. The behavior is partly territorial (players feel ownership over extraction points they've been camping) and partly what happens when a zone builds a reputation for aggression and then self-selects for aggressive players.
Free loadout runs are a legitimate meta response to this. You go in with nothing invested. Die, you lose nothing. Extract, you net whatever you looted. The community specifically uses free loadouts at Stella Montis because the expected kit loss in contested lobbies outweighs the average extraction value from a full-kit run. The Bobcat (a high-value material) appears in the loot tables here; even one clean free-loadout extraction is a net positive.
Extract camping is denser here than anywhere else in the game. The compact layout makes extraction points easier to watch. Know at least two options before you start looting, and don't commit to an exit you haven't checked. Players camping an extraction in Stella Montis will find easier targets than they would on larger maps, because you have fewer fallback exits.
The elevated compound sections and upper structures are the contested terrain. High ground principle applies everywhere in ARC Raiders, but those same elevated positions in Stella Montis are where aggressive players move first. Moving through them requires patience rather than speed.
Patch 1.7.0 fixed spawn distance checks, reducing the frequency of players spawning within immediate engagement range of each other. This made early-session encounters slightly less chaotic. The PvP pressure remains high; it just doesn't start in the first 30 seconds as often as it did at the zone's launch.
Loadout recommendations for Stella Montis
The mid-to-long range weapon profile that works on Spaceport works here too. Stella Montis has elevation and open sightlines across its compound sections: a Ferro battle rifle or Bastinelli marksman rifle handles those angles. The zone's interior sections are tighter and favor a Canto SMG as a secondary.
Medium armor is correct for Stella Montis. Light builds get punished by the ARC units at this tier. Heavy armor slows you in a zone where repositioning under fire is necessary. Medium absorbs the burst damage and keeps you mobile enough to respond.
The ARC Raiders armor guide covers the noise-to-protection tradeoffs for each tier in detail; the Stella Montis recommendation is medium with noise management considered.
Sightline control from elevation in Stella Montis: the compact footprint means holding high ground gives line of sight to most active loot areas.
Extraction from Stella Montis
Fewer extraction points than larger zones. The compact footprint means extraction camping is more viable for aggressive players here than elsewhere.
Standard practice: identify two extraction options before looting, not during. Cargo elevator extractions in Stella Montis are slower than in some other zones due to the ARC patrol density around them. Raider Hatches, where keys are available, give a faster exit with less exposure time. Check the modification status before the run; Electromagnetic Storm conditions disable Hatches entirely.
If a lobby is clearly contested and you've looted meaningful materials, take the faster extraction rather than pushing for more loot. Stella Montis's extraction points are more easily camped than other zones; leaving before you're forced to is usually better than extracting under fire.
Related Reading
- ARC Raiders maps guide: Overview of all six zones, difficulty ratings, and what order to run them.
- ARC Raiders Dam guide: The mid-game zone that prepares you for Stella Montis's interior clearance challenges.
- ARC Raiders Riven Tides guide: Coastal zone added in 1.26.0. More survivable than Stella Montis, good mid-tier progression stop.
- ARC Raiders armor guide: Tier and noise recommendations for each zone including Stella Montis.
- ARC Raiders extractions guide: Cargo, hatch, and elevated platform mechanics explained for all zones.
- ARC Raiders 1.27.0: Riven Tides Map and All Changes: ARC Raiders 1.27 dropped May 5: Turbine visibility fixes, grenade exploit patched, audio overhaul, and Embark's direct response....
References
- r/arcraiders: Stella Montis has a bit of a problem: 3,809-upvote community post on PvP behavior in the zone
- r/arcraiders: Did everyone forget Stella Montis was a Major Update: 2,977-upvote post confirming Stella Montis was not in the game at original launch
- r/arcraiders: My guide to finding the rare blueprints: 989-upvote blueprint farming guide, source for night-exclusive Tempest and Wolfpack drops
- r/arcraiders: RC Raiders Expedition Project guide: 1,610-upvote Expedition farming guide including Stella Montis routing
- ARC Raiders Patch 1.7.0 (Cold Snap) notes: Official patch notes confirming Aphelion blueprint relocation and spawn distance fixes
- ARC Raiders on Steam
Frequently Asked Questions
What level should I be for Stella Montis? Level 25+ is Embark's stated recommendation. It's the only zone in ARC Raiders with a published level recommendation. Below that, the encounter quality costs more in loadout replacement than the zone pays out in loot value.
What are the night-exclusive blueprints in Stella Montis? Tempest augment blueprint and Wolfpack blueprint are night-raid-only. They don't appear in day raid loot tables. The Aphelion blueprint (moved to Stella Montis in patch 1.7.0) drops in both variants.
Is Stella Montis worth running for PvE players? Yes, but the PvP pressure is real and unavoidable in this zone. The loot density is the best in the game. Free loadout runs are the community's response to the PvP risk; they let you capture value without losing kit investment.
Why do players fight each other even in free loadouts at Stella Montis? The compact map footprint creates unavoidable player proximity, and the zone's reputation for aggression has become self-reinforcing. Players who enter Stella Montis already expect conflict, which means they initiate it earlier than they would in other zones.
Where is the best loot in Stella Montis? The elevated compound sections and interior structures concentrate the highest-value materials. The tradeoff is those areas also attract the most player and ARC traffic. Lower structures near extraction points tend to have lower density but less contact pressure.
What weapons work best in Stella Montis? Mid-to-long range primary (Ferro battle rifle, Bastinelli marksman rifle) for the open compound sightlines, with a Canto SMG for interior sections. Medium armor is correct; light builds get punished by the zone's ARC units.
Was this guide helpful?
Keep reading


Disclaimer
This article is published for informational and entertainment purposes. It does not constitute professional financial, legal, or technical advice. Game performance, online services, patch schedules, and store listings change. Verify critical details (pricing, system requirements, regional availability) with publishers and storefronts before you buy. Affiliate links, where present, help support our editorial work and are labelled in our affiliate disclosure.
About the author

Senior Critic & Analyst
Former game data analyst turned critic with 11 years covering indie and mid-tier games. Based in Austin. Runs spreadsheets on games most people just play.
- 11 years games criticism
- Former game economy analyst
- Roguelike and strategy specialist